Page 129 of 317
126 Interior equipment
Te ch n ica l
data Instruments
and controlsOperationDrivingInstrument
cluster displayPractical hints Car care Index
Third row seats (MB Accessory)
Two single seats can be unfolded to enlarge the seating
area.
To fold seat down:
1. Remove head restraint from seat cushion.
2. Remove cargo f loor plate, see page 129.
3. Lift tensioner (1) upward to a horizontal position to
release tension of the strap.4. Disengage hook (2) and attach belt at hook and loop
strip on underside of seat.
5. Fold seat down until it locks securely in place.
Important!
When seat is correctly unfolded, the red marking on
the seat release (4) should not be visible.
6. Store cargo floor plates inside the backrest, see
page 130.
4
ProCarManuals.com
Page 130 of 317

127 Interior equipment
Te ch n ica l
data Instruments
and controlsOperationDrivingInstrument
cluster displayPractical hints Car care Index 7. Pull release lever (3) and unfold seat back until it
locks securely in place.
8. Install head restraint in seat back.
Note:
For removal and installation of head restraint refer to
rear seat head restraints on page 124.
To sto r e s ea t:
1. Remove head restraint from seat back.
2. Pull release lever (3) and fold seat back forward
until it audibly locks securely in place. Place seat
belt between lever (3) and backrest.
3. Remove cargo floor plates from the backrest.
4. Pull seat release (4) and fold seat up. Engage
hook (2) in ceiling mount. Pull on free end of strap
until tight.
5. Install head restraint in openings provided in seat
cushion.
6. Install cargo floor plates, see page 129.
Wa r n i n g !
Failure to assure that seats are locked into place
could result in an increased chance of injury in an
accident.Never place hands under seat or near any moving
parts while a seat is being adjusted.For your protection, drive only with properly
positioned head restraints.Adjust head restraint to support the back of the
head approximately at ear level.
ProCarManuals.com
Page 138 of 317
135 Interior equipment
Te ch n ica l
data Instruments
and controlsOperationDrivingInstrument
cluster displayPractical hints Car care Index Installation behind rear seats
1. Insert tie down hooks (2) in rings (3) behind the
rear seats.
2. Pull on loose ends of tie downs until net is tight.Removal:
1. Lift tensioner (4) upward to a horizontal position to
release tensioning of the strap.
2. Disengage tie down hooks (2) from rings (3).
3. Remove partition net from holders (1) and close the
covers.
Storage:
1. Roll up and close partition net.
2. Store partition net behind rear seat bench.
Caution!
While the partition net will help protect you from
smaller objects, it cannot prevent the movement of
large, heavier objects into the passenger area in an
accident. Such items must be properly secured using
the cargo tie-down rings in the cargo area floor, see
page 132.
ProCarManuals.com
Page 141 of 317
138 Interior equipment
Te ch n ica l
data Instruments
and controlsOperationDrivingInstrument
cluster displayPractical hints Car care Index
Removing blind:
Pull right side mounting sleeve toward vehicle center
(arrow) until button (1) engages, and remove blind from
holders.Installing blind:
Place left side of blind in left mount. Position right side
of blind over right mount. Push button (1), releasing
mounting sleeve to slide into mount.
Notes:
A removable cap is fitted into the mount openings on
vehicles fitted with third row seats.
Passenger use of third row seats with cargo area cover
blind installed is restricted.
2
ProCarManuals.com
Page 166 of 317
163 Steering lock
Te ch n ica l
data Instruments
and controlsOperationDrivingInstrument
cluster displayPractical hints Car care Index Caution!
To prevent accelerated battery discharge and a possible
dead battery, always remove the key from the steering
lock. Do not leave the key in steering lock position 0.
Notes:
A warning sounds when the driver’s door is opened
while the key is in steering lock position 1 or 0.
With the engine at idle speed, the charging rate of the
alternator (output) is limited.It is therefore recommended that you turn off
unnecessary electrical consumers while driving in stop-
and-go traffic. This precaution helps to avoid draining of
the battery.
Unnecessary strain on the battery and charging system
may be minimized by turning off the following power
consumers, for example: Heated seats, rear window
defroster.
ProCarManuals.com
Page 250 of 317

247 Tires, Wheels
Te ch n ica l
data Instruments
and controlsOperation DrivingInstrument
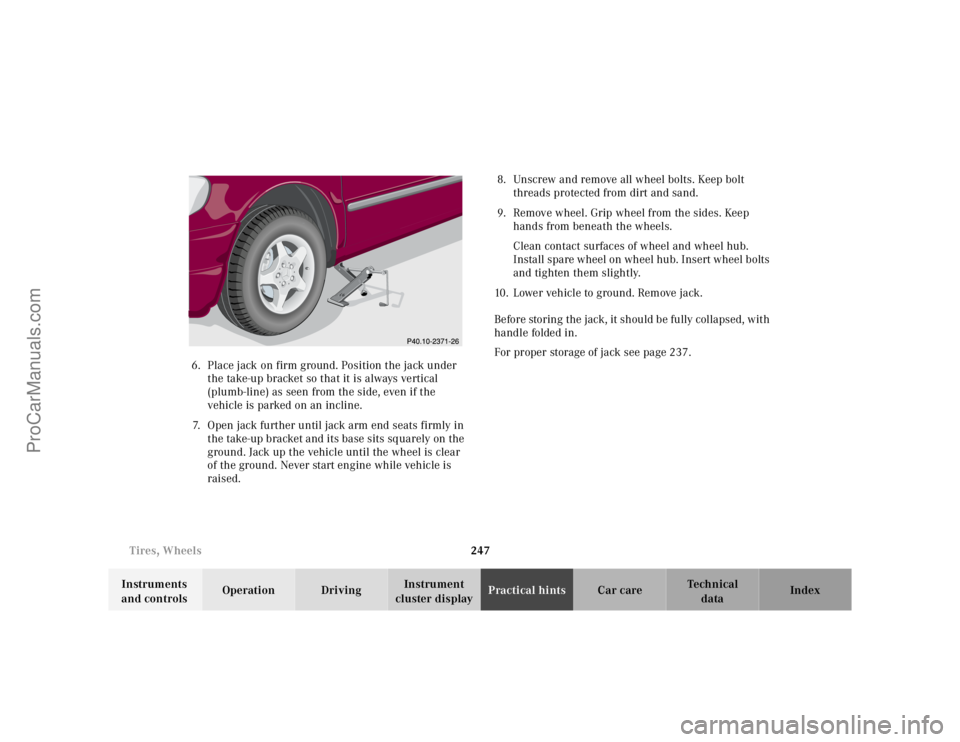
cluster displayPractical hintsCar care Index 6. Place jack on firm ground. Position the jack under
t he take-up bracket so t hat it is always ve rtical
(plumb-line) as seen from the side, even if the
vehicle is parked on an incline.
7. Open jack further until jack arm end seats firmly in
the take-up bracket and its base sits sq uarely on the
ground. Jack up the vehicle until the wheel is clear
of the ground. Never start engine while vehicle is
raised.8. Unscrew and remove all wheel bolts. Keep bolt
threads protected from dirt and sand.
9. Remove wheel. Grip wheel from the sides. Keep
hands from beneath the wheels.
Clean contact surfaces of wheel and wheel hub.
Install spare wheel on wheel hub. Insert wheel bolts
and tighten them slightly.
10. Lower vehicle to ground. Remove jack.
Before storing the jack, it should be fully collapsed, with
handle folded in.
For proper storage of jack see page 237.
ProCarManuals.com