Page 80 of 341

77 Restraint systems
Te ch n ica l
data Instruments
and controlsOperationDrivingInstrument
cluster displayPractical hints Car care IndexWhen you sell the vehicle we strongly urge you to give
notice to the subsequent owner that it is equipped with
an “SRS” by alerting him to the applicable section in the
Operator’s Manual.
• Airbags and “ETR’s” are designed to function
on a one-time-only basis. An airbag or
emergency tensioning retractor (ETR) that was
activated must be replaced.• No modifications of any kind may be made to
any components or wiring of the “SRS”. This
includes changing or removing any component
or part of the “SRS”, the installation of
additional trim material, badges etc. over the
steering wheel hub, front passenger airbag
cover, door trim panels, or door frame trims,
and installation of additional electrical /
electronic equipment on or near “SRS”
components and wiring. Keep area between
airbags and occupants free of objects (e.g.
packages, purses, umbrellas, etc.).• Do not use handles above doors for placing
such items as coat hangers etc..• An airbag system component within the
steering wheel gets hot after the airbag has
inflated. Do not touch.
• Improper work on the system, including
incorrect installation and removal, can lead to
possible injury through an unintended
activation of the “SRS”.• In addition, through improper work there is
the risk of rendering the “SRS” inoperative or
causing unintended deployment. Work on the
“SRS” must therefore only be performed by an
authorized Mercedes-Benz Center.• For your protection and the protection of
others, when scrapping the airbag unit or
emergency tensioning retractor, our safety
instructions must be followed. These
instructions are available at your authorized
Mercedes-Benz Center.• Given the considerable deployment speed and
the textile structure of the airbags, there is the
possibility of abrasions or other injuries
resulting from airbag deployment.
Page 82 of 341

79 Restraint systems
Te ch n ica l
data Instruments
and controlsOperationDrivingInstrument
cluster displayPractical hints Car care Index
Wa r n i n g !
Children 12 years old and under must never ride in
the front seat, except in a Mercedes-Benz
authorized BabySmart
TM compatible child seat,
which operates with the BabySmart
TM system
installed in the vehicle to deactivate the passenger
front airbag when it is properly installed.
Otherwise they will be struck by the airbag when it
inflates in a crash. If this happens, serious or fatal
injury can result.
According to accident statistics, children are safer
when properly restrained in the rear seating
positions than in the front seating positions.
Infants and small children must ride in back seats
and be seated in an appropriate infant or child
restraint system, which is properly secured with
the vehicle’s seat belt, fully in accordance with the
child seat manufacturer’s instructions.
Infants and small children should never share a
seat belt with another occupant. During an
accident, they could be crushed between the
occupant and seat belt.Children too big for child restraint systems must
ride in back seats using regular seat belts. Position
shoulder belt across chest and shoulder, not face or
neck. A booster seat may be necessary to achieve
proper belt positioning for children from 41 lbs. to
the point where a lap / shoulder belt fits properly
without one.When the child restraint is not in use, remove it
from the vehicle or secure it with the seat belt to
prevent the child restraint from becoming a
projectile in the event of an accident.
Page 91 of 341

88 Instrument cluster
Te ch n ica l
data Instruments
and controlsOperationDrivingInstrument
cluster displayPractical hints Car care Index
Indicator lamps in the instrument cluster
High beam
ABS malfunction, see page 237
Brake fluid low (except Canada).
Parking brake engaged, see page 202
Brake fluid low (Canada only).
Parking brake engaged, see page 202
BAS malfunction, see page 237
ESP malfunction, see page 237
Fasten seat belts, see page 60
ESP. Adjust driving to road condition,
see page , see page 237Engine malfunction indicator lamp. If the
“CHECK ENGINE” malfunction indicator
lamp comes on when the engine is running,
it indicates a malfunction of the fuel
management system, emission control
system, systems which impact emissions, or
the fuel cap is not closed tight. In all cases,
we recommend that you have the
malfunction checked as soon as possible, see
page 234
SRS malfunction, see page 236
Function indicator lamp on the center console
Front passenger airbag automatically
switched off, see page 238
ABSBRAKE
CHECK
ENGINESRS
Page 114 of 341

111 Multifunction steering wheel, multifunction display
Te ch n ica l
data Instruments
and controlsOperationDrivingInstrument
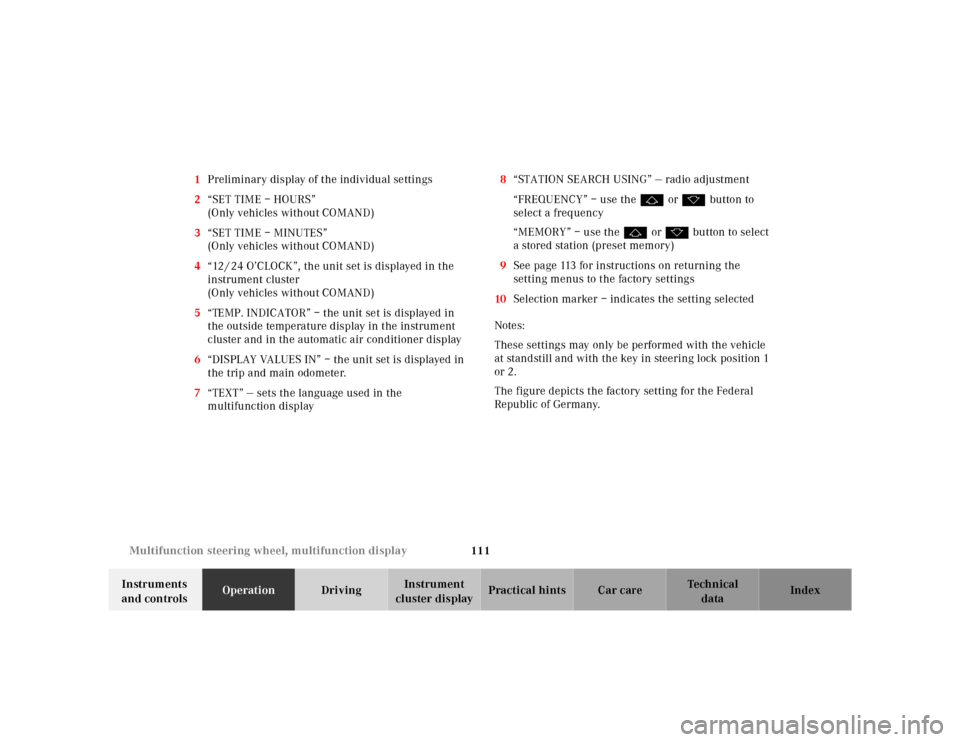
cluster displayPractical hints Car care Index 1Preliminary display of the individual settings
2“SET TIME – HOURS”
(Only vehicles without COMAND)
3“SET TIME – MINUTES”
(Only vehicles without COMAND)
4“12 / 24 O’CLOCK”, the unit set is displayed in the
instrument cluster
(Only vehicles without COMAND)
5“TEMP. INDICATOR” – the unit set is displayed in
the outside temperature display in the instrument
cluster and in the automatic air conditioner display
6“DISPLAY VALUES IN” – the unit set is displayed in
the trip and main odometer.
7“TEXT” — sets the language used in the
multifunction display8“STATION SEARCH USING” — radio adjustment
“FREQUENCY” – use the j or k button to
select a frequency
“MEMORY” – use the j or k button to select
a stored station (preset memory)
9See page 113 for instructions on returning the
setting menus to the factory settings
10Selection marker – indicates the setting selected
Notes:
These settings may only be performed with the vehicle
at standstill and with the key in steering lock position 1
or 2.
The figure depicts the factory setting for the Federal
Republic of Germany.
Page 130 of 341

127 Automatic climate control
Te ch n ica l
data Instruments
and controlsOperationDrivingInstrument
cluster displayPractical hints Car care Index 1Air volume control for center air outlets, turn wheel
up to open.
2Air volume control for side air outlet and side
window defroster outlet.
To open side air outlets:
Turn wheel to position i.
To open defroster outlets:
Turn wheel to position l.
3Center air outlets, adjustable
4Side air outlet, adjustable
5Side defroster outlet
6Display and controlsThe system is always at operational readiness, except
when manually switched off.
The automatic climate control only operates with the
engine running.
The temperature selector should be left at the desired
temperature setting. The temperature selected is
reached as quickly as possible.
The system will not heat or cool any quicker by setting a
higher or lower temperature.
The automatic climate control removes considerable
moisture from the air during operation in the cooling
mode. It is normal for water to drip on the ground
through ducts in the underbody.
The desired interior temperature can be selected
separately for the left and right side of the passenger
compartment.
Page 131 of 341
128 Automatic climate control
Te ch n ica l
data Instruments
and controlsOperationDrivingInstrument
cluster displayPractical hints Car care Index
Display and controlsPress the desired button to activate, indicator lamp is on
while activated.
UAu tom atic mo de
fRaise temperature
gLower temperature
PDefrost
OAir recirculation
eActivated charcoal filter
FRear window defroster
bAir distribution, manual
SEconomy mode
ïAir volume, manual
TResidual engine heat utilization
0
MAX
P83.40-2167-26
Page 132 of 341

129 Automatic climate control
Te ch n ica l
data Instruments
and controlsOperationDrivingInstrument
cluster displayPractical hints Car care Index Basic setting - automatic mode
Press left and right U button for automatic mode.
Simultaneously press both f and g buttons for
temperature setting of 72°F.
QAir volume and distribution are controlled
automatically.
This setting can be used all year around.
Economy
The function of this setting corresponds to the
automatic mode. However, because the air conditioning
compressor will not engage (fuel savings), it is not
possible to air condition in this setting.
Press S button to activate.
Press S button once again to return to previous
setting.Special settings
(use only for short duration)
Defogging windows
Switch off O button.
Press left and right U buttons.
Press b button repeatedly until air is directed
upward.
STurn wheels (2) to position to open left and right
defroster outlets (5).
Defrosting
Turn wheels (2) to position l to open left and right
defroster outlets (5).
Press P button. Maximum heated and automatically
controlled amount of air is directed to the windshield
and side windows.PPress P button once again to return to previous
setting.
Page 133 of 341

130 Automatic climate control
Te ch n ica l
data Instruments
and controlsOperationDrivingInstrument
cluster displayPractical hints Car care Index
Rear window defroster
Turn electronic key in steering lock to position 2.
To select, press F button.
To cancel, press F button again.
Notes:
Heavy accumulation of snow and ice should be removed
before activating the defroster.
The rear window defroster uses a large amount of power.
To keep the battery drain to a minimum, turn off the
defroster as soon as the window is clear.
The defroster is automatically turned off after a
maximum of 12 minutes of operation.
If several power consumers are turned on
simultaneously, or the battery is only partially charged,
it is possible that the defroster will automatically turn
itself off. When this happens, the indicator lamp inside
the switch starts blinking.
As soon as the battery has sufficient voltage, the
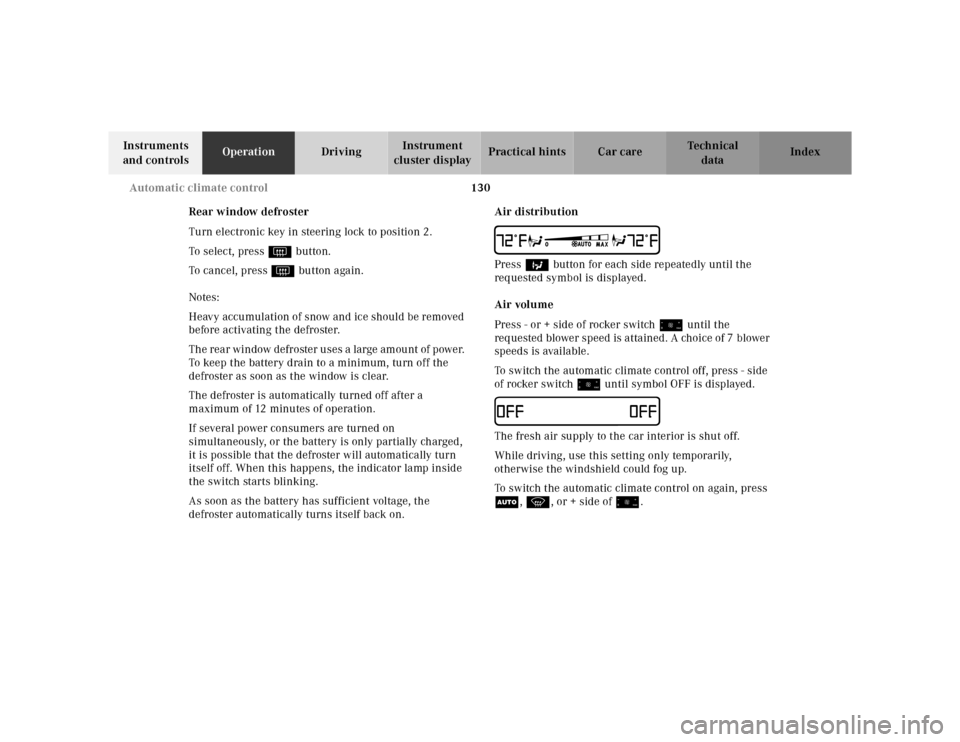
defroster automatically turns itself back on.Air distribution
UPress b button for each side repeatedly until the
requested symbol is displayed.
Air volume
Press - or + side of rocker switch ï until the
requested blower speed is attained. A choice of 7 blower
speeds is available.
To switch the automatic climate control off, press - side
of rocker switch ï until symbol OFF is displayed.IThe fresh air supply to the car interior is shut off.
While driving, use this setting only temporarily,
otherwise the windshield could fog up.
To switch the automatic climate control on again, press
U, P, or + side of ï.