Page 46 of 341
43 Antitheft alarm system
Te ch n ica l
data Instruments
and controlsOperationDrivingInstrument
cluster displayPractical hints Car care Index Antitheft alarm system
1Indicator lamp in switch located in center consoleThe antitheft alarm is automatically armed or disarmed
with the remote control by locking or unlocking the
vehicle.
The antitheft alarm is armed within approximately
10 seconds after locking the vehicle.
A blinking lamp (1) indicates that the alarm is armed.
Operation:
Once the alarm system has been armed, the exterior
vehicle lamps will flash and an alarm will sound when
someone:
•opens a door,
•opens the trunk,
•opens the hood,
•attempts to raise the vehicle.
1
Page 48 of 341

45 Tow-away alarm
Te ch n ica l
data Instruments
and controlsOperationDrivingInstrument
cluster displayPractical hints Car care Index Tow - aw ay al a rm
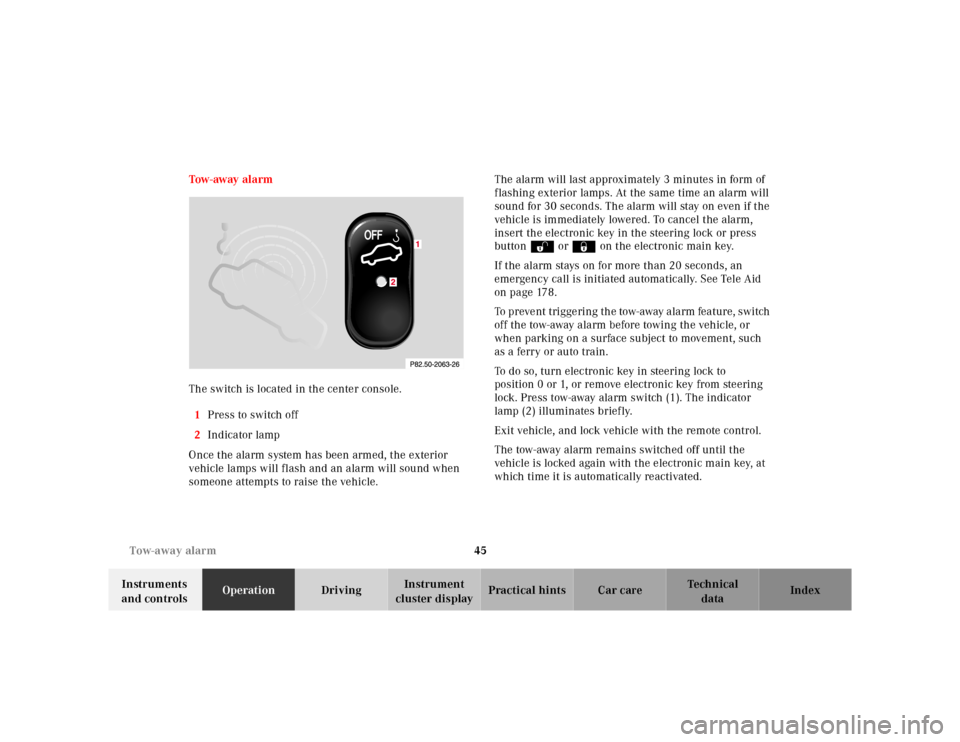
The switch is located in the center console.
1Press to switch off
2Indicator lamp
Once the alarm system has been armed, the exterior
vehicle lamps will flash and an alarm will sound when
someone attempts to raise the vehicle.The alarm will last approximately 3 minutes in form of
flashing exterior lamps. At the same time an alarm will
sound for 30 seconds. The alarm will stay on even if the
vehicle is immediately lowered. To cancel the alarm,
insert the electronic key in the steering lock or press
buttonŒ or‹ on the electronic main key.
If the alarm stays on for more than 20 seconds, an
emergency call is initiated automatically. See Tele Aid
on page 178.
To prevent triggering the tow-away alarm feature, switch
off the tow-away alarm before towing the vehicle, or
when parking on a surface subject to movement, such
as a ferry or auto train.
To do so, turn electronic key in steering lock to
position 0 or 1, or remove electronic key from steering
lock. Press tow-away alarm switch (1). The indicator
lamp (2) illuminates briefly.
Exit vehicle, and lock vehicle with the remote control.
The tow-away alarm remains switched off until the
vehicle is locked again with the electronic main key, at
which time it is automatically reactivated.
Page 59 of 341
56 Seats
Te ch n ica l
data Instruments
and controlsOperationDrivingInstrument
cluster displayPractical hints Car care Index
Vehicles without seat ventilation
The front seat heater switches are located in the center
console.Press switch to turn on seat heater:
1Normal seat heating mode. One indicator lamp in
the switch lights up.
2Rapid seat heating mode. Both indicator lamps in
the switch light up.
After approximately 5 minutes in the rapid seat
heating mode, the seat heater automatically
switches to normal operation and only one indicator
lamp will stay on.
Turning off seat heater:
If one indicator lamp is on, press upper half of switch.
If both indicator lamps are on, press lower half of
switch.
If left on, the seat heater automatically turns off after
approximately 30 minutes of operation.
P54.25-2036-26
12
Page 60 of 341
57 Seats
Te ch n ica l
data Instruments
and controlsOperationDrivingInstrument
cluster displayPractical hints Car care Index Vehicles with seat ventilation
The front seat heater switches are located in the center
console.Rapid heating mode:
Press button (3) once.
Both red indicator lamps above the button light up.
The system switches over to normal heating mode
automatically after approximately 5 minutes.
Normal heating mode:
Press button (3) twice.
One red indicator lamp above the button lights up.
The seat heater will be automatically switched off after
approximately 30 minutes.
Turning off the heater:
Press the button (3) again.
The indicator lamps go out. The seat heater is switched
off.
Page 61 of 341
58 Seats
Te ch n ica l
data Instruments
and controlsOperationDrivingInstrument
cluster displayPractical hints Car care Index
Seat ventilation
The front seat ventilation switches are located in the
center console.
Turn the electronic key in steering lock to position 1
or 2.Level 3 ventilation setting (maximum):
Press button (1).
Three blue indicator lamps beside the button light up.
The level of ventilation is decreased one step
approximately every 10 minutes.
Level 2 ventilation setting (middle):
Press button (1) again.
Two blue indicator lamps beside the button light up.
Level 1 ventilation setting (minimum):
Press button (1) again.
One blue indicator lamp beside the button lights up.
Turning off seat ventilation:
If one blue indicator lamp is on, press button (1) once.
If two blue indicator lamps are on, press button (1)
twice.
If three blue indicator lamps are on, press button (1)
three times.
Page 70 of 341

67 Restraint systems
Te ch n ica l
data Instruments
and controlsOperationDrivingInstrument
cluster displayPractical hints Car care Index BabySmart
TM airbag deactivation system
Special BabySmart
TM compatible child seats, designed
for use with the Mercedes-Benz system and available at
any authorized Mercedes-Benz Center are required for
use with the BabySmart
TM airbag deactivation system.
With the special child seat properly installed, the
passenger front airbag will not deploy. The 7
indicator lamp located on the center console will be
illuminated, except with electronic key removed or in
steering lock position 0. The system does not deactivate
the door mounted side impact airbag and the window
airbag.
BabySmart
TM is a trademark of Siemens Automotive Corp.
Self-test BabySmart
TM
without special child seat installed
After turning electronic key in steering lock to
position 1 or 2, the 7 indicator lamp located on the
center console comes on for approximately 6 seconds
and then extinguishes.
If the indicator lamp should not come on or is
continuously lit, the system is not functioning. You must
see an authorized Mercedes-Benz Center before seating
any child on the front passenger seat.BabySmart
TM is a trademark of Siemens Automotive Corp.
Wa r n i n g !
The BabySmart
TM airbag deactivation system will
ONLY work with a special child seat designed to
operate with it. It will not work with child seats
which are not BabySmart
TM compatible.
Never place anything between seat cushion and
child seat (e.g. pillow), since it reduces the
effectiveness of the deactivation system.Follow the manufacturer’s instructions for
installation of special child seats.
The passenger front airbag will not deploy only if
the 7 indicator lamp remains illuminated.Please be sure to check the indicator every time
you use the special system child seat.
Should the light go out while the restraint is
installed, please check installation. If the light
remains out, do not use the BabySmart
TM restraint
to transport children on the front passenger seat
until the system has been repaired.
Page 75 of 341
72 Restraint systems
Te ch n ica l
data Instruments
and controlsOperationDrivingInstrument
cluster displayPractical hints Car care Index
Front airbags
The driver and passenger front airbags are designed to
activate only in certain frontal impacts exceeding a
preset threshold.
The front passenger airbag deploys only if the front
passenger seat is occupied and the 7 indicator lamp
on the center console is not illuminated.
Note:
Heavy objects on the front passenger seat can appear to
the “SRS” to indicate the presence of an occupant in
that seat which causes the passenger front airbag to
deploy in a crash exceeding the appropriate threshold.Side impact airbags, window curtain airbags
3Side impact airbags
4Window curtain airbag
Page 86 of 341

83 Rear view mirrors
Te ch n ica l
data Instruments
and controlsOperationDrivingInstrument
cluster displayPractical hints Car care Index Exterior rear view mirrors
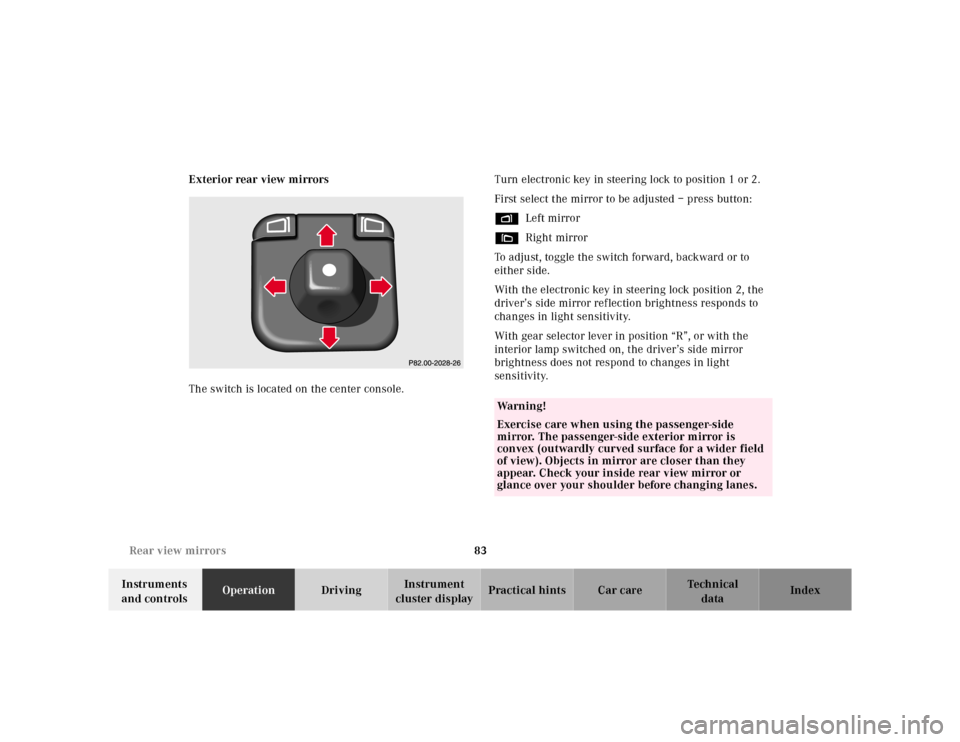
The switch is located on the center console.Turn electronic key in steering lock to position 1 or 2.
First select the mirror to be adjusted – press button:
%Left mirror
&Right mirror
To adjust, toggle the switch forward, backward or to
either side.
With the electronic key in steering lock position 2, the
driver’s side mirror reflection brightness responds to
changes in light sensitivity.
With gear selector lever in position “R”, or with the
interior lamp switched on, the driver’s side mirror
brightness does not respond to changes in light
sensitivity.
Wa r n i n g !
Exercise care when using the passenger-side
mirror. The passenger-side exterior mirror is
convex (outwardly curved surface for a wider field
of view). Objects in mirror are closer than they
appear. Check your inside rear view mirror or
glance over your shoulder before changing lanes.