2000 MERCEDES-BENZ E320 starting
[x] Cancel search: startingPage 6 of 341

3 ContentsShelf below rear window .............. 170
Garage door opener ....................... 171
DrivingControl and operation
of radio transmitters ................ 176
The first 1 000 miles
(1 500 km) ................................. 177
Maintenance ................................... 177
Tele Aid ........................................... 178
Catalytic converter ........................ 188
Emission control ............................ 189
Steering lock ................................... 190
Starting and turning off
the engine .................................. 192
Automatic transmission ............... 193
Parking brake .................................202
Driving instructions ......................203
Drive sensibly - Save Fuel .........203
Drinking and driving .................203
Pedals ...........................................203
Power assistance ........................204
Brakes ..........................................204
Driving off ...................................205Parking ........................................ 205
Tires ............................................. 206
Snow chains ............................... 208
Winter driving
instructions ................................ 209
Block heater .................................210
Deep water ................................... 211
Passenger compartment ............ 211
Traveling abroad ......................... 211
Cruise control .................................212
Brake assist system
(BAS) ...........................................215
Antilock brake system
(ABS) ...........................................217
Four Wheel Electronic Traction
System (4MATIC) .......................219
Electronic stability program
(ESP) ........................................... 220
Parking assist
(Parktronic) .............................. 224
What you should know
at the gas station ...................... 229
Check regularly and
before a long trip ...................... 231
Instrument cluster displayMalfunction and
indicator lamps in the
instrument cluster ....................234
On-board
diagnostic system .......................234
Check engine malfunction
indicator lamp .............................234
Brake warning lamp ..................235
Supplemental restraint
system (SRS)
indicator lamp .............................236
Fuel reserve and fuel cap
placement warning ....................236
Electronic stability program
(ESP) — warning lamp ...............237
BAS / ESP malfunction
indicator lamp .............................237
ABS malfunction
indicator lamp .............................237
Seat belt warning lamp .............238
Malfunction and
indicator lamp in
the center console .....................238
Page 7 of 341

4 Contents
AIRBAG OFF
indicator lamp .............................238
Malfunction and warning
messages in the
multifunction display ...............239
DISPLAY DEFECTIVE ................240
BATTERY / ALTERNATOR ......... 241
ABS-SYSTEM ...............................242
BRAKE ASSIST ...........................242
BRAKE LINING WEAR ..............243
BRAKE FLUID .............................243
PARKING BRAKE .......................244
ENGINE FAN ...............................244
COOLANT (coolant level) ..........245
COOLANT TEMP. ........................246
LIGHTING SYSTEM ....................247
LIGHT SENSOR ...........................248
REMOVE KEY .............................248
TELE AID .....................................249
STEERING GEAR OIL .................249
ENGINE OIL LEVEL ...................250
WASHER FLUID .......................... 251
ELEC. STABIL. PROG.
(Electronic stability program) ..252
Practical hintsFirst aid kit ..................................... 254
Stowing things in the vehicle ...... 254
Fuses ............................................... 255
Hood ................................................ 257
Checking engine oil level ............. 260
Automatic transmission
fluid level ................................... 261
Coolant level ................................... 261
Adding coolant ........................... 262
Windshield and headlamp
washer system .......................... 263
Windshield and headlamp
washer fluid mixing ratio ........ 263
Spare wheel, vehicle tools,
storage compartment ............... 264
Vehicle jack .................................... 265
Wheels ............................................ 266
Tire replacement ....................... 266
Rotating wheels ......................... 267
Spare wheel .................................... 268
Spare wheel bolts ...................... 268
Spare wheel .................................... 269Changing wheels ........................... 271
Tire inflation pressure .................. 276
Battery .............................................277
Jump starting ..................................279
Towing the vehicle .........................282
Transmission selector lever,
manually unlocking ..................284
Exterior lamps ................................285
Headlamp assembly ...................286
Taillamp assemblies ..................289
Changing batteries in the
electronic main key .................. 291
Synchronizing
remote control ............................293
Emergency engine
shut-down ..................................293
Rear seat cushion ..........................294
Emergency operation of
sliding / pop-up roof .................295
Manual release for
fuel filler flap .............................296
Replacing wiper blade insert .......296
Trunk lamp .....................................298
Roof rack .........................................298
Page 154 of 341

151 Audio system
Te ch n ica l
data Instruments
and controlsOperationDrivingInstrument
cluster displayPractical hints Car care Index Telephone operation
Various functions of the Mercedes-Benz integrated
cellular telephone
1 can be performed and displayed via
the car radio. Further instructions for operating the car
telephone can be found in the operation guide for the
cellular telephone1.
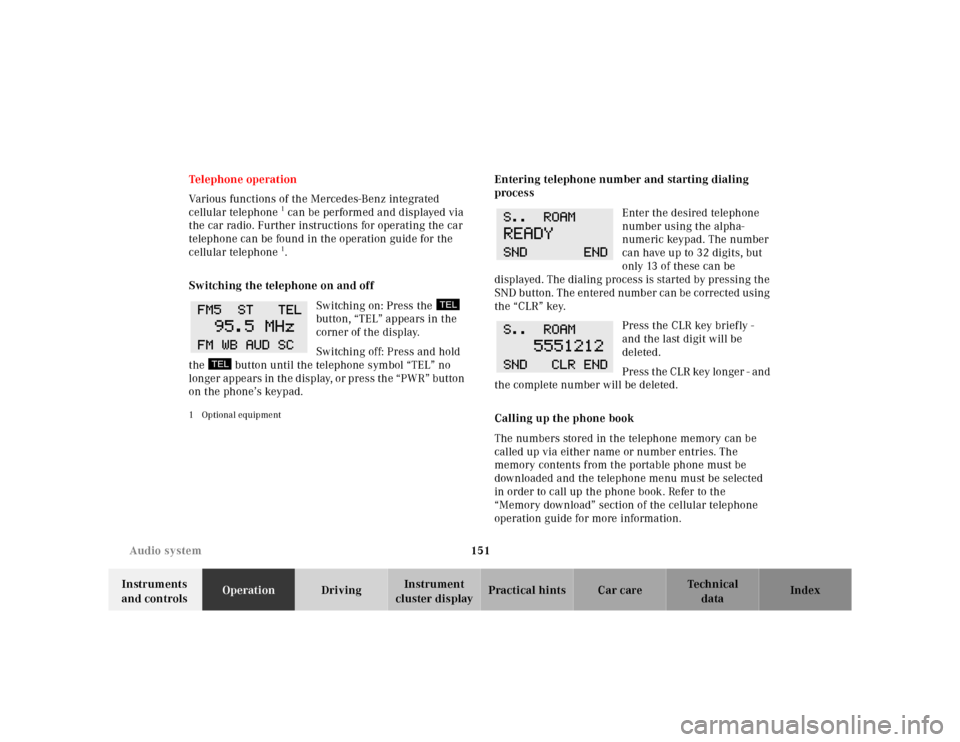
Switching the telephone on and off
Switching on: Press the
button, “TEL” appears in the
corner of the display.
Switching off: Press and hold
the button until the telephone symbol “TEL” no
longer appears in the display, or press the “PWR” button
on the phone’s keypad.
1 Optional equipment
Entering telephone number and starting dialing
process
Enter the desired telephone
number using the alpha-
numeric keypad. The number
can have up to 32 digits, but
only 13 of these can be
displayed. The dialing process is started by pressing the
SND button. The entered number can be corrected using
the “CLR” key.
Press the CLR key briefly -
and the last digit will be
deleted.
Press the CLR key longer - and
the complete number will be deleted.
Calling up the phone book
The numbers stored in the telephone memory can be
called up via either name or number entries. The
memory contents from the portable phone must be
downloaded and the telephone menu must be selected
in order to call up the phone book. Refer to the
“Memory download” section of the cellular telephone
operation guide for more information.
Page 178 of 341

175 Contents - Driving
Te ch n ica l
data Instruments
and controlsOperationDrivingInstrument
cluster displayPractical hints Car care Index
DrivingControl and operation
of radio transmitters ................ 176
The first 1 000 miles
(1 500 km) ................................. 177
Maintenance ................................... 177
Tele Aid ........................................... 178
Catalytic converter ........................ 188
Emission control ............................ 189
Steering lock ................................... 190
Starting and turning off
the engine .................................. 192
Automatic transmission ............... 193
Parking brake .................................202Driving instructions ...................... 203
Drive sensibly - Save Fuel ........ 203
Drinking and driving ................ 203
Pedals .......................................... 203
Power assistance ........................ 204
Brakes .......................................... 204
Driving off ................................... 205
Parking ........................................ 205
Tires ............................................. 206
Snow chains ............................... 208
Winter driving
instructions ................................ 209
Block heater .................................210
Deep water ................................... 211
Passenger compartment ............ 211
Traveling abroad ......................... 211Cruise control ................................. 212
Brake assist system
(BAS) ........................................... 215
Antilock brake system
(ABS) ........................................... 217
Four Wheel Electronic Traction
System (4MATIC) ...................... 219
Electronic stability program
(ESP) ...........................................220
Parking assist
(Parktronic) ..............................224
What you should know
at the gas station .......................229
Check regularly and
before a long trip ...................... 231
Page 193 of 341

190 Steering lock
Te ch n ica l
data Instruments
and controlsOperationDrivingInstrument
cluster displayPractical hints Car care Index
Steering lock
0The electronic key can be withdrawn in this position
only. The steering is locked when the electronic key
is removed from the steering lock. If necessary,
move steering wheel slightly to allow the locking
mechanism to engage. The electronic key can only
be removed with the selector lever in position “P”.
After removing the electronic key or with the
electronic key in steering lock position 0, the
selector lever is locked in position “P”.1Steering is unlocked. (If necessary, move steering
wheel slightly to allow the electronic key to be
turned clockwise to position 1.)
Most electrical consumers can be operated. For
detailed information see respective subjects.
2Driving position.
3Starting position.
See page 192 for instructions on starting and
stopping the engine.
P82.00-2073-26
Wa r n i n g !
When leaving the vehicle always remove the
electronic key from the steering lock, and lock the
vehicle. Do not leave children unattended in the
vehicle, or with access to an unlocked vehicle.
Unsupervised use of vehicle equipment may cause
serious personal injury.
Page 195 of 341

192 Starting and turning off the engine
Te ch n ica l
data Instruments
and controlsOperationDrivingInstrument
cluster displayPractical hints Car care Index
Starting and turning off the engine
Before starting
Ensure that parking brake is engaged and that selector
lever is in position “P” or “N”. Turn electronic key in
steering lock to position 2.
Starting
Do not depress accelerator.
Briefly turn electronic key in steering lock clockwise to
the stop and release. The starter will engage until the
engine is running.
If engine will not run, and the starting procedure stops,
turn electronic key completely to the left and repeat
starting the engine.
After several unsuccessful attempts, have the system
checked at the nearest authorized Mercedes-Benz
Center.Important!
Due to the installed starter non-repeat feature, the
electronic key must be turned completely to the left
before attempting to start the engine again.
In areas where temperatures frequently drop below
-4°F(-20°C) we recommend that an engine block heater
be installed. Your authorized Mercedes-Benz Center will
advise you on this subject, see page 210.
Turning off
Turn the electronic key in the steering lock to position 0
to stop the engine.
The electronic key can only be removed with the
selector lever in position “P”.
Page 208 of 341

205 Driving instructions
Te ch n ica l
data Instruments
and controlsOperationDrivingInstrument
cluster displayPractical hints Car care Index Caution!
When driving down long and steep grades, relieve the
load on the brakes by shifting into a lower gear to use
the engine’s braking power. This helps prevent
overheating of the brakes and reduces brake pad wear.
After hard braking, it is advisable to drive on for some
time, rather than immediately parking, so the air stream
will cool down the brakes faster.
Driving off
Apply the service brakes to test them briefly after
driving off. Perform this procedure only when the road
is clear of other traffic.
Warm up the engine smoothly. Do not place full load on
the engine until the operating temperature has been
reached.
When starting off on a slippery surface, do not allow one
drive wheel to spin for an extended period with the ESP
switched off. Doing so may cause serious damage to the
drive train which is not covered by the Mercedes-Benz
Limited Warranty.Parking
Important!
It is advisable to set the parking brake whenever
parking or leaving the vehicle. In addition, move
selector lever to position “P”.
When parking on hills, always set the parking brake.
Wa r n i n g !
To reduce the risk of personal injury as a result of
vehicle movement, before
turning off the engine
and leaving the vehicle, always:
1. Keep right foot on the service brake pedal.
2. Firmly depress parking brake pedal.
3. Move the selector lever to position “P”.
4. Slowly release the service brake pedal.
5. Turn front wheels towards the road curb.
6. Turn the electronic key to steering lock
position 0 and remove.
7. Take the electronic key and lock vehicle when
leaving.
Page 225 of 341

222 Driving systems
Te ch n ica l
data Instruments
and controlsOperationDrivingInstrument
cluster displayPractical hints Car care Index
ESP control switch
ESP control switch located on center console.
1Press to switch ESP off
ESP warning lampv, located in speedometer
dial, comes on.
2Press to switch ESP on
ESP warning lampv, located in speedometer
dial, goes out.To improve the vehicle’s traction when driving with
snow chains, or starting off in deep snow, sand or gravel,
switch off ESP by pressing the upper half (1) of the ESP
switch. The ESP warning lampv, located in the
speedometer dial, is continuously illuminated.
With the ESP system switched off, the engine torque
reduction feature is cancelled. Therefore, the enhanced
vehicle stability offered by ESP is unavailable.
Adapt your speed and driving to the prevailing road
conditions.
A portion of the ESP system remains active, even with
the switch in the OFF position.
If one drive wheel loses traction and begins to spin, the
brake is applied until the wheel regains sufficient
traction. The traction control engages at vehicle speeds
up to approximately 24 mph (40 km / h), and switches
off at 50 mph (80 km / h).
Wa r n i n g !
When the ESP warning lamp is illuminated
continuously, the ESP is switched off. Adapt your speed and driving to the prevailing road
conditions.