2000 MERCEDES-BENZ CLK430 starting
[x] Cancel search: startingPage 4 of 299

Operation Audio and telephone 123
DrivingBrakes 185
Power windows 141 Driving off 186
Sliding/pop-up roof 143 Control and operation of radio Parking 187
Interior lighting 145 transmitters 162 Tires 187
Rear window sunshade 146 COMAND, radio, telephone and Snow chains 190
Sun visors 146 two-way radio 162 Winter driving instructions 190
Illuminated vanity mirrors 147 Maintenance 163 Deep water 191
Interior 147 Catalytic converter 164 Passenger compartment 192
Storage compartments, armrest and
cup holder 147Emission control 165 Travelling abroad 192
Glove box 148 Tele Aid 166 Cruise control 193
Ashtrays 150 Steering lock 172 Brake assist system (BAS) 196
Lighter 151 Starting and turning off the engine 174 Antilock brake system (ABS) 198
Enlarged cargo area – split folding rear
seat backrest 152Automatic transmission 175
Electronic stability program (ESP)
200
Loading instructions 153 Parking brake 184 What you should know at the
Cargo tie down rings 155 Driving instructions 184 gas station 203
Parcel net in front passenger footwell 155 Drive sensibly – save fuel 184 Check regularly and before a
long trip 205
Telephone, general 156 Drinking and driving 185
Cellular telephone 156 Pedals 185
Garage door opener 157 Power assistance 185
4
Page 5 of 299

Instrument cluster displayBRAKE FLUID 217 Coolant level 236
PARKING BRAKE 218 Adding coolant 237
Malfunction and indicator lamps in the
instrument cluster 208ENGINE FAN 218 Windshield washer / headlamp
clean.system 238
On-board diagnostic systemCheck engine malfunction indicator lamp
208COOLANT (coolant level) 219 Windshield and headlamp
washer fluid mixing ratio 238
Brake warning lamp 209 COOLANT (coolant temp.) 220 Wheels 239
Supplemental restraint system STEER. WHEEL ADJUST. 221 Tire replacement 239
(SRS) indicator lamp 210 LIGHT SENSOR 221 Rotating wheels 240
Fuel reserve and fuel cap LIGHTING SYSTEM 222 Spare wheel 241
placement warning 210 WASHER FLUID 223 Changing wheels 242
Electronic stability program(ESP) OIL TEMP. (engine oil temperature) 224 Tire inflation pressure 247
warning lamp 211 ENGINE OIL LEVEL 224 Battery 249
BAS/ESP malfunction indicator lamp 211 ELEC. STABIL. PROG. (Electronic Jump starting 251
ABS malfunction indicator lamp 211 stability program) 226 Towing the vehicle 253
Telescoping steering column – Transmission selector lever,
indicator lamp 212
Practical hintsmanually unlocking 255
Seat belt warning lamp 212 Bulbs 256
Malfunction and indicator lamps in the First aid kit 228 Adjusting headlamp aim 261
center console 212 Shelf below rear window 228 Changing batteries in the
AIRBAG OFF indicator lamp 212 Stowing things in the vehicle 228 electronic main key 264
Roll bar warning lamp 221 Spare wheel, vehicle tools, storage Synchronizing remote control 266
Malfunction and warning messages in compartment 229 Emergency operation of
the multifunction display 213 Vehicle jack 230 sliding/pop-up roof 267
DISPLAY DEFECTIVE 214 Fuses 231
Manual release for fuel filler flap
268
BATTERY/ALTERNATOR 215 Hood 233 Replacing wiper blade insert 268
ABS-SYSTEM 216 Checking engine oil level 234 Trunk lamp 270
BRAKE ASSIST 216 Automatic transmission fluid level 236 Roof rack 270
BRAKE LINING WEAR 217
5
Page 73 of 299
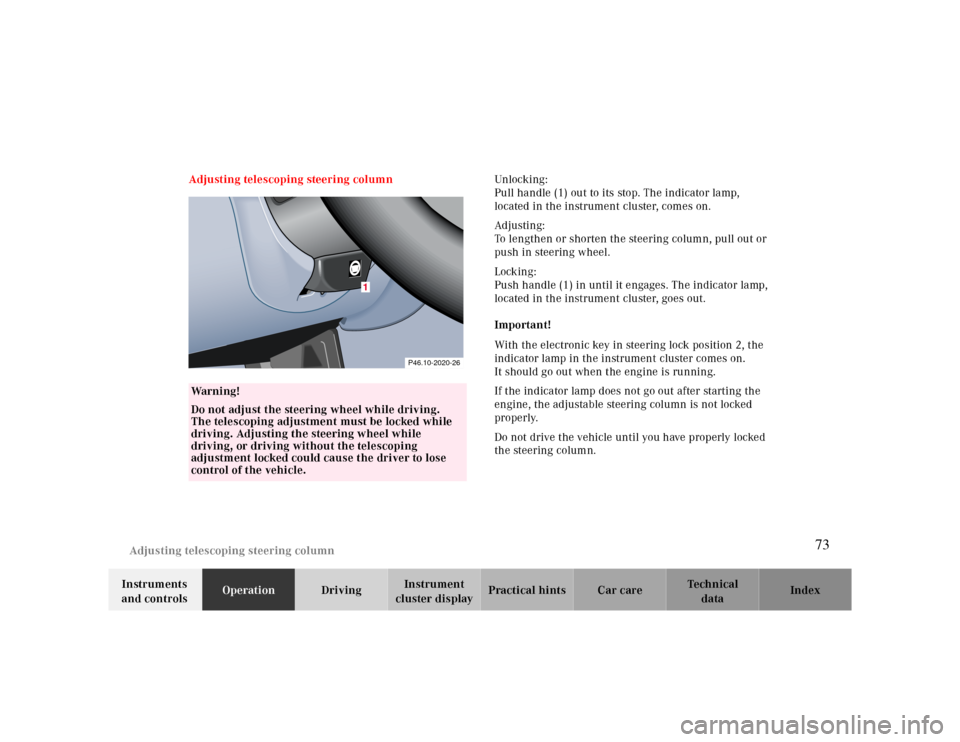
Adjusting telescoping steering column
Te ch n ica l
data Instruments
and controlsOperationDrivingInstrument
cluster displayPractical hints Car care Index Adjusting telescoping steering columnUnlocking :
Pull handle (1) out to its stop. The indicator lamp,
located in the instrument cluster, comes on.
Ad justing:
To lengthen or shorten the steering column, pull out or
push in steering wheel.
Locking:
Push handle (1) in until it engages. The indicator lamp,
located in the instrument cluster, goes out.
Important!
With the electronic key in steering lock position 2, the
indicator lamp in the instrument cluster comes on.
It should go out when the engine is running.
If the indicator lamp does not go out after starting the
engine, the adjustable steering column is not locked
properly.
Do not drive the vehicle until you have properly locked
the steering column.
Warning!
Do not adjust the steering wheel while driving.
The telescoping adjustment must be locked while
driving. Adjusting the steering wheel while
driving, or driving without the telescoping
adjustment locked could cause the driver to lose
control of the vehicle.
1
P46.10-2020-26
73
Page 138 of 299
Audio system
Te ch n ica l
data Instruments
and controlsOperationDrivingInstrument
cluster displayPractical hints Car care Index Telephone operation
Various functions of the Mercedes-Benz integrated
cellular telephone
1 can be performed and displayed via
the car radio. Further instructions for operating the car
telephone can be found in the operation guide for the
cellular telephone1.
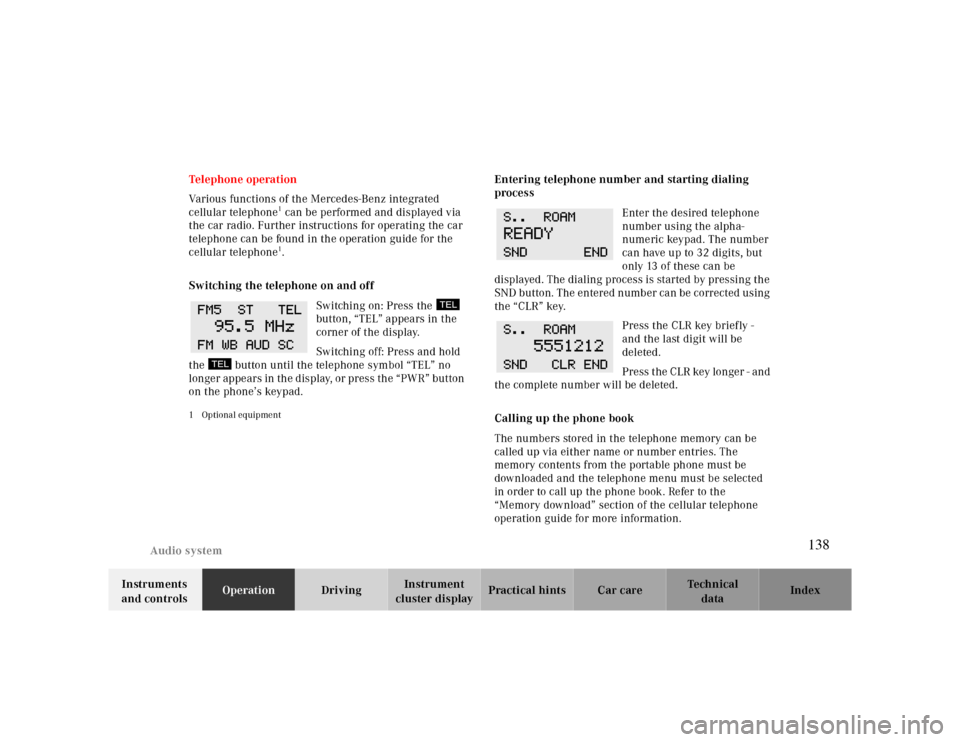
Switching the telephone on and off
Switching on: Press the
button, “TEL” appears in the
corner of the display.
Switching off: Press and hold
the button until the telephone symbol “TEL” no
longer appears in the display, or press the “PWR” button
on the phone’s keypad.
1 Optional equipment
Entering telephone number and starting dialing
process
Enter the desired telephone
number using the alpha-
numeric keypad. The number
can have up to 32 digits, but
only 13 of these can be
displayed. The dialing process is started by pressing the
SND button. The entered number can be corrected using
the “CLR” key.
Press the CLR key briefly -
and the last digit will be
deleted.
Press the CLR key longer - and
the complete number will be deleted.
Calling up the phone book
The numbers stored in the telephone memory can be
called up via either name or number entries. The
memory contents from the portable phone must be
downloaded and the telephone menu must be selected
in order to call up the phone book. Refer to the
“Memory download” section of the cellular telephone
operation guide for more information.
138
Page 161 of 299

DrivingBrakes 185
Driving off 186
Control and operation of radio Parking 187
transmitters 162 Tires 187
COMAND, radio, telephone and Snow chains 190
two-way radio 162 Winter driving instructions 190
Maintenance 163 Deep water 191
Catalytic converter 164 Passenger compartment 192
Emission control 165 Travelling abroad 192
Tele Aid 166 Cruise control 193
Steering lock 172 Brake assist system (BAS) 196
Starting and turning off the engine 174 Antilock brake system (ABS) 198
Automatic transmission 175
Electronic stability program (ESP)
200
Parking brake 184 What you should know at the
Driving instructions 184 gas station 203
Drive sensibly – save fuel 184 Check regularly and before a
long trip 205
Drinking and driving 185
Pedals 185
Power assistance 185
161
Page 172 of 299
Steering lock
Te ch n ica l
data Instruments
and controlsOperationDrivingInstrument
cluster displayPractical hints Car care Index
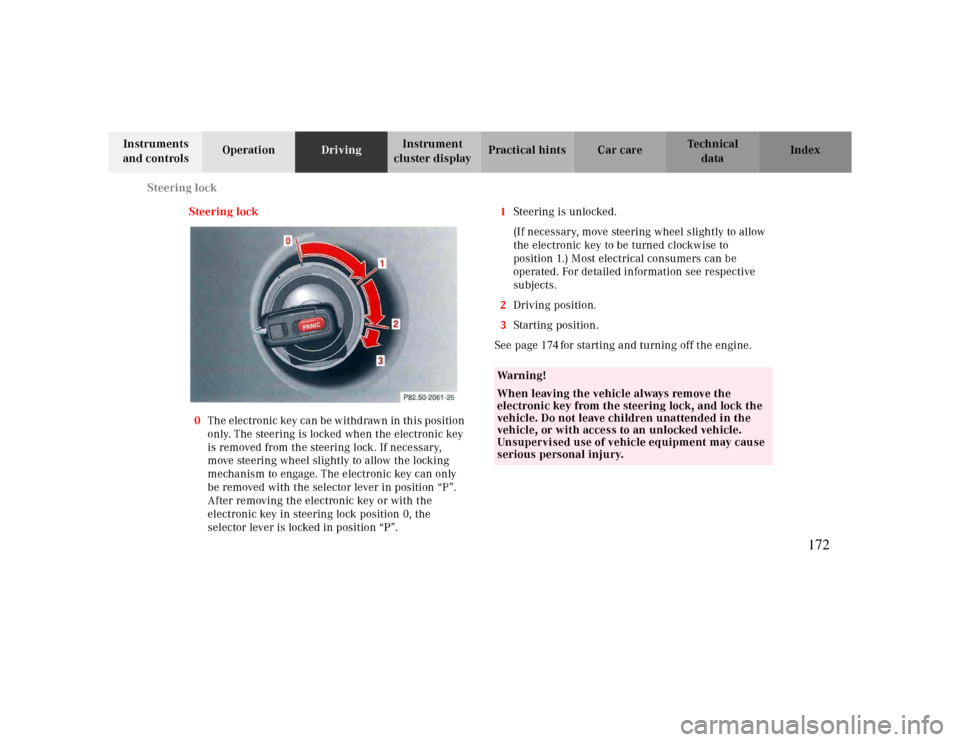
Steering lock
0The electronic key can be withdrawn in this position
only. The steering is locked when the electronic key
is removed from the steering lock. If necessary,
move steering wheel slightly to allow the locking
mechanism to engage. The electronic key can only
be removed with the selector lever in position “P”.
After removing the electronic key or with the
electronic key in steering lock position 0, the
selector lever is locked in position “P”.1Steering is unlocked.
(If necessary, move steering wheel slightly to allow
the electronic key to be turned clockwise to
position 1.) Most electrical consumers can be
operated. For detailed information see respective
subjects.
2Driving position.
3Starting position.
See page174for starting and turning off the engine.
Wa r n i n g !
When leaving the vehicle always remove the
electronic key from the steering lock, and lock the
vehicle. Do not leave children unattended in the
vehicle, or with access to an unlocked vehicle.
Unsupervised use of vehicle equipment may cause
serious personal injury.
172
Page 174 of 299
Starting and turning off the engine
Te ch n ica l
data Instruments
and controlsOperationDrivingInstrument
cluster displayPractical hints Car care Index
Starting and turning off the engine
Before starting
Ensure that parking brake is engaged and that selector
lever is in position “P” or “N”. Turn electronic key in
steering lock to position 2.
Starting
Do not depress accelerator.
Briefly turn electronic key in steering lock clockwise to
the stop and release. The starter will engage until the
engine is running.
If engine will not run, and the starting procedure stops,
turn electronic key completely to the left and repeat
starting the engine.
After several unsuccessful attempts, have the system
checked at the nearest authorized Mercedes-Benz
Center.Important!
Due to the installed starter non-repeat feature, the
electronic key must be turned completely to the left
before attempting to start the engine again.
In areas where temperatures frequently drop below -4°F
(-20°C) we recommend that an engine block heater be
installed. Your authorized Mercedes-Benz Center will
advise you on this subject.
Turning off
Turn the electronic key in the steering lock to position 0
to stop the engine.
The electronic key can only be removed with the
selector lever in position “P”.
174
Page 186 of 299
Driving instructions
Te ch n ica l
data Instruments
and controlsOperationDrivingInstrument
cluster displayPractical hints Car care Index
The condition of the parking brake system is checked
each time the vehicle is in the shop for the required
maintenance service.
If the parking brake is released and the brake warning
lamp in the instrument cluster stays on, the brake fluid
level in the reservoir is too low.
Brake pad wear or a leak in the system may be the
reason for low brake f luid in the reservoir.
Have the brake system inspected at an authorized
Mercedes-Benz Center immediately.
All checks and service work on the brake system should
be carried out by an authorized Mercedes-Benz Center.
Install only brake pads and brake fluid recommended by
Mercedes-Benz.
Wa r n i n g !
If other than recommended brake pads are
installed, or other than recommended brake fluid
is used, the braking properties of the vehicle can be
degraded to an extent that safe braking is
substantially impaired. This could result in an
accident.Caution!
When driving down long and steep grades, relieve the
load on the brakes by shifting into a lower gear to use
the engine’s braking power. This helps prevent
overheating of the brakes and reduces brake pad wear.
After hard braking, it is advisable to drive on for some
time, rather than immediately parking, so the air stream
will cool down the brakes faster.
Driving off
Apply the service brakes to test them briefly after
driving off. Perform this procedure only when the road
is clear of other traffic.
Warm up the engine smoothly. Do not place full load on
the engine until the operating temperature has been
reached.
When starting off on a slippery surface, do not allow one
drive wheel to spin for an extended period with the ESP
switched off. Doing so may cause serious damage to the
drive train which is not covered by the Mercedes-Benz
Limited Warranty.
186