2000 MERCEDES-BENZ CLK430 glove box
[x] Cancel search: glove boxPage 4 of 299

Operation Audio and telephone 123
DrivingBrakes 185
Power windows 141 Driving off 186
Sliding/pop-up roof 143 Control and operation of radio Parking 187
Interior lighting 145 transmitters 162 Tires 187
Rear window sunshade 146 COMAND, radio, telephone and Snow chains 190
Sun visors 146 two-way radio 162 Winter driving instructions 190
Illuminated vanity mirrors 147 Maintenance 163 Deep water 191
Interior 147 Catalytic converter 164 Passenger compartment 192
Storage compartments, armrest and
cup holder 147Emission control 165 Travelling abroad 192
Glove box 148 Tele Aid 166 Cruise control 193
Ashtrays 150 Steering lock 172 Brake assist system (BAS) 196
Lighter 151 Starting and turning off the engine 174 Antilock brake system (ABS) 198
Enlarged cargo area – split folding rear
seat backrest 152Automatic transmission 175
Electronic stability program (ESP)
200
Loading instructions 153 Parking brake 184 What you should know at the
Cargo tie down rings 155 Driving instructions 184 gas station 203
Parcel net in front passenger footwell 155 Drive sensibly – save fuel 184 Check regularly and before a
long trip 205
Telephone, general 156 Drinking and driving 185
Cellular telephone 156 Pedals 185
Garage door opener 157 Power assistance 185
4
Page 10 of 299

Introduction
Roadside assistance
The Mercedes-Benz Roadside Assistance Program provides factory trained technical help in the event of a breakdown.
Calls to the toll-free Roadside Assistance number:
1-800-FOR-MERCedes (in the USA)
1-800-387-0100 (in Canada)
will be answered by Mercedes-Benz Client Assistance Representatives 24 hours a day, 365 days a year.
For additional information refer to the Mercedes-Benz Roadside Assistance Program brochure in your glove box.
Change of address or ownership
If you change your address, be sure to send in the “Change of Address Notice” found in the Service and Warranty
Information Booklet, or simply call the Mercedes-Benz Client Assistance Center (in the USA) at 1-800-FOR MERCedes,
or Customer Service (in Canada) at 1-800-387-0100. It is in your own interest that we can contact you should the need
arise.
If you sell your Mercedes, please leave all literature with the vehicle to make it available to the next operator.
If you bought this vehicle used, be sure to send in the “Notice of Purchase of Used Car” found in the Service and
Warranty Information Booklet, or call the Mercedes-Benz Client Assistance Center (in the USA) at
1-800--FOR-MERCedes, or Customer Service (in Canada) at 1-800-387-0100.
10
Page 19 of 299
Instruments and controls
Te ch n ica l
data Instruments
and controlsOperation DrivingInstrument
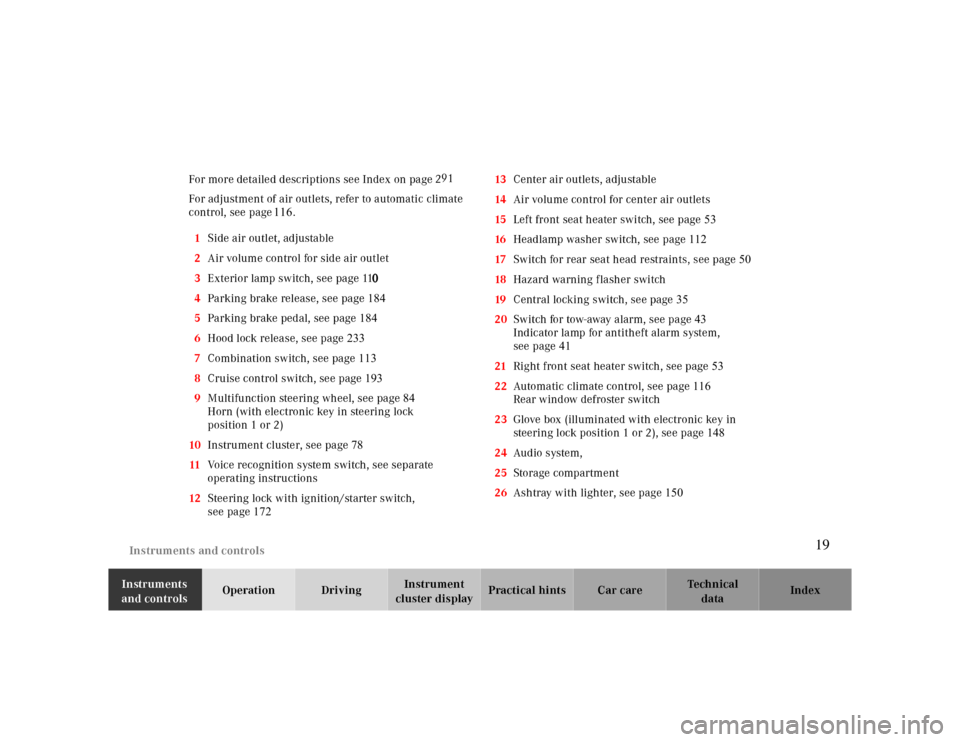
cluster displayPractical hints Car care Index For more detailed descriptions see Index on page
For adjustment of air outlets, refer to automatic climate
control, see page 1
2
116
.
1Side air outlet, adjustable
2Air volume control for side air outlet
3Exterior lamp switch, see page 11
0
4Parking brake release, see page 184
5Parking brake pedal, see page 184
6Hood lock release, see page 2339
7Combination switch, see page 113
8Cruise control switch, see page 193
9Multifunction steering wheel, see page 84
Horn (with electronic key in steering lock
position 1 or 2)
10Instrument cluster, see page 78
11Voice recognition system switch, see separate
operating instructions
12Steering lock with ignition/starter switch,
see page17213Center air outlets, adjustable
14Air volume control for center air outlets
15Left front seat heater switch, see page 53
16Headlamp washer switch, see page 112
17Switch for rear seat head restraints, see page 50
18Hazard warning flasher switch
19Central locking switch, see page 35
20Switch for tow-away alarm, see page43
Indicator lamp for antitheft alarm system,
see page41
21Right front seat heater switch, see page 53
22Automatic climate control, see page 116
Rear window defroster switch
23Glove box (illuminated with electronic key in
steering lock position 1 or 2), see page 148
24Audio system,
25Storage compartment
26Ashtray with lighter, see page 150
19
Page 23 of 299

Engine oil consumption 109 Glove box 148
Exterior lamp switch 110 Ashtrays 150
Night security illumination 111 Lighter 151
Headlamp cleaning system 112 Enlarged cargo area – split folding rear
seat backrest 152
Combination switch 113 Loading instructions 153
Hazard warning flasher switch 115 Cargo tie down rings 155
Automatic climate control 116 Parcel net in front passenger footwell 155
Operation Audio and telephone 123 Telephone, general 156
Power windows 141 Cellular telephone 156
Sliding/pop-up roof 143 Garage door opener 157
Interior lighting 145
Rear window sunshade 146
Sun visors 146
Illuminated vanity mirrors 147
Interior 147
Storage compartments, armrest and
cup holder 147
23
Page 131 of 299
Audio system
Te ch n ica l
data Instruments
and controlsOperationDrivingInstrument
cluster displayPractical hints Car care Index Cassette mode
Note:
Vehicles equipped with the COMAND system do not
come with a factory installed cassette mechanism.
A standard 1/8” stereo phono plug for auxiliary audio
input (located in glove box) is provided for connection of
a portable battery operated cassette player or any other
portable device which uses a headphone output. Please
refer to the COMAND operating manual for information
concerning the activation of the audio input.
Playing cassettes
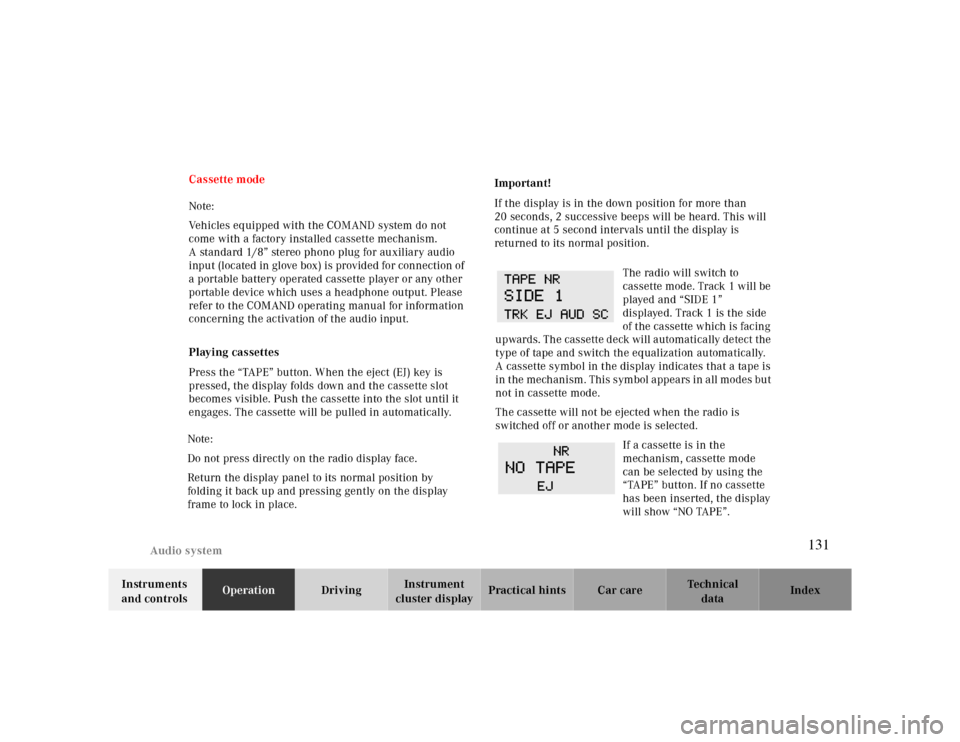
Press the “TAPE” button. When the eject (EJ) key is
pressed, the display folds down and the cassette slot
becomes visible. Push the cassette into the slot until it
engages. The cassette will be pulled in automatically.
Note:
Do not press directly on the radio display face.
Return the display panel to its normal position by
folding it back up and pressing gently on the display
frame to lock in place. Important!
If the display is in the down position for more than
20 seconds, 2 successive beeps will be heard. This will
continue at 5 second intervals until the display is
returned to its normal position.
The radio will switch to
cassette mode. Track 1 will be
played and “SIDE 1”
displayed. Track 1 is the side
of the cassette which is facing
upwards. The cassette deck will automatically detect the
type of tape and switch the equalization automatically.
A cassette symbol in the display indicates that a tape is
in the mechanism. This symbol appears in all modes but
not in cassette mode.
The cassette will not be ejected when the radio is
switched off or another mode is selected.
If a cassette is in the
mechanism, cassette mode
can be selected by using the
“TAPE” button. If no cassette
has been inserted, the display
will show “NO TAPE”.
131
Page 148 of 299
Interior equipment
Te ch n ica l
data Instruments
and controlsOperationDrivingInstrument
cluster displayPractical hints Car care Index Glove box
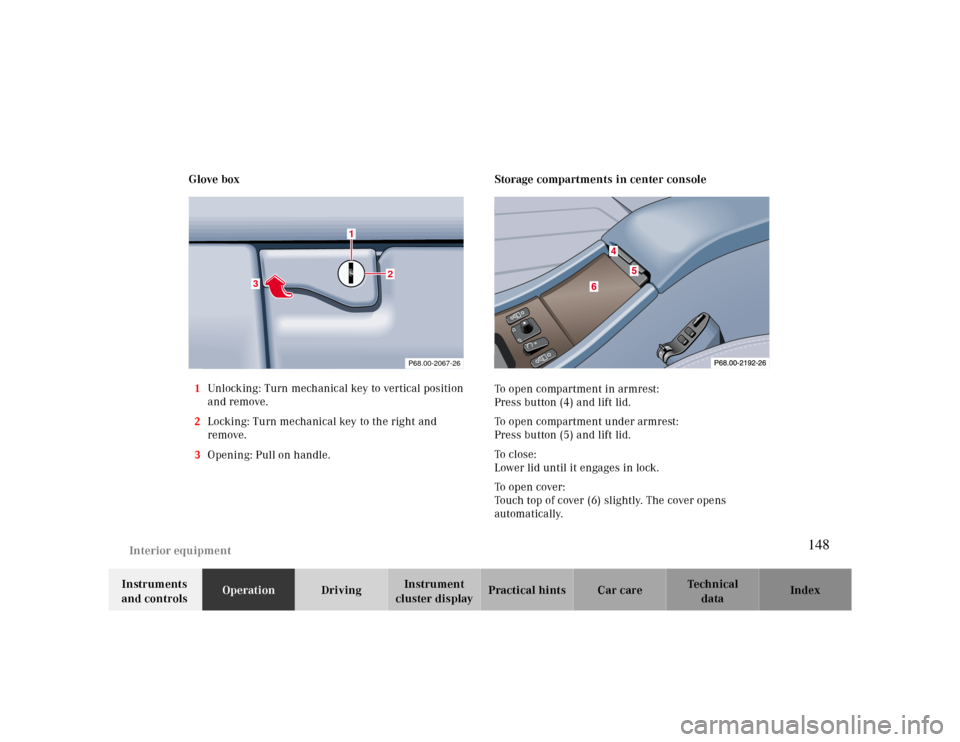
1Unlocking: Turn mechanical key to vertical position
and remove.
2Locking: Turn mechanical key to the right and
remove.
3Opening: Pull on handle.
Storage compartments in center console
To open compartment in armrest:
Press button (4) and lift lid.
To open compartment under armrest:
Press button (5) and lift lid.
To c l o s e :
Lower lid until it engages in lock.
To open cover:
Touch top of cover (6) slightly. The cover opens
automatically.
P68.00-2067-26
3
1
2
148
Page 295 of 299
GGarage door opener.................................................... 157Gasoline
Additives .............................................................. 287Fuel requirements ................................................. 286Premium unleaded ................................................ 286
Glove box ................................................................... 148
Instrument cluster........................................................ 78
Activating display .................................................... 81Indicator lamps ....................................................... 80
Instrument lamps ........................................................ 81Instruments and controls ............................................. 18Interior
General notes ........................................................ 147
Interior lighting ......................................................... 145
HHazard warning flasher switch ....................................115Head restraints
Front .......................................................................49Rear.........................................................................50
Headlamp cleaning system ..........................................112Heated seats.................................................................53Hood .......................................................................... 233IIlluminated vanity mirrors ........................................147Indicator lamps in the instrument cluster ....................80Infant and child restraint systems .................................70
Installation...............................................................72
JJump starting ............................................................. 251LLIGHT SENSOR - malfunction and
warning messages ................................................ 221
Lighter ...................................................................... 151LIGHTING SYSTEM - malfunction and
warning messages ................................................ 222
Limp home mode (Automatic transmission)................ 183Loading instructions .................................................. 153Locking and unlocking ................................................ 29
295
Page 297 of 299
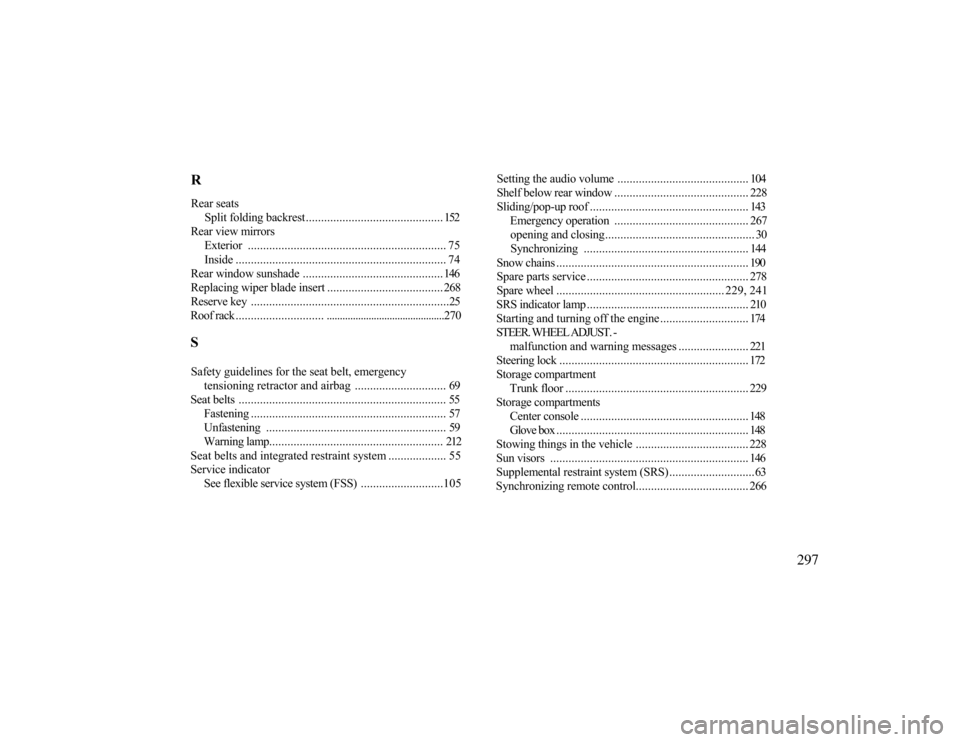
RRear seats
Split folding backrest............................................. 152
Rear view mirrors
Exterior ................................................................. 75Inside ..................................................................... 74
Rear window sunshade .............................................. 146Replacing wiper blade insert ...................................... 268Reserve key .................................................................25Roof rack ..........................................................................270SSafety guidelines for the seat belt, emergency
tensioning retractor and airbag .............................. 69
Seat belts .................................................................... 55
Fastening ................................................................ 57Unfastening ........................................................... 59Warning lamp......................................................... 212
Seat belts and integrated restraint system ................... 55Service indicator
See flexible service system (FSS) ...........................105
Setting the audio volume........................................... 104Shelf below rear window ............................................ 228Sliding/pop-up roof .................................................... 143
Emergency operation ............................................ 267opening and closing................................................. 30Synchronizing ...................................................... 144
Snow chains ............................................................... 190Spare parts service ..................................................... 278Spare wheel ....................................................... 229, 241SRS indicator lamp ..................................................... 210Starting and turning off the engine ............................. 174STEER. WHEEL ADJUST. -
malfunction and warning messages ....................... 221
Steering lock .............................................................. 172Storage compartment
Trunk floor ............................................................ 229
Storage compartments
Center console ....................................................... 148Glove box ............................................................... 148
Stowing things in the vehicle ..................................... 228Sun visors ................................................................. 146Supplemental restraint system (SRS)............................63Synchronizing remote control..................................... 266
297