Page 115 of 299

Hazard warning flasher
Te ch n ica l
data Instruments
and controlsOperationDrivingInstrument
cluster displayPractical hints Car care Index Windshield wiper smears
If the windshield wiper smears the windshield, even
during rain, activate the washer system as often as
necessary. The fluid in the washer reservoir should be
mixed in the correct ratio .
Blocked windshield wiper
If the windshield wiper becomes blocked (for example,
due to snow), switch off the wiper.
For safety reasons before removing ice or snow, remove
electronic key from steering lock. Remove blockage.
Activate combination switch again (electronic key in
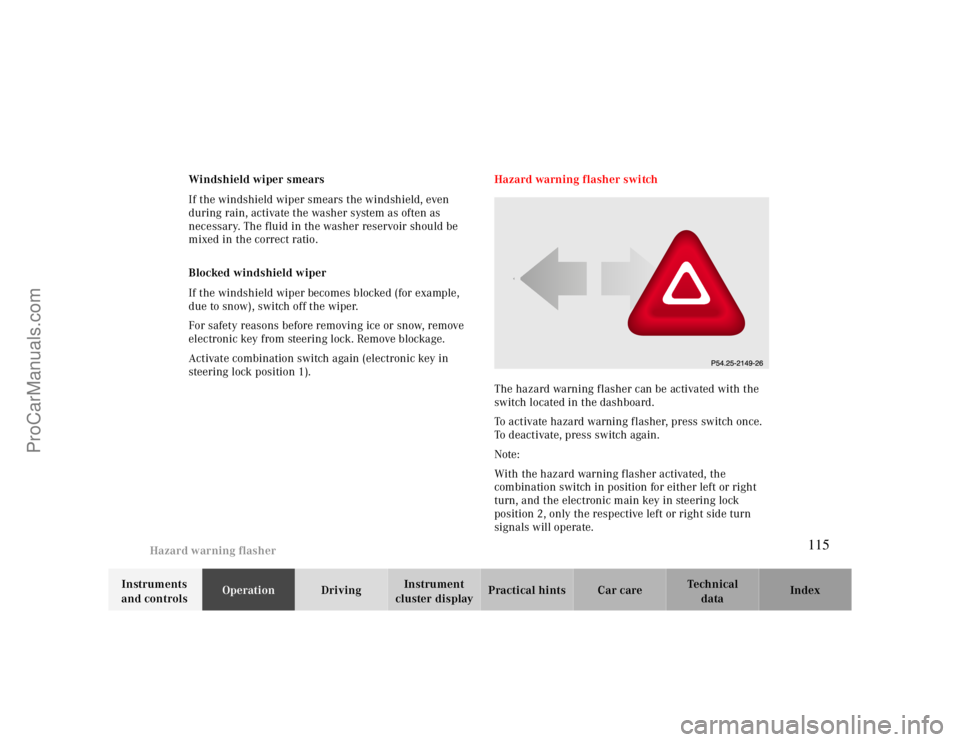
steering lock position 1).Hazard warning flasher switch
The hazard warning flasher can be activated with the
switch located in the dashboard.
To activate hazard warning flasher, press switch once.
To deactivate, press switch again.
Note:
With the hazard warning flasher activated, the
combination switch in position for either left or right
turn, and the electronic main key in steering lock
position 2, only the respective left or right side turn
signals will operate.
115
ProCarManuals.com
Page 119 of 299

Automatic climate control
Te ch n ica l
data Instruments
and controlsOperationDrivingInstrument
cluster displayPractical hints Car care Index Economy
The function of this setting corresponds to the
automatic mode. However, because the air conditioning
compressor will not engage (fuel savings), it is not
possible to air condition in this setting.
Press S button to activate.
Press S button once again to return to previous
setting.
Special settings (use only for short duration)
Defogging windows
Switch off O button.
Press left and right U buttons.
Press button b repeatedly until air is directed
upward.
UTurn wheels (2) to position i to open left and right
side air outlets (4). Adjust side air outlets upward.Defrosting
Turn wheels (2) to position i to open left and right
side air outlets (4). Adjust side air outlets upward.
Press P button. Maximum heated and automatically
controlled amount of air is directed to the windshield
and side windows.
PPress P button once again to return to previous
setting.
119
ProCarManuals.com
Page 130 of 299

Audio system
Te ch n ica l
data Instruments
and controlsOperationDrivingInstrument
cluster displayPractical hints Car care Index
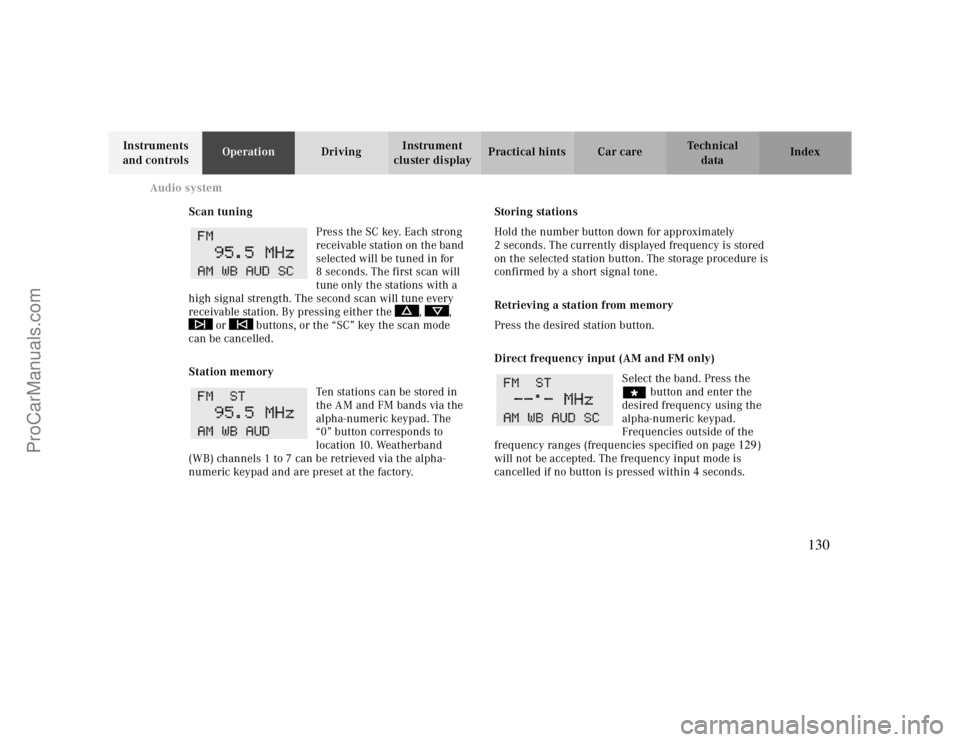
Scan tuning
Press the SC key. Each strong
receivable station on the band
selected will be tuned in for
8 seconds. The first scan will
tune only the stations with a
high signal strength. The second scan will tune every
receivable station. By pressing either the , ,
or buttons, or the “SC” key the scan mode
can be cancelled.
Station memory
Ten stations can be stored in
the AM and FM bands via the
alpha-numeric keypad. The
“0” button corresponds to
location 10. Weatherband
(WB) channels 1 to 7 can be retrieved via the alpha-
numeric keypad and are preset at the factory.Storing stations
Hold the number button down for approximately
2 seconds. The currently displayed frequency is stored
on the selected station button. The storage procedure is
confirmed by a short signal tone.
Retrieving a station from memory
Press the desired station button.
Direct frequency input (AM and FM only)
Select the band. Press the
“ button and enter the
desired frequency using the
alpha-numeric keypad.
Frequencies outside of the
frequency ranges (frequencies specified on page
129
)
will not be accepted. The frequency input mode is
cancelled if no button is pressed within 4 seconds.
130
ProCarManuals.com
Page 136 of 299

Audio system
Te ch n ica l
data Instruments
and controlsOperationDrivingInstrument
cluster displayPractical hints Car care Index If there is no CD in the
selected magazine slot,
“NO CD” and the
corresponding slot number
will be displayed
(e.g.“NO CD3”). After the last track on a CD has been
played, the next CD will automatically be selected and
played.
Skipping tracks forwards/backwards
Press the button. The next track on the CD will be
played.
Press the button. If the track has been playing for
more than 10 seconds, it will revert to the start of that
track. If it has been playing for less than ten seconds it
will revert to the preceding track. To skip several tracks,
the respective button must be pressed until the desired
track is reached. If the beginning or end of the CD is
reached during the search, the first or last track will be
played.Fast forward/reverse
Press the button and hold it down for audible fast
forward.
Press the button and hold it down for audible
reverse.
The search will stop when the
button is released. The
relative time of the track will
be displayed during the
search. The search mode will
cancel if the beginning or end of the CD is reached.
Scanning
Press the SC key. Each tra ck w ill be played for 8 second s
in ascending order. The search will stop at the track in
question if the , , , buttons or the
“SC” key is pressed.
136
ProCarManuals.com
Page 149 of 299
Interior equipment
Te ch n ica l
data Instruments
and controlsOperationDrivingInstrument
cluster displayPractical hints Car care Index
Cup holder in center console
To open cup holder:
Briefly press button (7). The cup holder opens
automatically.
To store cup holder:
Push button (7) down until cup holder engages. Close
cover .
Cup holder in rear bench armrest
Briefly press drawer (1) and pull out to its detent.
Caution!
Keep cup holder closed while traveling. Place only
containers that fit into the cup holder to prevent spills.
Do not fill containers to a height where the contents
could spill during vehicle maneuvers, especially hot
liquids.
1
149
ProCarManuals.com
Page 158 of 299

Garage door opener
Te ch n ica l
data Instruments
and controlsOperationDrivingInstrument
cluster displayPractical hints Car care Index For operation in the USA only: This device complies
with Part
15 of the FCC Rules.
Operation is subject to the following two conditions:
(1) This device may not cause harmful interference, and
(2) this device must accept any interference received,
including interference that may cause undesired
operation.
WARNING: Changes or modification not expressly
approved by party responsible for compliance could void
the user’s authority to operate the equipment.
Programming or reprogramming the integrated
remote control:
1. Turn electronic key in steering lock to position 1
or 2.
2. Hold the end of the hand-held transmitter of the
device you wish to train approximately 2 to 5 inches
(5 cm to 12 cm) away from the surface of the
integrated remote control located on the inside rear
view mirror, keeping the indicator lamp in view.3. Using both hands, simultaneously push the hand-
held transmitter button and the desired integrated
remote control button. Do not release the buttons
until completing step 4.
4. The indicator lamp on the integrated remote control
will flash, first slowly and then rapidly. When the
indicator lamp flashes rapidly, both buttons may be
released (the rapid flashing lamp indicates
successful programming of the new frequency
signal). To program the remaining two buttons,
follow steps 1 though 4.
Note:
If after repeated attempts, you do not successfully
program the integrated remote control device to learn
the signal of the hand-held transmitter, the garage door
opener could be equipped with the “rolling code
feature”.
158
ProCarManuals.com
Page 161 of 299
DrivingBrakes 185
Driving off 186
Control and operation of radio Parking 187
transmitters 162 Tires 187
COMAND, radio, telephone and Snow chains 190
two-way radio 162 Winter driving instructions 190
Maintenance 163 Deep water 191
Catalytic converter 164 Passenger compartment 192
Emission control 165 Travelling abroad 192
Tele Aid 166 Cruise control 193
Steering lock 172 Brake assist system (BAS) 196
Starting and turning off the engine 174 Antilock brake system (ABS) 198
Automatic transmission 175
Electronic stability program (ESP)
200
Parking brake 184 What you should know at the
Driving instructions 184 gas station 203
Drive sensibly – save fuel 184 Check regularly and before a
long trip 205
Drinking and driving 185
Pedals 185
Power assistance 185
161
ProCarManuals.com
Page 162 of 299

Control and operation of radio transmitters
Te ch n ica l
data Instruments
and controlsOperationDrivingInstrument
cluster displayPractical hints Car care Index
Control and operation of radio transmitters
COMAND, radio and telephone
1 Observe all legal requirements.
Telephones and two-way radio
Radio transmitters, such as a portable telephone or a
citizens band unit should only be used inside the
vehicle if they are connected to an antenna that is
installed on the outside of the vehicle.
Refer to the radio transmitter operation instructions
regarding use of an external antenna.
Warning!
Please do not forget that your primary
responsibility is to drive the vehicle. Only operate
the COMAND (Cockpit Management and Data
System), radio or telephone
1 if road and traffic
conditions permit.
Bear in mind that at a speed of just 30 mph
(approximately 50 km/h), your vehicle is covering
a distance of approximately 50 feet (approximately
14 m ) e ve r y s e c o n d .
Wa r n i n g !
Never operate radio transmitters equipped with a
built-in or attached antenna (i.e. without being
connected to an external antenna) from inside the
vehicle while the engine is running. Doing so could
lead to a malfunction of the vehicle’s electronic
system, possibly resulting in an accident and
personal injury.
162
ProCarManuals.com