Page 157 of 323
Garage door opener
Te ch n ica l
data Instruments
and controlsOperationDrivingInstrument
cluster displayPractical hints Car care Index Operation of remote control:
1. Turn electronic key in steering lock to position 1
or 2.
2. Select and press the appropriate button to activate
the remote controlled device. The integrated remote
control transmitter continues to send the signal as
long as the button is pressed – up to 20 seconds.Erasing the remote control memory:
1. Turn electronic key in steering lock to position 1
or 2.
2. Simultaneously holding down the left and right side
buttons for approximately 20 seconds, or until the
control lamp blinks rapidly, will erase the codes of
all three channels.
157
Page 161 of 323

Soft top
Te ch n ica l
data Instruments
and controlsOperationDrivingInstrument
cluster displayPractical hints Car care Index Notes:
If indicator lamp blinks slowly, a malfunction has
occurred in the system.
If indicator lamp blinks rapidly, the trunk lid and/or
the luggage cover may be open, and need to be
closed.6. Lift symbol side of the soft top switch and hold:
•The roll bar lowers (when in the upper position).
•The soft top compartment cover and rear
window section of the soft top unlocks.
•The rear window section of the soft top raises.
•The soft top compartment cover opens.
•The soft top lowers into its storage compartment.
•The soft top compartment cover closes and
locks.
•The indicator lamp in the soft top switch goes
out – the lowering procedure is completed – a
signal sounds.
If the soft top switch is held or is released and lifted
again within approximately 2 seconds, the side
windows will close. If the roll bar was previously in the
upper position, it will return to that position.
The side windows can also be opened/closed later on.
Lift/press soft top switch twice and hold, see page145.
However, the side windows and the roll bar can also be
activated using their respective switches, see page143
and page51.
161
Page 162 of 323

Soft top
Te ch n ica l
data Instruments
and controlsOperationDrivingInstrument
cluster displayPractical hints Car care Index
Note:
For safety reasons, the soft top cannot be lowered while
driving.
Raising Soft Top
1. Engage parking brake.
2. Close luggage cover and trunk lid.
For notes on the luggage cover, see page 250.
3. Turn electronic key in steering lock to position 2. 4. Press symbol side of soft top switch and hold:
•The indicator lamp in the soft top switch lights
up.
Notes:
If indicator lamp blinks slowly, a malfunction
has occurred in the system.
If indicator lamp blinks rapidly, the trunk lid
and/or the luggage cover may be open, and need
to be closed.
•The side windows lower.
•The roll bar lowers (when in the upper position).
•The soft top compartment cover unlocks and
opens.
•The soft top is raised from its storage
compartment to the closing position.
•The soft top storage compartment closes and the
rear window section of the soft top lowers – a
signal sounds.
Warning!
To prevent possible accidents, drive the vehicle
only with the soft top either completely closed and
locked, or fully lowered into its storage
compartment.
162
Page 177 of 323

Tele Aid
Te ch n ica l
data Instruments
and controlsOperationDrivingInstrument
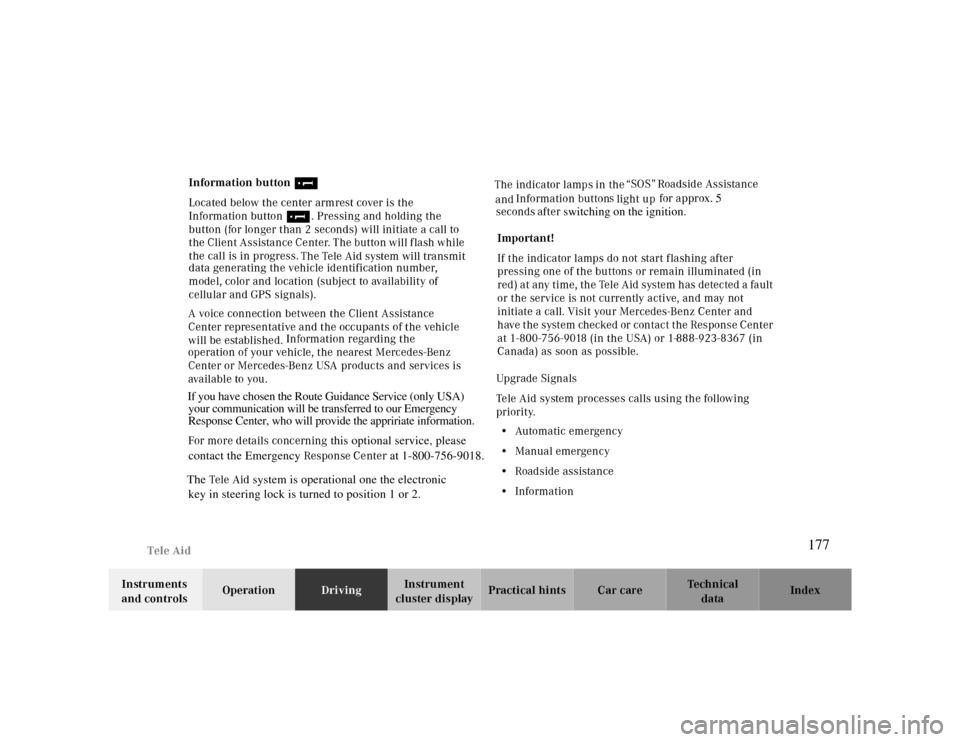
cluster displayPractical hints Car care Index Information button ¡
Located below the center armrest cover is the
Information button¡. Pressing and holding the
button (for longer than 2 seconds) will initiate a call to
the Client Assistance Center. The button will flash while
the call is in progress.
The Tele Aid system will transmit
data generating the vehicle identification number,
model, color and location (subject to availability of
cellular and GPS signals).
A voice connection between the Client Assistance
Center representative and the occupants of the vehicle
will be established. Information regarding the
operation of your vehicle, the nearest Mercedes-Benz
Center or Mercedes-Benz USA products and services is
ava il ab l e to you .
For more details concerning this optional service, please
TheTele A id system is operational one the electronic If you have chosen the Route Guidance Service (only USA)
your communication will be transferred to our Emergency
Response Center, who will provide the appririate information. The indicator lamp in the
Information buttons
for approx. 5
seconds s
after switching on the ignition.“SOS”
Roadside Assistance
light up
and
key in steering lock is turned to position 1 or 2.contact the Emergency Response Center at 1-800-756-9018.Important!
If the indicator lamps do not start f lashing after
pressing one of the buttons or remain illuminated (in
red) at any time, the Tele Aid system has detected a fault
or the service is not currently active, and may not
initiate a call. Visit your Mercedes-Benz Center and
have the system checked or contact the Response Center
at 1-800-756-9018 (in the USA) or 1-888-923-8367 (in
Canada) as soon as possible.
Upgrade Signals
Tele Aid system processes calls using the following
priority.
•Automatic emergency
•Manual emergency
•Roadside assistance
•Information
177
Page 212 of 323

What you should know at the gas station
Te ch n ica l
data Instruments
and controlsOperationDrivingInstrument
cluster displayPractical hints Car care Index •Engine oil
Engine oil level check, see page110 and page246
Fill quantity between upper and lower dipstick
marking level: 2.1 US qt (2.0 l).
Recommended engine oils, see Approved Service
Products sheet.
• Coolant
For normal replenishing, use water (potable water
quality).
For further information (e.g. anticorrosion/
antifreeze), see page307.
• Spark plugs
Approved spark plugs, see page305.
• Tire pressure
For tire pressure, refer to tire pressure label inside
the fuel filler flap. See page259 for further details.• Air conditioner
R-134a refrigerant and special PAG lubricant, see
page307.
•Bulbs
High and low beams: H7 (55 W),
low beam: Xenon (optional)
fog lamps: H1 (55 W),
turn signal lamps,
front 1156 NA (26.9/5 W/32/4 cp),
parking and standing lamps, front: H 6W (6 W),
side marker lamps, front: 5 W/4 cp,
turn signal lamps, rear: 21 W/24 cp,
stop, tail, parking and side marker lamps: 21/4 W,
tail and parking lamp: 5 W/4 cp,
rear fog lamp, driver’s side: 21 W/32 cp,
backup lamps: 21 W/32 cp,
license plate lamps: 5 W/4 cp.
212
Page 267 of 323
Towing
Te ch n ica l
data Instruments
and controlsOperation DrivingInstrument
cluster displayPractical hintsCar care Index
Note:
To signal turns while being towed with hazard warning
flasher in use, turn electronic key in steering lock to
position 2 and activate combination switch for left or
right turn signal in usual manner – only the selected
turn signal will operate.
Upon canceling the turn signal, the hazard warning
flasher will operate again.Caution!
If the vehicle is towed with the front axle raised, the
engine must be shut off (electronic key in steering lock
position 0 or 1). Otherwise, the ESP will immediately be
engaged and will apply the rear wheel brakes. Switch off
the tow-away alarm as well as the ESP
.
267
Page 270 of 323
Exterior lamps
Te ch n ica l
data Instruments
and controlsOperation DrivingInstrument
cluster displayPractical hintsCar care Index Headlamp assembly (Halogen)
1Headlamp vertical adjustment screw
2Cover for low beam headlamp
3Cover for high beam headlamp, parking and
standing lampHeadlamp assembly (Xenon)
4Bulb socket for turn signal lamp
5Electrical connector for low beam headlamp bulb
6Electrical connector for high beam headlamp bulb
7Bulb socket for parking and standing lamp
P82.10-2394-26
4
1
5
6
7
2
3
4
6
7
2
3P82.10-2395-26
5
1
270
Page 271 of 323

Exterior lamps
Te ch n ica l
data Instruments
and controlsOperation DrivingInstrument
cluster displayPractical hintsCar care Index
Bulbs for low or high beam
H7 (55 W)
Open hood.
Rotate cover (2 or 3) counterclockwise and remove. Pull
off electrical connector (5 or 6). Unhook clamping ring
and remove bulb.
Insert new bulb (seating properly in cutouts of bulb
socket), mount clamping ring. Reinstall and push
electrical connector on securely.
Reinstall cover (2 or 3).
Xenon (optional)
Bulb for low beamTurn signal lamp
1156 NA (26.9/5 W/32/4 cp bulb)
Open hood.
Twist bulb socket (4) counterclockwise and pull out.
Push bulb into socket, turn counterclockwise and
remove.
Insert new bulb in socket, push in and twist clockwise.
Reinstall bulb socket. Reinstall lamp assembly until
properly seated.
Parking and standing lamp
H6W (6Wbulb)
Open hood.
Rotate cover (3) counterclockwise and remove.
Twist bulb socket (7) counterclockwise and pull out.
Push bulb into socket, turn counterclockwise and
remove.
Insert new bulb in socket, push in and twist clockwise.
Reinstall bulb socket. Reinstall lamp assembly until
properly seated.
Reinstall cover (3).
Warning!
Because of high voltage in Xenon lamps, it is
dangerous to replace the bulb or repair the lamp
and its components. We recommend that you have
such work done by a qualified technician.
271