2000 LINCOLN TOWN CAR Turning on
[x] Cancel search: Turning onPage 130 of 224

Driving while you tow
Do not drive faster than 88 km/h (55 mph) when towing a trailer.
Speed control may shut off if you are towing on long, steep grades.
When towing a trailer:
²Use a lower gear when towing up or down steep hills. This will
eliminate excessive downshifting and upshifting for optimum fuel
economy and transmission cooling.
²Anticipate stops and brake gradually.
Exceeding the GCWR rating may cause internal transmission
damage and void your warranty coverage.
Servicing after towing
If you tow a trailer for long distances, your vehicle will require more
frequent service intervals. Refer to your Scheduled Maintenance guide
for more information.
Trailer towing tips
²Practice turning, stopping and backing up in an area before starting on
a trip to get the feel of the vehicle trailer combination. When turning,
make wider turns so the trailer wheels will clear curbs and other
obstacles.
²Allow more distance for stopping with a trailer attached.
²The trailer tongue weight should be 10% of the loaded trailer weight.
²After you have traveled 80 km (50 miles), thoroughly check your
hitch, electrical connections and trailer wheel lug nuts.
²When stopped in traffic for long periods of time in hot weather, place
the gearshift in P (Park) and increase idle speed. This aids engine
cooling and air conditioner efficiency.
²Vehicles with trailers should not be parked on a grade. If you must
park on a grade, place wheel chocks under the trailer's wheels.
Launching or retrieving a boat
When backing down a ramp during boat launching or retrieval,
²Do not allow the static water level to rise above the bottom edge of
the rear bumper and
²Do not allow waves to break higher than 15 cm (6 inches) above the
bottom edge of the rear bumper.
Driving
130
Page 143 of 224

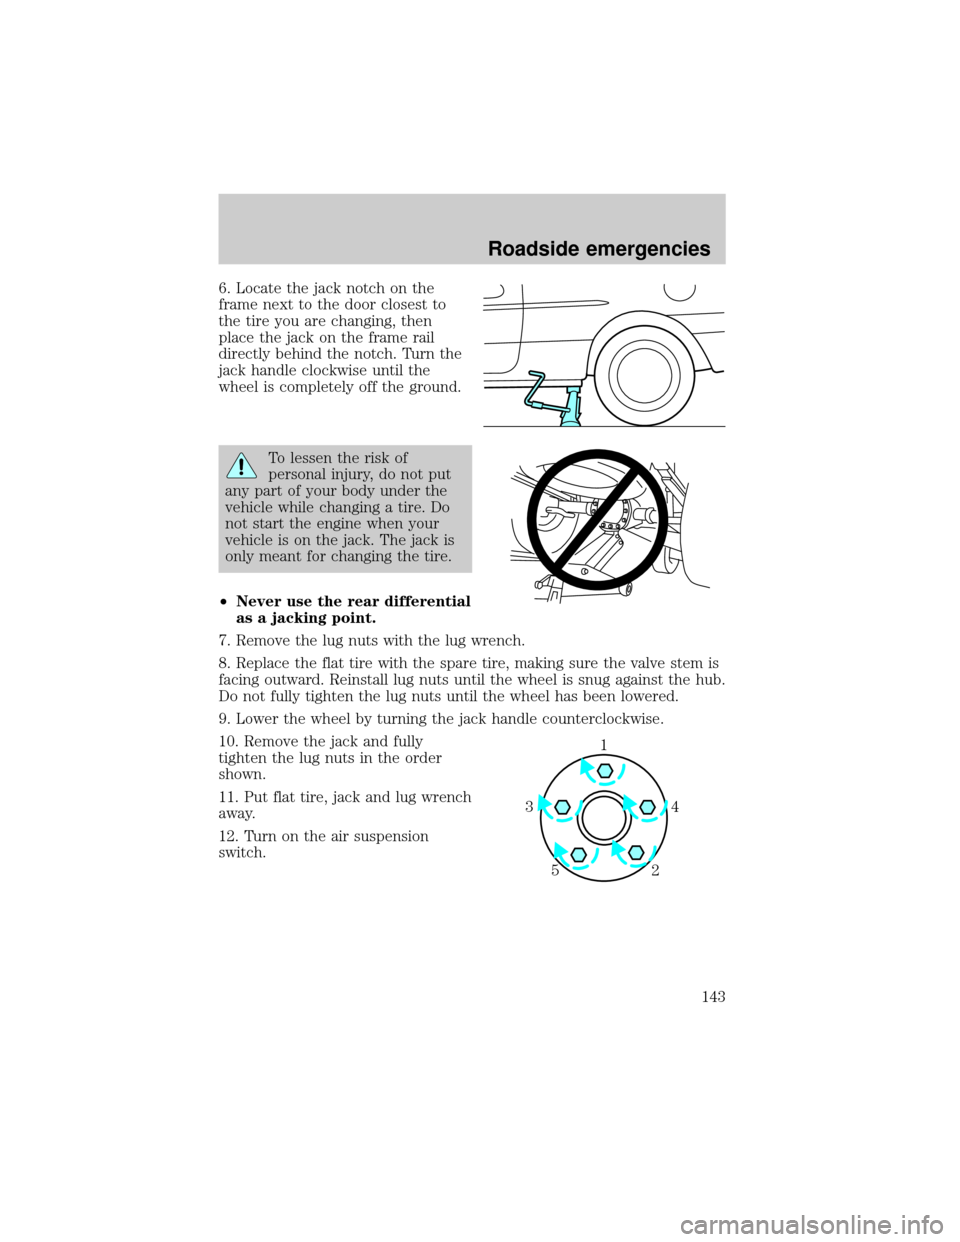
6. Locate the jack notch on the
frame next to the door closest to
the tire you are changing, then
place the jack on the frame rail
directly behind the notch. Turn the
jack handle clockwise until the
wheel is completely off the ground.
To lessen the risk of
personal injury, do not put
any part of your body under the
vehicle while changing a tire. Do
not start the engine when your
vehicle is on the jack. The jack is
only meant for changing the tire.
²Never use the rear differential
as a jacking point.
7. Remove the lug nuts with the lug wrench.
8. Replace the flat tire with the spare tire, making sure the valve stem is
facing outward. Reinstall lug nuts until the wheel is snug against the hub.
Do not fully tighten the lug nuts until the wheel has been lowered.
9. Lower the wheel by turning the jack handle counterclockwise.
10. Remove the jack and fully
tighten the lug nuts in the order
shown.
11. Put flat tire, jack and lug wrench
away.
12. Turn on the air suspension
switch.
1
4 3
2 5
Roadside emergencies
143
Page 155 of 224

3. Recheck the engine oil level. Make sure the oil level is not above the
MAX mark on the engine oil level indicator (dipstick).
4. Install the indicator and ensure it is fully seated.
5. Fully install the engine oil filler cap by turning the filler cap clockwise
until three clicks can be heard.
To avoid possible oil loss, DO NOT operate the vehicle with the
engine oil level indicator and/or the engine oil filler cap removed.
Engine oil and filter recommendations
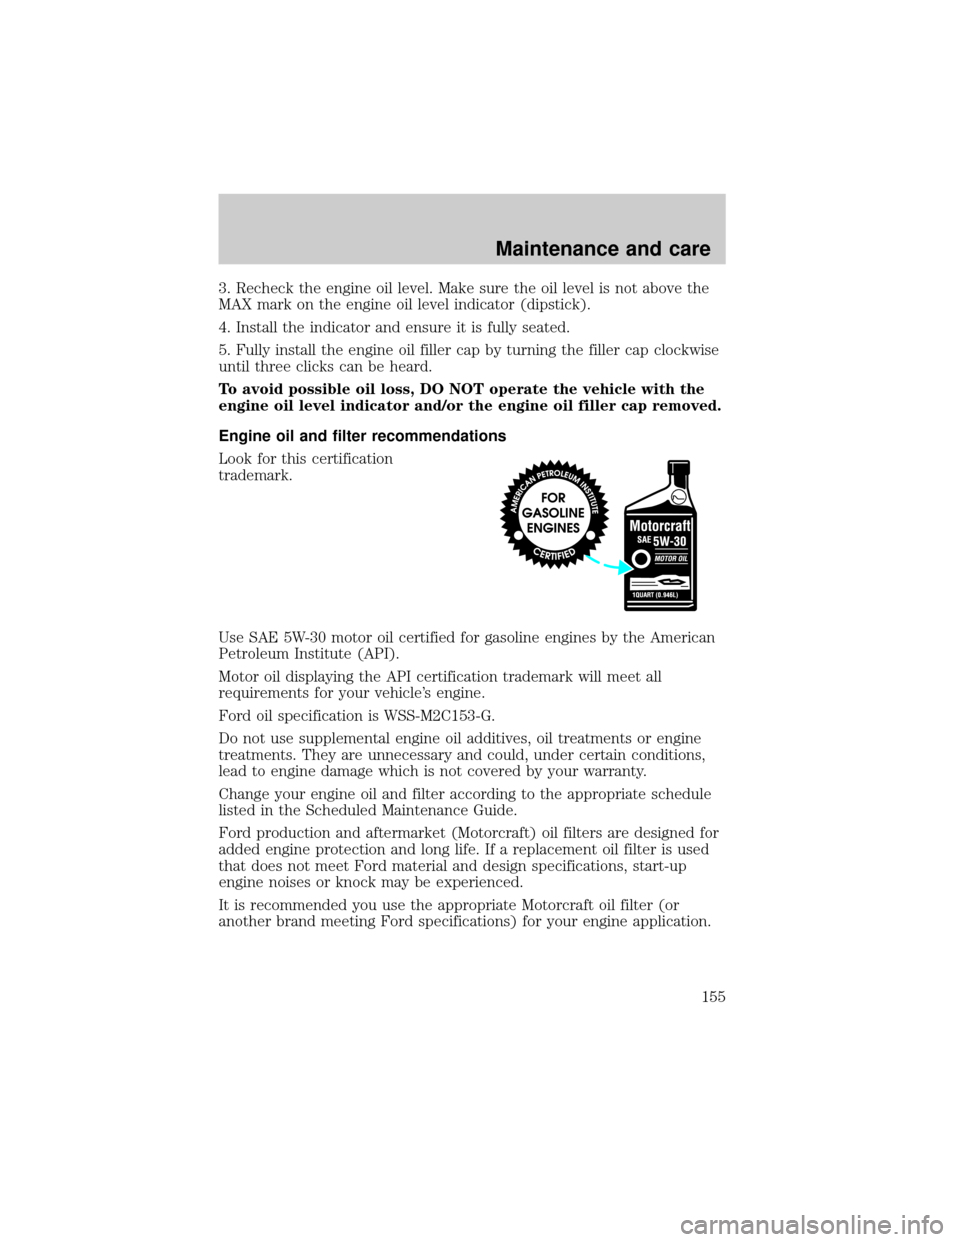
Look for this certification
trademark.
Use SAE 5W-30 motor oil certified for gasoline engines by the American
Petroleum Institute (API).
Motor oil displaying the API certification trademark will meet all
requirements for your vehicle's engine.
Ford oil specification is WSS-M2C153-G.
Do not use supplemental engine oil additives, oil treatments or engine
treatments. They are unnecessary and could, under certain conditions,
lead to engine damage which is not covered by your warranty.
Change your engine oil and filter according to the appropriate schedule
listed in the Scheduled Maintenance Guide.
Ford production and aftermarket (Motorcraft) oil filters are designed for
added engine protection and long life. If a replacement oil filter is used
that does not meet Ford material and design specifications, start-up
engine noises or knock may be experienced.
It is recommended you use the appropriate Motorcraft oil filter (or
another brand meeting Ford specifications) for your engine application.
Maintenance and care
155
Page 180 of 224

Calculating fuel economy
1. Fill the fuel tank completely and record the initial odometer reading
(in kilometers or miles).
2. Each time you fill the tank, record the amount of fuel added (in liters
or gallons).
3. After at least three to five tank fill-ups, fill the fuel tank and record
the current odometer reading.
4. Subtract your initial odometer reading from the current odometer
reading.
5. Follow one of the simple calculations in order to determine fuel
economy:
Multiply liters used by 100, then divide by total kilometers
traveled.
Divide total miles traveled by total gallons used.
Keep a record for at least one month and record the type of driving (city
or highway). This will provide an accurate estimate of the vehicle's fuel
economy under current driving conditions. Additionally, keeping records
during summer and winter will show how temperature impacts fuel
economy. In general, lower temperatures give lower fuel economy.
Driving style Ð good driving and fuel economy habits
Give consideration to the lists that follow and you may be able to change
a number of variables and improve your fuel economy.
Habits
²Smooth, moderate operation can yield up to 10% savings in fuel.
²Steady speeds without stopping will usually give the best fuel
economy.
²Idling for long periods of time (greater than one minute) may waste
fuel.
²Anticipate stopping; slowing down may eliminate the need to stop.
²Sudden or hard accelerations may reduce fuel economy.
²Slow down gradually.
²Driving at reasonable speeds (traveling at 88 km/h [55 mph] uses 15%
less fuel than traveling at 105 km/h [65 mph]).
²Revving the engine before turning it off may reduce fuel economy.
Maintenance and care
180
Page 185 of 224

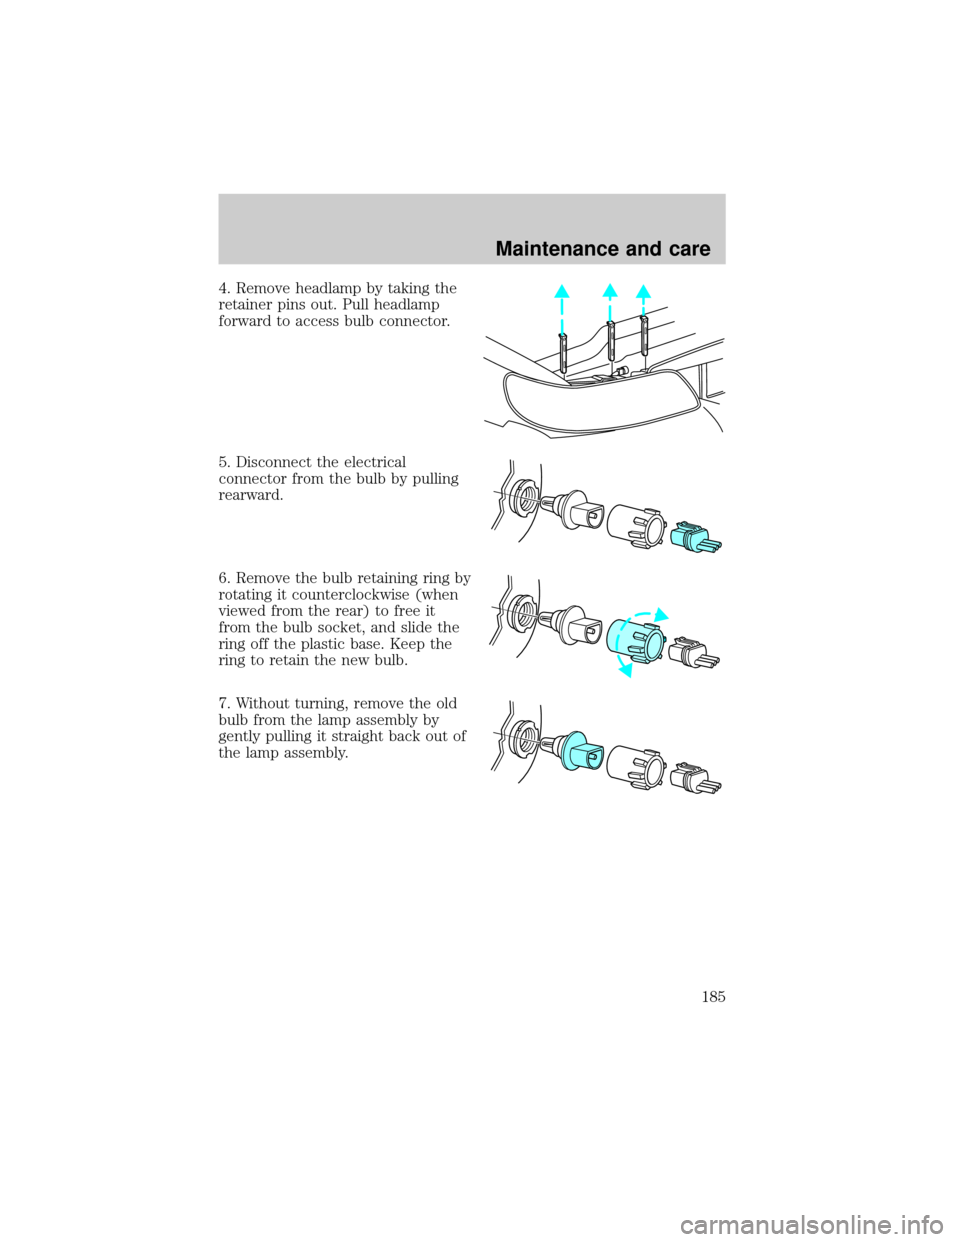
4. Remove headlamp by taking the
retainer pins out. Pull headlamp
forward to access bulb connector.
5. Disconnect the electrical
connector from the bulb by pulling
rearward.
6. Remove the bulb retaining ring by
rotating it counterclockwise (when
viewed from the rear) to free it
from the bulb socket, and slide the
ring off the plastic base. Keep the
ring to retain the new bulb.
7. Without turning, remove the old
bulb from the lamp assembly by
gently pulling it straight back out of
the lamp assembly.
Maintenance and care
185
Page 189 of 224

A bubble (vertical indicator) that is not centered between the two red
lines does not necessarily indicate out-of-aim headlamps. If your vehicle
is not positioned on a level surface, the slope will be included in the
vertical indication. Therefore, vertical and horizontal headlamp
adjustment should be performed only when the beam direction appears
to be incorrect.
You will need one 4 mm wrench or socket to make the adjustments.
If the vehicle has been in an accident, the vehicle's front structure
should be properly aligned before aiming the headlamps.
Horizontal aim adjustment
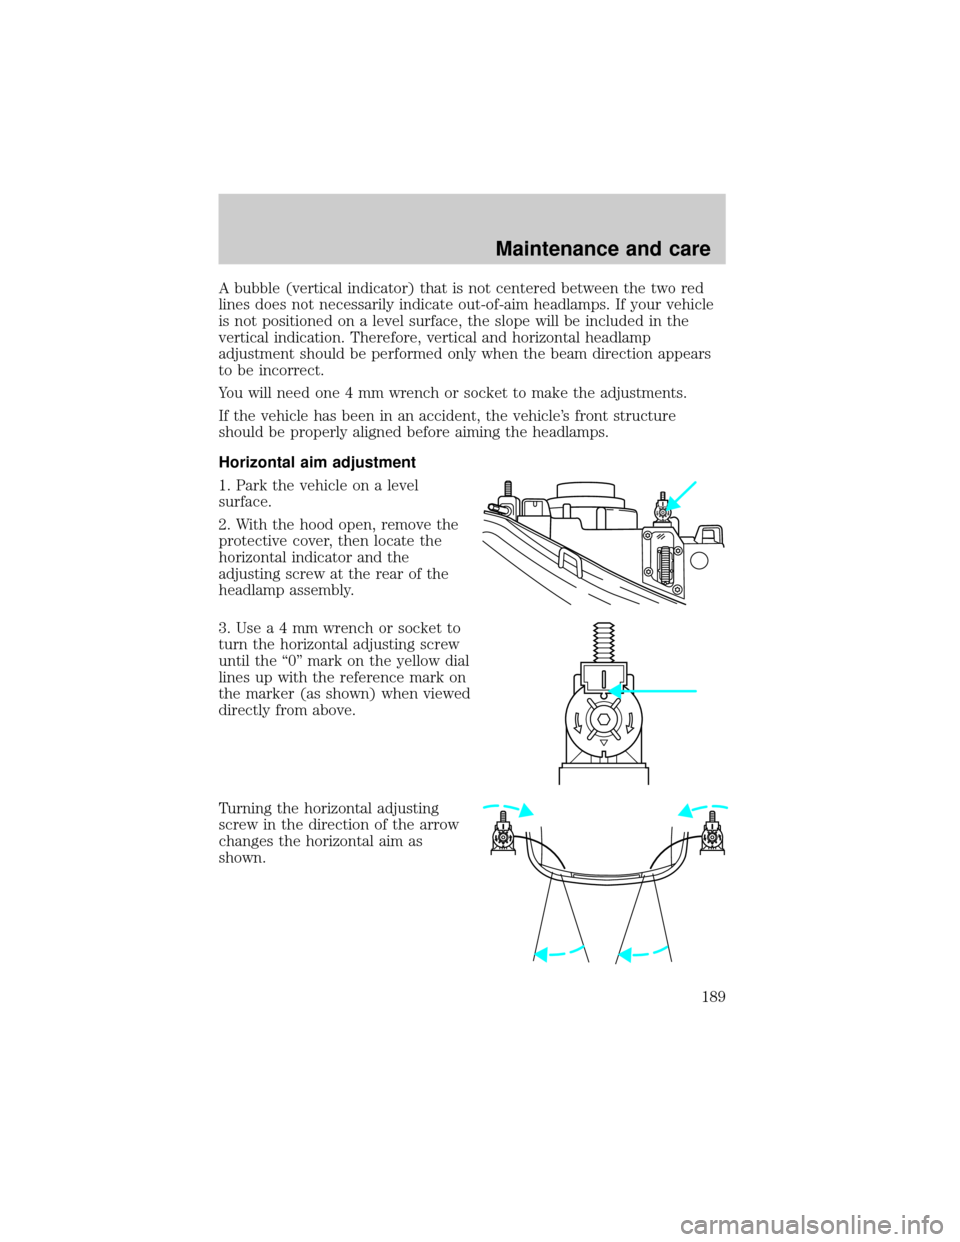
1. Park the vehicle on a level
surface.
2. With the hood open, remove the
protective cover, then locate the
horizontal indicator and the
adjusting screw at the rear of the
headlamp assembly.
3.Usea4mmwrench or socket to
turn the horizontal adjusting screw
until the ª0º mark on the yellow dial
lines up with the reference mark on
the marker (as shown) when viewed
directly from above.
Turning the horizontal adjusting
screw in the direction of the arrow
changes the horizontal aim as
shown.
Maintenance and care
189
Page 216 of 224

filter, specifications .........178,195
fuel filler door override ............67
fuel filler door release ..............66
fuel pump shut-off switch .....133
gauge .........................................15
improving fuel economy ........179
octane rating ....................177,198
quality ......................................177
running out of fuel .................178
safety information relating
to automotive fuels ................174
Fuses ...................................134,135
Garage door opener ....................61
Gas cap (see Fuel cap) ............176
Gas mileage
(see Fuel economy) .................179
Gauges .........................................15
engine coolant
temperature gauge ...................16
fuel gauge ..................................15
odometer ...................................15
speedometer .............................16
GAWR
(Gross Axle Weight Rating) .....127
definition .................................127
driving with a heavy load ......127
location ....................................127
GVWR (Gross Vehicle
Weight Rating) ..........................127
calculating ...............................127
definition .................................127
driving with a heavy load ......127
location ....................................127
Hazard flashers .........................133
Head restraints ...........................84
Headlamps ...................................23
aiming ........................188,189,190
autolamp system .......................23
bulb specifications ..................188
daytime running lights .............23
flash to pass ..............................24
high beam ............................10,24replacing bulbs .......................184
turning on and off ....................23
warning chime ..........................14
Heating ........................................24
HomeLink universal
transceiver (see
Garage door opener) ...61,62,63,64
Hood ..........................................151
Ignition .......................................198
positions of the ignition ...........54
Infant seats
(see Safety seats) .....................107
Inspection/maintenance
(I/M) testing ..............................183
Instrument panel
cleaning ...................................193
cluster ..........................................8
lighting up
panel and interior .....................23
location of components ..............8
Jump-starting your vehicle ......144
Keyless entry system .................77
autolock .....................................75
keypad .......................................77
programming entry code .........78
Keys .............................................55
key in ignition chime ...............14
positions of the ignition ...........54
Lamps
autolamp system .......................23
bulb replacement
specifications chart ................188
cargo lamps ...............................23
daytime running light ...............23
headlamps .................................23
headlamps, flash to pass ..........24
instrument panel, dimming .....23
interior lamps ....................65,188
replacing bulbs .........184,186,187
Lane change indicator
(see Turn signal) ........................55
Lights, warning and indicator ......8
Index
216