Page 102 of 272

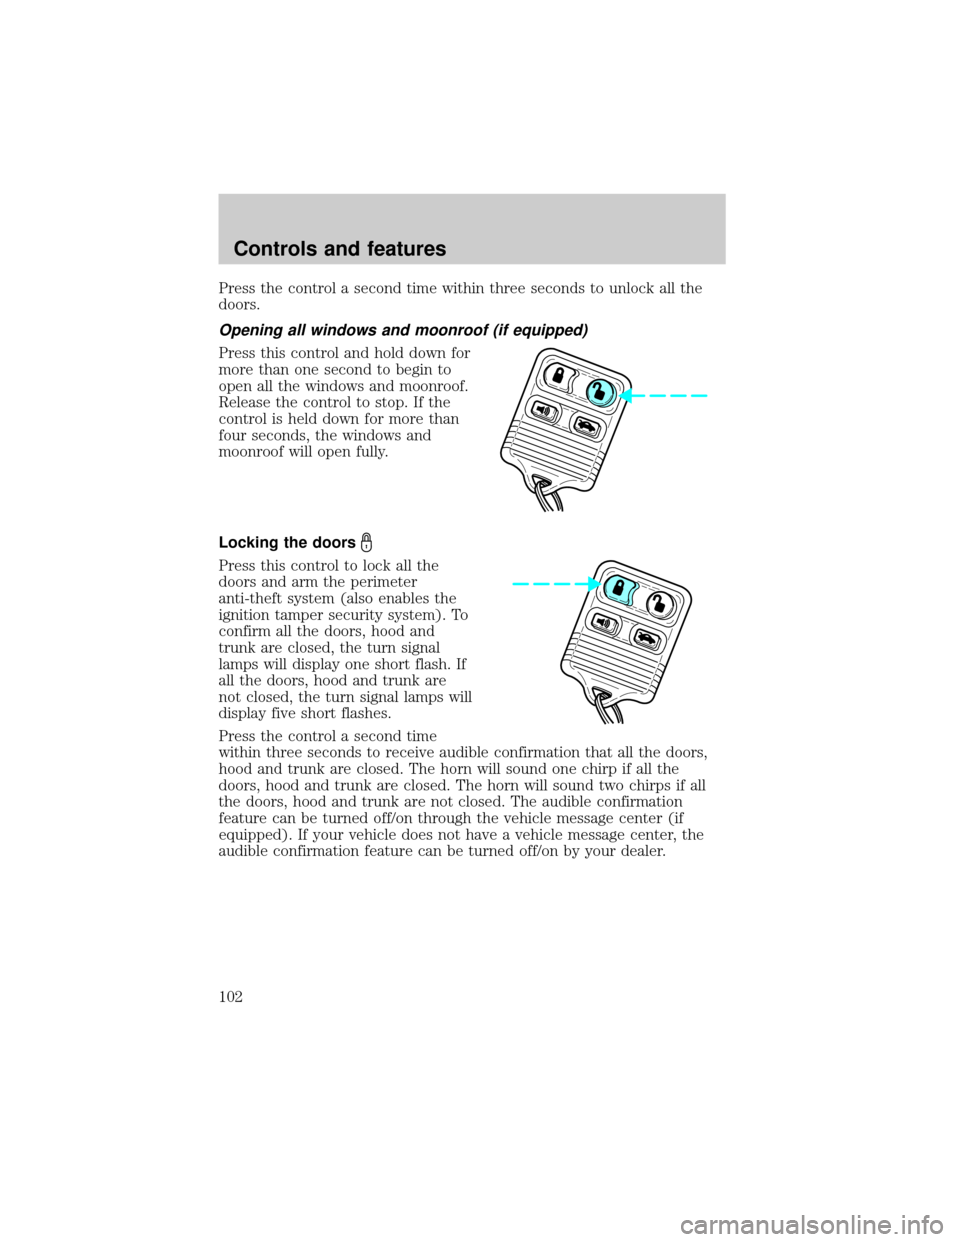
Press the control a second time within three seconds to unlock all the
doors.
Opening all windows and moonroof (if equipped)
Press this control and hold down for
more than one second to begin to
open all the windows and moonroof.
Release the control to stop. If the
control is held down for more than
four seconds, the windows and
moonroof will open fully.
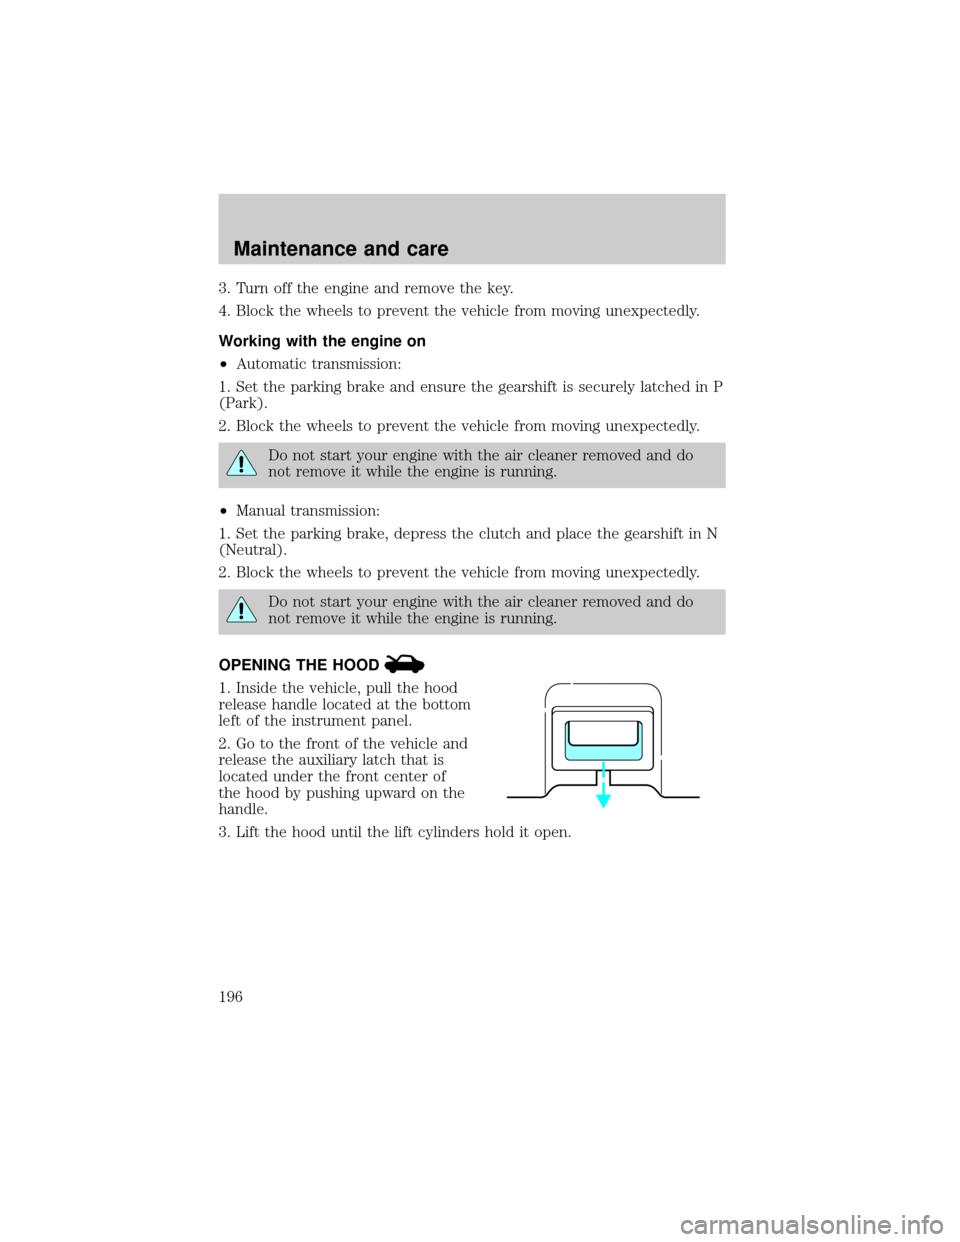
Locking the doors
Press this control to lock all the
doors and arm the perimeter
anti-theft system (also enables the
ignition tamper security system). To
confirm all the doors, hood and
trunk are closed, the turn signal
lamps will display one short flash. If
all the doors, hood and trunk are
not closed, the turn signal lamps will
display five short flashes.
Press the control a second time
within three seconds to receive audible confirmation that all the doors,
hood and trunk are closed. The horn will sound one chirp if all the
doors, hood and trunk are closed. The horn will sound two chirps if all
the doors, hood and trunk are not closed. The audible confirmation
feature can be turned off/on through the vehicle message center (if
equipped). If your vehicle does not have a vehicle message center, the
audible confirmation feature can be turned off/on by your dealer.
Controls and features
102
Page 196 of 272

3. Turn off the engine and remove the key.
4. Block the wheels to prevent the vehicle from moving unexpectedly.
Working with the engine on
²Automatic transmission:
1. Set the parking brake and ensure the gearshift is securely latched in P
(Park).
2. Block the wheels to prevent the vehicle from moving unexpectedly.
Do not start your engine with the air cleaner removed and do
not remove it while the engine is running.
²Manual transmission:
1. Set the parking brake, depress the clutch and place the gearshift in N
(Neutral).
2. Block the wheels to prevent the vehicle from moving unexpectedly.
Do not start your engine with the air cleaner removed and do
not remove it while the engine is running.
OPENING THE HOOD
1. Inside the vehicle, pull the hood
release handle located at the bottom
left of the instrument panel.
2. Go to the front of the vehicle and
release the auxiliary latch that is
located under the front center of
the hood by pushing upward on the
handle.
3. Lift the hood until the lift cylinders hold it open.
Maintenance and care
196
Page 218 of 272
To replace the filter, perform the following procedure:
1. Open the hood.
2. Remove the five pushpins that retain the passenger side portion of the
cowl screen. To release the pins, depress the center ªbuttonº of the pins
using a key or similar object. Note also that the cowl screen is retained
to the rubber hood hinge cover with Velcro. This must be released to
remove the cowl screen.
Maintenance and care
218
Page 237 of 272

²Tail lamps
²Brakelamps
²High-mount brakelamp
²Turn signals
²Backup lamps
²License plate lamp
²Fog lamps
Do not remove lamp bulbs unless they will be replaced immediately. If a
bulb is removed for an extended period of time, contaminants may enter
the lamp housings and affect performance.
Replacing headlamp bulbs
To remove the high or low beam headlamp bulb:
1. Make sure headlamp switch is in
OFF position.
2. Lift the hood, push and release
four tabs and remove the protective
cover from the headlamps.
3. Disconnect the electrical
connector from the bulb by pulling
rearward.
4. Remove the old bulb from the
lamp assembly by turning to unlock
and pulling it straight out of the
lamp assembly.
To install the new bulb:
Handle a halogen headlamp bulb carefully and keep out of
children's reach. Grasp the bulb only by its plastic base and do
not touch the glass. The oil from your hand could cause the bulb to
break the next time the headlamps are operated.
1. Install the new bulb in lamp assembly by pushing straight in and
turning to lock in position. You may need to turn the bulb slightly to
align the grooves in the plastic base with the tabs in the lamp assembly.
2. Connect the electrical connector to the bulb.
Maintenance and care
237
Page 272 of 272

Item Information
Required fuel Unleaded premium fuel only - 91 octane
Fuel tank capacity 68.2L (18.0 gallons)
Engine oil capacity-3.0L
V6 engine (includes filter
change)6.4L (6.7 quarts). Use Motorcraft SAE
5W-20 or 10W-30 Super Premium Motor
Oil, Ford specification WSS-M2C153-G.
Engine oil capacity-3.9L
V8 engine (includes filter
change)5.7L (6.0 quarts). Use Motorcraft SAE
5W-20 or 10W-30 Super Premium Motor
Oil, Ford specification WSS-M2C153-G.
Tire size and pressure Refer to label on right rear passenger door
jamb.
Hood release Pull handle under the instrument panel.
Coolant capacity-3.0L V6
engine
110.6L (11.2 quarts)
Coolant capacity-3.9L V8
engine
111.3L (11.9 quarts)
Power steering fluid
capacityFill to MAX line on reservoir. Use
Motorcraft MERCONtAT F.
Engine cooling fan fluid
capacityFill to MAX line on reservoir. Use
Motorcraft MERCONtAT F.
Manual transmission fluid
capacity
2, 31.1L (1.2 quarts). Use Motorcraft
MERCONtAT F.
Automatic transmission
fluid capacity (5R55N)
2, 411.2L (11.9 quarts). Use Motorcraft
MERCONtV ATF.
1Use Ford Premium Engine Coolant (green in color). DO NOT USE Ford
Extended Life Engine Coolant (orange in color). Refer toAdding engine
coolant, in the Maintenance and Care chapter.
2Ensure the correct automatic transmission fluid is used. MERCONtand
MERCONtV are not interchangeable. DO NOT mix MERCONtand
MERCONtV. Refer to your Scheduled Maintenance Guide to determine the
correct service interval.
3Service refill capacity is determined by filling the transmission to the
bottom of the filler hole with the vehicle on a level surface.
4Approximate dry capacity, includes cooler and tubes. Fluid level indicator
should be used to determine actual fluid requirements and fluid specification.
Check the fluid level at normal operating temperature. DO NOT OVERFILL. If
it is necessary to add or change fluid, use only the fluid which has been
certified by the supplier as meeting the Ford specification listed.
Filling station information
272