Page 816 of 1111
B01887
B01889
Pry
Pry
B01890
Pull
B01891
Pull SF±12
± SFI (2JZ±GE)FUEL PUMP
1478 Author�: Date�:
2000 LEXUS GS300/GS400 (RM718U)
8. REMOVE FUEL SUCTION FILTER
(a) Remove the clip.
(b) Pull out the suction filter.
9. REMOVE NO.1 FUEL SUCTION SUPPORT
(a) Using 2 screwdrivers, disconnect the 4 snap claws from
the claw holes and remove the fuel suction support.
NOTICE:
Be careful not to damage the suction support and suction
plate.
(b) Remove the No.2 fuel filter cushion.
10. REMOVE FUEL FILTER AND FUEL PUMP ASSEMBLY
(a) Disconnect the fuel pump connector from the fuel pump.
(b) Pull out the fuel filter and fuel pump assembly.
(c) Remove the No.1 fuel filter cushion.
(d) Remove the O±ring from the fuel poet of the fuel suction
plate.
11. REMOVE FUEL PUMP FROM FUEL FILTER
Pull out the fuel pump.
Page 817 of 1111

SF0N5±02
B02037
Push
B01892
Fuel Port Hole
No.1 Fuel Filter
Cushion
Fuel Port
New O±Ring
B01893
B02038
Snap Claw
Push
B01887
New Clip
± SFI (2JZ±GE)FUEL PUMP
SF±13
1479 Author�: Date�:
2000 LEXUS GS300/GS400 (RM718U)
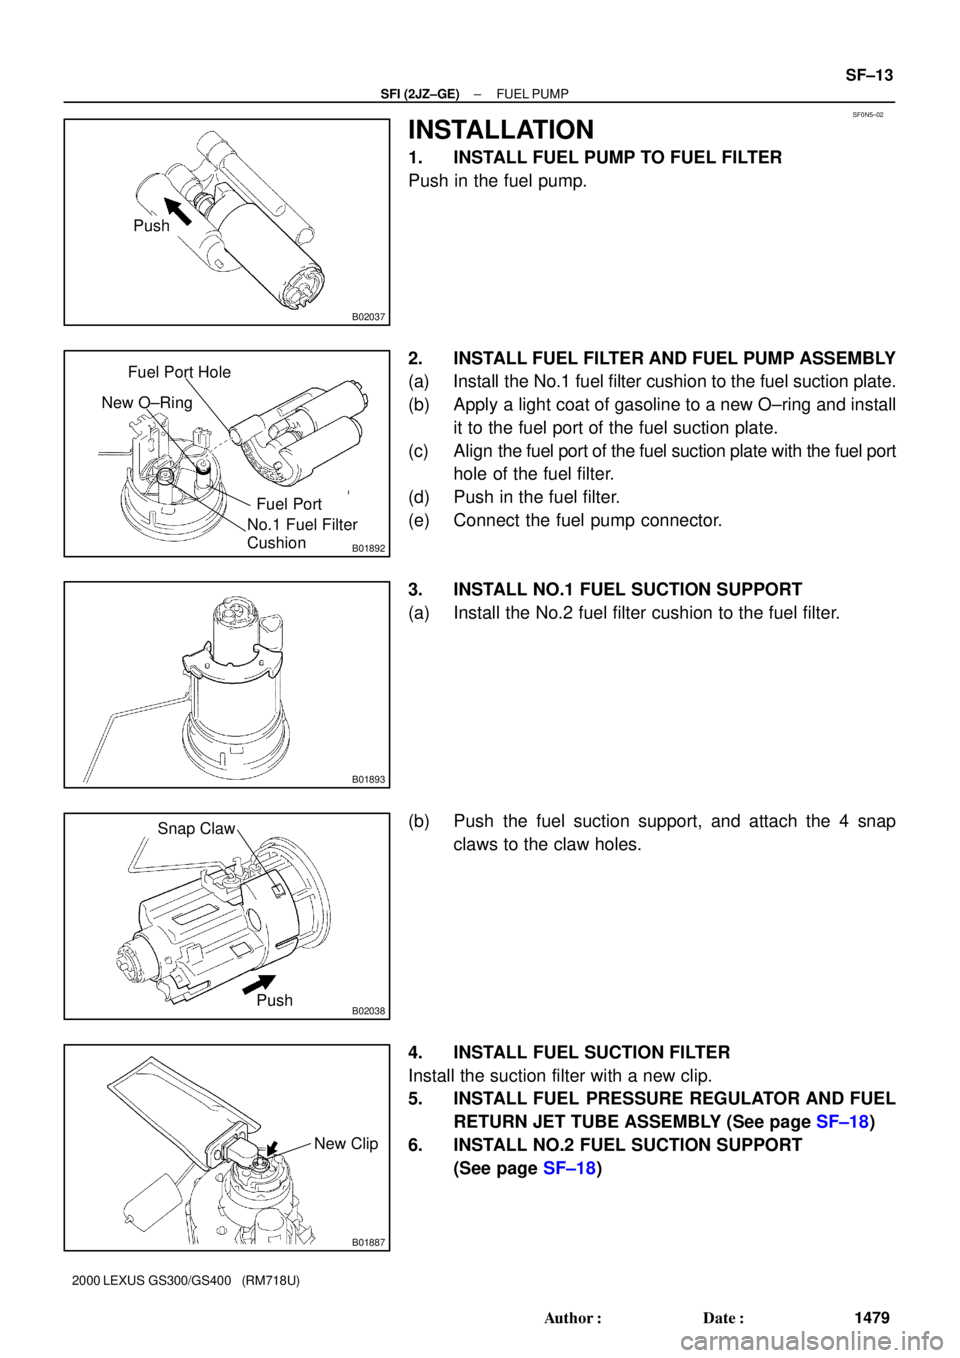
INSTALLATION
1. INSTALL FUEL PUMP TO FUEL FILTER
Push in the fuel pump.
2. INSTALL FUEL FILTER AND FUEL PUMP ASSEMBLY
(a) Install the No.1 fuel filter cushion to the fuel suction plate.
(b) Apply a light coat of gasoline to a new O±ring and install
it to the fuel port of the fuel suction plate.
(c) Align the fuel port of the fuel suction plate with the fuel port
hole of the fuel filter.
(d) Push in the fuel filter.
(e) Connect the fuel pump connector.
3. INSTALL NO.1 FUEL SUCTION SUPPORT
(a) Install the No.2 fuel filter cushion to the fuel filter.
(b) Push the fuel suction support, and attach the 4 snap
claws to the claw holes.
4. INSTALL FUEL SUCTION FILTER
Install the suction filter with a new clip.
5. INSTALL FUEL PRESSURE REGULATOR AND FUEL
RETURN JET TUBE ASSEMBLY (See page SF±18)
6. INSTALL NO.2 FUEL SUCTION SUPPORT
(See page SF±18)
Page 821 of 1111
SF0N7±01
B01884
PrySnap ClawPry
B01886
Disconnect
Pull
± SFI (2JZ±GE)FUEL PRESSURE REGULATOR
SF±17
1483 Author�: Date�:
2000 LEXUS GS300/GS400 (RM718U)
REMOVAL
1. REMOVE FUEL PUMP AND SENDER GAUGE AS-
SEMBLY FROM FUEL TANK (See page SF±11)
2. REMOVE NO.2 FUEL SUCTION SUPPORT
(a) Using 2 screwdrivers, disconnect the 4 snap claws from
the claw holes and remove the fuel suction support.
NOTICE:
Be careful not to damage the suction supports.
(b) Remove the rubber cushion.
3. REMOVE FUEL PRESSURE REGULATOR AND FUEL
RETURN JET TUBE ASSEMBLY
(a) Disconnect the fuel return jet tube from the clamp of the
No.2 fuel suction support.
(b) Pull out the fuel pressure regulator from the fuel filter, and
remove the fuel pressure regulator and fuel return jet tube
assembly.
(c) Remove the O±ring from the fuel pressure regulator.
Page 822 of 1111
SF0N8±01
B02061
Connect
Push
B01885
B02039Push
Snap Claw
SF±18
± SFI (2JZ±GE)FUEL PRESSURE REGULATOR
1484 Author�: Date�:
2000 LEXUS GS300/GS400 (RM718U)
INSTALLATION
1. INSTALL FUEL PRESSURE REGULATOR AND FUEL
RETURN JET TUBE ASSEMBLY
(a) Apply a light coat of gasoline to a new O±ring, and install
it to the fuel pressure regulator.
(b) Push in the fuel pressure regulator to the fuel filter.
(c) Check that the fuel pressure regulator rotates smoothly.
If it does not rotates smoothly, the O±ring may be pinched, so
remove the fuel pressure regulator and perform again steps (b)
and (c) above.
(d) Connect the fuel return jet tube to the clamp of the No.2
fuel suction support.
2. INSTALL NO.2 FUEL SUCTION SUPPORT
(a) Install the rubber cushion to the fuel pump.
(b) Push the fuel suction support, and attach the 4 snap
claws to the claw holes.
3. INSTALL FUEL PUMP AND SENDER GAUGE AS-
SEMBLY TO FUEL TANK (See page SF±13)
Page 824 of 1111
SF151±01
B08999
N´m (kgf´cm, ft´lbf) : Specified torque
� Non±reusable part
21 (210, 15)
21 (210, 15)
VSV Connector for EVAP
Camshaft Position Sensor Connector
No.2 Vacuum Pipe
Accelerator Cable
EVAP Hose
Noise Filter
Connector
Vacuum
Hose
Throttle Position
Sensor Connector
� Gasket
PS Air Hose
Engine Wire Clamp
� Gasket
Oil Dipstick and
Guide for A/T
Engine Wire
Clamp
42 (420, 31)
Fuel Pressure Pulsation Damper
� Gasket
� O±Ring
Fuel Inlet Pipe Delivery Pipe
21 (210, 15)
Spacer
Injector Connector� O±Ring� O±Ring
Injector
� Insulator
� Grommet
28 (280, 21)
Engine Cover
SF±20
± SFI (2JZ±GE)INJECTOR
1486 Author�: Date�:
2000 LEXUS GS300/GS400 (RM718U)
COMPONENTS
Page 865 of 1111

B01982
LEXUS
Hand±Held
Tester
B01879
Ohmmeter54
B01880
5
4 Battery
± SFI (2JZ±GE)FUEL PUMP
SF±7
1473 Author�: Date�:
2000 LEXUS GS300/GS400 (RM718U)
(f) Connect a LEXUS hand±held tester to the DLC3.
(See step 1 in check fuel pump operation (a) to (e))
(g) Measure the fuel pressure.
Fuel pressure:
304 ± 343 kPa (3.1 ± 3.5 kgf/cm
2, 44 ± 50 psi)
If pressure is high, replace the fuel pressure regulator.
If pressure is low, check the fuel hoses and connections, fuel
pump, fuel filter and fuel pressure regulator.
(h) Disconnect the LEXUS hand±held tester from the DLC3.
(i) Start the engine.
(j) Measure the fuel pressure at idle.
Fuel pressure:
304 ± 343 kPa (3.1 ± 3.5 kgf/cm
2, 44 ± 50 psi)
(k) Stop the engine.
(l) Check that the fuel pressure remains as specified for 5
minutes after the engine has stopped.
Fuel pressure: 147 kPa (1.5 kgf/cm
2, 21 psi) or more
If pressure is not as specified, check the fuel pump, pressure
regulator and/or injectors.
(m) After checking fuel pressure, disconnect the negative (±)
terminal cable from the battery and carefully remove SST
to prevent gasoline from splashing.
SST 09268±45014
(n) Reconnect the fuel inlet hose to the fuel pipe support with
2 new gaskets and the union bolt.
Torque: 29 N´m (300 kgf´cm, 21 ft´lbf)
(o) Reconnect the negative (±) terminal cable to the battery.
(p) Check for fuel leaks.
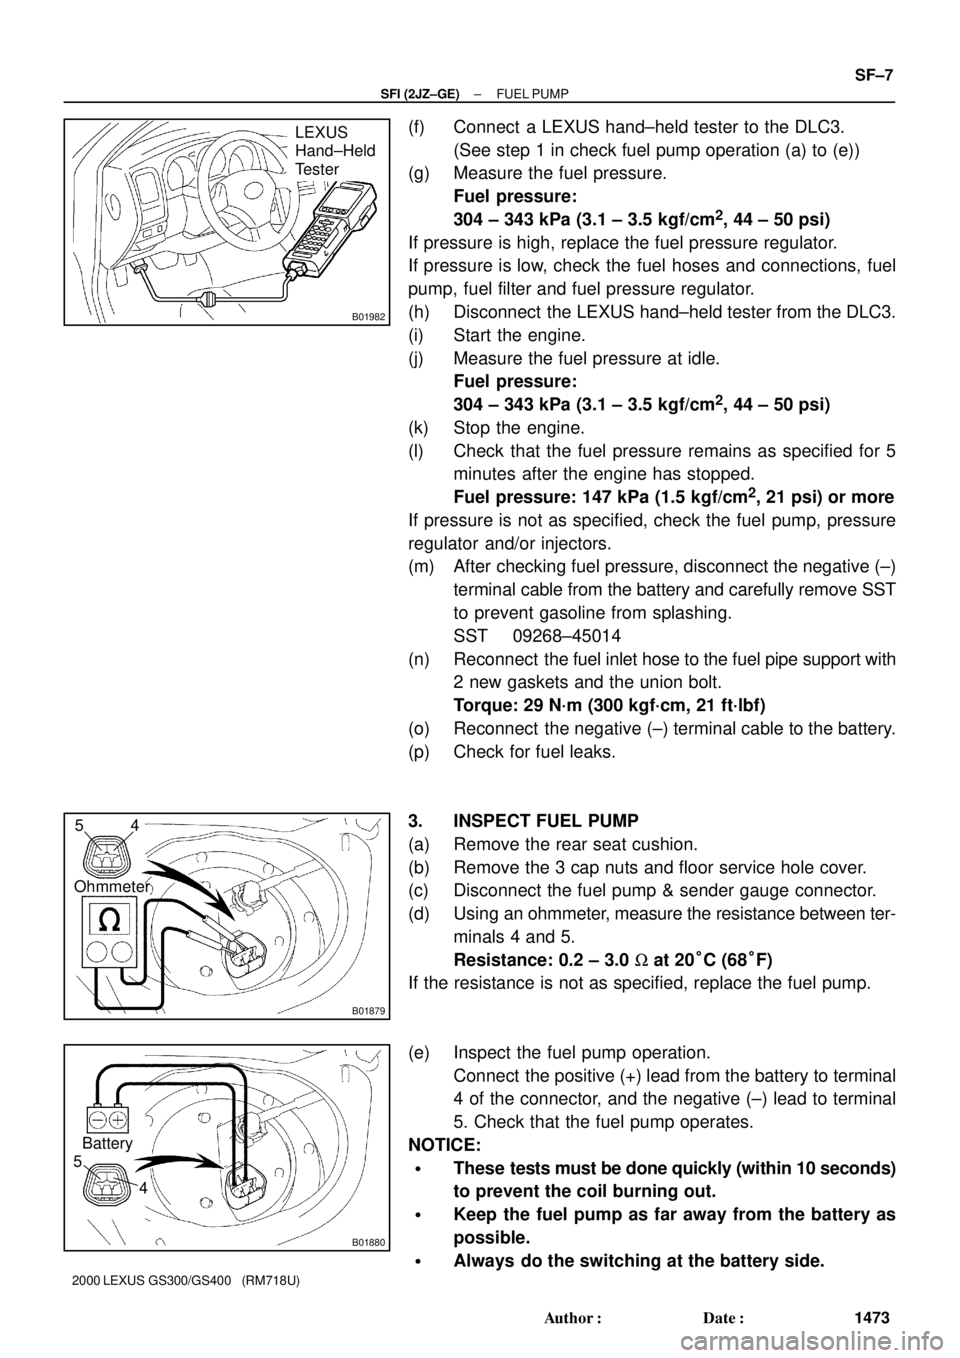
3. INSPECT FUEL PUMP
(a) Remove the rear seat cushion.
(b) Remove the 3 cap nuts and floor service hole cover.
(c) Disconnect the fuel pump & sender gauge connector.
(d) Using an ohmmeter, measure the resistance between ter-
minals 4 and 5.
Resistance: 0.2 ± 3.0 W at 20°C (68°F)
If the resistance is not as specified, replace the fuel pump.
(e) Inspect the fuel pump operation.
Connect the positive (+) lead from the battery to terminal
4 of the connector, and the negative (±) lead to terminal
5. Check that the fuel pump operates.
NOTICE:
�These tests must be done quickly (within 10 seconds)
to prevent the coil burning out.
�Keep the fuel pump as far away from the battery as
possible.
�Always do the switching at the battery side.
Page 881 of 1111
B01894
No.1 Fuel Filter Cushion
Fuel Filter
No.2 Fuel Filter Cushion
� O±Ring
Fuel Pump
Connector
Fuel Pump
No.1 Fuel Suction Support
Fuel Suction
Filter
Fuel Pressure
Regulator and Fuel
Return Jet Tube
Assembly Rubber Cushion� Clip Fuel Suction Plate
with Sender Gauge
No.2 Fuel Suction Support
� O±Ring
� Non±reusable part
SF±10
± SFI (2JZ±GE)FUEL PUMP
1476 Author�: Date�:
2000 LEXUS GS300/GS400 (RM718U)