Page 66 of 352

Gauges
Trip Mete r
This meter shows the number of
miles (U.S.) or kilometers (Canada)driven since you last reset it.
There are two trip meters: Trip A and Trip B. Switch between these
displays by pressing the Select/
Reset button repeatedly. Each trip
meter works independently, so you can keep track of two different
distances.
To reset a trip meter, display it and then press and hold the Select/Reset
button until the number resets to
"0.0".
Temperatur e Gaug e
This shows the temperature of the engine's coolant. During normal
operation, the pointer should rise
from the bottom white mark to about the middle of the gauge. In severedriving conditions, such as very hot
weather or a long period of uphill driving, the pointer may rise to near
the upper white mark. If it reaches
the red (Hot) mark, pull safely to the side of the road. Turn to page 305 for
instructions and precautions on checking the engine's cooling
system.
Fue l Gaug e
This shows how much fuel you have. It is most accurate when the vehicle
is on level ground. It may showslightly more or less than the actual
amount when you are driving on
curvy or hilly roads.
The needle returns to the bottom after you turn off the ignition. The
gauge shows the fuel level reading
immediately after you turn the
ignition switch back ON (II).
Instrument s an d Control s
Page 196 of 352
Service Statio n Procedure s
4. Remove the dipstick again and
check the level. It should be
between the upper and lower marks.
If it is near or below the lower mark, see Addin g Oi l on page 239 .
Engine Coolant Check
MA X RESERV E TAN K
Look at the coolant level in the
radiator reserve tank. Make sure it is
between the MAX and MIN lines. If
it is below the MIN line, see Addin g
Engin e Coolan t on page 243 for
information on adding the proper
coolant. Refer to Owne
r Maintenanc e
Check s on page 237 for information
on checking other items in your
Honda.
Befor e Drivin g
MIN
UPPE R MAR K
LOWE R MAR K
Page 242 of 352

Engine Oi l
Addin g Oi l
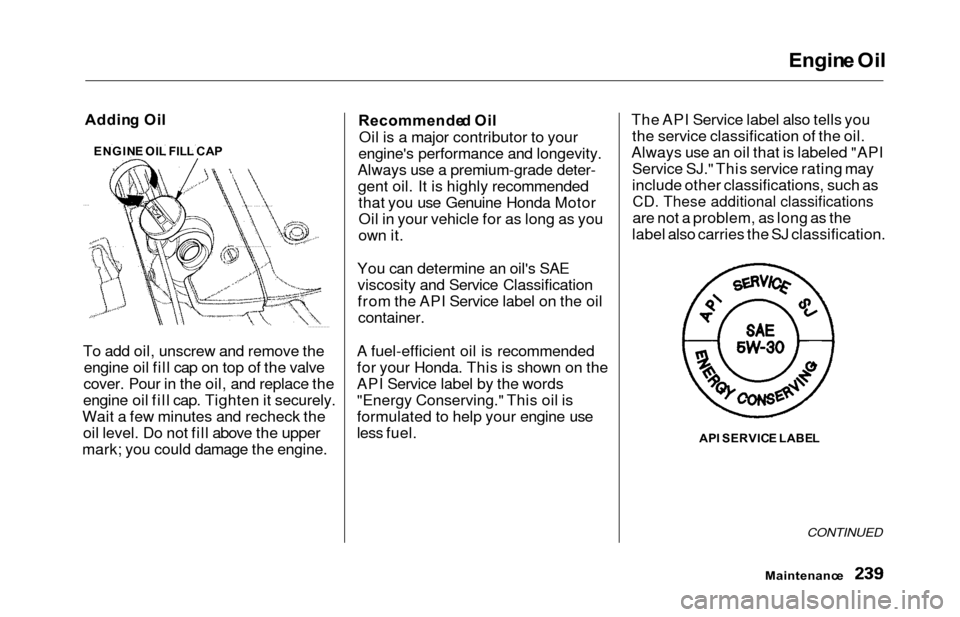
To add oil, unscrew and remove the engine oil fill cap on top of the valve
cover. Pour in the oil, and replace the
engine oil fill cap. Tighten it securely.
Wait a few minutes and recheck the oil level. Do not fill above the upper
mark; you could damage the engine. Recommende
d Oi l
Oil is a major contributor to your
engine's performance and longevity.
Always use a premium-grade deter- gent oil. It is highly recommendedthat you use Genuine Honda MotorOil in your vehicle for as long as you
own it.
You can determine an oil's SAE viscosity and Service Classification
from the API Service label on the oilcontainer.
A fuel-efficient oil is recommended
for your Honda. This is shown on the
API Service label by the words
"Energy Conserving." This oil is
formulated to help your engine use
less fuel. The API Service label also tells you
the service classification of the oil.
Always use an oil that is labeled "API Service SJ." This service rating may
include other classifications, such as
CD. These additional classifications
are not a problem, as long as the
label also carries the SJ classification.
AP I SERVIC E LABE L
Maintenanc e
CONTINUED
ENGINE OI L FIL L CA P
Page 245 of 352

Engine Oi l
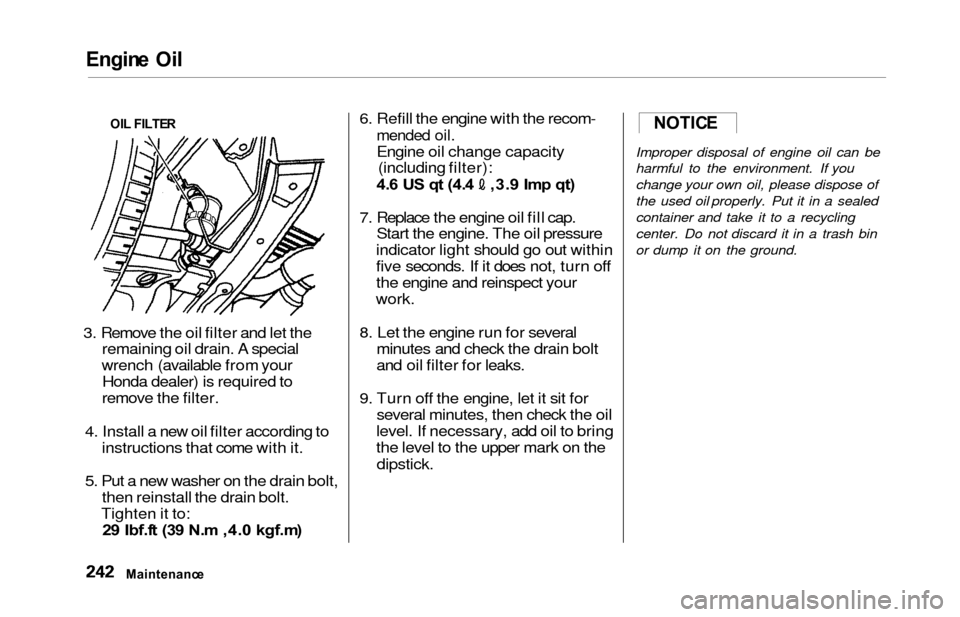
3. Remove the oil filter and let the
remaining oil drain. A special
wrench (available from your Honda dealer) is required to
remove the filter.
4. Install a new oil filter according to instructions that come with it.
5. Put a new washer on the drain bolt, then reinstall the drain bolt.
Tighten it to: 2 9 Ibf.f t (3 9 N. m ,4. 0 kgf.m ) 6. Refill the engine with the recom-
mended oil.
Engine oil change capacity
(including filter):
4. 6 U S q t (4. 4 ,3. 9 Im p qt )
7. Replace the engine oil fill cap. Start the engine. The oil pressure
indicator light should go out within
five seconds. If it does not, turn off
the engine and reinspect your
work.
8. Let the engine run for several minutes and check the drain bolt
and oil filter for leaks.
9. Turn off the engine, let it sit for several minutes, then check the oil
level. If necessary, add oil to bring
the level to the upper mark on the
dipstick.
Improper disposal of engine oil can be
harmful to the environment. If you
change your own oil, please dispose of
the used oil properly. Put it in a sealed
container and take it to a recycling
center. Do not discard it in a trash bin
or dump it on the ground.
Maintenanc e
OI
L FILTE R
NOTIC E
Page 252 of 352

Automatic Transmissio n Flui d
Check the fluid level with the engine
at normal operating temperature.
1. Park the vehicle on level ground. Shut off the engine.
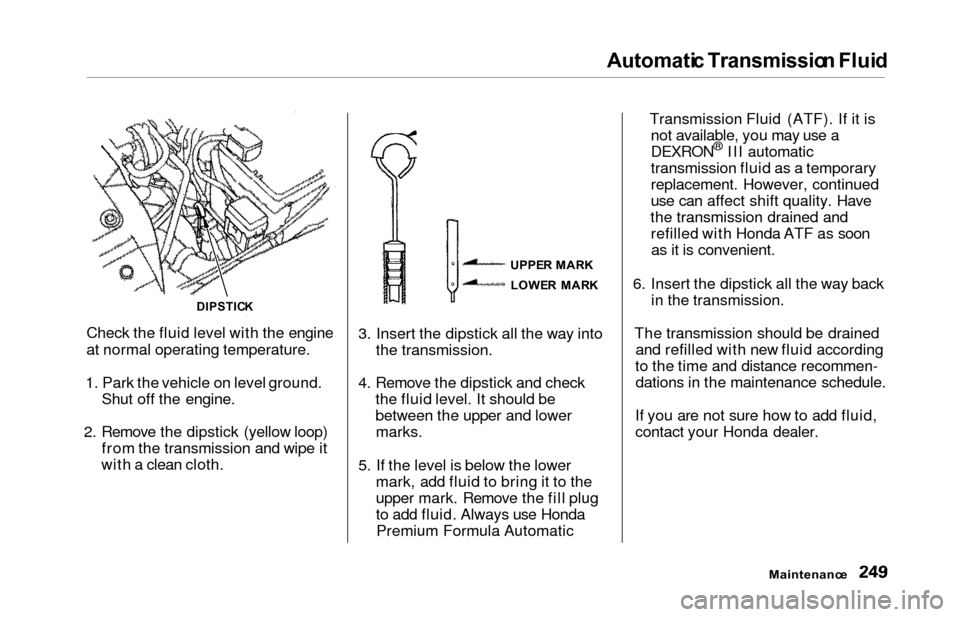
2. Remove the dipstick (yellow loop) from the transmission and wipe it
with a clean cloth. 3. Insert the dipstick all the way into
the transmission.
4. Remove the dipstick and check the fluid level. It should be
between the upper and lowermarks.
5. If the level is below the lower mark, add fluid to bring it to the
upper mark. Remove the fill plug
to add fluid. Always use HondaPremium Formula Automatic Transmission Fluid (ATF). If it is
not available, you may use a
DEXRON
® III automatic
transmission fluid as a temporary
replacement. However, continued
use can affect shift quality. Have
the transmission drained and refilled with Honda ATF as soonas it is convenient.
6. Insert the dipstick all the way back in the transmission.
The transmission should be drained and refilled with new fluid according
to the time and distance recommen- dations in the maintenance schedule.
If you are not sure how to add fluid,
contact your Honda dealer.
Maintenanc e
DIPSTICK
UPPER MAR K
LOWE R MAR K