Page 96 of 352

Power Slidin g Door s (E X Model )
If a person or object is in the way
after the door begins to close, the
door handles cannot be used to stop
the door. To stop the door, use the dashboard switches or the remote
transmitter.
A Note About Refueling
Before refueling, make sure the driver's side sliding door is fully
closed. When you release the fuel fill
door, the driver's side sliding door
automatically locks so it cannot open
and interfere with the fuel door. If a
passenger attempts to unlock the door by cycling the lock knob several
times, the door may unlock and can be opened.
If a passenger needs to get out of the
vehicle while you are refueling, instruct that person to exit on the
passenger's side, not the driver's
side.
After you close the fuel fill door, the sliding door does not automatically
unlock. You must unlock it manually.
Parking Facing Downhill
When parking facing downhill on a steep grade, the power sliding doors
may not open or close as they do
normally.
Make sure the MAIN switch is in
the ON position. This allows the
power assist to keep the doors
from slamming shut.
If the MAIN switch is off, the doorcan slam shut and possibly injure
someone.
Make sure the power sliding doors
are latched in the fully-open
position, then hold the door open
while allowing your passengers to enter or exit the vehicle. Do not
pull the inside or outside door
handle, or the latch will release
and the door will close.
How to Reset the Power Sliding
Doors
If your vehicle's battery is
disconnected or goes dead while asliding door is open, the power
sliding door system needs to be reset.
After reconnecting the battery:
Close each sliding door completely
by hand; or
Move the MAIN switch on the
dashboard to the ON position.
Push and hold the top of each door switch until each sliding door
closes completely.
If the power sliding doors are closed, the system will reset itselfautomatically once the battery has
been reconnected. If the power sliding doors do notoperate properly after resetting,
have your vehicle checked by a Honda dealer.
Instrument s an d Control s
CONTINUED
Page 118 of 352
Mirrors
Keep the inside and outside mirrors
clean and adjusted for best visibility.
Be sure to adjust the mirrors before
you start driving.
The inside mirror has day and night positions. The night position reduces
glare from headlights behind you.Flip the tab on the bottom edge of
the mirror to select the day or night
position.
Adjustin g th e Powe r Mirror s
Adjust the outside mirrors with the adjustment switch on the left side of
the dashboard:
1. Turn the ignition switch ON (II).
2. Move the selector switch to L (driver's side) or R (passenger's
side).
3. Push the appropriate edge of theadjustment switch to move the
mirror right, left, up or down.
4. When you finish, move the
selector switch to the center (off)
position. This turns off the
adjustment switch so you can't
move a mirror out of position by
accidentally bumping the switch.
Instrument s an d Control s
CONTINUED
SELECTO R SWITC H
ADJUSTMENT SWITC H
TAB
Page 134 of 352
Heating an d Coolin g
Mode Button s
Use the MODE buttons to select the
vents the air flows from. Some air
will flow from the dashboard corner
vents in all modes.
Air flows from the center
and corner vents in the dashboard.
Air flow is divided between
the vents in the dashboard and the
floor vents.
Air flows from the floor
vents.
Air flow is divided between
the floor vents and the defroster
vents at the base of the windshield.
Air flows from the defroster
vents at the base of the windshield.
When you select or the system automatically switches toFresh Air mode and turns on the
A/C.
Comfor t an d Convenienc e Feature s
Page 135 of 352
Heating an d Coolin g
Vent Control s
You can adjust the direction of the air coming from the dashboard vents
by moving the tab in the center of each vent up-and-down and side-to-
side.
CORNE R VEN T
The vents in the corners of the
dashboard can be opened and closed
with the dials next to them.
REA R CEILIN G VEN T
There are four vents in the ceiling
(see page 154).
Comfor t an d Convenienc e Feature s
CENTER VENT S
Page 141 of 352

Climate Contro l Syste m
On EX model
The automatic climate control
system in your Honda picks the
proper combination of air condi-
tioning, heating, and ventilation to maintain the interior temperature
you select. The system also adjusts the fan speed and air flow levels.
Your vehicle also has a rear A/C unit that allows the rear passengers to
adjust the heating, cooling, and air
flow (see page 152).
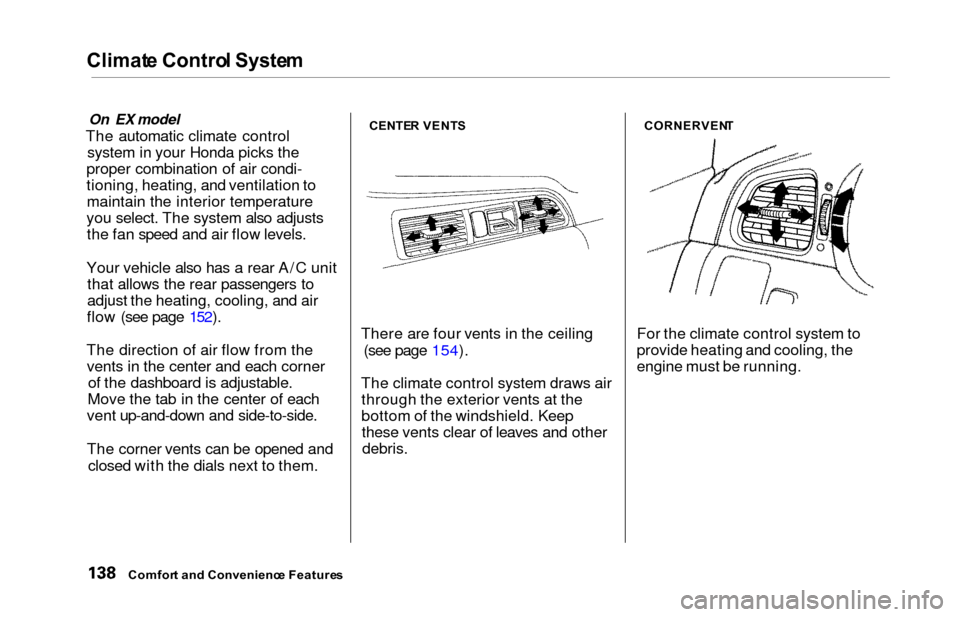
The direction of air flow from the vents in the center and each corner of the dashboard is adjustable.
Move the tab in the center of each
vent up-and-down and side-to-side.
The corner vents can be opened and
closed with the dials next to them.CENTE R VENT S
There are four vents in the ceiling
(see page 154).
The climate control system draws air through the exterior vents at the
bottom of the windshield. Keepthese vents clear of leaves and other
debris.
CORNERVEN T
For the climate control system to
provide heating and cooling, the
engine must be running.
Comfort an d Convenienc e Feature s
Page 146 of 352
Climate Contro l Syste m
Fan Control Dial
You can manually select the fan
speed by turning the fan control dial.
When you turn the dial clockwise, the fan is taken out of automaticmode and starts to run at its lowestspeed. Turning the dial fully
clockwise increases the fan's speed,
which increases air flow.
Rear A/C Control Dial
With this dial, you can adjust the rear A/C unit heating, cooling, andair flow (see page 152).
Mode Button
Use the MODE button to select the
vents the air flows from. Some air will flow from the dashboard corner
vents in all modes. Each time you
press the MODE button, the display shows the mode selected. Press the
button four times to see all the
modes.
MOD E BUTTO N
REAR A/ C CONTRO L DIA L
CONTINUED
Comfor t an d Convenienc e Feature s
FA
N CONTRO L DIA L
Page 147 of 352
Climate Contro l Syste m
The main air flow is divided
between the floor vents and de-
froster vents at the base of the wind-
shield.
The main air flow comes
from the floor vents.
The main air flow is divided
between the dashboard vents and
the floor vents.
The main air flow comes
from the dashboard vents.
Comfor t an d Convenienc e Feature s
Page 148 of 352
Climat
e Contro l Syste m
The button directs the main
air flow to the windshield for faster
defrosting. It also overrides any
MODE selection you may have made. When you select the A/C
turns on automatically and thesystem selects Fresh Air mode. For
faster defrosting, manually set the fan speed to high. You can alsoincrease air flow to the windshield byclosing the side vents in the
dashboard.
When you turn off by
pressing the button again, thesystem returns to its former settings.
Rea r Windo w Defogge r Butto n
This button turns the rear window defogger on and off (see page 71).
REAR WINDO W DEFOGGE R BUTTO N
Comfor t an d Convenienc e Feature s