Page 171 of 352
Audio Syste m
Operatin g th e Radi o
The ignition switch must be in ACCESSORY (I) or ON (II) to operate the audio system. Turn the
system on by pushing the PWR/
VOL knob. Adjust the volume by turning the same knob.
The band and frequency that the radio was last tuned to is displayed.
To change bands, press the AM/FM button. On the FM band, ST will bedisplayed if the station is broadcast-
ing in stereo. Stereo reproduction on
AM is not available.
You can use any of four methods to find radio stations on the selected
band: TUNE, SEEK, SCAN or thePreset buttons. TUN
E — Use the TUNE bar to tune
the radio to a desired frequency.
Press the side of the bar to tune
to a higher frequency, and the
side to tune to a lower
frequency. The frequency numbers
will start to change rapidly. Release the bar when the display reaches thedesired frequency. To change the
frequency in small increments, press and release the TUNE bar quickly. SEE
K — The SEEK function
searches the band for a station with a strong signal. To activate it, press
the SEEK bar on either the or
side, then release it.
Depending on which side you press,
the system scans upward or down-
ward from the current frequency. It stops when it finds a station with a
strong signal.
Comfor t an d Convenienc e Feature s
Page 174 of 352
Audio Syste m
AUTO SELEC T — If you are
traveling far from home and can no
longer receive the stations you
preset, you can use the Auto Select
feature to find stations in the local
area.
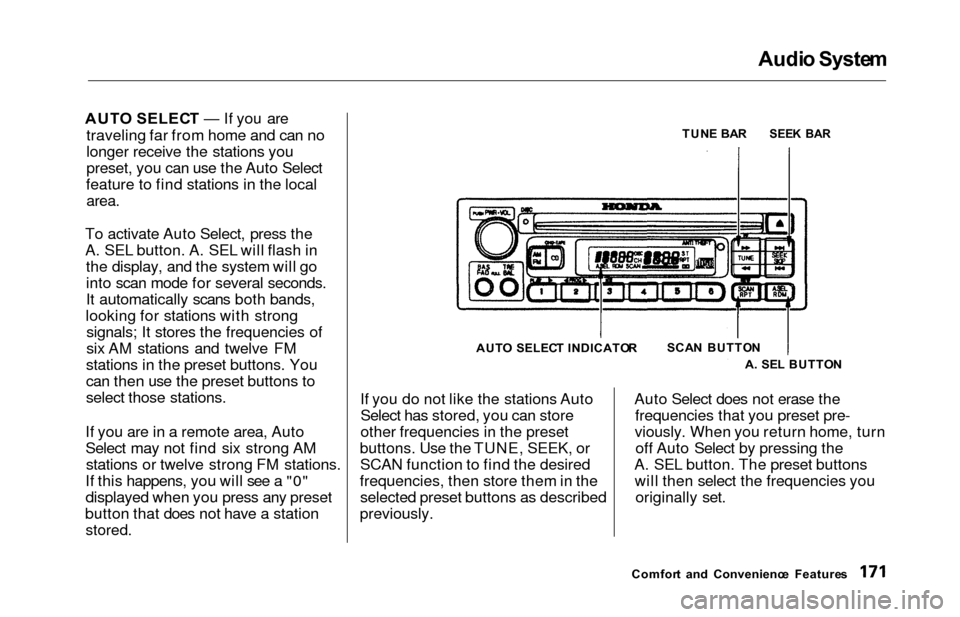
To activate Auto Select, press the
A. SEL button. A. SEL will flash in the display, and the system will go
into scan mode for several seconds.
It automatically scans both bands,
looking for stations with strong signals; It stores the frequencies of
six AM stations and twelve FM
stations in the preset buttons. You
can then use the preset buttons to
select those stations.
If you are in a remote area, Auto
Select may not find six strong AM stations or twelve strong FM stations.
If this happens, you will see a "0"
displayed when you press any preset
button that does not have a station
stored.
If you do not like the stations Auto Select has stored, you can store
other frequencies in the preset
buttons. Use the TUNE, SEEK, or SCAN function to find the desired
frequencies, then store them in the selected preset buttons as described
previously. Auto Select does not erase the
frequencies that you preset pre-
viously. When you return home, turn off Auto Select by pressing the
A. SEL button. The preset buttons will then select the frequencies you originally set.
Comfor t an d Convenienc e Feature s
TUN
E BA R
SEE K BA R
SCA N BUTTO N
A . SE L BUTTO N
AUT
O SELEC T INDICATO R
Page 176 of 352
Audio Syste m
Audio Syste m Lightin g
You can use the instrument panel brightness control knob to adjust the
illumination of the audio system (see
page 67). The audio systemilluminates when the parking lights
are on, even if the radio is turned off.
Radi o Frequencie s
Your Honda's radio can receive the
complete AM and FM bands.
Those bands cover these frequen-
cies:
AM band:
530 to 1,710 kilohertz
FM band:
87.7 to 107.9 megahertz
Radio stations on the AM band are
assigned frequencies at least ten
kilohertz apart (530, 540, 550).Stations on the FM band are
assigned frequencies at least 0.2
megahertz apart (87.9, 88.1, 88.3).
Stations must use these exact
frequencies. It is fairly common for stations to round-off the frequency in
their advertising, so your radio could display a frequency of 100.9 even
though the announcer may identify
the station as "FM101."
Radi o Receptio n
How well your Honda's radio
receives stations is dependent on many factors, such as the distance
from the station's transmitter,
nearby large objects, and atmos-
pheric conditions.
A radio station's signal gets weaker as you get farther away from its
transmitter. If you are listening to an
AM station, you will notice the sound
volume becoming weaker, and the station drifting in and out. If you are
listening to an FM station, you will see the stereo indicator flickering off
and on as the signal weakens.
Eventually, the stereo indicator will go off and the sound will fade
completely as you get out of range of
the station's signal.
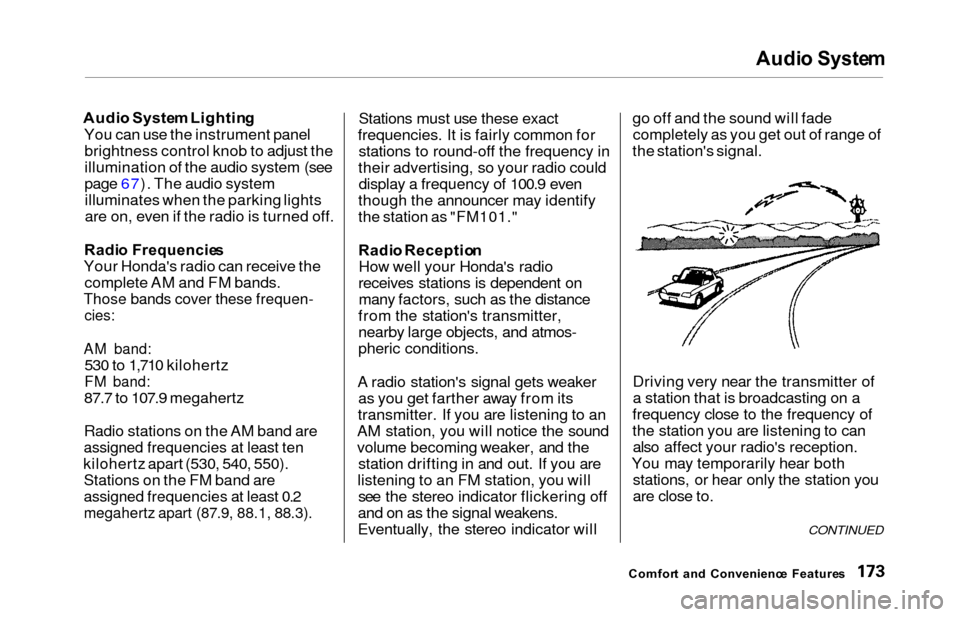
Driving very near the transmitter of
a station that is broadcasting on a
frequency close to the frequency of
the station you are listening to can also affect your radio's reception.
You may temporarily hear both stations, or hear only the station you
are close to.
Comfor t an d Convenienc e Feature s
CONTINUED
Page 240 of 352
Owner Maintenanc e Check s
You should check the following
items at the specified intervals. If
you are unsure of how to perform
any check, turn to the page given.
Engine oil level — Check every
time you fill the fuel tank. See
page 192.
Engine coolant level — Check the
radiator reserve tank every time
you fill the fuel tank. See page 193.
Windshield washer fluid — Check the level in the reservoir monthly.If weather conditions cause you to
use the washers frequently, check
the reservoir each time you stop
for fuel. See page 248.
Automatic transmission — Check the fluid level monthly. See page
249.
Brakes — Check the fluid level
monthly. See page 250. Tires — Check the tire pressure
monthly. Examine the tread for
wear and foreign objects. See page
263.
Lights — Check the operation of
the headlights, parking lights,
taillights, high-mount brake light,
turn signals, brake lights, and
license plate light monthly. See
page 270.
Maintenanc e
Page 273 of 352
Lights
Check the operation of your vehicle's
exterior lights at least once a month.
A burned out bulb can create an unsafe condition by reducing your
vehicle's visibility and the ability to signal your intentions to other
drivers.
HEADLIGH TTURN SIGNAL /SIDE MARKER /PARKING LIGHT S
Maintenanc e
Page 274 of 352
Light
s
STOP/TAILLIGHTS /
SID E MARKE R LIGHT S
TAILLIGH
T
HIGH-MOUN T BRAK E LIGH T
TUR N SIGNA L LIGH T
BACK-UP LIGH T
Check the following:
Headlights (low and high beam)
Parking lights
Taillights Brake lights
High-mount brake light
Turn signals
Back-up lights
Hazard light function
License plate light
Side marker lights
Daytime running lights
(Canadian models)
If you find any bulbs are burned out,
replace them as soon as possible.
Refer to the chart on page 323 to
determine what type of replacement
bulb is needed.
Maintenance
LICENS
E PLAT E LIGH T
Page 277 of 352
Lights
4. Remove the socket from the
headlight assembly by turning it
one-quarter turn counterclockwise.
5. Remove the burned out bulb from the socket by pushing it in and
turning counterclockwise until it
unlocks.
6. Install the new bulb in the socket. Turn it clockwise to lock it in place.
7. Insert the socket back into the headlight assembly. Turn it
clockwise to lock it in place.
8. Test the lights to make sure the new bulb is working.
9. Put the inner fender in place. Install the two holding clips. Lock
each clip in place by pushing on
the center. Replacin
g Rea r Bulb s
(i n Fenders )
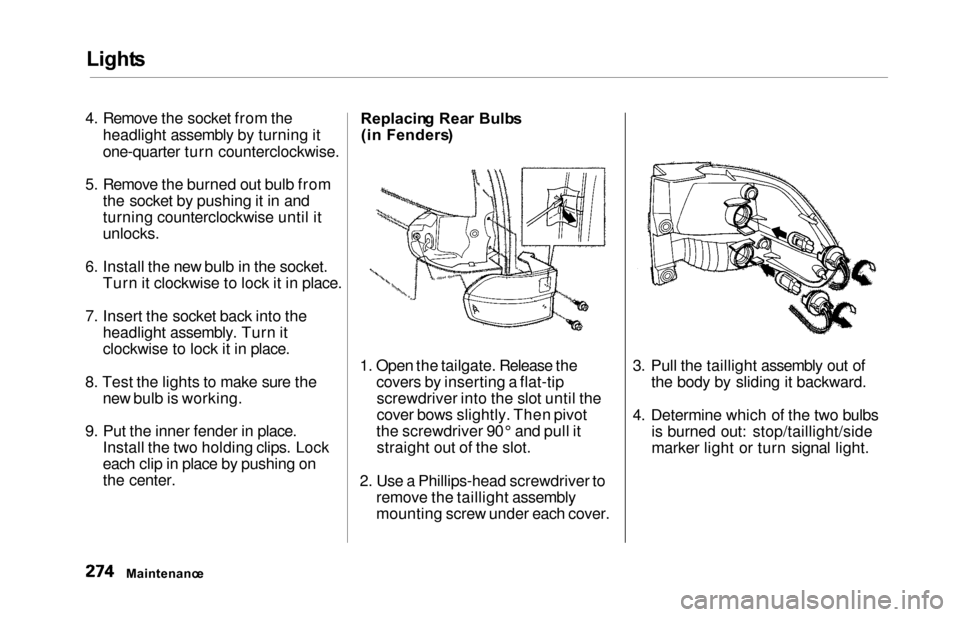
1. Open the tailgate. Release the covers by inserting a flat-tipscrewdriver into the slot until the
cover bows slightly. Then pivot
the screwdriver 90° and pull it straight out of the slot.
2. Use a Phillips-head screwdriver to remove the taillight assembly
mounting screw under each cover. 3. Pull the taillight assembly out of
the body by sliding it backward.
4. Determine which of the two bulbs is burned out: stop/taillight/side
marker light or turn signal light.
Maintenanc e
Page 343 of 352
Index
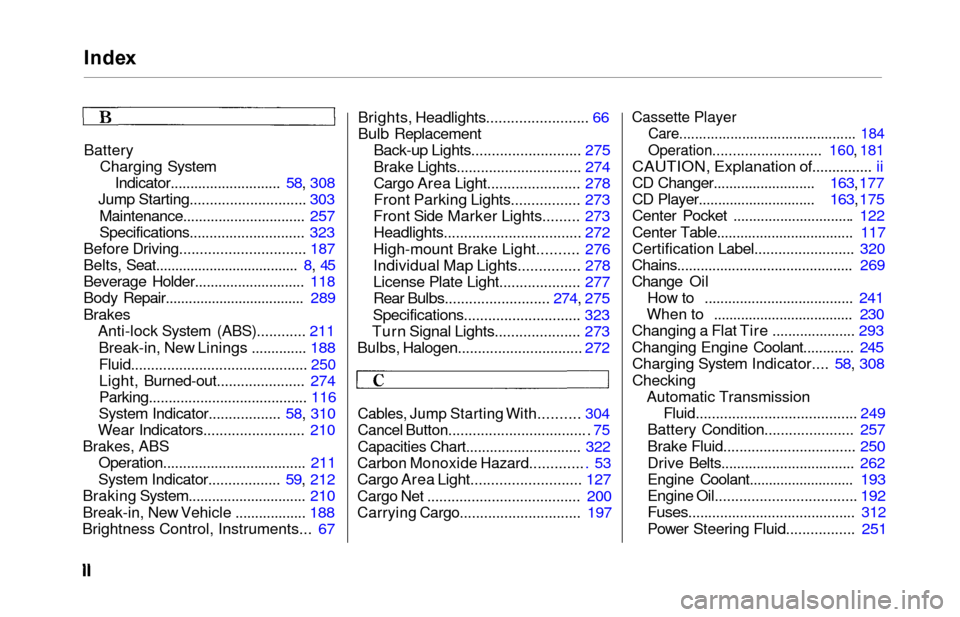
Battery
Charging SystemIndicator............................ 58, 308
Jump Starting............................. 303
Maintenance............................... 257
Specifications............................. 323
Before Driving.............................. . 187
Belts, Seat.................................... . 8, 4 5
Beverage Holder............................ 118
Body Repair.................................... 289
Brakes Anti-lock System (ABS)............
211
Break-in, Ne
w Linings .............. 188
Fluid............................................ 250
Light, Burned-out...................... 274
Parking........................................ 116
System Indicator.................. 58, 310
Wear Indicators......................... 210
Brakes, ABS Operation................................... . 211
System Indicator.................. 59, 212
Braking System............................. . 210
Break-in, New Vehicle .................. 188
Brightness Control, Instruments...
67 Brights, Headlights......................... 66
Bulb Replacement
Back-up Lights........................... 275
Brake Lights............................... 274
Cargo Area Light....................... 278
Front Parking Lights................. 273
Front Side Marker Lights......... 273 Headlights.................................. 272
High-mount Brake Light.......... 276
Individual Map Lights............... 278
License Plate Light.................... 277
Rear Bulbs.......................... 274, 275
Specifications............................. 323
Turn Signal Lights..................... 273
Bulbs, Halogen............................... 272
Cables, Jump Starting With.......... 304
Cancel Button.................................. . 75
Capacities Chart............................. 322
Carbon Monoxide Hazard............. . 53
Cargo Area Light........................... 127
Cargo Net ...................................... 200
Carrying Cargo.............................. 197
Cassette Player
Care............................................. 184
Operation........................... 160, 181
CAUTION, Explanation of............... ii
CD Changer.......................... 163, 177
CD Player.............................. 163, 175
Center Pocket .............................. . 122
Center Table................................... 117
Certification Label......................... 320
Chains............................................. 269
Change Oil How to ......................................
241
When to ....................................
230
Changing a Flat Tire ..................... 293
Changing Engine Coolant............. 245 Charging System Indicator.... 58, 308
Checking Automatic Transmission Fluid....................................... . 249
Battery Condition...................... 257
Brake Fluid................................ . 250
Drive Belts.................................. 262
Engine Coolant........................... 193
Engine Oil................................... 192
Fuses.......................................... 312
Power Steering Fluid................. 251