Page 69 of 352
Control
s Nea r th e Steerin g Whee l
Headlight s
The rotating switch on the left lever controls the lights. Turning this switch to the position turns
on the parking lights, taillights,
instrument panel lights, side-marker
lights, and rear license plate lights. Turning the switch to the
position turns on the headlights. If you leave the lights on with the
ignition switch in ACCESSORY (I) or LOCK (0), you will hear a
reminder chime when you open the driver's door.
To change between low beams and high beams, pull the turn signal lever
until you hear a click, then let go.
The blue high beam indicator will light (see page 61). To flash the high beams, pull the
turn signal lever back lightly, thenrelease it. The high beams will come
on and go off.
The high beams will stay on for as long as you hold the lever back, no
matter what position the headlightswitch is in.
Instrument s an d Control s
Page 70 of 352
Control
s Nea r th e Steerin g Whee lAutomatic Lightin g Of f Featur e
On EX model
The Automatic Lighting Off feature
turns off the headlights, parking
lights, taillights, side marker lights,
license plate lights and instrument panel lights within 15 seconds of
removing the key from the ignition switch and closing the driver's door.
This feature activates if you leave
the headlight switch in the or
position, remove the key, open,
then close the driver's door. If you remove the key from the
ignition switch with the headlight switch on, but do not open the door
and get out, the lights will turn off
after 10 minutes. The lights will turn on again when
you unlock or open the driver's door.If you unlock the door, but do notopen it within 15 seconds, the lights
will go off. With the driver's door open, you will hear a lights-on
reminder chime.
Daytim e Runnin g Light s
(Canadia n Models )
With the headlight switch off, the
high beam headlights come on withreduced brightness when you turn
the ignition switch to ON (II) and
release the parking brake. They
remain on until you turn the ignitionoff, even if you set the parking brake.
The headlights revert to normal operation when you turn them on
with the switch. Instrumen
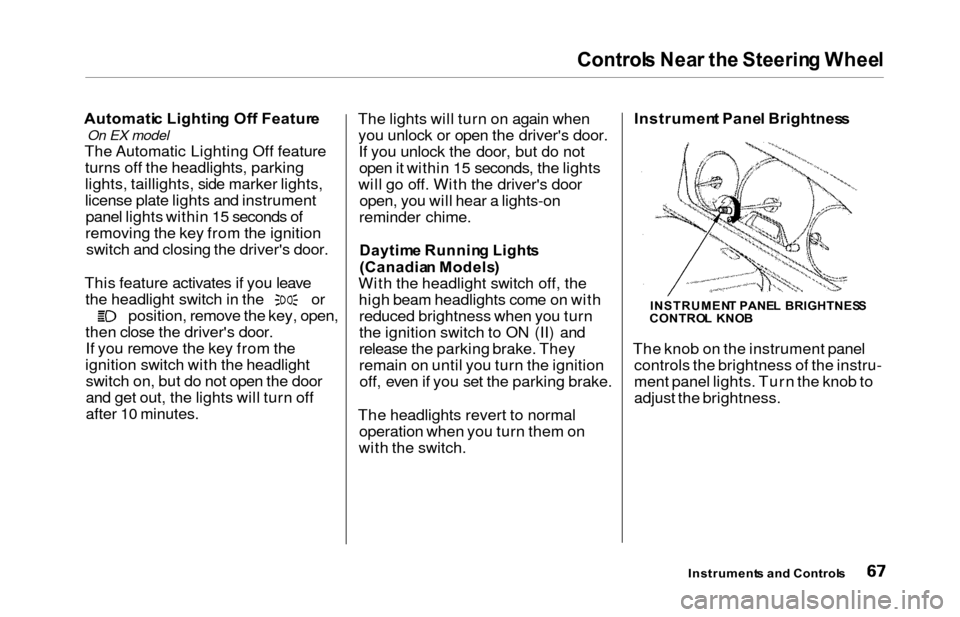
t Pane l Brightnes s
The knob on the instrument panel controls the brightness of the instru-
ment panel lights. Turn the knob to
adjust the brightness.
Instrument s an d Control s
INSTRUMEN T PANE L BRIGHTNES S
CONTRO L KNO B
Page 79 of 352
Steering Whee l Controls , Key s an d Lock s
Remot e Audi o Control s
On EX model
These buttons let you control some
functions of the audio system with-
out removing your hands from the
wheel. Refer to page 179 for a com-
plete explanation.
Keys
Your vehicle comes with two master
keys and a valet key.
The master key fits all the locks on your vehicle:
Ignition
DoorsGlove box
Tailgate The valet key works only in the
ignition and the door locks. You can
keep the glove box locked when you
leave your vehicle and valet key at a
parking facility.
You should have received a key number plate with your keys. You
will need this key number if you ever have to get a lost key replaced. Keep
the plate stored in a safe place. If you
need to replace a key, use only
Honda-approved key blanks.
Instrument s an d Control s
KEYNUMBE RPLATE
MASTE R
KEY S
(BLACK )
VALET KE Y(GRAY )
Page 82 of 352
Keys an d Lock s
ACCESSOR Y (I ) — In this position,
you can operate the audio system and the accessory power socket.
O N (II ) — This is the normal key
position when driving. All features and accessories on the vehicle are
usable. Several of the lights on the instrument panel come on as a test
when you turn the ignition switch from ACCESSORY to ON. STAR
T (III ) — Use this position
only to start the engine. The switch
returns to ON (II) when you let go of
the key.
The engine will not start if the Immobilizer System does not
recognize the key's coding (see page
77).
You will hear a reminder beeper if
you leave the key in the ignition
switch in the LOCK (0) or
ACCESSORY (I) position and open the driver's door. Remove the key toturn off the beeper. Powe
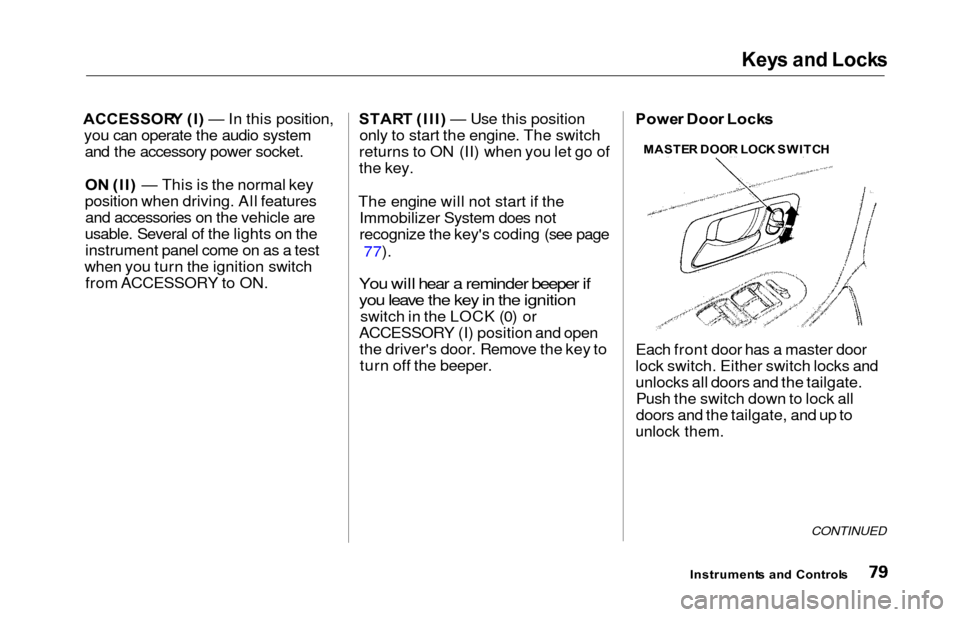
r Doo r Lock s
Each front door has a master door
lock switch. Either switch locks and
unlocks all doors and the tailgate. Push the switch down to lock all
doors and the tailgate, and up to
unlock them.
CONTINUED
Instrument s an d Control s
MASTE
R DOO R LOC K SWITC H
Page 83 of 352
Keys and Locks
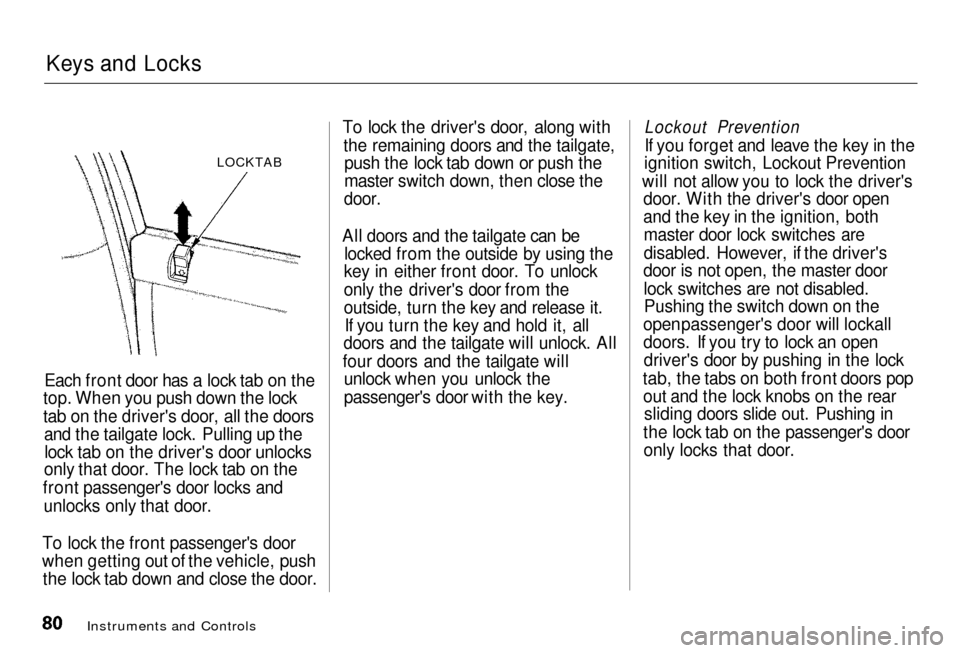
LOCKTAB
Each front door has a lock tab on the
top.
When you push down the lock
tab on the driver's door, all the doors and the tailgate lock. Pulling up the
lock tab on the driver's door unlocks
only
that door. The lock tab on the
front
passenger's door locks and
unlocks only that door.
To lock the front passenger's door
when getting out of the vehicle, push
the
lock tab down and close the door. To lock the driver's door, along with
the
remaining doors and the tailgate,
push the lock tab down or push the
master
switch down, then close the
door.
All doors and the tailgate can be locked from the outside by using the
key
in either front door. To unlock
only
the driver's door from the
outside,
turn the key and release it.
If you turn the key and hold it, all
doors
and the tailgate will unlock. All
four doors and the tailgate will unloc
k when you unlock the
passenger's door with the key.
Instruments and Controls
Lockout Prevention
I
f you forget and leave the key in the
ignition
switch, Lockout Prevention
will
not allow you to lock the driver's
door.
With the driver's door open
and
the key in the ignition, both
master
door lock switches are
disabled. However, if the driver's
door is not open, the master door
lock switches are not disabled.Pushin
g the switch down on the
open
passenger's door will lockall
doors. If you try to lock an open driver's
door by pushing in the lock
tab, the tabs on both front doors pop out
and the lock knobs on the rear
sliding doors slide out. Pushing in
the lock tab on the passenger's door only
locks that door.
Page 84 of 352
Keys an d Lock s
Remot e Transmitte r
On EX model
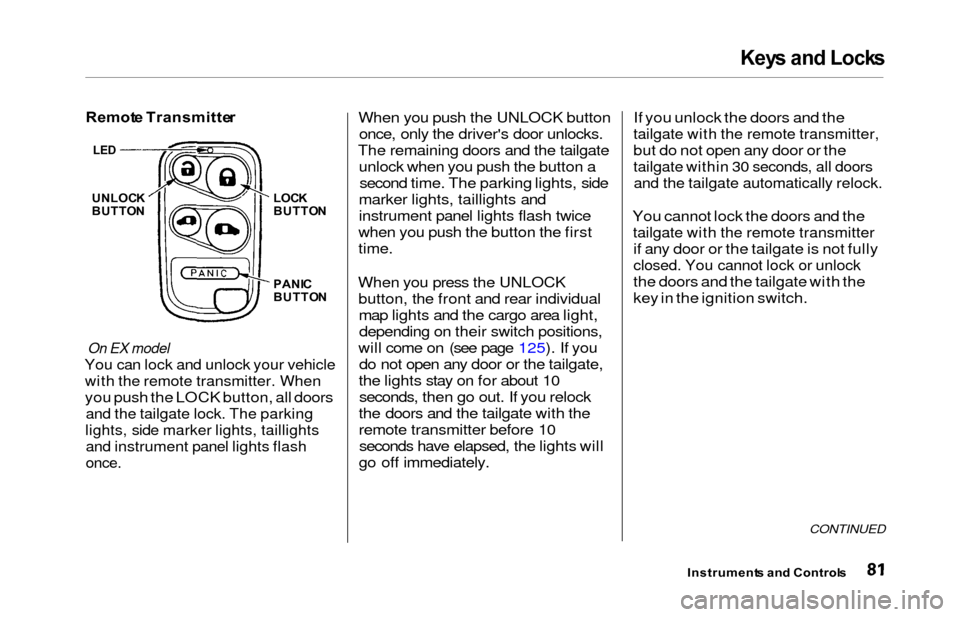
You can lock and unlock your vehicle
with the remote transmitter. When
you push the LOCK button, all doors
and the tailgate lock. The parking
lights, side marker lights, taillights
and instrument panel lights flash
once.
When you push the UNLOCK button
once, only the driver's door unlocks.
The remaining doors and the tailgate unlock when you push the button asecond time. The parking lights, side
marker lights, taillights and
instrument panel lights flash twice
when you push the button the first
time.
When you press the UNLOCK button, the front and rear individualmap lights and the cargo area light,depending on their switch positions,
will come on (see page 125). If you do not open any door or the tailgate,
the lights stay on for about 10 seconds, then go out. If you relock
the doors and the tailgate with the
remote transmitter before 10 seconds have elapsed, the lights will
go off immediately. If you unlock the doors and the
tailgate with the remote transmitter,
but do not open any door or the
tailgate within 30 seconds, all doors
and the tailgate automatically relock.
You cannot lock the doors and the
tailgate with the remote transmitter
if any door or the tailgate is not fully
closed. You cannot lock or unlock
the doors and the tailgate with the
key in the ignition switch.
CONTINUED
Instrument
s an d Control s
UNLOCK
BUTTO N LOC
K
BUTTO N
PANI C
BUTTO N
LED
Page 85 of 352
Keys an d Lock s
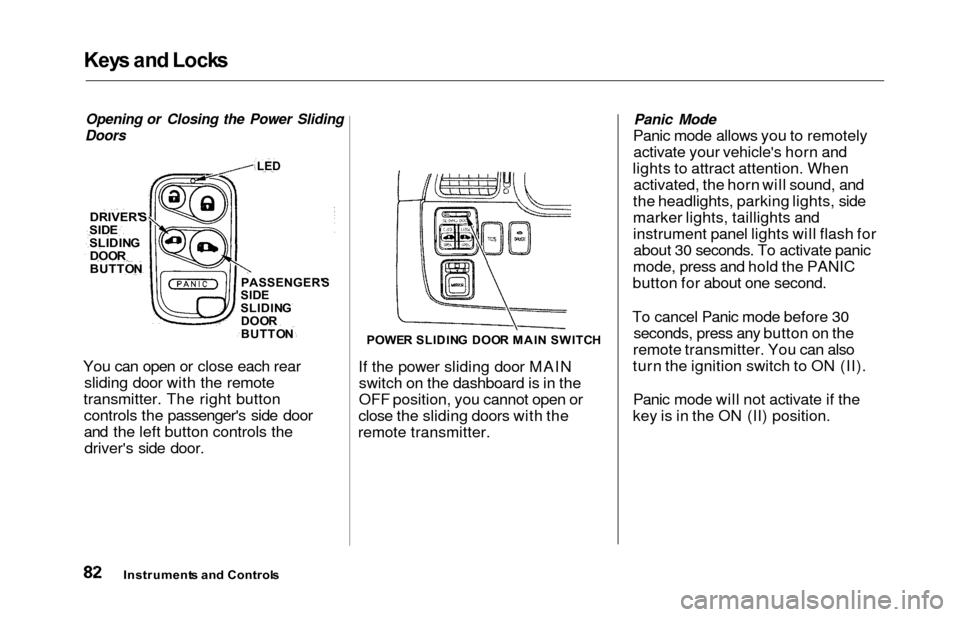
Opening or Closing the Power Sliding
Doors
You can open or close each rear sliding door with the remote
transmitter. The right button controls the passenger's side door
and the left button controls thedriver's side door.
POWE R SLIDIN G DOO R MAI N SWITC H
If the power sliding door MAIN
switch on the dashboard is in the
OFF position, you cannot open or
close the sliding doors with the
remote transmitter.
Panic Mode
Panic mode allows you to remotely activate your vehicle's horn and
lights to attract attention. When activated, the horn will sound, and
the headlights, parking lights, side
marker lights, taillights and
instrument panel lights will flash for about 30 seconds. To activate panic
mode, press and hold the PANIC
button for about one second.
To cancel Panic mode before 30 seconds, press any button on the
remote transmitter. You can also
turn the ignition switch to ON (II).
Panic mode will not activate if the
key is in the ON (II) position.
Instrument s an d Control s
DRIVER'
S
SIDESLIDIN G
DOO R
BUTTO NPASSENGER' S
SID E
SLIDIN G
DOO R
BUTTO N
LED
Page 86 of 352
Keys an d Lock s
Replacing the Battery
When the remote transmitter's
battery begins to get weak, it maytake several pushes on the button tolock or unlock the doors and the
tailgate, and the LED will get dim.Replace the battery as soon as
possible.
Battery type: CR2025 To replace the battery, remove the
round cover on the back of the trans-
mitter by turning it counterclockwise
with a coin.
Remove the old battery and note the
polarity. Make sure the polarity of
the new battery is the same (+ side
facing up), then insert it in the
transmitter. Reinstall the O-ring. Align the
mark on the cover with the
mark on the transmitter,
then set the cover in place and turn it clockwise.
CONTINUED
Instrument s an d Control s
Ope
n
Clos e
ROUN DCOVERCUSHIO N
RIN G
BATTER Y