Page 299 of 421
yellowblue
5-32
A. Wing Nut
B. Wheel Blocks
C. Wheel Wrench and
Extensions Retainer
D. Gloves
E. Wheel Wrench and
ExtensionsF. Storage Bag
G. Bottle Jack Holder
H. Bottle Jack
I. Wheel Block
Retainer
Store the flat tire where the spare tire was stored.Store the tire under the rear of the vehicle in the spare
tire carrier. To store the tire:
1. Put the tire on the ground at the rear of the vehicle
with the valve stem pointed downward and to
the rear.
2. Tilt the retainer downward and through the wheel
opening. Make sure that the retainer is fully seated
across the underside of the wheel.
3. Attach the wheel wrench and extensions together.
Insert the hoist end through the hole in the rear
bumper and into the hoist shaft.
4. Raise the tire part of the way upward. When the tire
is almost in the stored position, adjust the tire so that
the valve stem is toward the rear of the vehicle.
Page 304 of 421

6-
yellowblue
6-1
Section 6 Service and Appearance Care
Here you will find information about the care of your vehicle. This section begins with service and fuel information,
and then it shows how to check important fluid and lubricant levels. There is also technical information about your
vehicle, and a part devoted to its appearance care.
6
-2 Service
6
-3 Fuel
6
-5 Fuels in Foreign Countries
6
-6 Filling Your Tank
6
-8 Checking Things Under the Hood
6
-12 Engine Oil
6
-16 Engine Air Cleaner/Filter
6
-19 Automatic Transmission Fluid
6
-23 Manual Transmission Fluid
6
-24 Hydraulic Clutch
6
-25 Rear Axle
6
-26 Four-Wheel Drive
6
-28 Engine Coolant
6
-31 Coolant Surge Tank Pressure Cap
6
-32 Power Steering Fluid6
-33 Windshield Washer Fluid
6
-34 Brakes
6
-38 Battery
6
-38 Bulb Replacement
6
-44 Windshield Wiper Blade Replacement
6
-45 Tires
6
-53 Appearance Care
6
-54 Cleaning the Inside of Your Vehicle
6
-57 Cleaning the Outside of Your Vehicle
6
-61 GM Vehicle Care/Appearance Materials
6
-62 Vehicle Identification Number (VIN)
6
-63 Electrical System
6
-71 Replacement Bulbs
6
-72 Capacities and Specifications
Page 322 of 421

yellowblue
6-19
2. If your vehicle does not
have a panel under the
center of the instrument
panel, or when the panel
is removed, reach under
the instrument panel
towards the front of the
vehicle and pull
downward on the filter
retaining bracket.
3. Remove the air filter by pulling downward on the
element. Remove the second portion of the air filter
by sliding it towards the rear of the vehicle and then
pulling downward.
4. Install the new filter by reversing the steps listed
previously. Be sure to follow any instructions that
may be included in the replacement filter package.
Refer to the Maintenance Schedule to determine when to
replace the passenger compartment air filter. See
ªScheduled Maintenanceº in the Index.Automatic Transmission Fluid
When to Check and Change
A good time to check your automatic transmission fluid
level is when the engine oil is changed.
Change both the fluid and filter every 50,000 miles
(83 000 km) if the vehicle is mainly driven under one or
more of these conditions:
�In heavy city traffic where the outside temperature
regularly reaches 90�F (32�C) or higher.
�In hilly or mountainous terrain.
�When doing frequent trailer towing.
�Uses such as found in taxi, police or delivery service.
If you do not use your vehicle under any of these
conditions, change the fluid and filter every
100,000 miles (166 000 km).
See ªScheduled Maintenance Servicesº in the Index.
Page 324 of 421

yellowblue
6-21
Checking Transmission Fluid Cold
A cold check is made after the vehicle has been sitting
for eight hours or more with the engine off and is used
only as a reference. Let the engine run at idle for five
minutes if outside temperatures are 50�F (10�C) or
more. If it's colder than 50�F (10�C), you may have to
idle the engine longer. Should the fluid level be low
during a cold check, you must perform a hot check
before adding fluid. This will give you a more accurate
reading of the fluid level.
Checking the Fluid Level
Prepare your vehicle as follows:
�Park your vehicle on a level place. Keep the
engine running.
�With the parking brake applied, place the shift lever
in PARK (P).
�With your foot on the brake pedal, move the shift
lever through each gear range, pausing for about
three seconds in each range. Then, position the shift
lever in PARK (P).
�Let the engine run at idle for three minutes or more.Then, without shutting off the engine, follow
these steps:
1. The red transmission dipstick handle is located at the
rear of the engine compartment, on the passenger's
side. Flip the handle up and then pull out the dipstick
and wipe it with a clean rag or paper towel.
2. Push it back in all the way, wait three seconds and
then pull it back out again.
Page 328 of 421
yellowblue
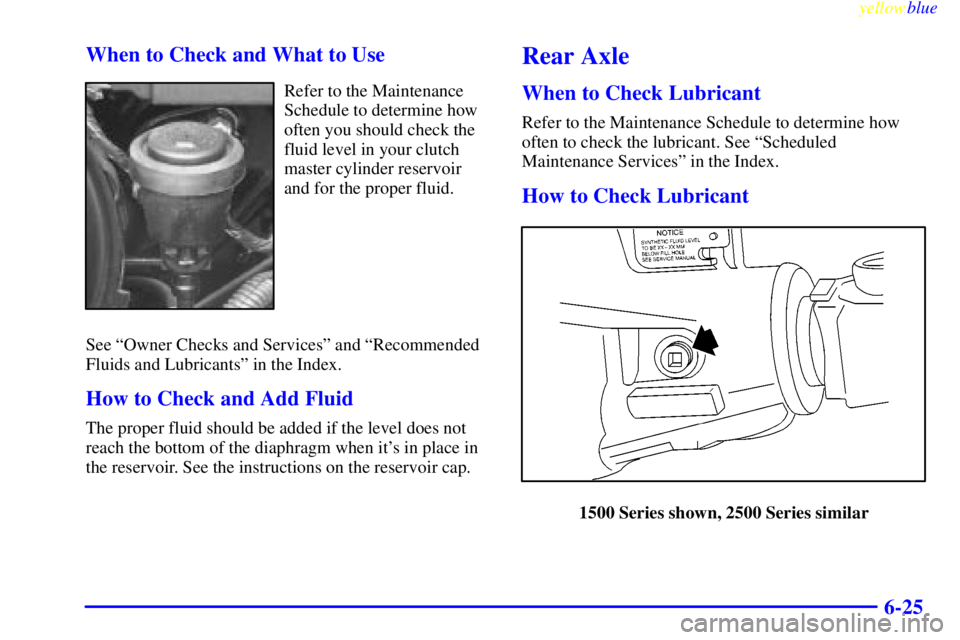
6-25 When to Check and What to Use
Refer to the Maintenance
Schedule to determine how
often you should check the
fluid level in your clutch
master cylinder reservoir
and for the proper fluid.
See ªOwner Checks and Servicesº and ªRecommended
Fluids and Lubricantsº in the Index.
How to Check and Add Fluid
The proper fluid should be added if the level does not
reach the bottom of the diaphragm when it's in place in
the reservoir. See the instructions on the reservoir cap.
Rear Axle
When to Check Lubricant
Refer to the Maintenance Schedule to determine how
often to check the lubricant. See ªScheduled
Maintenance Servicesº in the Index.
How to Check Lubricant
1500 Series shown, 2500 Series similar
Page 340 of 421

yellowblue
6-37
Some driving conditions or climates may cause a brake
squeal when the brakes are first applied or lightly
applied. This does not mean something is wrong with
your brakes.
Properly torqued wheel nuts are necessary to help
prevent brake pulsation. When tires are rotated, inspect
brake pads for wear and evenly torque wheel nuts in the
proper sequence to GM specifications.
Brake linings should always be replaced as complete
axle sets.
See ªBrake System Inspectionº in Section 7 of this manual
under Part C ªPeriodic Maintenance Inspections.º
Brake Pedal Travel
See your dealer if the brake pedal does not return to
normal height, or if there is a rapid increase in pedal
travel. This could be a sign of brake trouble.
Brake Adjustment
Every time you make a brake stop, your disc brakes
adjust for wear.
Replacing Brake System Parts
The braking system on a vehicle is complex. Its many
parts have to be of top quality and work well together if
the vehicle is to have really good braking. Your vehicle
was designed and tested with top
-quality GM brake
parts. When you replace parts of your braking
system
-- for example, when your brake linings wear
down and you have to have new ones put in
-- be sure
you get new approved GM replacement parts. If you
don't, your brakes may no longer work properly. For
example, if someone puts in brake linings that are wrong
for your vehicle, the balance between your front and
rear brakes can change
-- for the worse. The braking
performance you've come to expect can change in many
other ways if someone puts in the wrong replacement
brake parts.
Page 345 of 421
yellowblue
6-42
4. If a CHMSL bulb is replaced, put the bulb into the
socket and press it in until it is tight.
5. If a cargo lamp is replaced, put a new cargo lamp
bulb into the socket and press it in until it is tight
before turning the socket counterclockwise.
6. Put the bulb holder back plate into the lamp housing.
7. Replace the lamp assembly and tighten the screws.
Taillamps (Pickup Models)
1. Open the tailgate.
2. Remove the two rear
lamp assembly screws
near the tailgate latch
and pull out the
lamp assembly.
Page 346 of 421
yellowblue
6-43
A. Stoplamp
B. Turn Signal Lamp
C. Back
-up Lamp
3. Press the release tab and turn the bulb socket
counterclockwise to remove it from the
taillamp housing.
4. Pull the bulb straight out from the socket.
5. Press a new bulb into the socket and turn the socket
clockwise into the taillamp housing until it clicks.
6. Reinstall the rear lamp assembly and tighten
the screws.
7. Close the tailgate.