2000 FORD WINDSTAR instrument cluster
[x] Cancel search: instrument clusterPage 6 of 280

404080
120
16020
12345
6
760
80100 MPH RPMX1000 THEFT
TRAC
ACTIVE TRAC
OFFTEMP
H
FFUEL
E
km/h
BRAKE
mi
O/D
OFFO/D
ON/OFF
PON
OFFSET
CST RES
_+
Headlamp control
(pg. 26)Speed control
(pg. 82) Driver air bag
(pg. 140) Turn signal and
wiper/washer control
(pg. 86)Instrument cluster
(pg. 8)
Instrument panel
dimmer control
(pg. 27)Gearshift (includes O/D
OFF control)
(pg. 169)
Traction control*
(pg. 167)
Instrumentation
6
Page 8 of 280
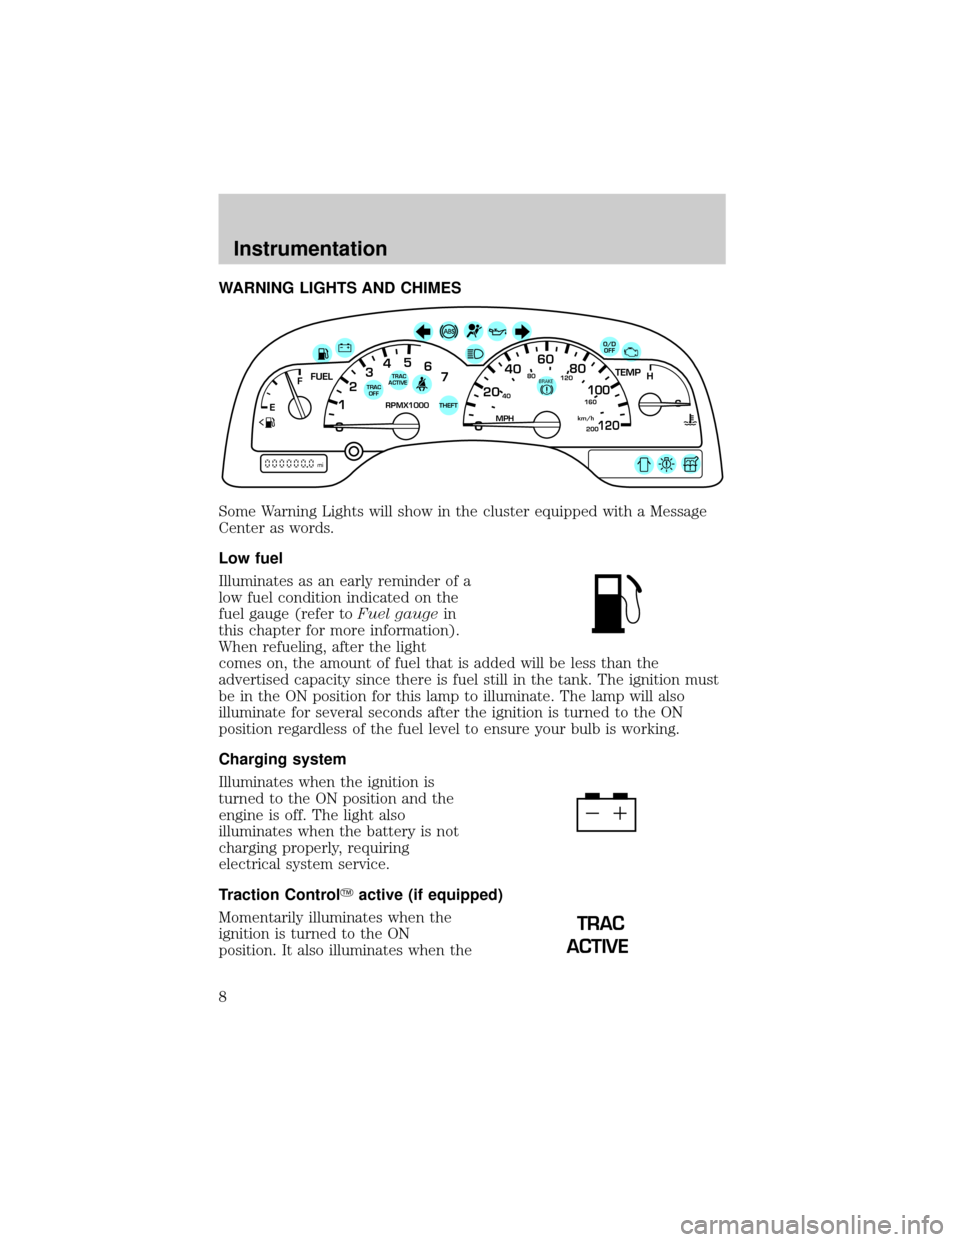
WARNING LIGHTS AND CHIMES
Some Warning Lights will show in the cluster equipped with a Message
Center as words.
Low fuel
Illuminates as an early reminder of a
low fuel condition indicated on the
fuel gauge (refer toFuel gaugein
this chapter for more information).
When refueling, after the light
comes on, the amount of fuel that is added will be less than the
advertised capacity since there is fuel still in the tank. The ignition must
be in the ON position for this lamp to illuminate. The lamp will also
illuminate for several seconds after the ignition is turned to the ON
position regardless of the fuel level to ensure your bulb is working.
Charging system
Illuminates when the ignition is
turned to the ON position and the
engine is off. The light also
illuminates when the battery is not
charging properly, requiring
electrical system service.
Traction ControlYactive (if equipped)
Momentarily illuminates when the
ignition is turned to the ON
position. It also illuminates when the
40
4080
120
160
20020
12345
6
760
80100
120MPH RPMX1000 THEFT
TRAC
ACTIVE TRAC
OFFTEMP
H
FFUEL
E
km/h
BRAKE
mi
O/D
OFF
TRAC
ACTIVE
Instrumentation
8
Page 16 of 280
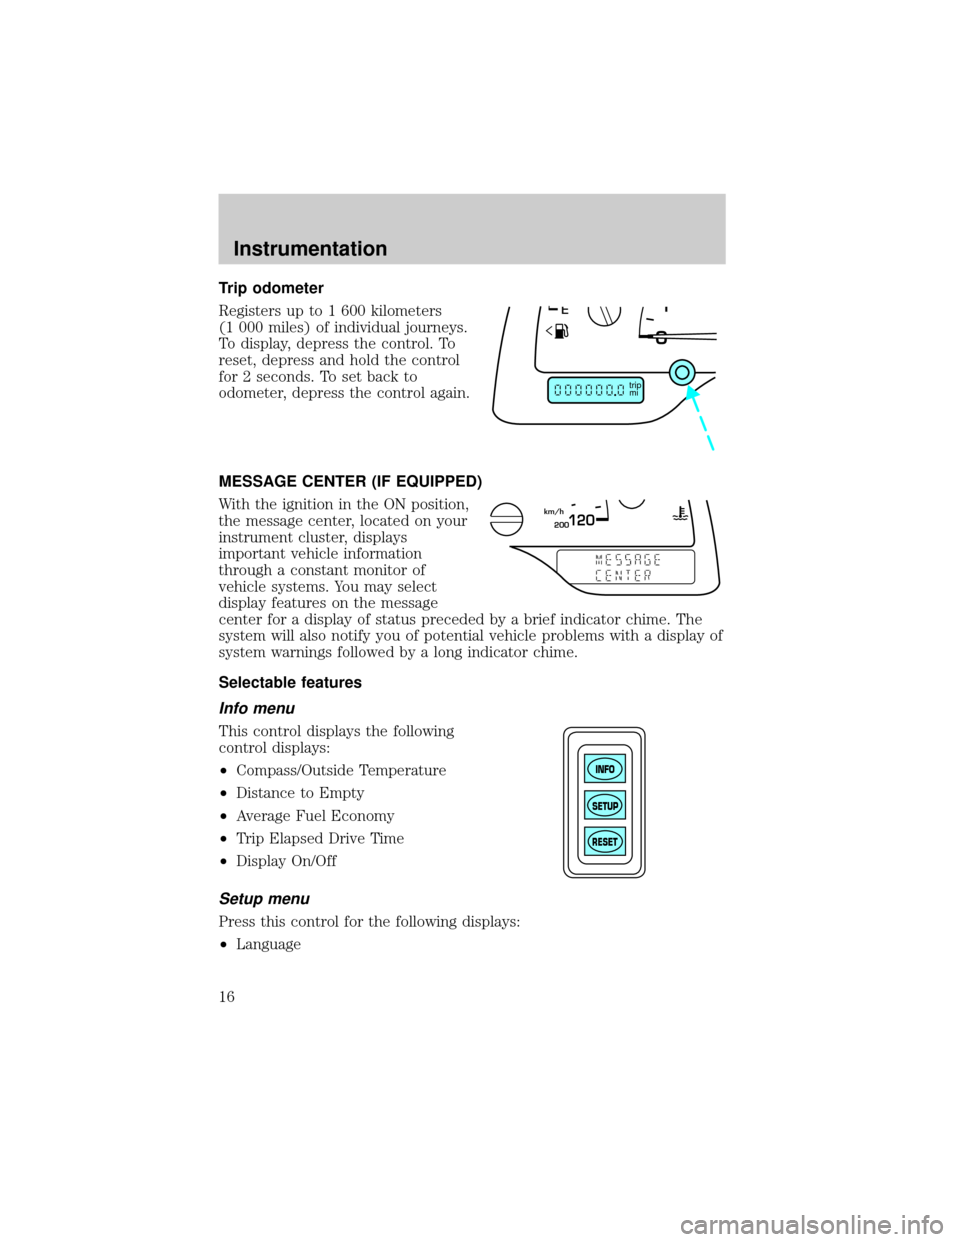
Trip odometer
Registers up to 1 600 kilometers
(1 000 miles) of individual journeys.
To display, depress the control. To
reset, depress and hold the control
for 2 seconds. To set back to
odometer, depress the control again.
MESSAGE CENTER (IF EQUIPPED)
With the ignition in the ON position,
the message center, located on your
instrument cluster, displays
important vehicle information
through a constant monitor of
vehicle systems. You may select
display features on the message
center for a display of status preceded by a brief indicator chime. The
system will also notify you of potential vehicle problems with a display of
system warnings followed by a long indicator chime.
Selectable features
Info menu
This control displays the following
control displays:
²Compass/Outside Temperature
²Distance to Empty
²Average Fuel Economy
²Trip Elapsed Drive Time
²Display On/Off
Setup menu
Press this control for the following displays:
²Language
mi trip
200120km/h
INFO
SETUP
RESET
Instrumentation
16
Page 87 of 280
OVERDRIVE CONTROL
Activating overdrive
(Overdrive) is the normal drive position for the best fuel economy.
The overdrive function allows automatic upshifts and downshifts through
all available gears.
Deactivating overdrive
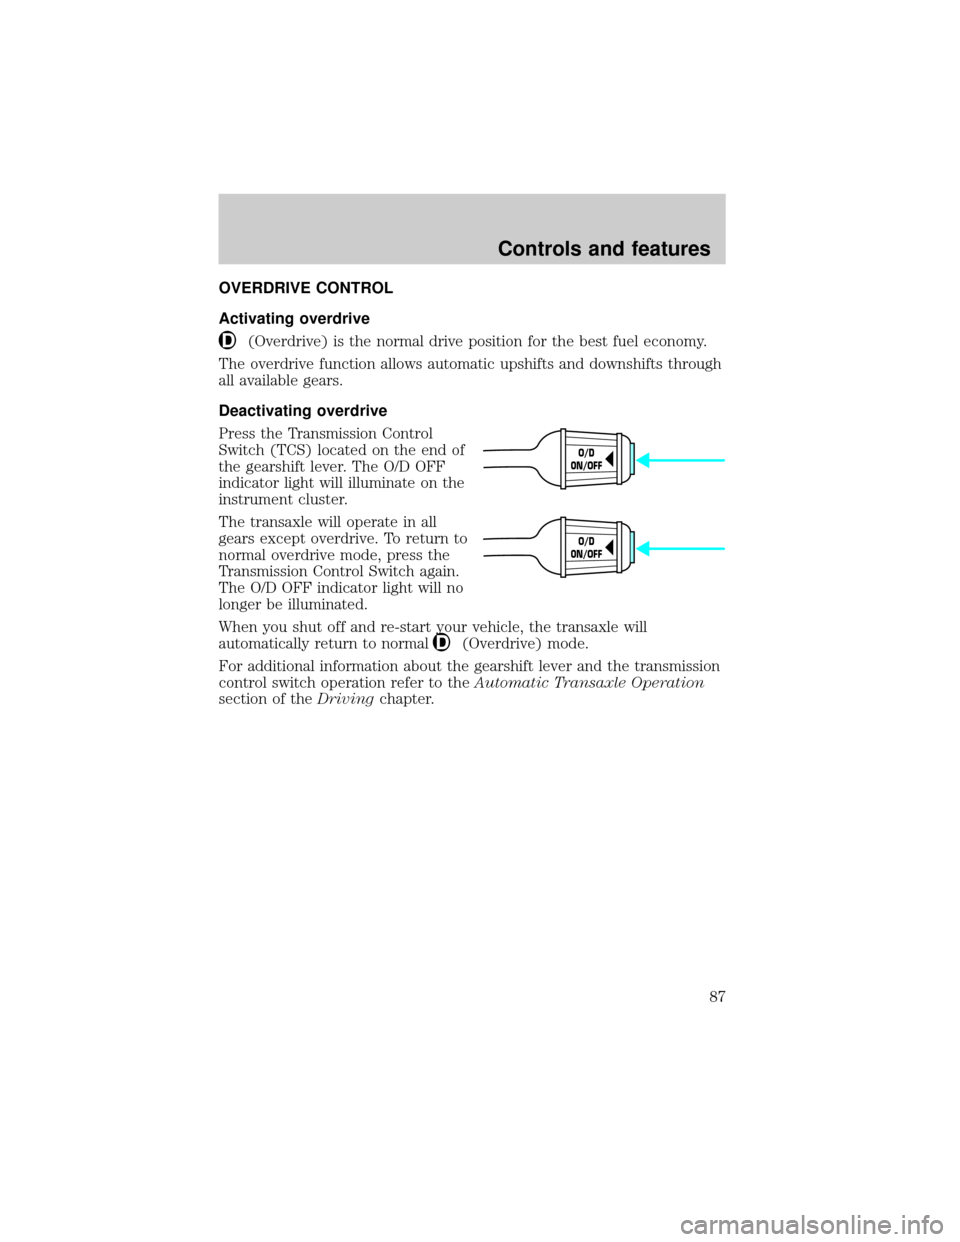
Press the Transmission Control
Switch (TCS) located on the end of
the gearshift lever. The O/D OFF
indicator light will illuminate on the
instrument cluster.
The transaxle will operate in all
gears except overdrive. To return to
normal overdrive mode, press the
Transmission Control Switch again.
The O/D OFF indicator light will no
longer be illuminated.
When you shut off and re-start your vehicle, the transaxle will
automatically return to normal
(Overdrive) mode.
For additional information about the gearshift lever and the transmission
control switch operation refer to theAutomatic Transaxle Operation
section of theDrivingchapter.
O/D
ON/OFF
O/D
ON/OFF
Controls and features
87
Page 115 of 280

gasoline or similar items, or a second key on the same key ring as the
PATS ignition key may cause vehicle starting concern and record DTC's
under certain conditions. If present, you need to keep these objects from
touching the PATS ignition key while starting the engine. These objects
and devices cannot damage the PATS ignition key, but can cause a
momentary concern if they are too close to the key during engine start.
If a problem occurs, turn ignition OFF and restart the engine with all
other objects on the key ring held away from the ignition key. Check to
make sure the encoded ignition key is an approved Ford encoded
ignition key.
Spare coded keys can be purchased from your dealership and
programmed to your anti-theft system. Refer toProgramming spare
SecuriLockykeysfor more information.
If one or both of your coded keys are lost or stolen and you want to
ensure the lost or stolen key will not operate your vehicle, bring your
vehicle and all available coded keys to your dealership for reinitialization.
Theft indicator
The theft indicator in the instrument cluster will operate as follows:
²When the ignition is OFF, the theft indicator will flash briefly every
two seconds to indicate the anti-theft system is protecting your
vehicle.
²When the ignition is turned to ON or START, the theft indicator will
light for three seconds and then go out. If the theft indicator stays on
for an extended period of time or flashes rapidly, have the system
serviced by your dealership or a qualified technician.
Programming spare SecuriLockYkeys
Spare coded keys can be purchased from your dealership and
programmed to your anti-theft system (up to a total of eight keys). Your
dealership can program your new coded key(s) to your vehicle or you
can do it yourself using the following simple procedure. To program a
new coded key yourself, you will need two previously programmed coded
keys (keys that already operate your vehicle's engine). If two previously
programmed coded keys are not available (one or both of your original
keys were lost or stolen), you must bring your vehicle to your dealership
to have the spare coded key(s) programmed.
Controls and features
115
Page 135 of 280
Safety belt height adjustment
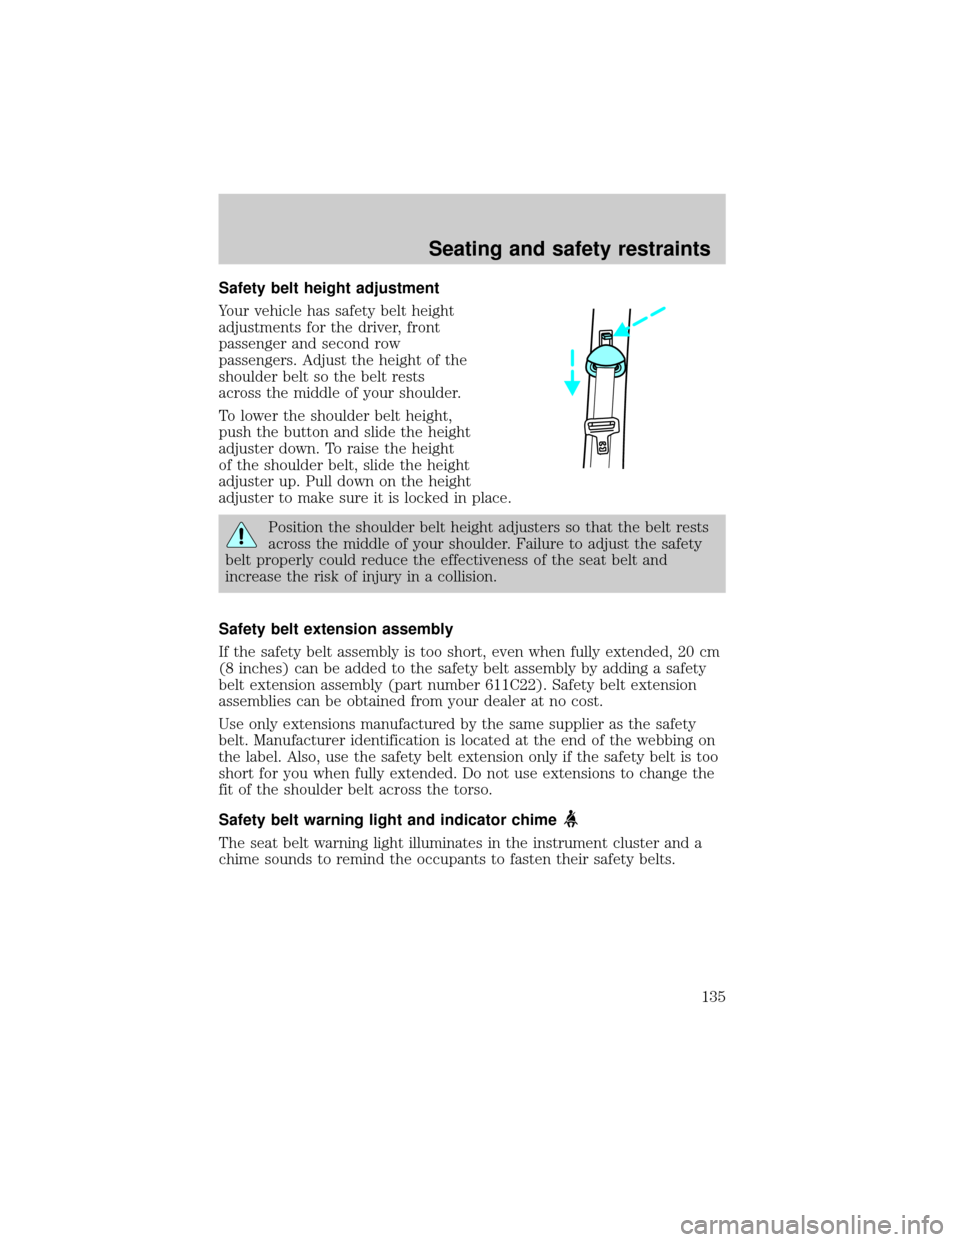
Your vehicle has safety belt height
adjustments for the driver, front
passenger and second row
passengers. Adjust the height of the
shoulder belt so the belt rests
across the middle of your shoulder.
To lower the shoulder belt height,
push the button and slide the height
adjuster down. To raise the height
of the shoulder belt, slide the height
adjuster up. Pull down on the height
adjuster to make sure it is locked in place.
Position the shoulder belt height adjusters so that the belt rests
across the middle of your shoulder. Failure to adjust the safety
belt properly could reduce the effectiveness of the seat belt and
increase the risk of injury in a collision.
Safety belt extension assembly
If the safety belt assembly is too short, even when fully extended, 20 cm
(8 inches) can be added to the safety belt assembly by adding a safety
belt extension assembly (part number 611C22). Safety belt extension
assemblies can be obtained from your dealer at no cost.
Use only extensions manufactured by the same supplier as the safety
belt. Manufacturer identification is located at the end of the webbing on
the label. Also, use the safety belt extension only if the safety belt is too
short for you when fully extended. Do not use extensions to change the
fit of the shoulder belt across the torso.
Safety belt warning light and indicator chime
The seat belt warning light illuminates in the instrument cluster and a
chime sounds to remind the occupants to fasten their safety belts.
Seating and safety restraints
135
Page 136 of 280
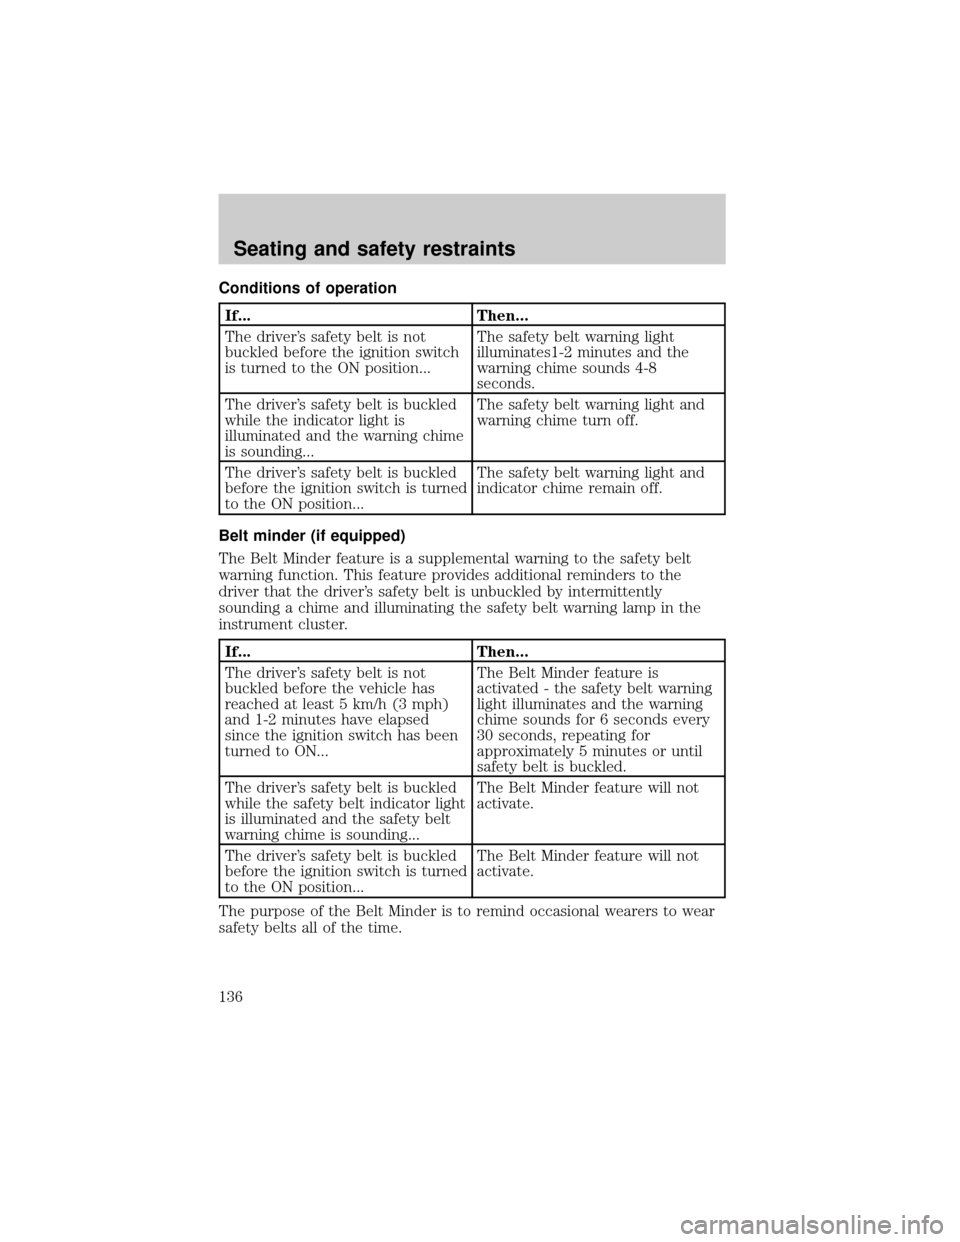
Conditions of operation
If... Then...
The driver's safety belt is not
buckled before the ignition switch
is turned to the ON position...The safety belt warning light
illuminates1-2 minutes and the
warning chime sounds 4-8
seconds.
The driver's safety belt is buckled
while the indicator light is
illuminated and the warning chime
is sounding...The safety belt warning light and
warning chime turn off.
The driver's safety belt is buckled
before the ignition switch is turned
to the ON position...The safety belt warning light and
indicator chime remain off.
Belt minder (if equipped)
The Belt Minder feature is a supplemental warning to the safety belt
warning function. This feature provides additional reminders to the
driver that the driver's safety belt is unbuckled by intermittently
sounding a chime and illuminating the safety belt warning lamp in the
instrument cluster.
If... Then...
The driver's safety belt is not
buckled before the vehicle has
reached at least 5 km/h (3 mph)
and 1-2 minutes have elapsed
since the ignition switch has been
turned to ON...The Belt Minder feature is
activated - the safety belt warning
light illuminates and the warning
chime sounds for 6 seconds every
30 seconds, repeating for
approximately 5 minutes or until
safety belt is buckled.
The driver's safety belt is buckled
while the safety belt indicator light
is illuminated and the safety belt
warning chime is sounding...The Belt Minder feature will not
activate.
The driver's safety belt is buckled
before the ignition switch is turned
to the ON position...The Belt Minder feature will not
activate.
The purpose of the Belt Minder is to remind occasional wearers to wear
safety belts all of the time.
Seating and safety restraints
136
Page 144 of 280
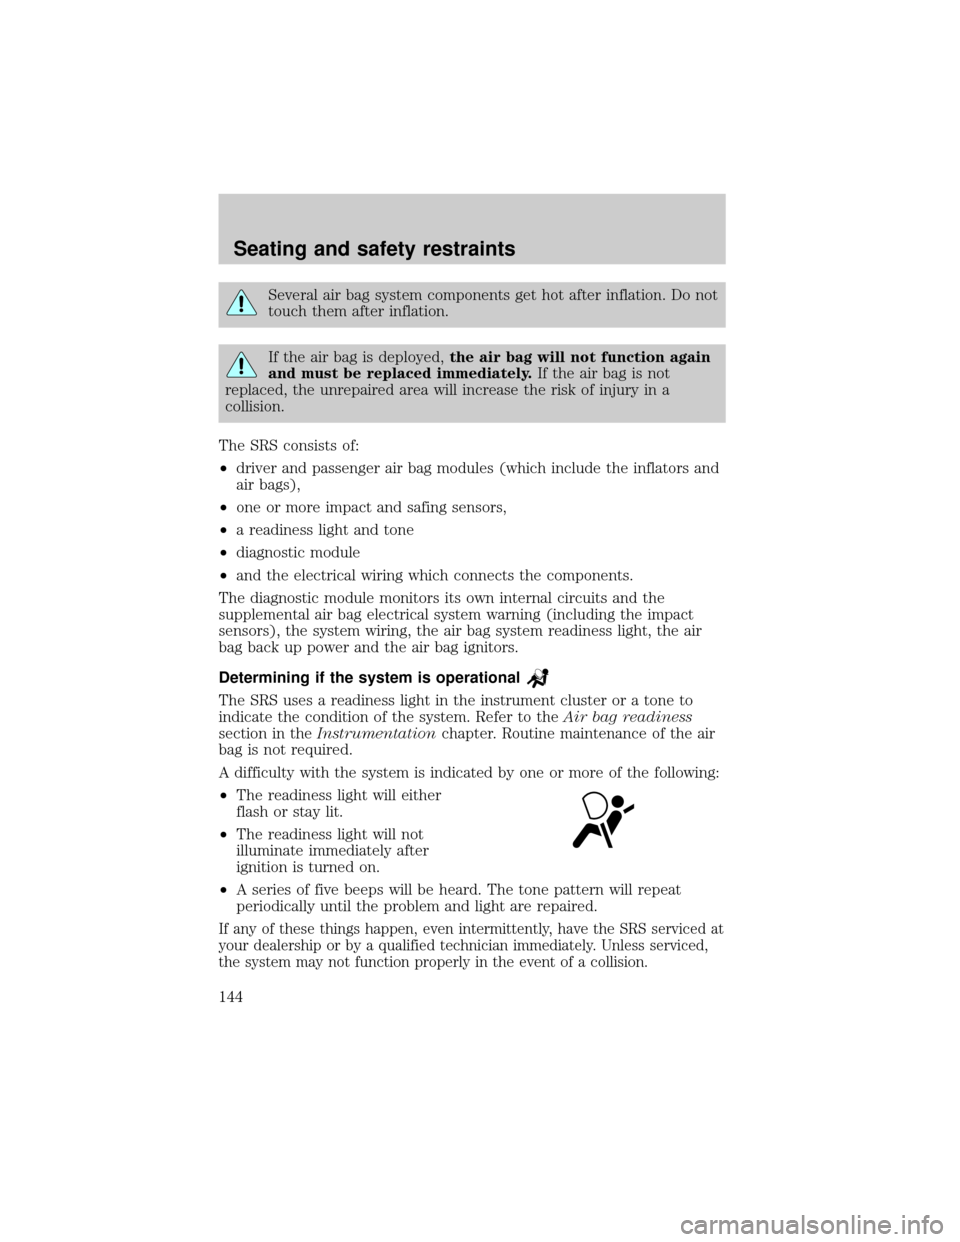
Several air bag system components get hot after inflation. Do not
touch them after inflation.
If the air bag is deployed,the air bag will not function again
and must be replaced immediately.If the air bag is not
replaced, the unrepaired area will increase the risk of injury in a
collision.
The SRS consists of:
²driver and passenger air bag modules (which include the inflators and
air bags),
²one or more impact and safing sensors,
²a readiness light and tone
²diagnostic module
²and the electrical wiring which connects the components.
The diagnostic module monitors its own internal circuits and the
supplemental air bag electrical system warning (including the impact
sensors), the system wiring, the air bag system readiness light, the air
bag back up power and the air bag ignitors.
Determining if the system is operational
The SRS uses a readiness light in the instrument cluster or a tone to
indicate the condition of the system. Refer to theAir bag readiness
section in theInstrumentationchapter. Routine maintenance of the air
bag is not required.
A difficulty with the system is indicated by one or more of the following:
²The readiness light will either
flash or stay lit.
²The readiness light will not
illuminate immediately after
ignition is turned on.
²A series of five beeps will be heard. The tone pattern will repeat
periodically until the problem and light are repaired.
If any of these things happen, even intermittently, have the SRS serviced at
your dealership or by a qualified technician immediately. Unless serviced,
the system may not function properly in the event of a collision.
Seating and safety restraints
144