Page 179 of 224

6. Without turning,
remove the old bulb
from the lamp
assembly by gently
pulling it straight out of
the lamp assembly.
To install the new bulb:
Handle a halogen headlamp bulb carefully
and keep out of children's reach. Grasp the
bulb only by its plastic base and do not touch the
glass. The oil from your hand could cause the bulb
to break the next time the headlamps are
operated.
1. With the flat side of the new bulb's plastic base
facing upward, insert the glass end of the bulb into
the lamp assembly. You may need to turn the bulb
left or right to align the grooves in the plastic base
with the tabs in the lamp assembly. When the
grooves are aligned, push the bulb into the lamp
assembly until the plastic base contacts the rear of
the lamp assembly.
2. Install the bulb retaining ring over the plastic base
until it contacts the rear of the socket by rotating
clockwise until you feel a ªstop.º
3. Connect the electrical connector into the plastic
base until it snaps, locking it into position.
4. Install the headlamp on vehicle by aligning the
lamp with the rear snap retainers, push to seat and
secure with two retainer pins.
5. Turn the headlamps on and make sure they work
properly. If the headlamp was correctly aligned
before you changed the bulb, you should not need to
align it again.
Replacing front parking lamp/turn signal bulbs
1. Make sure the headlamp control is in the OFF
position.
Maintenance and care
179
Page 180 of 224
2. Open the hood.
3. At the back of the
headlamp, pull two
retainer pins up to
release the headlamp
assembly.
4. Pull headlamp
assembly forward
disengaging the lamp
from the rear snap retainers to expose the back of
the bulb.
5. Rotate the bulb
socket
counterclockwise and
remove from lamp
assembly.
6. Carefully pull the
bulb straight out from
the socket and push in
the new bulb.
7. To complete installation, follow the removal
procedure in reverse order.
Replacing high-mount brakelamp bulbs
1. Open trunk.
2. Inside trunk, locate
access hole under the
rear decklid.
3. Remove the bulb
socket by rotating it 45
degrees and pulling it
out of the lamp
assembly.
4. Carefully pull bulb
straight out of socket and push in new bulb.
5. To complete installation, follow the removal
procedure in reverse order.
Maintenance and care
180
Page 181 of 224

Replacing foglamp bulbs
The halogen bulb contains gas under pressure.
The bulb may shatter if the glass envelope is
scratched or if the bulb is dropped. Handle the
bulb carefully. Grasp the bulb only by its base.
Avoid touching the glass envelope.
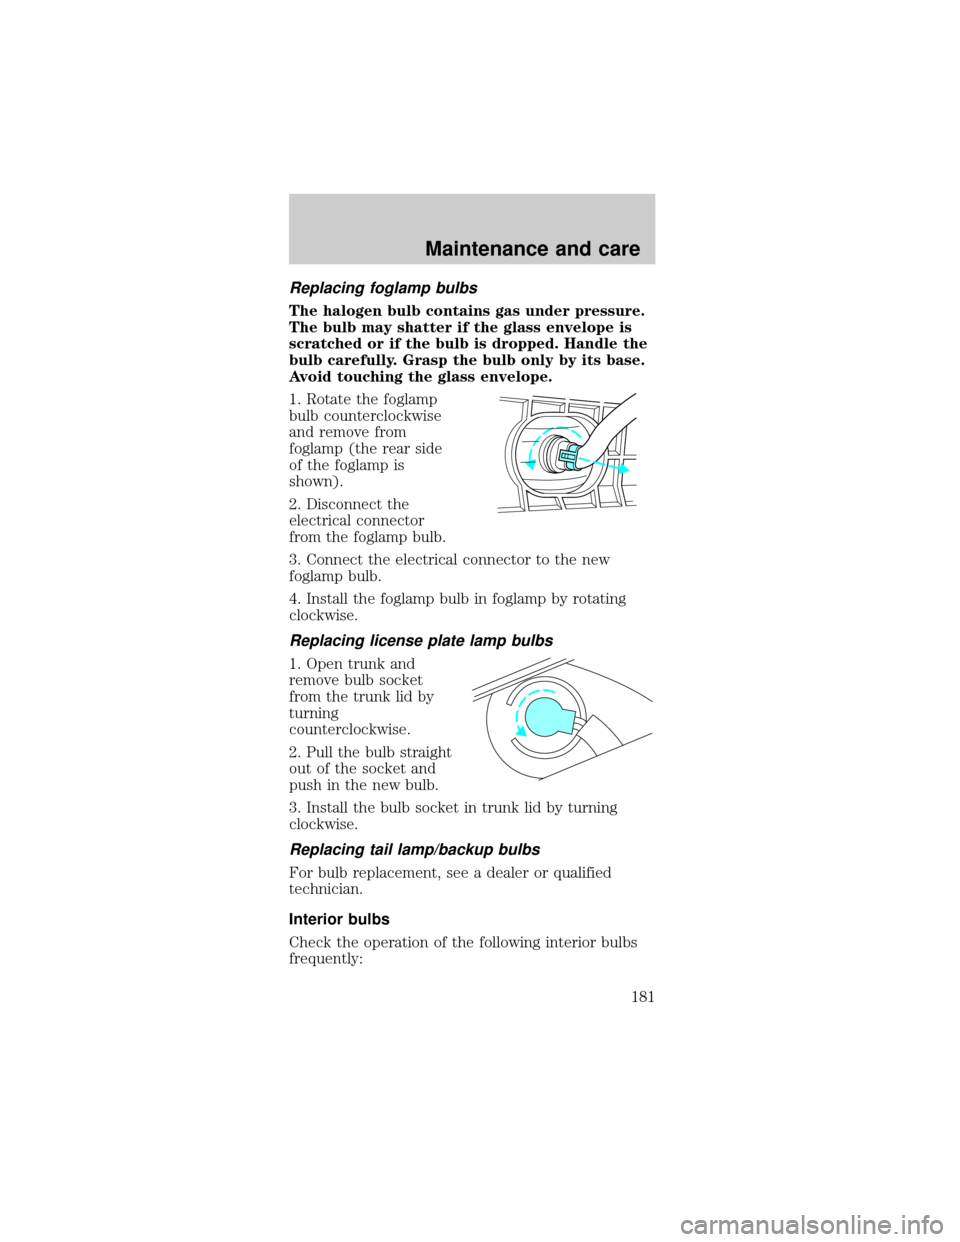
1. Rotate the foglamp
bulb counterclockwise
and remove from
foglamp (the rear side
of the foglamp is
shown).
2. Disconnect the
electrical connector
from the foglamp bulb.
3. Connect the electrical connector to the new
foglamp bulb.
4. Install the foglamp bulb in foglamp by rotating
clockwise.
Replacing license plate lamp bulbs
1. Open trunk and
remove bulb socket
from the trunk lid by
turning
counterclockwise.
2. Pull the bulb straight
out of the socket and
push in the new bulb.
3. Install the bulb socket in trunk lid by turning
clockwise.
Replacing tail lamp/backup bulbs
For bulb replacement, see a dealer or qualified
technician.
Interior bulbs
Check the operation of the following interior bulbs
frequently:
Maintenance and care
181
Page 184 of 224

3. On the wall or
screen you will observe
a light pattern with a
distinct horizonal edge
of high intensity light.
If this edge is not at
the horizontal reference line, the beam will need to
be adjusted.
4. Locate the vertical adjuster on each headlamp,
then usea6mmallen wrench or screwdriver to turn
the adjuster either counterclockwise (to adjust up)
or clockwise (to adjust down) centering the light on
the horizontal reference line.
5. HORIZONTAL AIM IS NOT REQUIRED FOR THIS
VEHICLE AND IS NON-ADJUSTABLE.
6. Close the hood and turn off the lamps.
CLEANING AND CARING FOR YOUR VEHICLE
Refer to the Customer Assistance chapter for a list
of Ford-approved cleaners, polishes and waxes.
Washing your vehicle
Wash your vehicle
regularly with cold or
lukewarm water. Never
use strong detergents
or soap. If your vehicle
is particularly dirty, use
a quality car wash
detergent. Always use a
clean sponge, washing
glove or similar device and plenty of water for best
results. To avoid spots, avoid washing when the
hood is still warm, immediately after or during
exposure to strong sunlight.
During winter months, it is especially important to
wash the vehicle on a regular basis. Large quantities
of dirt and road salt are difficult to remove and also
cause damage to the vehicle.
Maintenance and care
184
Page 188 of 224
²Do not spray with cold water to avoid cracking
the engine block or other engine components.
²Never apply anything to the drive belt (including
belt dressing).
²Cover the highlighted areas to prevent water
damage when cleaning the engine.
²Never wash or rinse the engine while it is
running; water in the running engine may cause
internal damage.
Cleaning the instrument panel
Clean with a damp cloth, then dry with a dry cloth.
Avoid cleaner or polish that increases the gloss of
the upper portion of the instrument panel. The dull
finish in this area helps protect the driver from
undesirable windshield reflection.
Do not use chemical solvents or strong
detergents when cleaning the steering wheel
or instrument panel to avoid contamination of the
air bag system.
Cleaning the instrument cluster lens
Clean with a damp cloth, then dry with a dry cloth.
Do not use household or glass cleaners as these may
damage the lens.
Maintenance and care
188
Page 193 of 224

LUBRICANT SPECIFICATIONS
Item Ford part name Ford part
numberFord
specification
Brake fluid High Performance
DOT 3 Motor
Vehicle Brake
FluidC6AZ-19542-AB ESA-M6C25-A
and DOT 3
Door
weatherstripsSilicone Lubricant F7AZ-19G208-BA
and
F5AZ-19553-AAESR-M13P4-A
Door latch, hood
latch, auxiliary
hood latch, door
hinges, striker
plates, seat tracks
and fuel filler
door hingeMulti-Purpose
GreaseD0AZ-19584-AA
or
F5AZ-19G209-AAESB-M1C93-B or
ESR-M1C159-A
Engine coolant Ford Premium
Engine CoolantE2FZ-19549-AA
(in Canada,
Motorcraft
CXC-8-B)ESE-M97B44-A
Engine oil Motorcraft SAE
5W-30 Super
Premium Motor
OilXO-5W30-QSP WSS-M2C153-G
with API
Certification Mark
Lock cylinders Penetrating and
Lock LubricantE8AZ-19A501-B none
Power steering
fluid and
convertible top
fluid (if
equipped)Motorcraft
MERCONtAT FXT-2-QM MERCONt
Rear Axle
LubricantMotorcraft SAE
80W-90 Premium
Rear Axle
Lubricant
1
XY-80W90-QL WSP-M2C197-A
Automatic
transmission fluidMotorcraft
MERCONtVATF
2
XT-5-QM MERCONtV
Manual
transmission fluidMotorcraft
MERCONtAT FXT-2-QDX MERCONt
Disc brake caliper
railsSilicone Brake
Caliper Grease
and Dielectric
CompoundD7AZ-19A331-A
(Motorcraft
WA-10)ESE-M1C171-A
Windshield
washer fluidUltra-clear
Windshield
Washer
ConcentrateC9AZ-19550-AC ESR-M17P5-A
Capacities and specifications
193
Page 196 of 224

IDENTIFYING YOUR VEHICLE
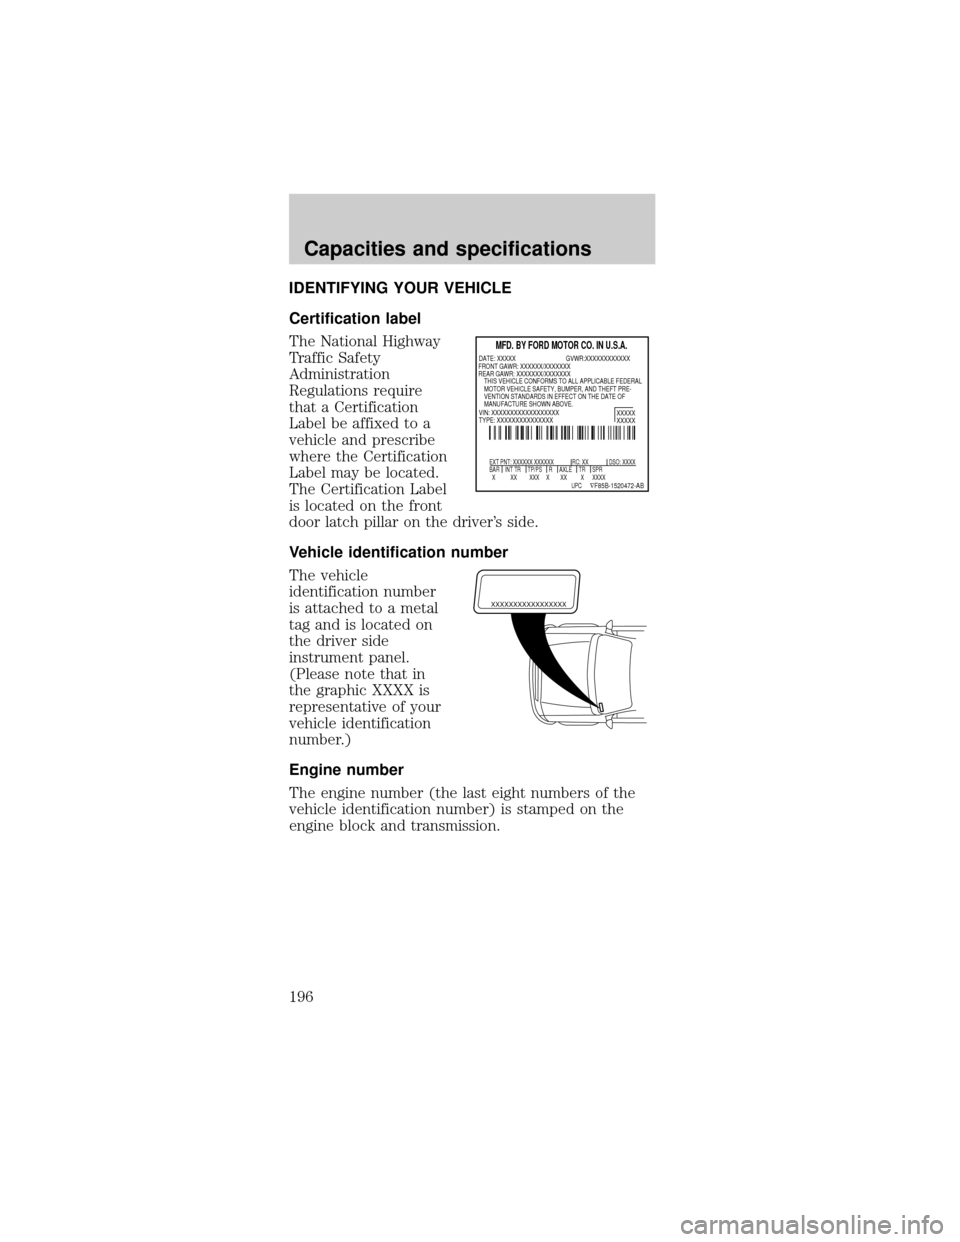
Certification label
The National Highway
Traffic Safety
Administration
Regulations require
that a Certification
Label be affixed to a
vehicle and prescribe
where the Certification
Label may be located.
The Certification Label
is located on the front
door latch pillar on the driver's side.
Vehicle identification number
The vehicle
identification number
is attached to a metal
tag and is located on
the driver side
instrument panel.
(Please note that in
the graphic XXXX is
representative of your
vehicle identification
number.)
Engine number
The engine number (the last eight numbers of the
vehicle identification number) is stamped on the
engine block and transmission.
MFD. BY FORD MOTOR CO. IN U.S.A.
EXT PNT: XXXXXX XXXXXX RC: XX DSO: XXXX
BAR INT TR TP/PS R AXLE TR SPR
X XX XXX X XX X XXXX
XXXXX
XXXXX
UPC ÑF85B-1520472-AB
DATE: XXXXX GVWR:XXXXXXXXXXXX
VIN: XXXXXXXXXXXXXXXXXX
TYPE: XXXXXXXXXXXXXXX FRONT GAWR: XXXXXX/XXXXXXX
REAR GAWR: XXXXXXX/XXXXXXX
THIS VEHICLE CONFORMS TO ALL APPLICABLE FEDERAL
MOTOR VEHICLE SAFETY, BUMPER, AND THEFT PRE-
VENTION STANDARDS IN EFFECT ON THE DATE OF
MANUFACTURE SHOWN ABOVE.
XXXXXXXXXXXXXXXXX
Capacities and specifications
196
Page 208 of 224
greater. See your dealer for complete warranty
information and availability.
Not all accessories are available for all models.
Vehicle Security
Styled wheel protector locks
Vehicle security systems
Comfort and convenience
Ash Cup
Cargo nets
Cargo organizers
Dash trim
Electrochromic mirror with compass
Electrochromic mirror with compass and
temperature display
Engine block heaters
Travel equipment
Auto headlamps with daytime running lights (DRL)
Cassette holder
Daytime running lights (DRL)
Fog lights
Heavy-duty battery
Removable luggage rack
Removable luggage rack adapters
Soft luggage cover
Speed control
Protection and appearance equipment
Air bag anti-theft locks
Cargo liners, interior
Carpet floor mats
Customer assistance
208