2000 FORD F350 towing
[x] Cancel search: towingPage 157 of 256
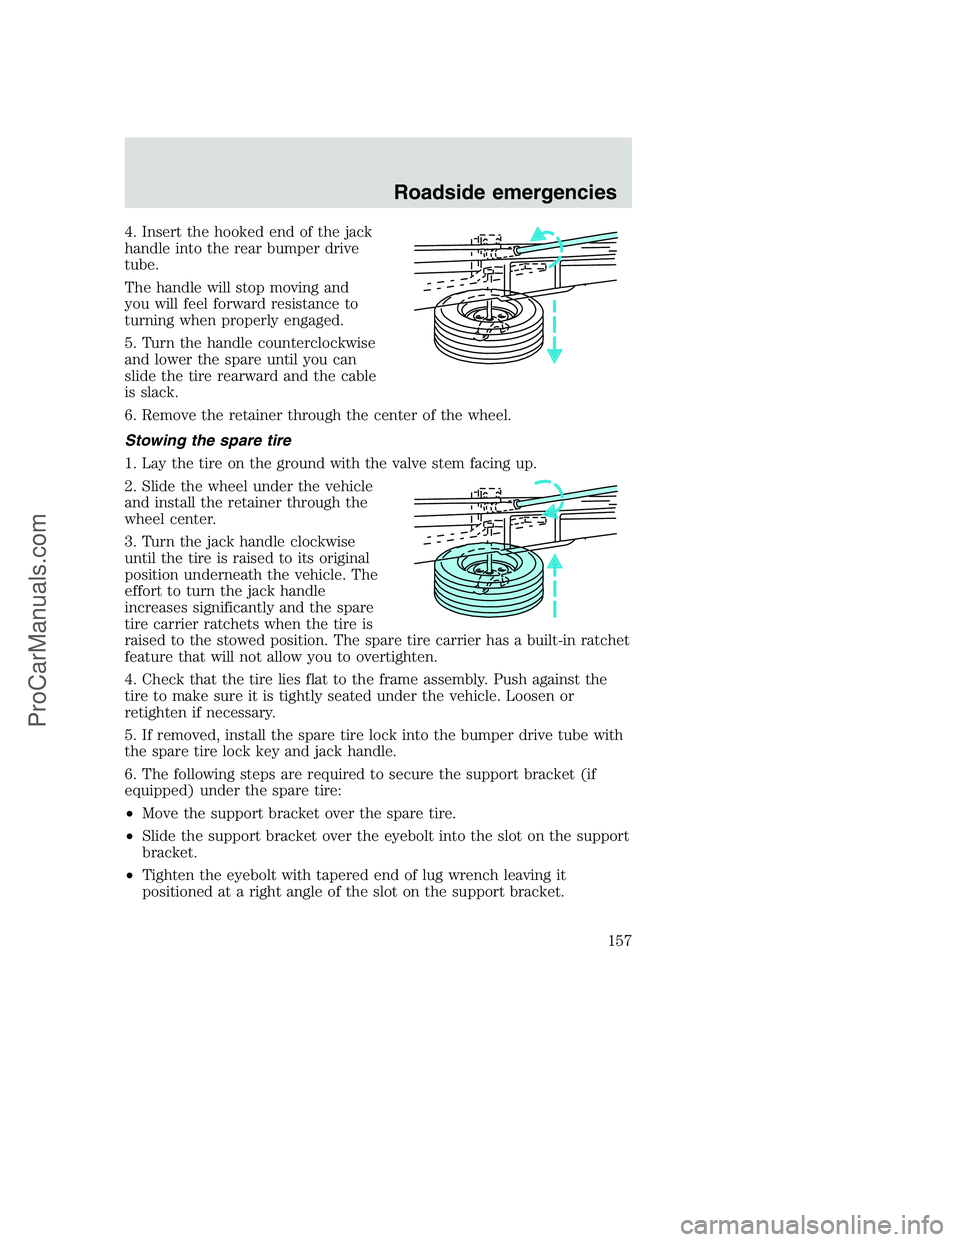
4. Insert the hooked end of the jack
handle into the rear bumper drive
tube.
The handle will stop moving and
you will feel forward resistance to
turning when properly engaged.
5. Turn the handle counterclockwise
and lower the spare until you can
slide the tire rearward and the cable
is slack.
6. Remove the retainer through the center of the wheel.
Stowing the spare tire
1. Lay the tire on the ground with the valve stem facing up.
2. Slide the wheel under the vehicle
and install the retainer through the
wheel center.
3. Turn the jack handle clockwise
until the tire is raised to its original
position underneath the vehicle. The
effort to turn the jack handle
increases significantly and the spare
tire carrier ratchets when the tire is
raised to the stowed position. The spare tire carrier has a built-in ratchet
feature that will not allow you to overtighten.
4. Check that the tire lies flat to the frame assembly. Push against the
tire to make sure it is tightly seated under the vehicle. Loosen or
retighten if necessary.
5. If removed, install the spare tire lock into the bumper drive tube with
the spare tire lock key and jack handle.
6. The following steps are required to secure the support bracket (if
equipped) under the spare tire:
•Move the support bracket over the spare tire.
•Slide the support bracket over the eyebolt into the slot on the support
bracket.
•Tighten the eyebolt with tapered end of lug wrench leaving it
positioned at a right angle of the slot on the support bracket.
Roadside emergencies
157
ProCarManuals.com
Page 165 of 256

The following steps apply to all vehicles:
19. Remove the jack and fully tighten
the lug nuts in the order shown.
20. Stow the flat tire. Refer to
Stowing the spare tireif the vehicle
is equipped with a spare tire carrier.
21. Stow the jack, jack handle and
lug wrench. Make sure the jack is
securely fastened so it does not
rattle when driving.
22. Unblock the wheels.
On vehicles equipped with single rear wheels, retighten the lug nuts to
the specified torque at 800 km (500 miles) after any wheel disturbance
(tire rotation, changing a flat tire, wheel removal, etc.).
On vehicles equipped with dual rear wheels, retighten the wheel lug nuts
to the specified torque at 160 km (100 miles), and again at 800 km (500
miles) of new vehicle operation and after any wheel disturbance (tire
rotation, changing a flat tire, wheel removal, etc.).
Bolt size Wheel lug nut torque*
Nm Lb-ft
M14 x 1.5 200-225 150-165
* Torque specifications are for nut and bolt threads free of dirt and
rust. Use only Ford recommended replacement fasteners.
On all two-piece flat wheel nuts,
apply one drop of motor oil between
the flat washer and the nut. Do not
apply motor oil to the wheel nut
threads or the wheel stud threads.
When a wheel is installed, always remove any corrosion, dirt or
foreign materials present on the mounting surfaces of the wheel or
the surface of the front disc brake hub and rotor that contacts the wheel.
Installing wheels without correct metal-to-metal contact at the wheel
mounting surfaces can cause the wheel nuts to loosen and the wheel to
come off while the vehicle is in motion, resulting in loss of control.
1
3 4
27 6
5 8
2000 F250/350/450/550(f23)
Owners Guide(owners)
USA English(fus)
Roadside emergencies
165
ProCarManuals.com
Page 171 of 256
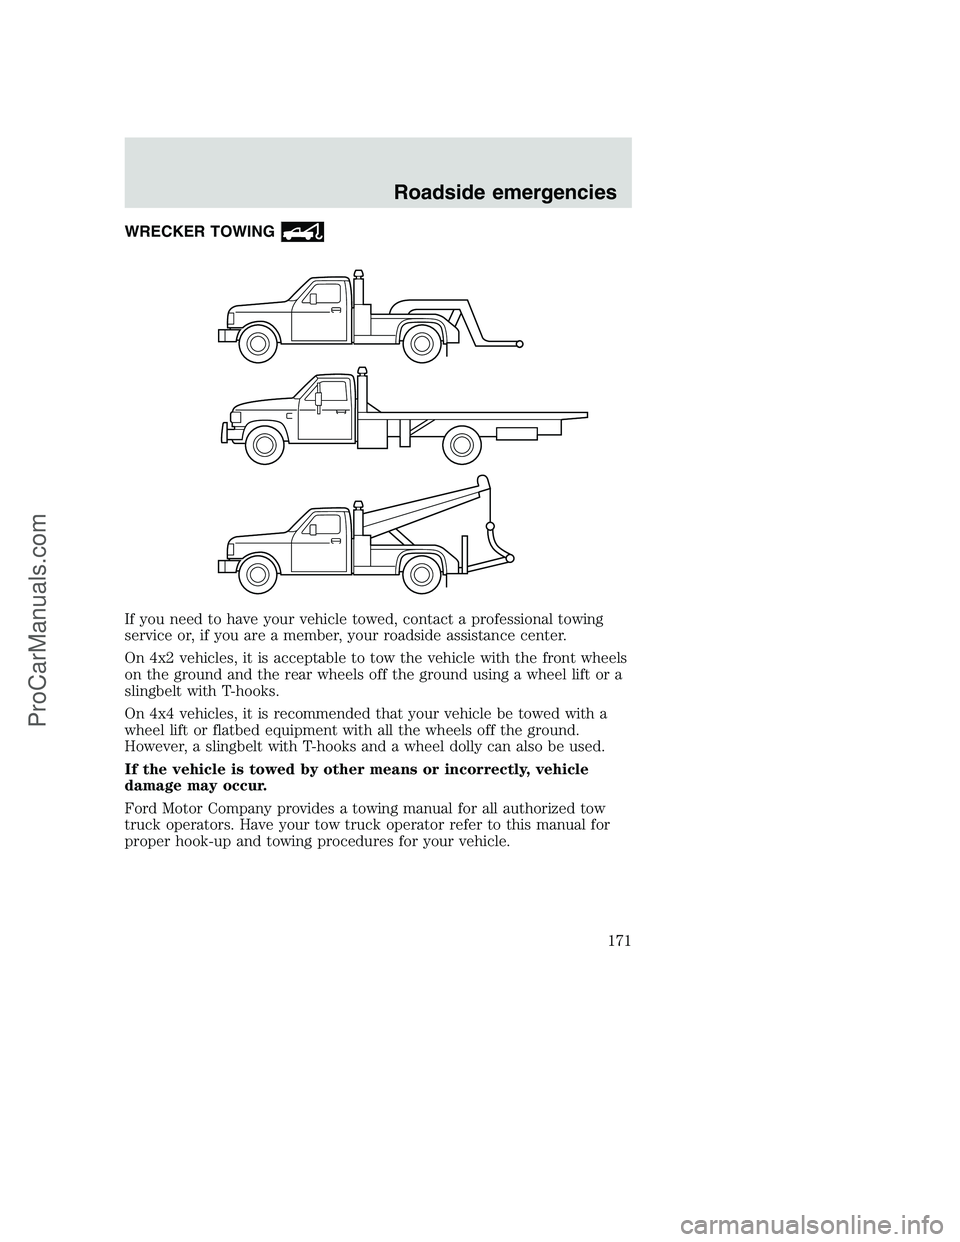
WRECKER TOWING
If you need to have your vehicle towed, contact a professional towing
service or, if you are a member, your roadside assistance center.
On 4x2 vehicles, it is acceptable to tow the vehicle with the front wheels
on the ground and the rear wheels off the ground using a wheel lift or a
slingbelt with T-hooks.
On 4x4 vehicles, it is recommended that your vehicle be towed with a
wheel lift or flatbed equipment with all the wheels off the ground.
However, a slingbelt with T-hooks and a wheel dolly can also be used.
If the vehicle is towed by other means or incorrectly, vehicle
damage may occur.
Ford Motor Company provides a towing manual for all authorized tow
truck operators. Have your tow truck operator refer to this manual for
proper hook-up and towing procedures for your vehicle.
Roadside emergencies
171
ProCarManuals.com
Page 209 of 256

•Using the air conditioner or defroster may reduce fuel economy.
•You may want to turn off the speed control in hilly terrain if
unnecessary shifting between third and fourth gear occurs.
Unnecessary shifting of this type could result in reduced fuel
economy.
•Warming up a vehicle on cold mornings is not required and may
reduce fuel economy.
•Resting your foot on the brake pedal while driving may reduce fuel
economy.
•Combine errands and minimize stop-and-go driving.
Maintenance
•Keep tires properly inflated and use only recommended size.
•Operating a vehicle with the wheels out of alignment will reduce fuel
economy.
•Use recommended engine oil. Refer toLubricant Specifications.
•Perform all regularly scheduled maintenance items. Follow the
recommended maintenance schedule and owner maintenance checks
found in your vehicle Scheduled Maintenance Guide.
Conditions
•Heavily loading a vehicle or towing a trailer may reduce fuel economy
at any speed.
•Carrying unnecessary weight may reduce fuel economy (approximately
0.4 km/L [1 mpg] is lost for every 180 kg [400 lb] of weight carried).
•Adding certain accessories to your vehicle (for example bug
deflectors, rollbars/light bars, running boards, ski/luggage racks) may
reduce fuel economy.
•Using fuel blended with alcohol may lower fuel economy.
•Fuel economy may decrease with lower temperatures during the first
12–16 km (8–10 miles) of driving.
•Driving on flat terrain offers improved fuel economy as compared to
driving on hilly terrain.
•Transmissions give their best fuel economy when operated in the top
cruise gear and with steady pressure on the gas pedal.
Maintenance and care
209
ProCarManuals.com
Page 232 of 256
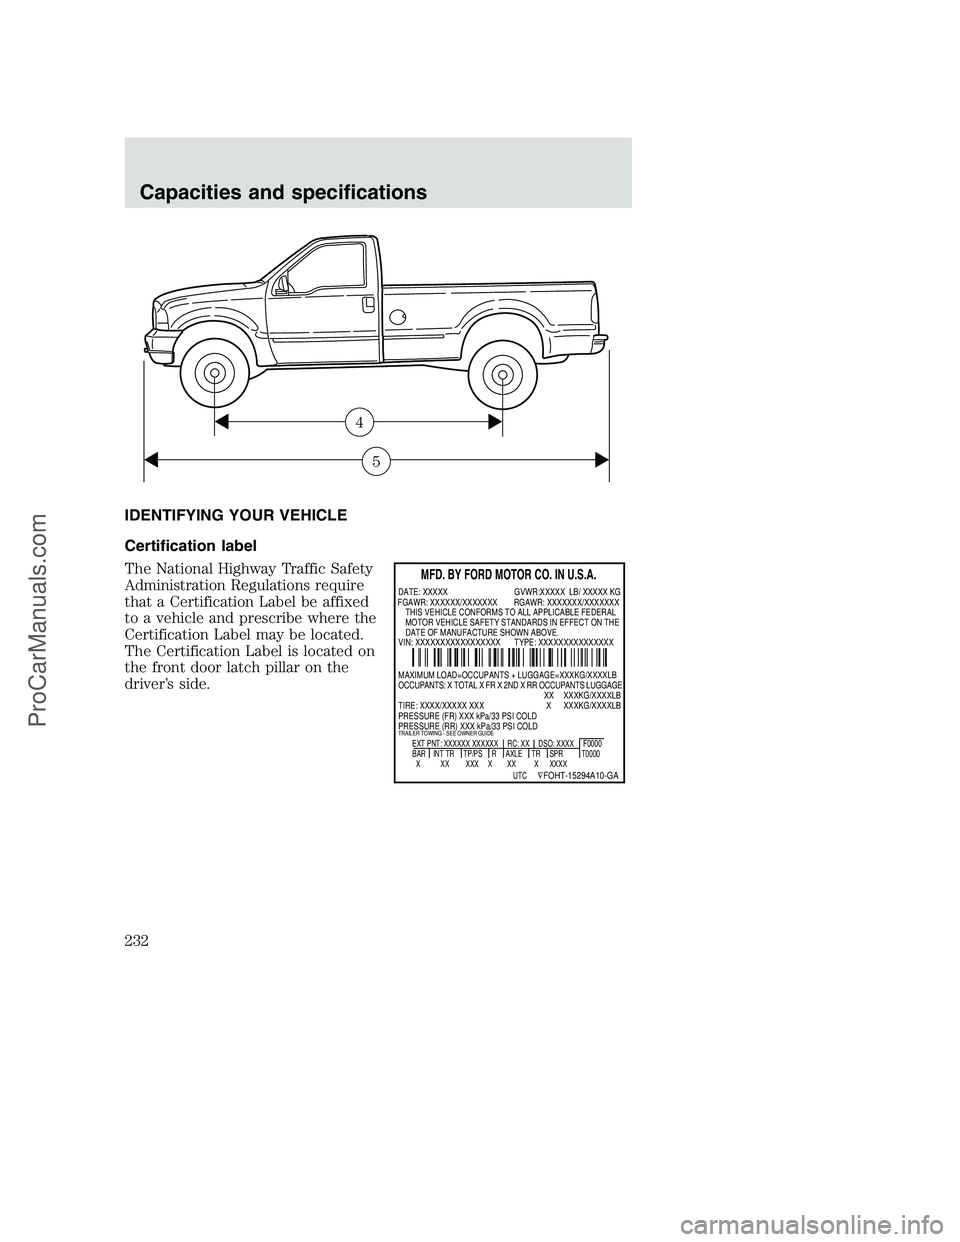
IDENTIFYING YOUR VEHICLE
Certification label
The National Highway Traffic Safety
Administration Regulations require
that a Certification Label be affixed
to a vehicle and prescribe where the
Certification Label may be located.
The Certification Label is located on
the front door latch pillar on the
driver’s side.
5
4
MFD. BY FORD MOTOR CO. IN U.S.A.
EXT PNT: XXXXXX XXXXXX RC: XX DSO: XXXX F0000
BAR INT TR TP/PS R AXLE TR SPR T0000
X XX XXX X XX X XXXX
UTC
∇FOHT-15294A10-GA
MAXIMUM LOAD=OCCUPANTS + LUGGAGE=XXXKG/XXXXLB
OCCUPANTS: X TOTAL X FR X 2ND X RR OCCUPANTS LUGGAGE
XX XXXKG/XXXXLB
TIRE: XXXX/XXXXX XXX X XXXKG/XXXXLB
PRESSURE (FR) XXX kPa/33 PSI COLD
PRESSURE (RR) XXX kPa/33 PSI COLD
TRAILER TOWING - SEE OWNER GUIDE
DATE: XXXXX GVWR:XXXXX LB/ XXXXX KG
VIN: XXXXXXXXXXXXXXXXX TYPE: XXXXXXXXXXXXXXX FGAWR: XXXXXX/XXXXXXX RGAWR: XXXXXXX/XXXXXXX
THIS VEHICLE CONFORMS TO ALL APPLICABLE FEDERAL
MOTOR VEHICLE SAFETY STANDARDS IN EFFECT ON THE
DATE OF MANUFACTURE SHOWN ABOVE.
Capacities and specifications
232
ProCarManuals.com
Page 234 of 256
Ford Extended Service Plan
You can get more protection for your new car or light truck by
purchasing Ford Extended Service Plan (Ford ESP) coverage. Ford ESP
is an optional service contract which is backed by Ford Motor Company
or Ford Motor Service Company (in the U.S.) and Ford of Canada (in
Canada). It provides the following:
•benefits during the warranty period depending on the plan you
purchase (such as: reimbursement for rentals; coverage for certain
maintenance and wear items)
•protection against repair costs after your Bumper to Bumper Warranty
expires
You may purchase Ford ESP from any participating Ford and Lincoln/
Mercury and Ford of Canada dealer. There are several plans available in
various time, distance and deductible combinations which can be tailored
to fit your own driving needs. Ford ESP also offers reimbursement
benefits for towing and rental coverage. (In Hawaii, rules vary. See your
dealer for details.)
When you buy Ford ESP, you receive Peace-of-Mind protection
throughout the United States and Canada, provided by a network of
more than 5,000 participating Ford or Lincoln/Mercury and Ford of
Canada dealers.
If you did not take advantage of the Ford Extended Service Plan at the
time of purchasing your vehicle, you may still be eligible. Please contact
your dealer for further information. Since this information is subject to
change, please ask your dealer for complete details about Ford Extended
Service Plan coverage options.
Getting the service you need
At home
Ford Motor Company and Ford of Canada have authorized dealerships to
service your vehicle. When you need warranty repairs your selling dealer
would like you to return to it for that service, but you may also take your
vehicle to another Ford Motor Company or Ford of Canada dealership
authorized for warranty repairs. Certain warranty repairs require special
training though, so not all dealers are authorized to perform all warranty
repairs. That means that depending on the warranty repair needed, the
vehicle may need to be taken to another dealer. If a particular dealership
can not assist you, then contact the Customer Assistance Center.
Customer assistance
234
ProCarManuals.com
Page 243 of 256

Comfort and convenience
Air conditioner
Bed web net
Cargo nets
Cargo organizers
Cargo storage bin
Cargo trays
Engine block heaters
Power sliding rear window
Tire step
Travel equipment
Auto headlamp system with Daytime Running Lights (DRL)
Bumper mounted bike courier
Daytime running lights (DRL)
Electrochromic inside mirror with compass
Electrochromic inside mirror with compass and temperature display
Fog lights
Framed luggage covers
Heavy-duty battery
Off road lights
Pickup box rails
Running boards and tubular running bars
Speed control
Towing mirrors
Trailer hitch, Class IV
Trailer hitch bars and balls
Trailer hitch mounted bike carrier
Trailer hitch wiring adaptor
Trailer wiring harness
Customer assistance
243
ProCarManuals.com
Page 250 of 256
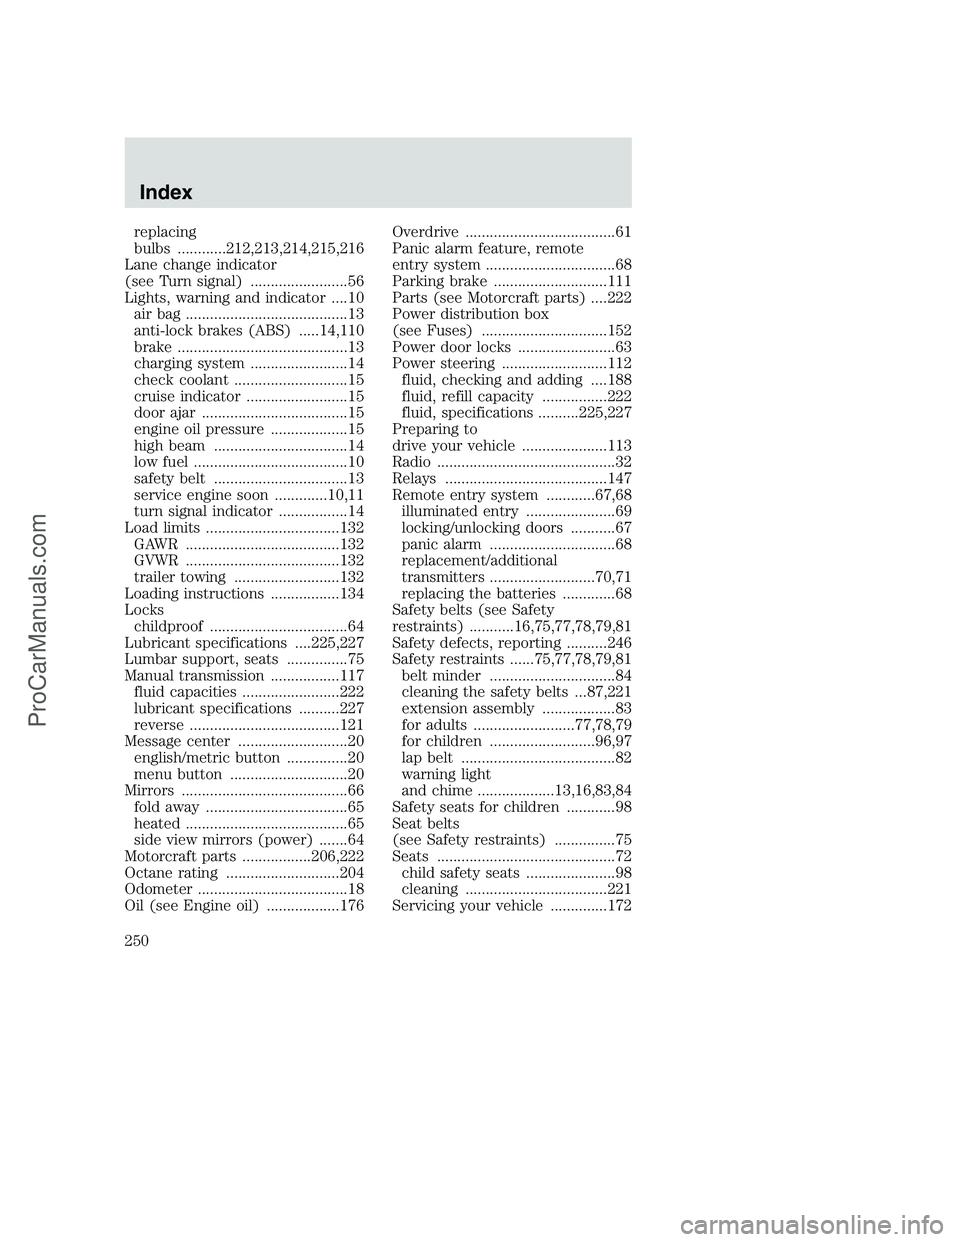
replacing
bulbs ............212,213,214,215,216
Lane change indicator
(see Turn signal) ........................56
Lights, warning and indicator ....10
air bag ........................................13
anti-lock brakes (ABS) .....14,110
brake ..........................................13
charging system ........................14
check coolant ............................15
cruise indicator .........................15
door ajar ....................................15
engine oil pressure ...................15
high beam .................................14
low fuel ......................................10
safety belt .................................13
service engine soon .............10,11
turn signal indicator .................14
Load limits .................................132
GAWR ......................................132
GVWR ......................................132
trailer towing ..........................132
Loading instructions .................134
Locks
childproof ..................................64
Lubricant specifications ....225,227
Lumbar support, seats ...............75
Manual transmission .................117
fluid capacities ........................222
lubricant specifications ..........227
reverse .....................................121
Message center ...........................20
english/metric button ...............20
menu button .............................20
Mirrors .........................................66
fold away ...................................65
heated ........................................65
side view mirrors (power) .......64
Motorcraft parts .................206,222
Octane rating ............................204
Odometer .....................................18
Oil (see Engine oil) ..................176Overdrive .....................................61
Panic alarm feature, remote
entry system ................................68
Parking brake ............................111
Parts (see Motorcraft parts) ....222
Power distribution box
(see Fuses) ...............................152
Power door locks ........................63
Power steering ..........................112
fluid, checking and adding ....188
fluid, refill capacity ................222
fluid, specifications ..........225,227
Preparing to
drive your vehicle .....................113
Radio ............................................32
Relays ........................................147
Remote entry system ............67,68
illuminated entry ......................69
locking/unlocking doors ...........67
panic alarm ...............................68
replacement/additional
transmitters ..........................70,71
replacing the batteries .............68
Safety belts (see Safety
restraints) ...........16,75,77,78,79,81
Safety defects, reporting ..........246
Safety restraints ......75,77,78,79,81
belt minder ...............................84
cleaning the safety belts ...87,221
extension assembly ..................83
for adults .........................77,78,79
for children ..........................96,97
lap belt ......................................82
warning light
and chime ...................13,16,83,84
Safety seats for children ............98
Seat belts
(see Safety restraints) ...............75
Seats ............................................72
child safety seats ......................98
cleaning ...................................221
Servicing your vehicle ..............172
Index
250
ProCarManuals.com