2000 FORD F150 low beam
[x] Cancel search: low beamPage 58 of 280

Troubleshooting the CD changer (if equipped)
The laser beam used in the compact disc player is harmful to the
eyes. Do not attempt to disassemble the case.
If sound skips:
²You may be traveling on a rough road, playing badly scratched discs or
the disc may be dirty. Skipping will not scratch the discs or damage
the player.
If your changer does not work, it may be that:
²A disc is already loaded where you want to insert a disc.
²The disc is inserted with the label surface downward.
²The disc is dusty or defective.
²The player's internal temperature is above 60ÉC (140ÉF). Allow the
player to cool down before operating.
²A disc with format and dimensions not within industry standards is
inserted.
Cleaning compact discs
Inspect all discs for contamination before playing. If necessary, clean
discs only with an approved CD cleaner and wipe from the center out to
the edge. Do not use circular motion.
CD and CD changer care
²Handle discs by their edges only. Never touch the playing surface.
²Do not expose discs to direct sunlight or heat sources for extended
periods of time.
²Do not insert more than one disc into each slot of the CD changer
magazine.
Do not insert any promotional (odd shaped or sized) discs, or
discs with removable labels into the CD player as jamming may
occur.
Cleaning cassette player (if equipped)
Clean the tape player head with a cassette cleaning cartridge after 10 to
12 hours of play in order to maintain the best sound and operation.
Controls and features
58
Page 172 of 280

Installing the snowplow
Removing the blocker beam without installing snowplow
attachment hardware may affect air bag deployment in a crash.
Do not operate the truck unless either the blocker beam or snowplow
attachment hardware is installed on the vehicle.
Read the following instructions before installing a snowplow:
²Front GAWR must not exceed 63% of the GVW. Add ballast weight to
the back of the vehicle, if necessary. Refer to the Safety Compliance
Certification Label to find Front GAWR.
²The Front Axle Accessory Reserve Capacity and the Total Accessory
Reserve Capacity listed on the bottom right of the Safety Compliance
Certification Label will determine whether or not the addition of a
snowplow will overload your vehicle.
²The weight of the snowplow and supporting components distributed to
the front axle must not exceed the front accessory reserve capacity.
²The total weight of the snowplow and aftermarket equipment must
not exceed the Total Accessory Reserve Capacity.
²The weight of the installed snowplow and aftermarket equipment must
not load the vehicle beyond the GAWR (front/rear) and GVWR listed
on the Safety Compliance Certification Label.
²The total weight of the snowplow and aftermarket equipment must be
considered part of the payload and must not exceed the Gross
Combined Weight Rating (GCWR) for towing.
²Federal and most local regulations require additional exterior lamps
for snowplow-equipped vehicles. Consult your dealer for additional
information.
²After installing a snowplow to the vehicle, ensure the vehicle's front
toe alignment and front ride height are within specification (reset if
required). These specifications are located in the vehicle's Workshop
Manual. Adherence to the toe, tire pressures and ride height
specification is important for proper tire wear, ride, handling and
headlight aim. Also, maintain the engine oil and transmission fluid
change intervals following the severe duty schedule.
Do not exceed the GVWR or the GAWR specified on the
certification label.
Driving
172
Page 180 of 280

The fuses are coded as follows.
Fuse/Relay
LocationFuse Amp
RatingPassenger Compartment Fuse
Panel Description
1 15A Audio
2 5A Powertrain Control Module (PCM),
Cluster
3 20A Cigar Lighter, OBD-II Scan Tool
Connector
4 5A Remote Entry Module, Mirrors
5 15A Speed Control Module, Reverse
Lamp, Climate Mode Switch,
Daytime Running Lamp Relay
6 5A Cluster, Brake Shift Interlock
Solenoid, GEM Module
7 Ð Not Used
8 5A Radio, Remote Entry Module, GEM
Module
9 Ð Not Used
10 Ð Not Used
11 30A Front Washer Pump Relay, Wiper
Run/Park Relay, Wiper Hi/LO Relay,
Windshield Wiper Motor
12 Ð Not Used
13 20A Stop Lamp Switch (Lamps),
Turn/Hazard Flasher, Speed Control
Module
14 15A Battery Saver Relay, Interior Lamp
Relay, Accessory Delay Relay (Power
Windows)
15 5A Stop Lamp Switch, (Speed Control,
Brake Shift Interlock, ABS, PCM
Module Inputs), GEM Module, RABS
Test Connector
16 20A Headlamps (Hi Beams), Cluster (Hi
Beam Indicator)
17 Ð Not Used
Roadside emergencies
180
Page 181 of 280

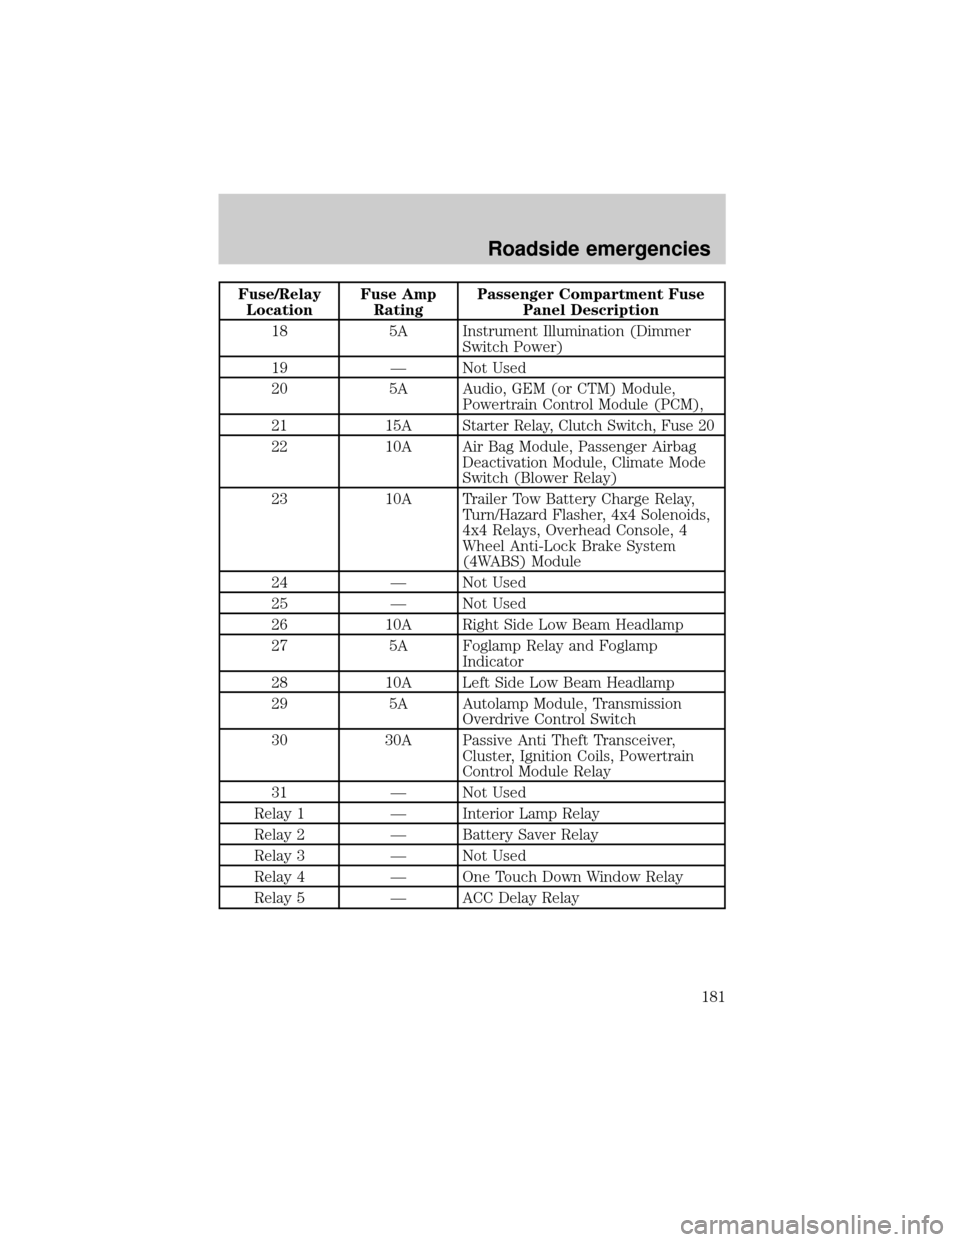
Fuse/Relay
LocationFuse Amp
RatingPassenger Compartment Fuse
Panel Description
18 5A Instrument Illumination (Dimmer
Switch Power)
19 Ð Not Used
20 5A Audio, GEM (or CTM) Module,
Powertrain Control Module (PCM),
21 15A
Starter Relay, Clutch Switch, Fuse 20
22 10A Air Bag Module, Passenger Airbag
Deactivation Module, Climate Mode
Switch (Blower Relay)
23 10A Trailer Tow Battery Charge Relay,
Turn/Hazard Flasher, 4x4 Solenoids,
4x4 Relays, Overhead Console, 4
Wheel Anti-Lock Brake System
(4WABS) Module
24 Ð Not Used
25 Ð Not Used
26 10A Right Side Low Beam Headlamp
27 5A Foglamp Relay and Foglamp
Indicator
28 10A Left Side Low Beam Headlamp
29 5A Autolamp Module, Transmission
Overdrive Control Switch
30 30A Passive Anti Theft Transceiver,
Cluster, Ignition Coils, Powertrain
Control Module Relay
31 Ð Not Used
Relay 1 Ð Interior Lamp Relay
Relay 2 Ð Battery Saver Relay
Relay 3 Ð Not Used
Relay 4 Ð One Touch Down Window Relay
Relay 5 Ð ACC Delay Relay
Roadside emergencies
181
Page 277 of 280

anti-lock brakes (ABS) ....13, 140
anti-theft ...................................13
brake ..........................................12
charging system ........................13
check coolant ............................14
cruise indicator .........................15
door ajar ....................................15
engine oil pressure ...................14
high beam .................................13
low fuel ......................................10
safety belt .................................12
service engine soon ..................11
speed control ............................71
turn signal indicator .................13
Load limits .................................160
GAWR ......................................160
GVWR ......................................160
trailer towing ..........................160
Loading instructions .................161
Locks
autolock .....................................91
Lubricant specifications ...251, 253
Lumbar support, seats .....100±101
M
Manual transmission .................147
fluid capacities ........................248
lubricant specifications ..........253
reverse .....................................152
Mirrors
automatic dimming
rearview mirror .........................77
fold away ...................................81
side view mirrors (power) .......80
Motorcraft parts ................231, 247O
Octane rating ............................229
Odometer .....................................17
Oil (see Engine oil) ..................200
Overdrive .....................................72
P
Panic alarm feature,
remote entry system ..................91
Parking brake ............................141
Parts (see Motorcraft parts) ....247
Pedals (see Power
adjustable foot pedals) ...............22
Power adjustable foot pedals .....22
Power distribution box
(see Fuses) ...............................182
Power door locks ..................79, 91
Power steering ..........................142
fluid, checking and adding ....212
fluid, refill capacity ................248
fluid, specifications .........251, 253
Preparing to
drive your vehicle .....................143
R
Radio ............................................24
Relays ........................................177
Remote entry system ...........89, 91
illuminated entry ......................94
locking/unlocking doors ...........90
panic alarm ...............................91
replacement/additional
transmitters .........................93±94
replacing the batteries .............92
Index
277