Page 83 of 256

Spare coded keys can be purchased from your dealership and
programmed to your anti-theft system. Refer toProgramming spare
SecuriLockykeysfor more information.
If one or both of your coded keys are lost or stolen and you want to
ensure the lost or stolen key will not operate your vehicle, bring your
vehicle and all available coded keys to your dealership for reinitialization.
Theft indicator
The theft indicator in the instrument cluster will operate as follows:
²When the ignition is OFF, the theft indicator will flash briefly every
two seconds to indicate the anti-theft system is protecting your
vehicle.
²When the ignition is turned to ON or START, the theft indicator will
light for three seconds and then go out. If the theft indicator stays on
for an extended period of time or flashes rapidly, have the system
serviced by your dealership or a qualified technician.
Programming spare SecuriLockYkeys
Spare coded keys can be purchased from your dealership and
programmed to your anti-theft system (up to a total of eight keys). Your
dealership can program your new coded key(s) to your vehicle or you
can do it yourself using the following simple procedure. To program a
new coded key yourself, you will need two previously programmed coded
keys (keys that already operate your vehicle's engine). If two previously
programmed coded keys are not available (one or both of your original
keys were lost or stolen), you must bring your vehicle to your dealership
to have the spare coded key(s) programmed.
Procedure to program spare SecuriLockYkeys to your vehicle
New coded keys must have the correct mechanical key cut for your
vehicle.
Conventional (non-coded) keyscannotbe programmed to your vehicle.
You will need to have two previously programmed coded keys and the
new unprogrammed SecuriLockykey readily accessible for timely
implementation of each step in the procedure. Please read and
understand the entire procedure before you begin.
1. Insert the first previously programmed coded key into the ignition and
turn the ignition from OFF to ON (maintain ignition in ON for at least
one second).
Controls and features
83
Page 169 of 256

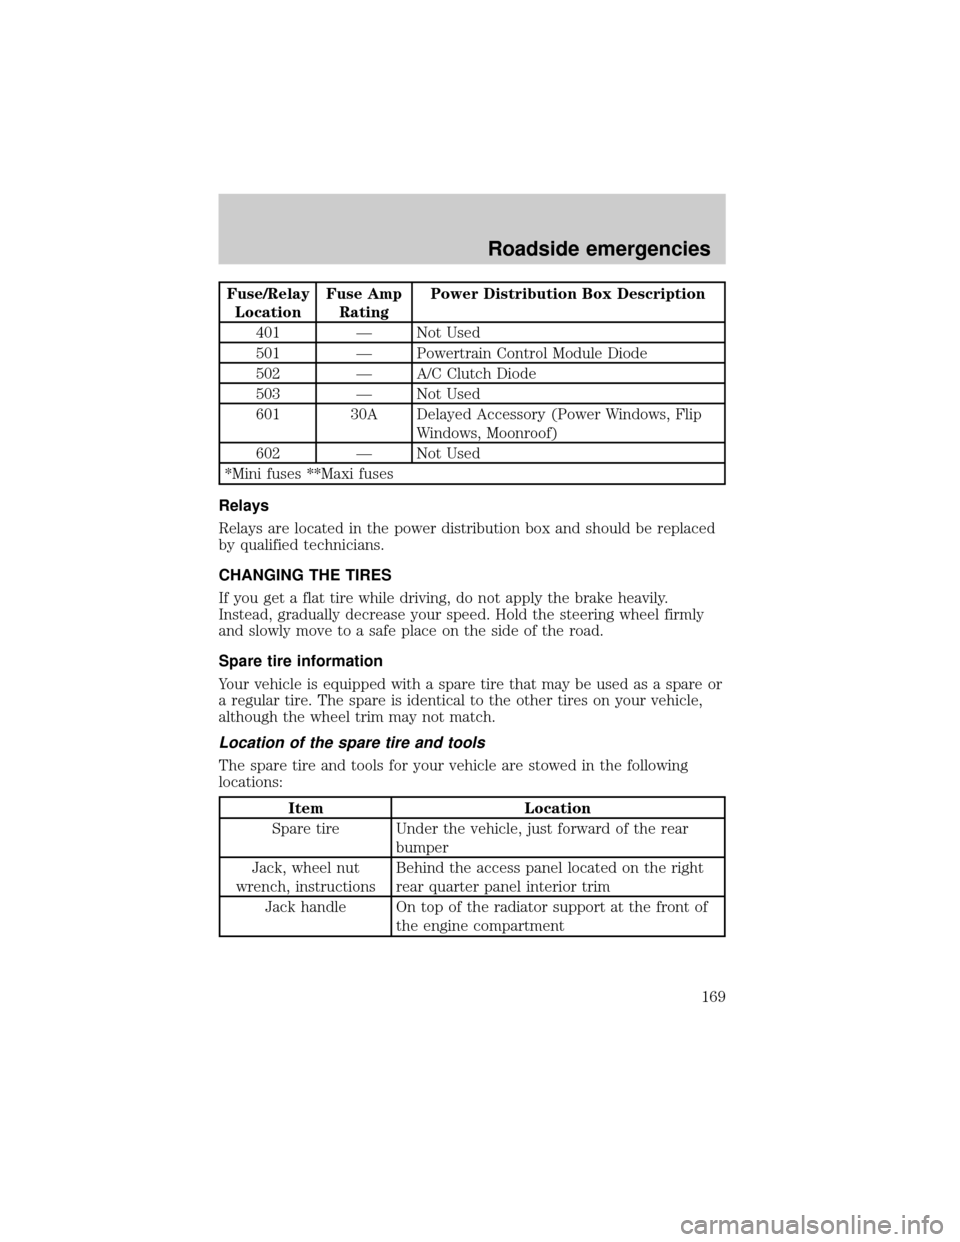
Fuse/Relay
LocationFuse Amp
RatingPower Distribution Box Description
401 Ð Not Used
501 Ð Powertrain Control Module Diode
502 Ð A/C Clutch Diode
503 Ð Not Used
601 30A Delayed Accessory (Power Windows, Flip
Windows, Moonroof)
602 Ð Not Used
*Mini fuses **Maxi fuses
Relays
Relays are located in the power distribution box and should be replaced
by qualified technicians.
CHANGING THE TIRES
If you get a flat tire while driving, do not apply the brake heavily.
Instead, gradually decrease your speed. Hold the steering wheel firmly
and slowly move to a safe place on the side of the road.
Spare tire information
Your vehicle is equipped with a spare tire that may be used as a spare or
a regular tire. The spare is identical to the other tires on your vehicle,
although the wheel trim may not match.
Location of the spare tire and tools
The spare tire and tools for your vehicle are stowed in the following
locations:
Item Location
Spare tire Under the vehicle, just forward of the rear
bumper
Jack, wheel nut
wrench, instructionsBehind the access panel located on the right
rear quarter panel interior trim
Jack handle On top of the radiator support at the front of
the engine compartment
Roadside emergencies
169
Page 170 of 256

Removing the jack handle
1. Open the hood.
2. Unsnap the end of the handle that is retained by the clip on the top of
the windshield washer bottle.
3. Unsnap the shaft of the handle from the two retaining clips attached
to the top of the radiator shroud.
Removing the jack and tools
1. Locate the access panel on the right rear quarter panel interior trim.
Lift the two panel retaining clips and remove the panel.
2. Unsnap the wheel lug nut wrench and instructions from their retaining
bracket.
3. Remove the jack by turning the thumbwheel counterclockwise to
relieve tension against the stowage bracket.
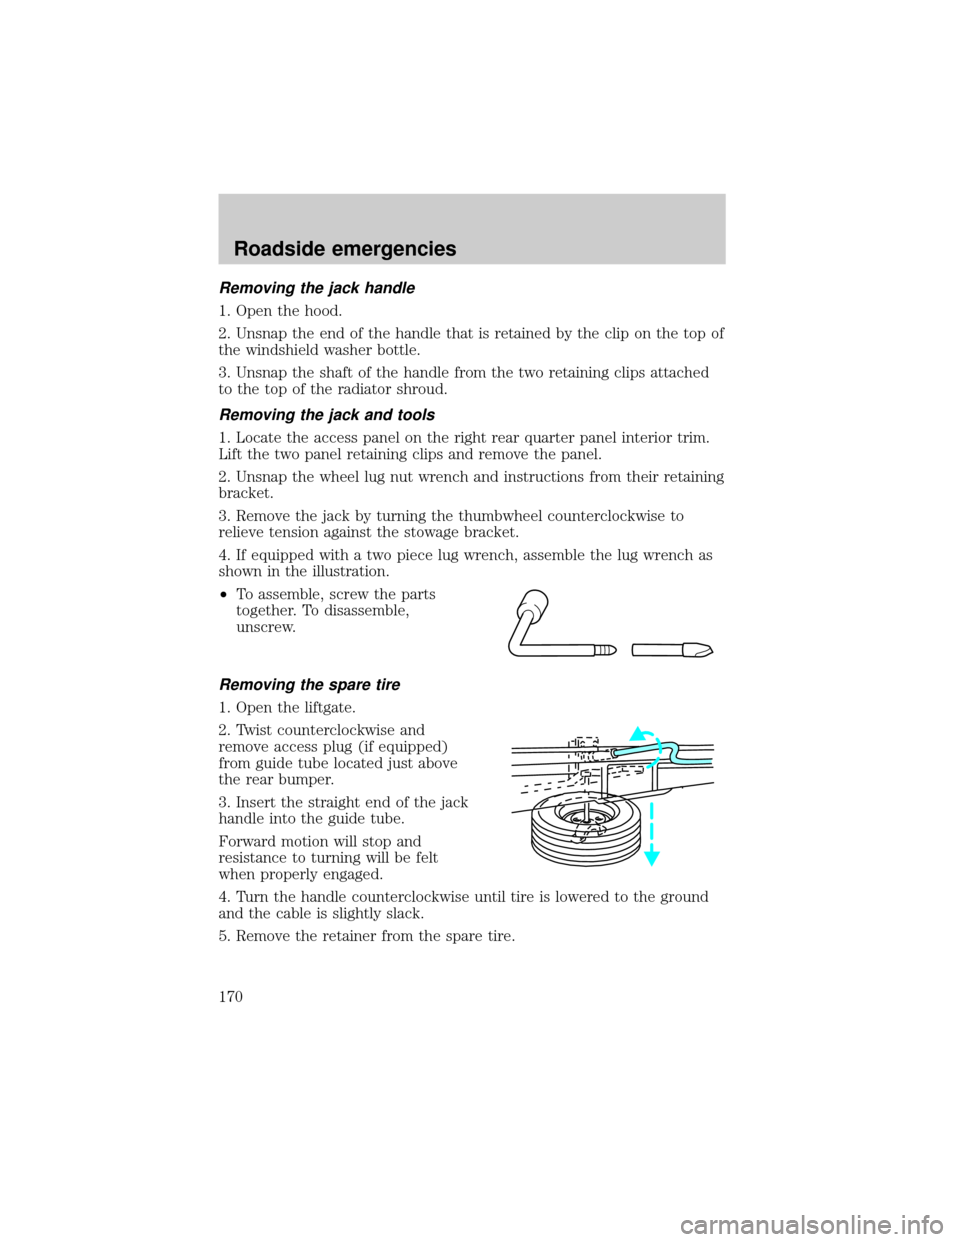
4. If equipped with a two piece lug wrench, assemble the lug wrench as
shown in the illustration.
²To assemble, screw the parts
together. To disassemble,
unscrew.
Removing the spare tire
1. Open the liftgate.
2. Twist counterclockwise and
remove access plug (if equipped)
from guide tube located just above
the rear bumper.
3. Insert the straight end of the jack
handle into the guide tube.
Forward motion will stop and
resistance to turning will be felt
when properly engaged.
4. Turn the handle counterclockwise until tire is lowered to the ground
and the cable is slightly slack.
5. Remove the retainer from the spare tire.
Roadside emergencies
170
Page 171 of 256

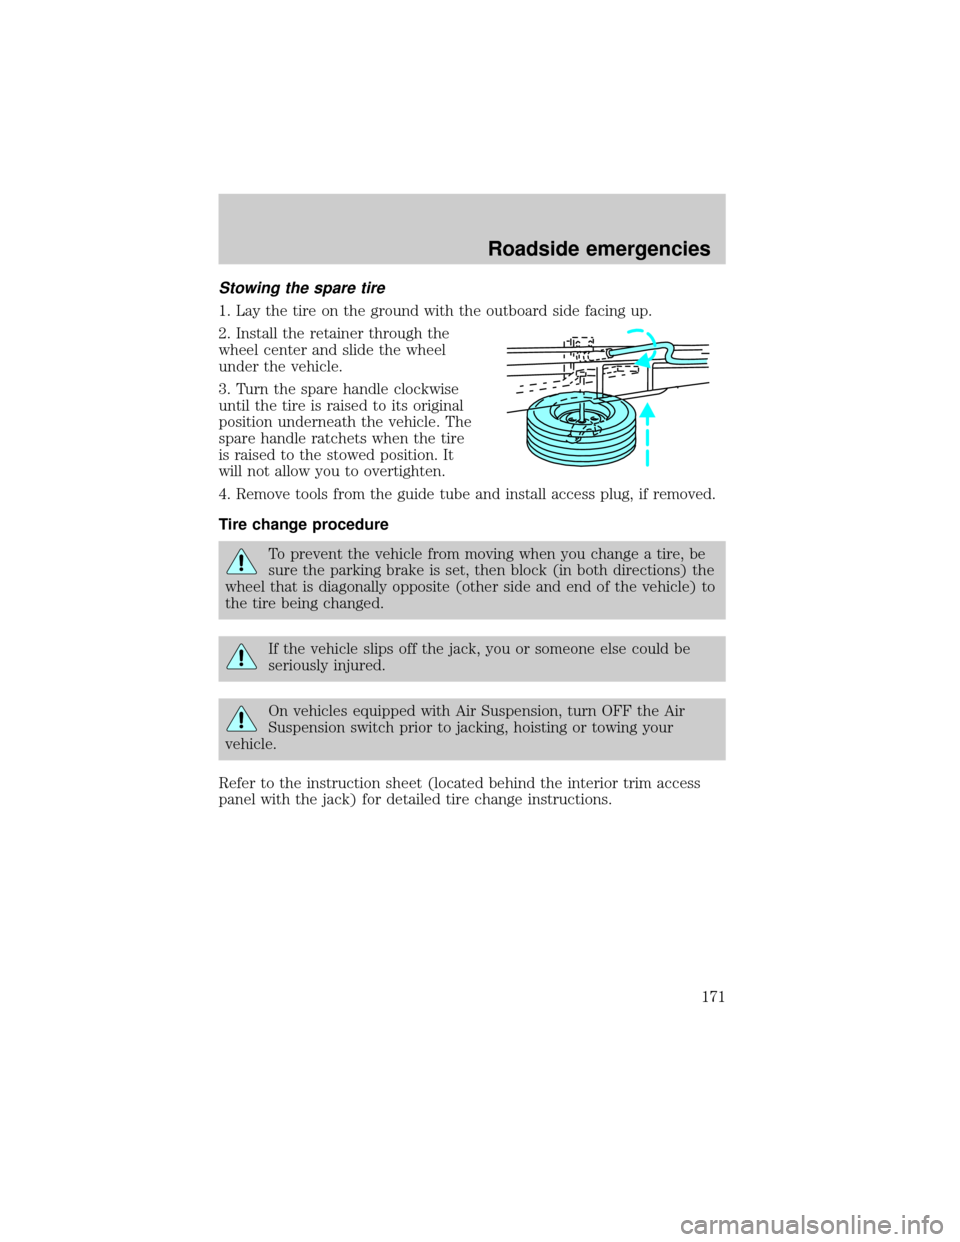
Stowing the spare tire
1. Lay the tire on the ground with the outboard side facing up.
2. Install the retainer through the
wheel center and slide the wheel
under the vehicle.
3. Turn the spare handle clockwise
until the tire is raised to its original
position underneath the vehicle. The
spare handle ratchets when the tire
is raised to the stowed position. It
will not allow you to overtighten.
4. Remove tools from the guide tube and install access plug, if removed.
Tire change procedure
To prevent the vehicle from moving when you change a tire, be
sure the parking brake is set, then block (in both directions) the
wheel that is diagonally opposite (other side and end of the vehicle) to
the tire being changed.
If the vehicle slips off the jack, you or someone else could be
seriously injured.
On vehicles equipped with Air Suspension, turn OFF the Air
Suspension switch prior to jacking, hoisting or towing your
vehicle.
Refer to the instruction sheet (located behind the interior trim access
panel with the jack) for detailed tire change instructions.
Roadside emergencies
171
Page 172 of 256
1. Park on a level surface, activate
hazard flashers and set the parking
brake.
2. Place gearshift lever in P (Park)
and turn engine OFF.
3. Block the diagonally opposite
wheel.
4. Obtain the spare tire and jack
from their storage locations.
5. Use the tip of the lug wrench to
remove any wheel trim.
6. Loosen each wheel lug nut
one-half turn counterclockwise but
do not remove them until the wheel
is raised off the ground.
BRAKE
HOOD
Roadside emergencies
172
Page 174 of 256
²Front (4x4)
²Rear
To lessen the risk of
personal injury, do not put
any part of your body under the
vehicle while changing a tire. Do
not start the engine when your
vehicle is on the jack. The jack is
only meant for changing the tire.
²Never use the front or rear
differential as a jacking point.
9. Remove the lug nuts with the lug wrench.
10. Replace the flat tire with the spare tire, making sure the valve stem
is facing outward. Reinstall the lug nuts until the wheel is snug against
the hub. Do not fully tighten the lug nuts until the wheel has been
lowered.
11. Lower the wheel by turning the jack handle counterclockwise.
Roadside emergencies
174
Page 202 of 256

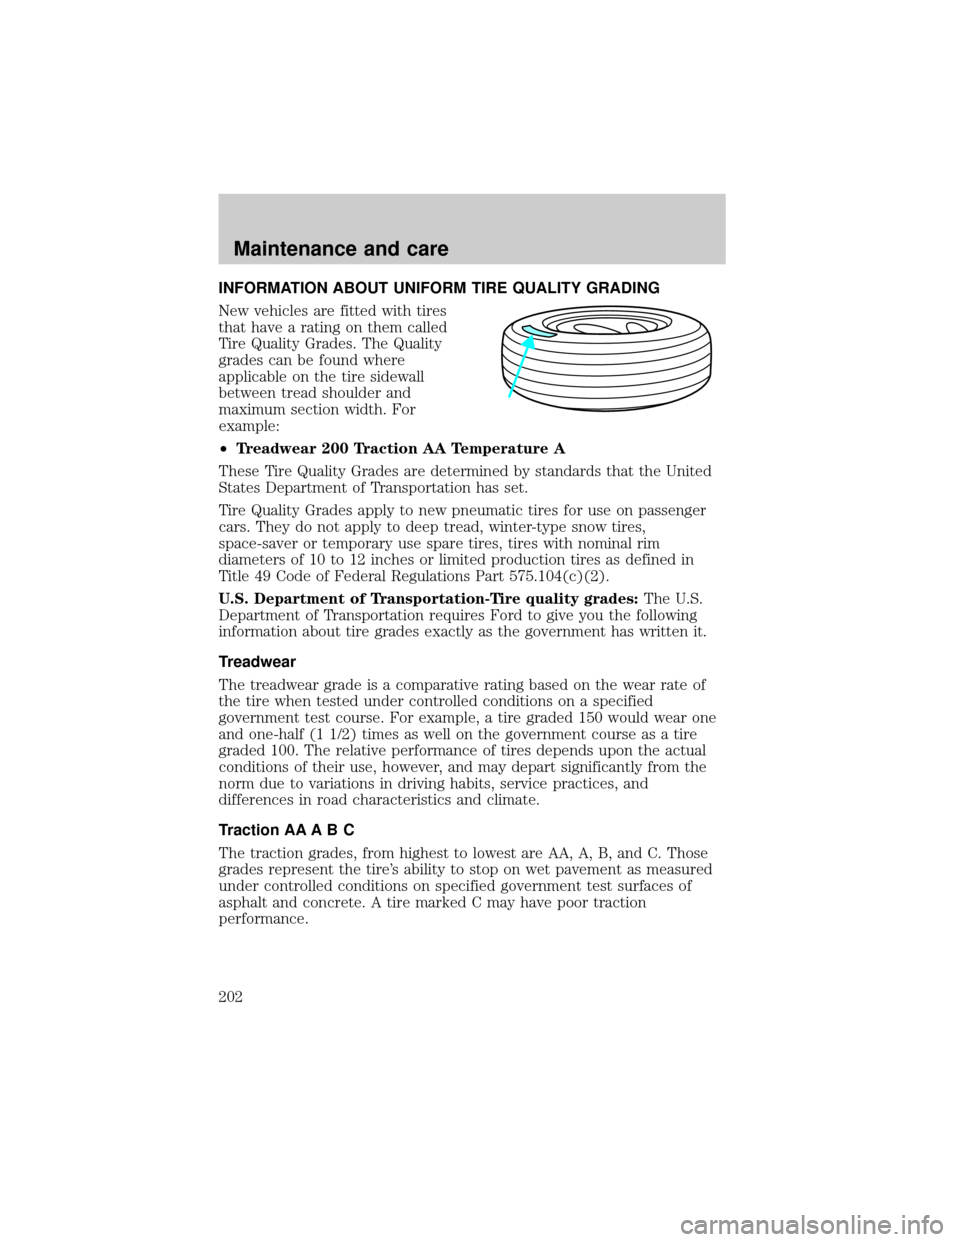
INFORMATION ABOUT UNIFORM TIRE QUALITY GRADING
New vehicles are fitted with tires
that have a rating on them called
Tire Quality Grades. The Quality
grades can be found where
applicable on the tire sidewall
between tread shoulder and
maximum section width. For
example:
²Treadwear 200 Traction AA Temperature A
These Tire Quality Grades are determined by standards that the United
States Department of Transportation has set.
Tire Quality Grades apply to new pneumatic tires for use on passenger
cars. They do not apply to deep tread, winter-type snow tires,
space-saver or temporary use spare tires, tires with nominal rim
diameters of 10 to 12 inches or limited production tires as defined in
Title 49 Code of Federal Regulations Part 575.104(c)(2).
U.S. Department of Transportation-Tire quality grades:The U.S.
Department of Transportation requires Ford to give you the following
information about tire grades exactly as the government has written it.
Treadwear
The treadwear grade is a comparative rating based on the wear rate of
the tire when tested under controlled conditions on a specified
government test course. For example, a tire graded 150 would wear one
and one-half (1 1/2) times as well on the government course as a tire
graded 100. The relative performance of tires depends upon the actual
conditions of their use, however, and may depart significantly from the
norm due to variations in driving habits, service practices, and
differences in road characteristics and climate.
Traction AA A B C
The traction grades, from highest to lowest are AA, A, B, and C. Those
grades represent the tire's ability to stop on wet pavement as measured
under controlled conditions on specified government test surfaces of
asphalt and concrete. A tire marked C may have poor traction
performance.
Maintenance and care
202
Page 229 of 256

amount of transmission fluid and fluid level should be set by the
indication on the dipstick's normal operating range.
3Use Ford Premium Engine Coolant (green in color). DO NOT USE Ford
Extended Life Engine Coolant (orange in color). Refer toAdding engine
coolant, in the Maintenance and Care chapter.
4Your vehicle's rear axle is filled with a synthetic rear axle lubricant and
is considered lubricated for life. These lubricants are not to be checked
or changed unless a leak is suspected, service is required or the axle has
been submerged in water. The axle lubricant should be changed any time
the axle has been submerged in water. Add 118 ml (4 oz.) of Additive
Friction Modifier C8AZ-19B546-A or equivalent meeting Ford
specification EST-M2C118±A for complete refill of Traction-Lok axles.
Service refill capacities are determined by filling the rear axle 6 mm to
14 mm (1/4 inch to 9/16 inch) below the bottom of the filler hole.
LUBRICANT SPECIFICATIONS
ItemFord part
nameFord part
numberFord
specification
Hinges, latches,
striker plates
and rotors, seat
tracks, fuel filler
door hinge and
springMulti-Purpose
GreaseDOAZ-19584-AA
or
F5AZ-19G209-AAESB-M1C93-B or
ESR-M1C159-A
Lock cylinders,
swing-away
spare tire carrier
padlockPenetrating and
Lock LubricantE8AZ-19A501-B none
Brake fluid High
Performance
DOT 3 Motor
Vehicle Brake
FluidC6AZ-19542-AB ESA-M6C25-A
and DOT 3
Capacities and specifications
229