Page 67 of 256
TILT STEERING
Pull the tilt steering control toward
you to move the steering wheel up
or down. Hold the control while
adjusting the wheel to the desired
position, then release the control.
Never adjust the steering wheel when the vehicle is moving.
HAZARD FLASHER
For information on the hazard flasher control, refer toHazard flasherin
theRoadside emergencieschapter.
WINDSHIELD WIPER/WASHER CONTROLS
Rotate the windshield wiper control
to the desired interval, low or high
speed position.
The bars of varying length are for
intermittent wipers. When in this
position rotate the control upward
for fast intervals and downward for
slow intervals.
Controls and features
67
Page 92 of 256

SEATING
Adjustable head restraints (if equipped)
Your vehicle's seats may be equipped with head restraints which are
vertically adjustable. The purpose of these head restraints is to help limit
head motion in the event of a rear collision. To properly adjust your head
restraints, lift the head restraint so that it is located directly behind your
head or as close to that position as possible. Refer to the following to
raise and lower the head restraints.
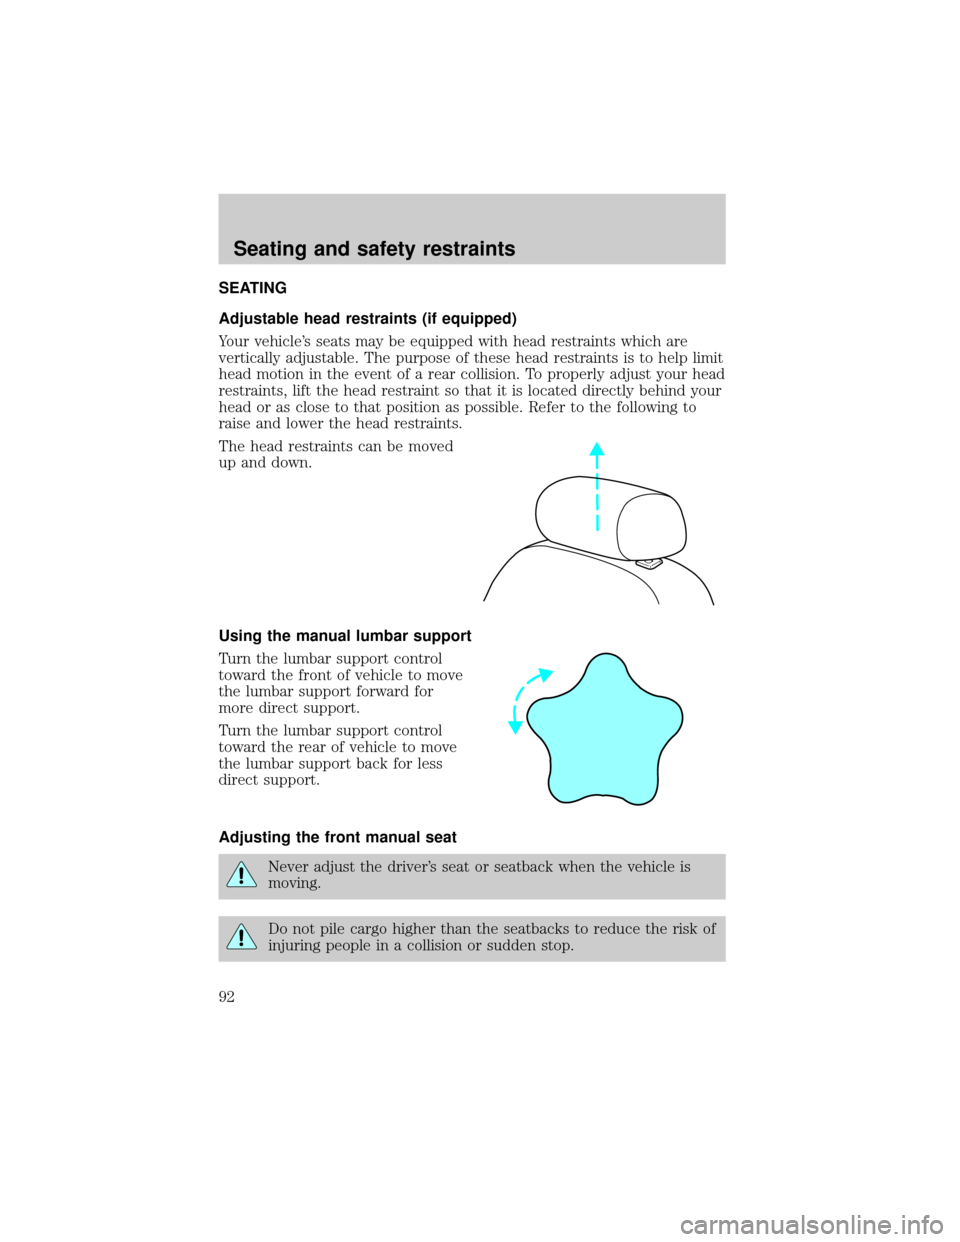
The head restraints can be moved
up and down.
Using the manual lumbar support
Turn the lumbar support control
toward the front of vehicle to move
the lumbar support forward for
more direct support.
Turn the lumbar support control
toward the rear of vehicle to move
the lumbar support back for less
direct support.
Adjusting the front manual seat
Never adjust the driver's seat or seatback when the vehicle is
moving.
Do not pile cargo higher than the seatbacks to reduce the risk of
injuring people in a collision or sudden stop.
Seating and safety restraints
92
Page 101 of 256
2. Before removing the seat, be sure
that the detachable anchor tongue is
stowed flat into the vehicle floor.
3. Use the black plastic clip (located
just above the detachable anchor) to
stow the loose seat belt.
²Pull the seat release lever located
on the lower right side of the
seatback while pushing the
seatback down into the seat
cushion.
²The seatback will latch into place.
4. Lift the seat release bar located
at the center of the seat near the
floor to release the floor latches.
5. While pulling up on the release
bar, lift the seat up and out of the floor tubs and roll seat rearward.
6. With assistance, lift the seat out of the vehicle.
Seating and safety restraints
101
Page 103 of 256
3rd row tip/stow feature
The 3rd row seat has a tip/stow feature to increase cargo space without
removing the seat from the vehicle.
To put seat in tip/stow position:
1. Pull the seat release lever located
on the lower right side of the
seatback while pushing the seatback
down into the seat cushion.
2. The seatback will latch into place.
3. To release the rear floor latches
of the 3rd row seat, lift the seat
release bar located at the center of
the seat near the floor to release the
floor latches.
4. Lift back of seat up and hold.
5. Lift latch up and out of floor tub
to upright position using the strap
on the latch.
Seating and safety restraints
103
Page 158 of 256
Disconnect the wiring to the trailer before backing the trailer into the
water. Reconnect the wiring to the trailer after the trailer is removed
from the water.
LUGGAGE RACK (IF EQUIPPED)
The rear crossbar can be adjusted to fit the item being carried. The front
crossbar does not move.
To adjust the luggage rack, push the
adjustment lever forward (toward
the front of the vehicle), then slide
the crossbar forward and lock the
adjusting levers by pushing them
down (toward the back of the
vehicle). Pull the crossbar rearward
to ensure that it is locked in place.
Load luggage at the front crossbar and adjust the rear crossbar as
necessary.
²Do not exceed 90.7 kg (200 lb) of luggage if the weight is placed
directly on the crossbars.
²Do not exceed 68 kg (150 lb) if the weight is resting directly on the
roof.
Use adjustable tie down loops to secure the load.
Driving
158
Page 213 of 256

²Perform all regularly scheduled maintenance items. Follow the
recommended maintenance schedule and owner maintenance checks
found in your vehicle Scheduled Maintenance Guide.
Conditions
²Heavily loading a vehicle or towing a trailer may reduce fuel economy
at any speed.
²Carrying unnecessary weight may reduce fuel economy (approximately
0.4 km/L [1 mpg] is lost for every 180 kg [400 lb] of weight carried).
²Adding certain accessories to your vehicle (for example bug
deflectors, rollbars/light bars, running boards, ski/luggage racks) may
reduce fuel economy.
²Using fuel blended with alcohol may lower fuel economy.
²Fuel economy may decrease with lower temperatures during the first
12±16 km (8±10 miles) of driving.
²Driving on flat terrain offers improved fuel economy as compared to
driving on hilly terrain.
²Transmissions give their best fuel economy when operated in the top
cruise gear and with steady pressure on the gas pedal.
²Four-wheel-drive operation (if equipped) is less fuel efficient than
two-wheel-drive operation.
²Close windows for high speed driving.
EPA window sticker
Every new vehicle should have the EPA window sticker. Contact your
dealer if the window sticker is not supplied with your vehicle. The EPA
window sticker should be your guide for the fuel economy comparisons
with other vehicles.
It is important to note the box in the lower left corner of the window
sticker. These numbers represent the Range of L/100 km (MPG)
expected on the vehicle under optimum conditions. Your fuel economy
may vary depending upon the method of operation and conditions.
EMISSION CONTROL SYSTEM
Your vehicle is equipped with various emission control components and a
catalytic converter which will enable your vehicle to comply with
applicable exhaust emission standards. To make sure that the catalytic
Maintenance and care
213
Page 234 of 256

IDENTIFYING YOUR VEHICLE
Certification label
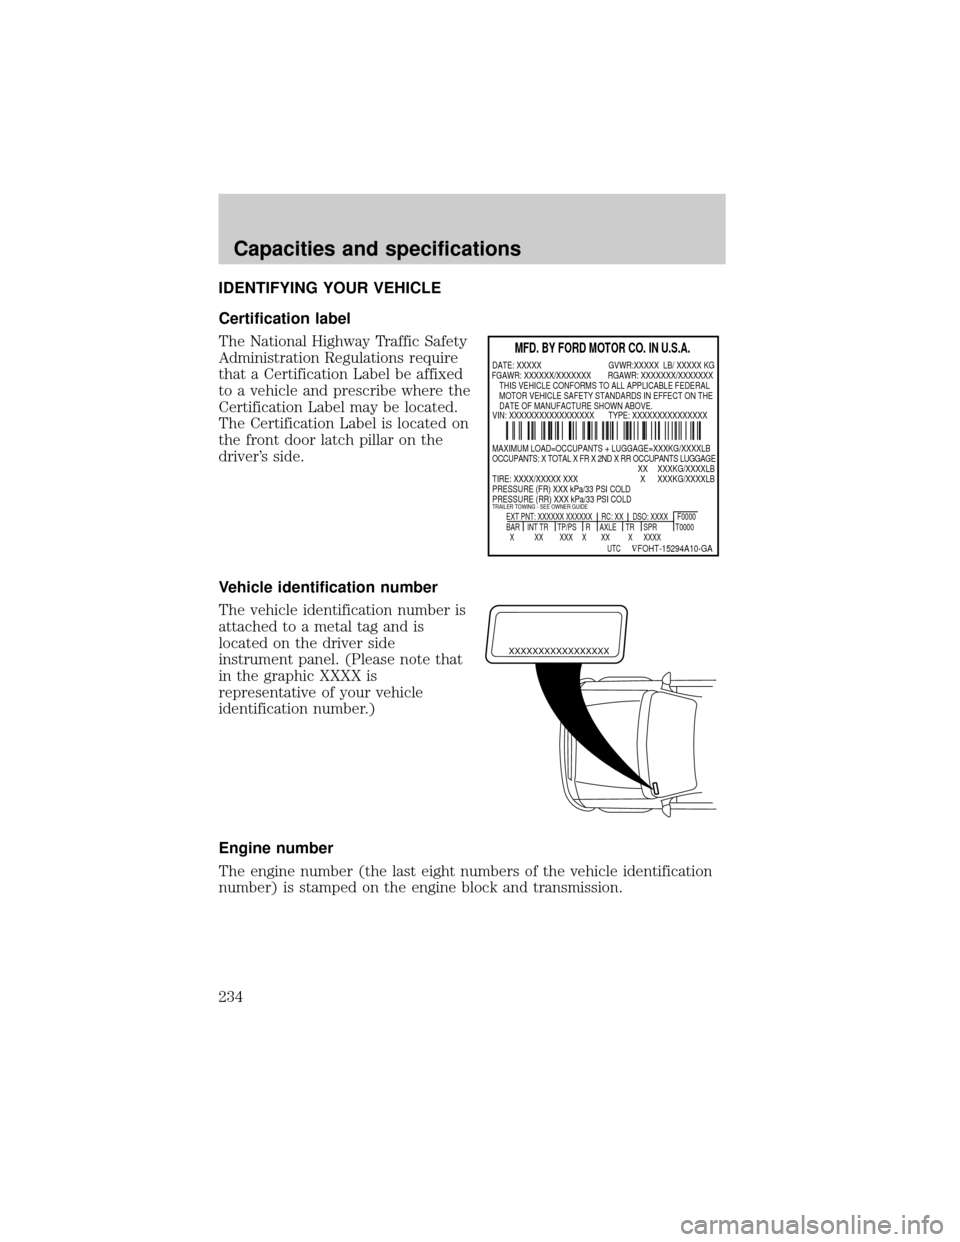
The National Highway Traffic Safety
Administration Regulations require
that a Certification Label be affixed
to a vehicle and prescribe where the
Certification Label may be located.
The Certification Label is located on
the front door latch pillar on the
driver's side.
Vehicle identification number
The vehicle identification number is
attached to a metal tag and is
located on the driver side
instrument panel. (Please note that
in the graphic XXXX is
representative of your vehicle
identification number.)
Engine number
The engine number (the last eight numbers of the vehicle identification
number) is stamped on the engine block and transmission.
MFD. BY FORD MOTOR CO. IN U.S.A.
EXT PNT: XXXXXX XXXXXX RC: XX DSO: XXXX F0000
BAR INT TR TP/PS R AXLE TR SPR T0000
X XX XXX X XX X XXXX
UTC
ÑFOHT-15294A10-GA
MAXIMUM LOAD=OCCUPANTS + LUGGAGE=XXXKG/XXXXLB
OCCUPANTS: X TOTAL X FR X 2ND X RR OCCUPANTS LUGGAGE
XX XXXKG/XXXXLB
TIRE: XXXX/XXXXX XXX X XXXKG/XXXXLB
PRESSURE (FR) XXX kPa/33 PSI COLD
PRESSURE (RR) XXX kPa/33 PSI COLD
TRAILER TOWING - SEE OWNER GUIDE
DATE: XXXXX GVWR:XXXXX LB/ XXXXX KG
VIN: XXXXXXXXXXXXXXXXX TYPE: XXXXXXXXXXXXXXX FGAWR: XXXXXX/XXXXXXX RGAWR: XXXXXXX/XXXXXXX
THIS VEHICLE CONFORMS TO ALL APPLICABLE FEDERAL
MOTOR VEHICLE SAFETY STANDARDS IN EFFECT ON THE
DATE OF MANUFACTURE SHOWN ABOVE.
XXXXXXXXXXXXXXXXX
Capacities and specifications
234
Page 244 of 256
Comfort and convenience
Cabin air filter
Cargo nets
Cargo organizers
Cargo trays
Dash trim (wood grain)
Engine block heaters
Tire step
Travel equipment
Auto headlamps with DRL
Bumper mount bike carrier
Daytime running lights (DRL)
Factory luggage rack adaptors
Fog lights
Framed luggage covers
Heavy-duty battery
Luggage/cargo basket
Removable luggage rack (Track rider bars)
Removable luggage rack adapters
Running boards (Molded and tubular)
Snow traction cables
Soft luggage cover
Towing mirrors (Removable and permanent)
Trailer hitch (Class III)
Trailer hitch bars and balls
Trailer hitch wiring adaptor
Protection and appearance equipment
Air bag anti-theft locks
Car/truck covers
Cargo liners, interior
Customer assistance
244