Page 129 of 200
OPENING THE HOOD
1. Inside the vehicle, pull the hood
release handle located under the
bottom left corner of the instrument
panel.
2. Go to the front of the vehicle and release the auxiliary latch that is
located under the front center of the hood.
3. Lift the hood and secure it with the prop rod.
Maintenance and care
129
Page 132 of 200
ENGINE OIL
Checking the engine oil
Refer to the Scheduled Maintenance Guide for the appropriate intervals
for checking the engine oil.
1. Make sure the vehicle is on level ground.
2. Turn the engine off and wait a few minutes for the oil to drain into the
oil pan.
3. Set the parking brake and ensure the gearshift is securely latched in P
(automatic transaxle) or 1st (manual transaxle).
4. Open the hood. Protect yourself from engine heat.
5. Locate and carefully remove the engine oil indicator (dipstick).
²2.0L SOHC I4 engine
ADDFULL
Maintenance and care
132
Page 163 of 200

engine must warm up to its normal operating temperature. Once started,
do not turn off the engine until the above driving cycle is complete.
BULBS
Replacing exterior bulbs
It is a good idea to check the operation of the following lights frequently:
²Headlamps
²Turn signals
²Foglamps (if equipped)
²High-mount brakelamp
²Tail lamps
²Brakelamps
²Backup lamps
²License plate lamp
²Hazard flashers
Do not remove lamp bulbs unless they will be replaced immediately. If a
bulb is removed for an extended period of time, contaminants may enter
the lamp housings and affect performance.
Replacing headlamp bulbs
1. Make sure that the headlamps are turned OFF.
2. Open the hood and disconnect the headlamp wiring socket from the
in-line connector. This will make it easier to change the bulb.
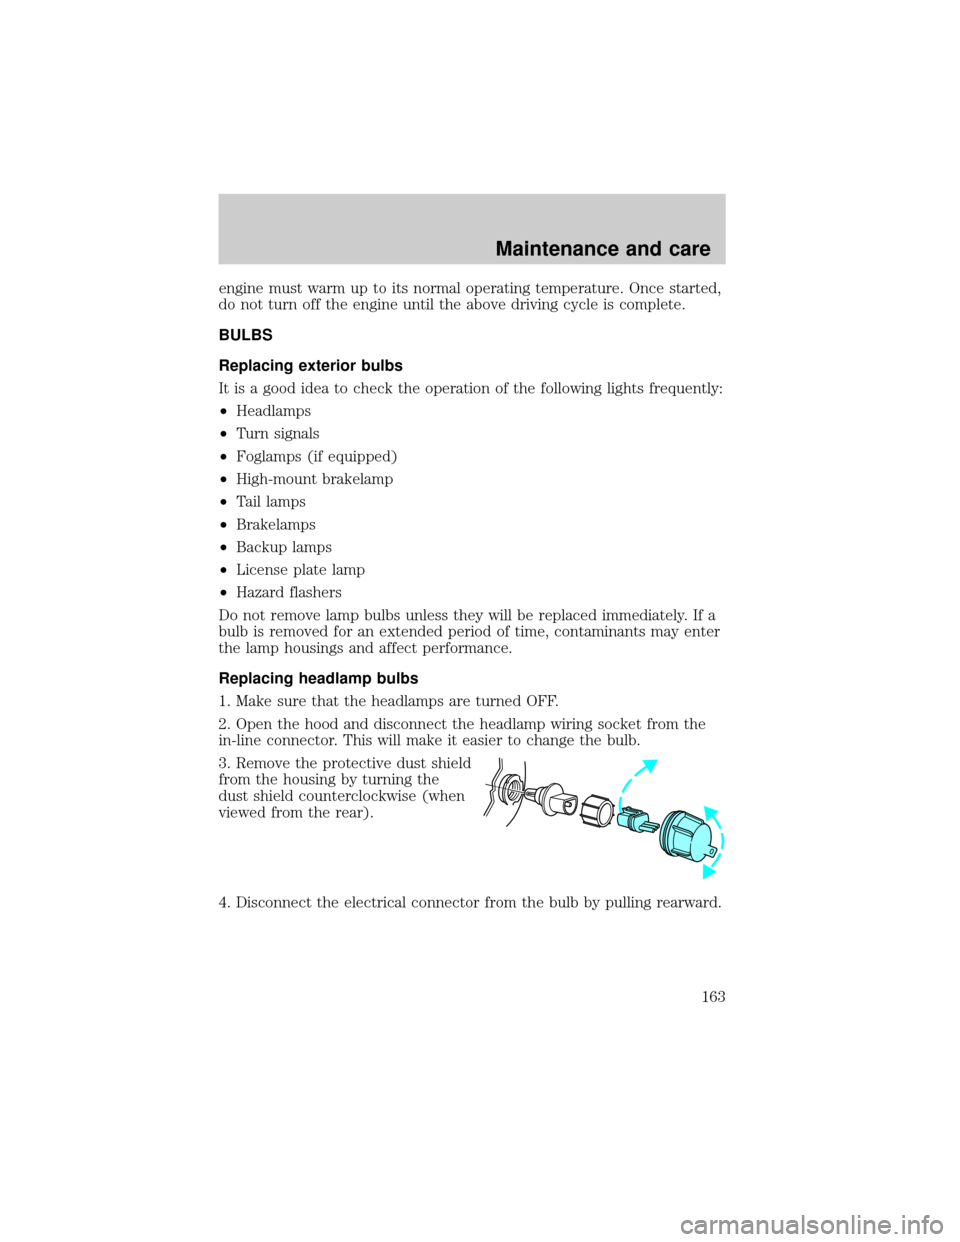
3. Remove the protective dust shield
from the housing by turning the
dust shield counterclockwise (when
viewed from the rear).
4. Disconnect the electrical connector from the bulb by pulling rearward.
Maintenance and care
163
Page 169 of 200
Horizontal aim adjustment
1. Park the vehicle on a level
surface.
2. With the hood open, locate the
horizontal indicator and the
adjusting screw. They are located
below the viewing window at the
rear of the headlamp assembly.
3. The ªLº and ªRº under the viewing window on the top of the
headlamp refer to the directional change (left or right) of the horizontal
aim.
4.Usea4mmwrench or socket to turn the horizontal adjusting screw
until the forward edge of the knurled portion of the screw is aligned with
the ª0º reference mark (as shown) on the plastic slider when viewed
directly from above.
Vertical aim adjustment
1. Park the vehicle on a level
surface.
2. With the hood open, locate the
bubble level and the vertical
adjustment screw. The adjustment
screw is located on the outboard
side of the headlamp below the
headlamp upper attachment.
L
R
UP
DN
Maintenance and care
169