Page 70 of 200
One time disable
Anytime the safety belt is buckled and then unbuckled during an ignition
ON cycle, Belt Minder will be disabled for that ignition cycle only.
Deactivating/activating the belt minder feature
Read steps1-9thoroughly before proceeding with the
deactivation/activation programming procedure.
The Belt Minder feature can be deactivated/activated by performing the
following procedure:
Before following the procedure, make sure that:
²the parking brake is set
²the gearshift is in P (Park) (automatic transmission) or the neutral
position (manual transmission).
²the ignition switch is in the OFF position
²all vehicle doors are closed
²the driver's safety belt is unbuckled
²the parklamps/headlamps are in OFF position (If vehicle is equipped
with Autolamps, this will not affect the procedure.)
To reduce the risk of injury, do not deactivate/activate the Belt
Minder feature while driving the vehicle.
1. Turn the ignition switch to the RUN (or ON) position. (DO NOT
START THE ENGINE)
2. Wait until the safety belt warning light turns off. (Approximately 1±2
minutes)
²Steps 3±5 must be completed within 60 seconds or the procedure will
have to be repeated.
3. Buckle then unbuckle the safety belt three times, ending with the
safety belt unbuckled. This can be done before or during Belt Minder
warning activation.
4. Turn on the parklamps/headlamps, turn off the parklamps/headlamps.
5. Buckle then unbuckle the safety belt three times, ending with the
safety belt unbuckled.
²After step 5 the safety belt warning light will be turned on for three
seconds.
Seating and safety restraints
70
Page 119 of 200
JUMP STARTING YOUR VEHICLE
The gases around the battery can explode if exposed to flames,
sparks, or lit cigarettes. An explosion could result in injury or
vehicle damage.
Do not push start your vehicle. You could damage the catalytic
converter.
Batteries contain sulfuric acid which can burn skin, eyes, and
clothing, if contacted.
Do not attempt to push start your vehicle. Automatic
transmissions do not have push-start capability.
Preparing your vehicle
1.Use only a 12±volt supply to start your vehicle.
2. Do not disconnect the battery of the disabled vehicle as this could
damage the vehicle's electrical system.
3. Park the booster vehicle close to the hood of the disabled vehicle
making sure the two vehiclesdo nottouch. Set the parking brake on
both vehicles and stay clear of the engine cooling fan and other moving
parts.
4. Check all battery terminals and remove any excessive corrosion before
you attach the battery cables. Ensure that vent caps are tight and level.
5. Turn the heater fan on in both vehicles to protect any electrical
surges. Turn all other accessories off.
Roadside emergencies
119
Page 124 of 200
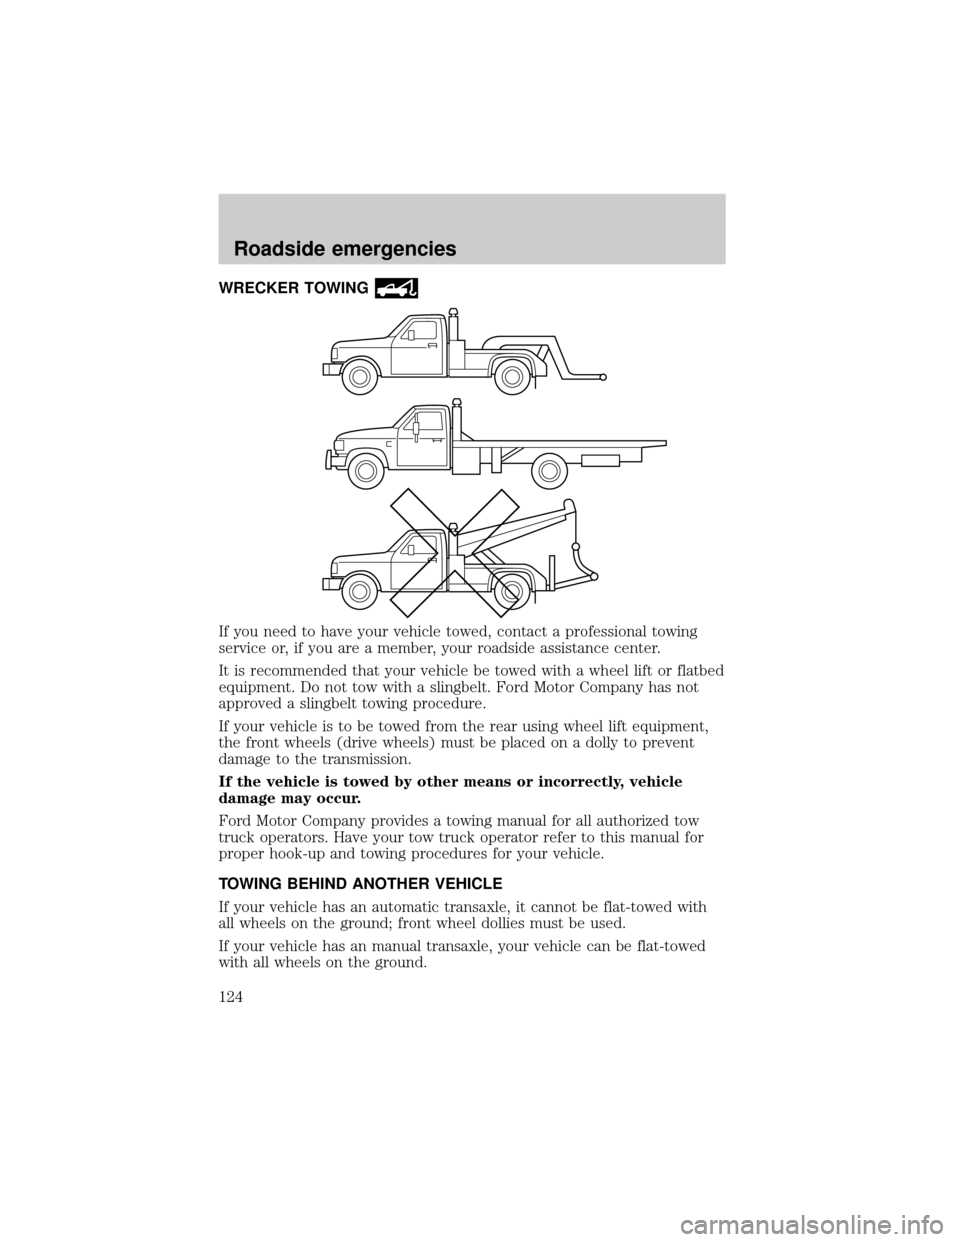
WRECKER TOWING
If you need to have your vehicle towed, contact a professional towing
service or, if you are a member, your roadside assistance center.
It is recommended that your vehicle be towed with a wheel lift or flatbed
equipment. Do not tow with a slingbelt. Ford Motor Company has not
approved a slingbelt towing procedure.
If your vehicle is to be towed from the rear using wheel lift equipment,
the front wheels (drive wheels) must be placed on a dolly to prevent
damage to the transmission.
If the vehicle is towed by other means or incorrectly, vehicle
damage may occur.
Ford Motor Company provides a towing manual for all authorized tow
truck operators. Have your tow truck operator refer to this manual for
proper hook-up and towing procedures for your vehicle.
TOWING BEHIND ANOTHER VEHICLE
If your vehicle has an automatic transaxle, it cannot be flat-towed with
all wheels on the ground; front wheel dollies must be used.
If your vehicle has an manual transaxle, your vehicle can be flat-towed
with all wheels on the ground.
Roadside emergencies
124
Page 130 of 200
IDENTIFYING COMPONENTS IN THE ENGINE COMPARTMENT
2.0L SOHC I4 engine
1. Engine oil dipstick
2. Brake fluid reservoir
3. Transmission fluid dipstick (automatic transaxle)
4. Battery
5. Air filter assembly
6. Engine oil filler cap
7. Power steering fluid reservoir
8. Engine coolant reservoir
9. Windshield washer fluid reservoir
91234
8756
Maintenance and care
130
Page 131 of 200
2.0L DOHC Zetec engine
1. Transmission fluid dipstick (automatic transaxle)
2. Battery
3. Air filter assembly
4. Engine oil filler cap
5. Engine oil dipstick
6. Power steering fluid reservoir
7. Engine coolant reservoir
8. Windshield washer fluid reservoir
9. Brake fluid reservoir
98712
3
4
65
Maintenance and care
131
Page 143 of 200
5. If the fluid is low, add fluid in small amounts, continuously checking
the level until it reaches the range between the MIN and MAX lines. Be
sure to put the cap back on the reservoir.
TRANSMISSION FLUID
Checking automatic transmission fluid
Refer to your Scheduled Maintenance Guide for scheduled intervals for
fluid checks and changes. Your transaxle does not consume fluid.
However, the fluid level should be checked if the transaxle is not working
properly, i.e., if the transaxle slips or shifts slowly or if you notice some
sign of fluid leakage.
Automatic transmission fluid expands when warmed. To obtain an
accurate fluid check, drive the vehicle until it is warmed up
(approximately 30 km [20 miles]). If your vehicle has been
operated for an extended period at high speeds, in city traffic
during hot weather or pulling a trailer, the vehicle should be
turned off for about 30 minutes to allow fluid to cool before
checking.
1. Drive the vehicle 30 km (20 miles) or until it reaches normal operating
temperature.
2. Park the vehicle on a level surface and engage the parking brake.
3. With the parking brake engaged and your foot on the brake pedal,
start the engine and move the gearshift lever through all of the gear
ranges. Allow sufficient time for each gear to engage.
4. Latch the gearshift lever in P (Park) and leave the engine running.
5. Remove the dipstick, wiping it clean with a clean, dry lint free rag. If
necessary, refer toIdentifying components in the engine compartment
in this chapter for the location of the dipstick.
6. Install the dipstick making sure it is fully seated in the filler tube.
7. Remove the dipstick and inspect the fluid level. The fluid should be in
the designated areas for normal operating temperature.
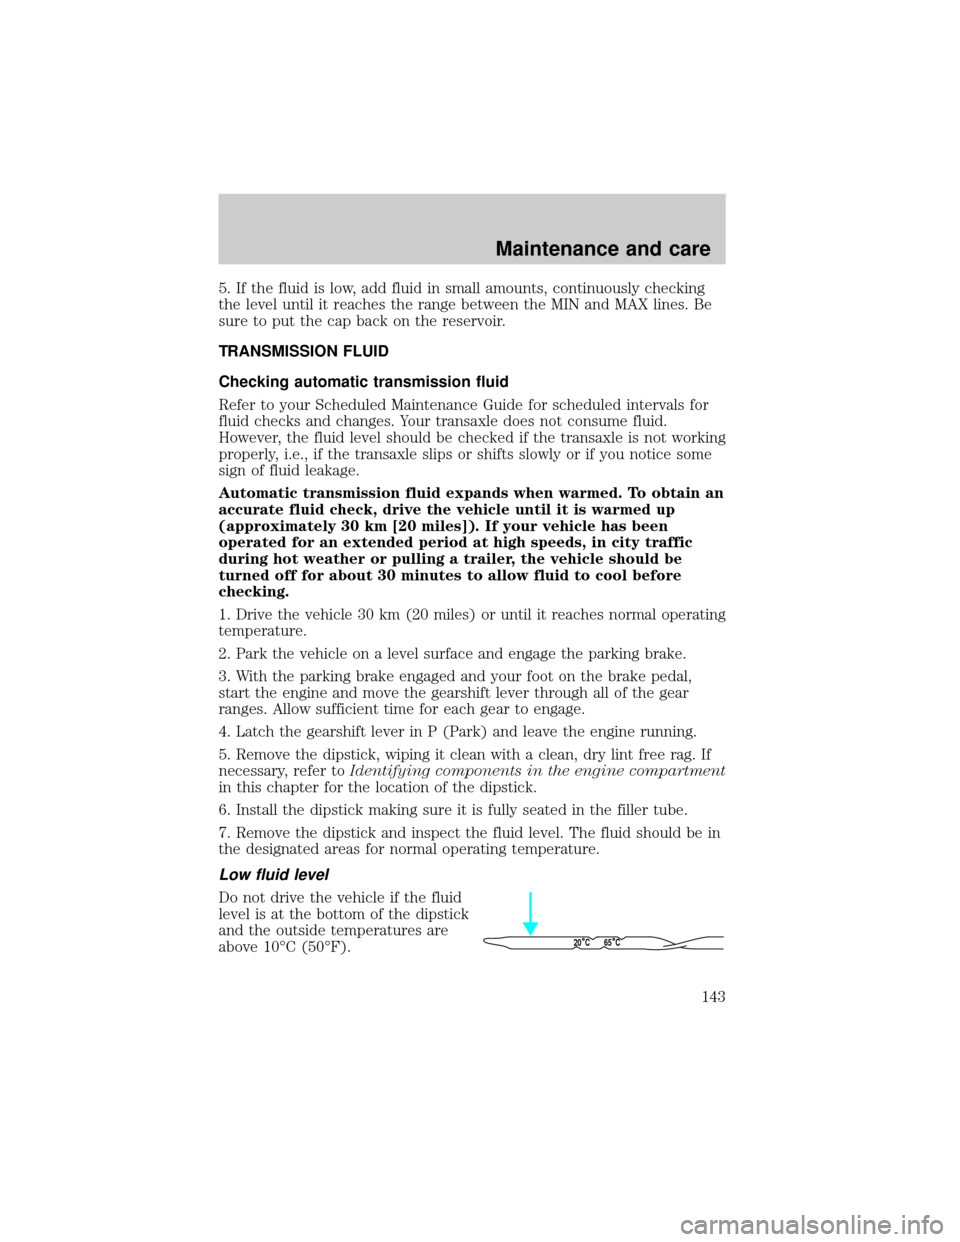
Low fluid level
Do not drive the vehicle if the fluid
level is at the bottom of the dipstick
and the outside temperatures are
above 10ÉC (50ÉF).
20 C65 C
Maintenance and care
143
Page 144 of 200
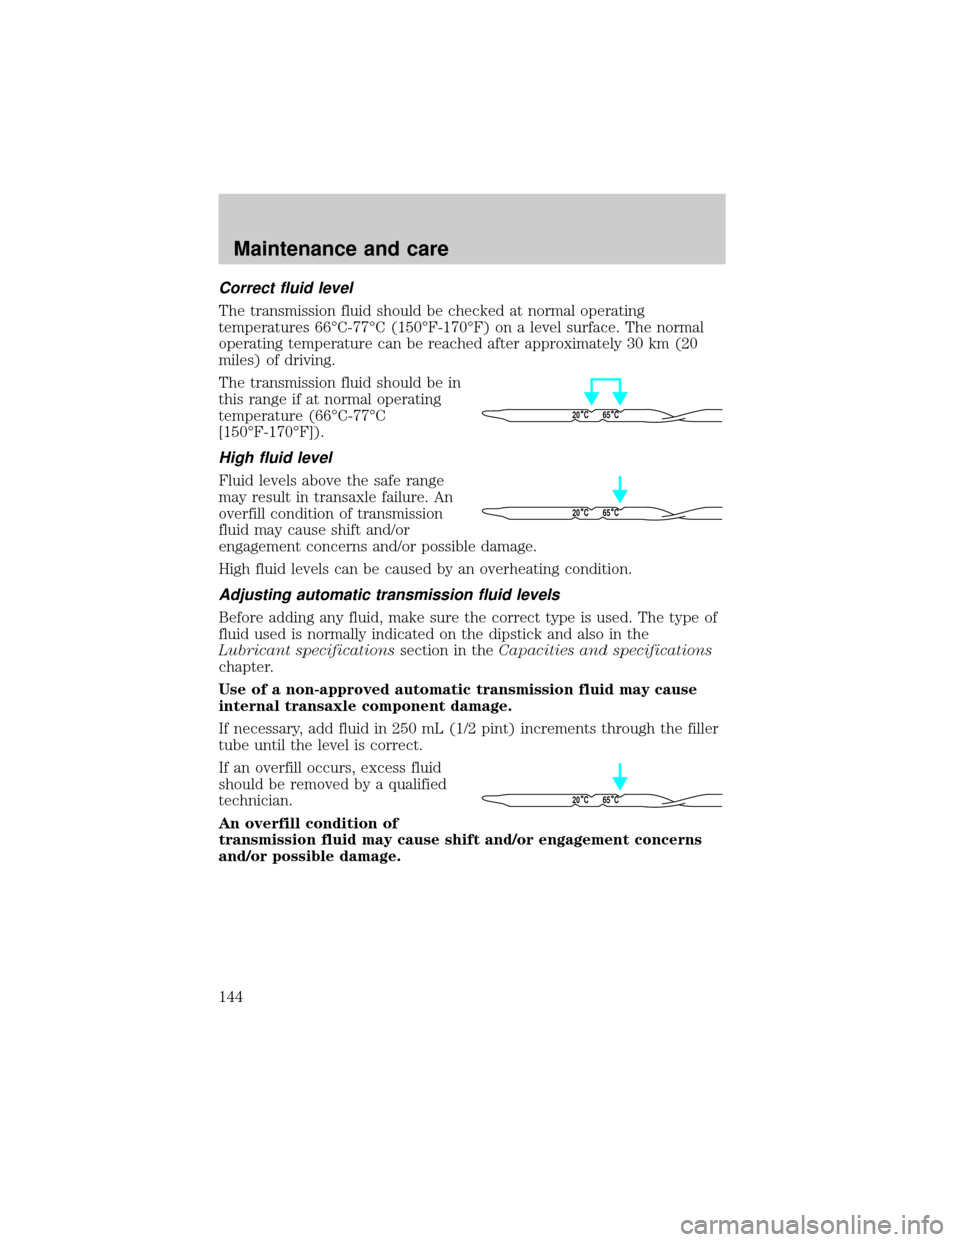
Correct fluid level
The transmission fluid should be checked at normal operating
temperatures 66ÉC-77ÉC (150ÉF-170ÉF) on a level surface. The normal
operating temperature can be reached after approximately 30 km (20
miles) of driving.
The transmission fluid should be in
this range if at normal operating
temperature (66ÉC-77ÉC
[150ÉF-170ÉF]).
High fluid level
Fluid levels above the safe range
may result in transaxle failure. An
overfill condition of transmission
fluid may cause shift and/or
engagement concerns and/or possible damage.
High fluid levels can be caused by an overheating condition.
Adjusting automatic transmission fluid levels
Before adding any fluid, make sure the correct type is used. The type of
fluid used is normally indicated on the dipstick and also in the
Lubricant specificationssection in theCapacities and specifications
chapter.
Use of a non-approved automatic transmission fluid may cause
internal transaxle component damage.
If necessary, add fluid in 250 mL (1/2 pint) increments through the filler
tube until the level is correct.
If an overfill occurs, excess fluid
should be removed by a qualified
technician.
An overfill condition of
transmission fluid may cause shift and/or engagement concerns
and/or possible damage.
20 C65 C
20 C65 C
20 C65 C
Maintenance and care
144
Page 176 of 200
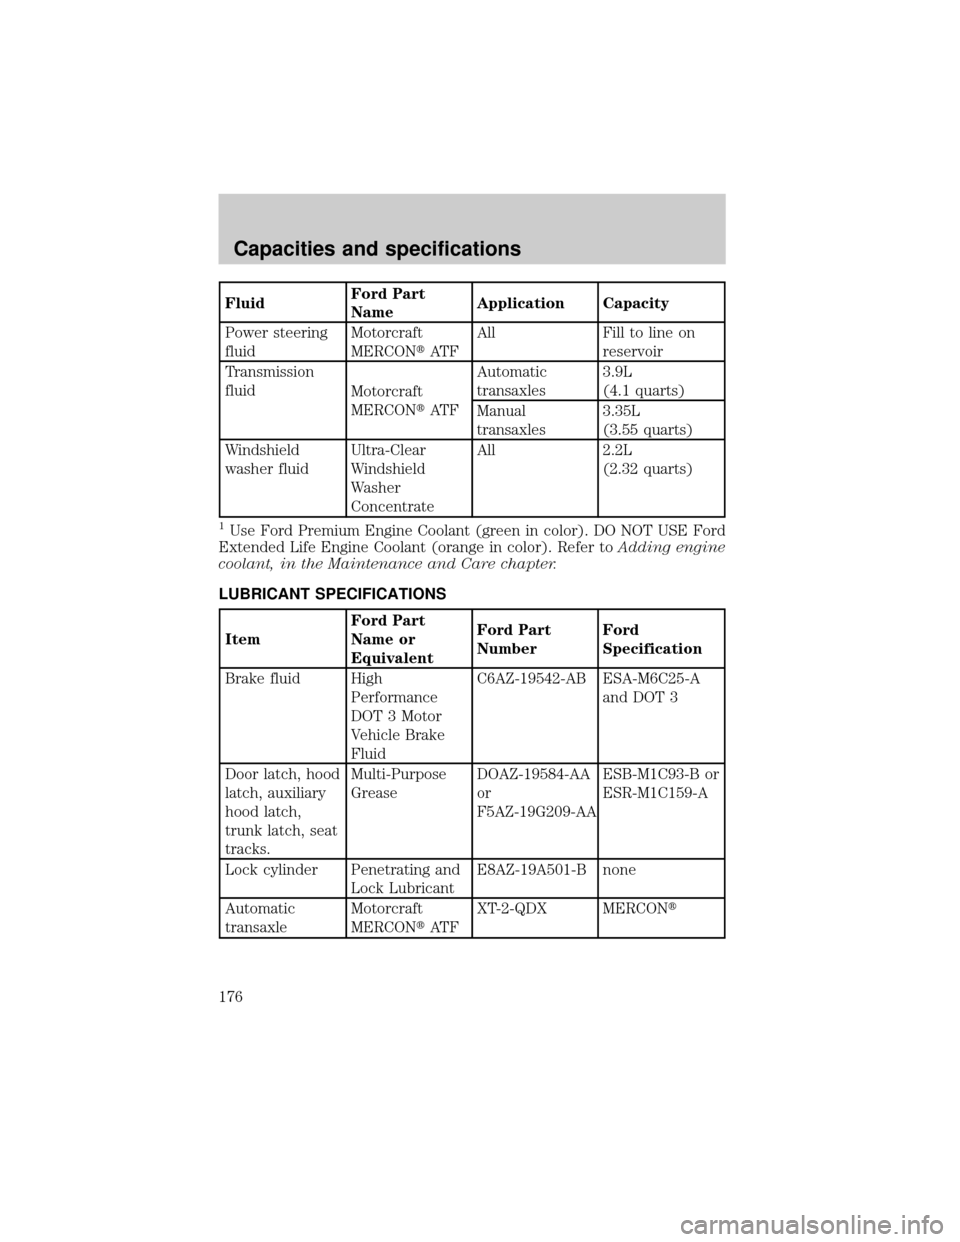
FluidFord Part
NameApplication Capacity
Power steering
fluidMotorcraft
MERCONtAT FAll Fill to line on
reservoir
Transmission
fluid
Motorcraft
MERCONtAT FAutomatic
transaxles3.9L
(4.1 quarts)
Manual
transaxles3.35L
(3.55 quarts)
Windshield
washer fluidUltra-Clear
Windshield
Washer
ConcentrateAll 2.2L
(2.32 quarts)
1Use Ford Premium Engine Coolant (green in color). DO NOT USE Ford
Extended Life Engine Coolant (orange in color). Refer toAdding engine
coolant, in the Maintenance and Care chapter.
LUBRICANT SPECIFICATIONS
ItemFord Part
Name or
EquivalentFord Part
NumberFord
Specification
Brake fluid High
Performance
DOT 3 Motor
Vehicle Brake
FluidC6AZ-19542-AB ESA-M6C25-A
and DOT 3
Door latch, hood
latch, auxiliary
hood latch,
trunk latch, seat
tracks.Multi-Purpose
GreaseDOAZ-19584-AA
or
F5AZ-19G209-AAESB-M1C93-B or
ESR-M1C159-A
Lock cylinder Penetrating and
Lock LubricantE8AZ-19A501-B none
Automatic
transaxleMotorcraft
MERCONtAT FXT-2-QDX MERCONt
Capacities and specifications
176