Page 124 of 407
2-48
Mirrors
Inside Day/Night Rearview Mirror
Pull the tab under the mirror toward you to reduce glare
from headlamps behind you after dark. Push the tab
away from you for normal daytime operation.
Electrochromic Inside Rearview Mirror
with Compass (If Equipped)
When on, an electrochromic mirror automatically dims
to the proper level to minimize glare from lights behind
you after dark.
The mirror also includes an eight-point compass display in
the upper right corner of the mirror face. When on, the
compass automatically calibrates as the vehicle is driven.
Page 125 of 407

2-49
Mirror Operation
The right button located at the bottom of the mirror turns
the electrochromic mirror on and off. The LED, located
to the right of the button, will come on when the
electrochromic mirror is turned on. To turn the mirror on,
press and hold the MIRROR button for three seconds.
The mirror will darken and remain dark until the button is
released. To turn the mirror off, press and release the
MIRROR button.Compass Operation
Press the COMP switch once briefly to turn the compass
on or off.
When the ignition and the compass feature are on, the
compass will show two character boxes for approximately
two seconds. After two seconds, the mirror will display the
compass heading.
When cleaning the mirror, use a paper towel or similar
material dampened with glass cleaner. Do not spray
glass cleaner directly on the mirror as that may cause
the liquid cleaner to enter the mirror housing.
Compass Calibration
The compass may need calibration if:
�After five seconds, the display does not show a
compass heading (ªNº for North, for example),
there may be a strong magnetic field interfering with
the compass. Such interference may be caused by a
magnetic antenna mount, magnetic note pad holder
or a similar magnetic item.
�The compass does not display the correct heading
and the compass zone variance is set correctly.
Page 128 of 407

2-52
Electrochromic Mirror Operation
The right side of the button, labeled TEMP and located
at the bottom of the mirror, turns the electrochromic
mirror on and off. An indicator light, located to the
right of the TEMP button, will come on when the
electrochromic mirror is turned on. To turn the mirror
on, press and hold the TEMP button for 15 seconds.
To turn the mirror off, press and hold the TEMP button
for 15 seconds. The indicator light will turn off.
Compass Operation
With the ignition on, the compass will show two character
boxes. The mirror will display the compass heading.
When cleaning the mirror, use a paper towel or similar
material dampened with glass cleaner. Do not spray
glass cleaner directly on the mirror as that may cause
the liquid cleaner to enter the mirror housing.Compass Calibration
The compass may need calibration if:
�After five seconds, the display does not show a
compass heading (ªNº for North, for example),
there may be a strong magnetic field interfering with
the compass. Such interference may be caused by a
magnetic antenna mount, magnetic note pad holder
or a similar magnetic item.
�The compass does not display the correct heading
and the compass zone variance is set correctly.
In order to calibrate, the letter ªCALº must be displayed in
the mirror compass windows. If ªCALº is not displayed,
push in the ªCOMPº button for approximately eight seconds
or until the letter ªCALº is displayed.
The compass can be calibrated in one of two ways:
�Drive the vehicle in circles at five mph (8 km/h) or
less until the display reads a direction, or
�Drive the vehicle on your everyday routine and after
several turns the compass will become calibrated and
will display a direction.
Page 130 of 407

2-54 Outside Manual Adjust Mirrors
Adjust your outside mirrors so you can just see the side of
your vehicle and have a clear view of objects behind you.
The mirrors can be folded in to enter narrow doorways.
The use of hood
-mounted air deflectors and add-on
convex mirror attachments may adversely affect
mirror performance.
Camper-Type Outside Mirrors (If Equipped)
If your vehicle is equipped with camper-type mirrors,
they can be adjusted so you can have a clear view of
objects behind you.
Pull out the mirror head to extend it for better visibility
when towing a trailer.
Electric Outside Rearview Mirrors
(If Equipped)
The control is located on the
driver's door armrest.
Move the upper control to the left or right to choose the
mirror you want to adjust, then press the arrows on the
lower control pad to adjust the mirror.
Heated Outside Rearview Mirrors
(If Equipped)
The outside rearview mirrors with this option feature a
defrost mode.
To turn on the defrost feature, press the rear window
defogger button. See ªRear Window Defoggerº in the
Index for further information.
Page 131 of 407

2-55 Convex Outside Mirror
Your passenger's side mirror is convex. A convex
mirror's surface is curved so you can see more from the
driver's seat.
CAUTION:
A convex mirror can make things (like other
vehicles) look farther away than they really are.
If you cut too sharply into the right lane, you
could hit a vehicle on your right. Check your
inside mirror or glance over your shoulder
before changing lanes.
Storage Compartments
Your vehicle has a variety of storage compartments
designed to store small items.
Glove Box
To open your glove box, move the switch toward the
passenger's side and pull the door open.
Cupholders
Your vehicle has cupholders in the middle of the
instrument panel, in the rear armrests and at the back
of the center console for rear passengers.
Center Console Storage Area (If Equipped)
Your vehicle may have a console compartment between
the bucket seats.
To open it, insert the console key into the lock and
unlock the console. Press the button and swing the
console lid open.
Page 133 of 407

2-57
To use the shade, pull the shade handle toward the rear
of the vehicle. Latch the shade posts into the retaining
sockets on the cargo area trim panels.
To return the shade to the retracted position, pull up on
the shade handle to release the shade posts from the
retaining sockets. Let the shade move forward to the full
retracted position.
To remove the shade from the vehicle, first let the
shade go all the way into the holder. Then, grasping the
passenger's side shade endcap, push the shade endcap
toward the driver's side of the vehicle. The endcap
should lock in the compressed position. Lift the shade
up on the passenger's side, swing the shade rearward
and take it out of the vehicle.
To put the shade in the vehicle, first make sure the shade
slot in the holder faces rearward with the round surface
facing down. Then, hold the shade at an angle and place
the shade holder tab into the slot in the driver's side trim
panel. Move the other end of the shade forward and hold
it next to the passenger's side trim panel slot.Push the button on top of the passenger's side endcap.
This will allow the shade to extend into the trim slot.
Lightly pull on the shade holder to make sure it is
secure. On Suburban/Yukon XL models there are
two slots. The slots furthest forward allow the shade
to be used if the third seat is removed or folded down.
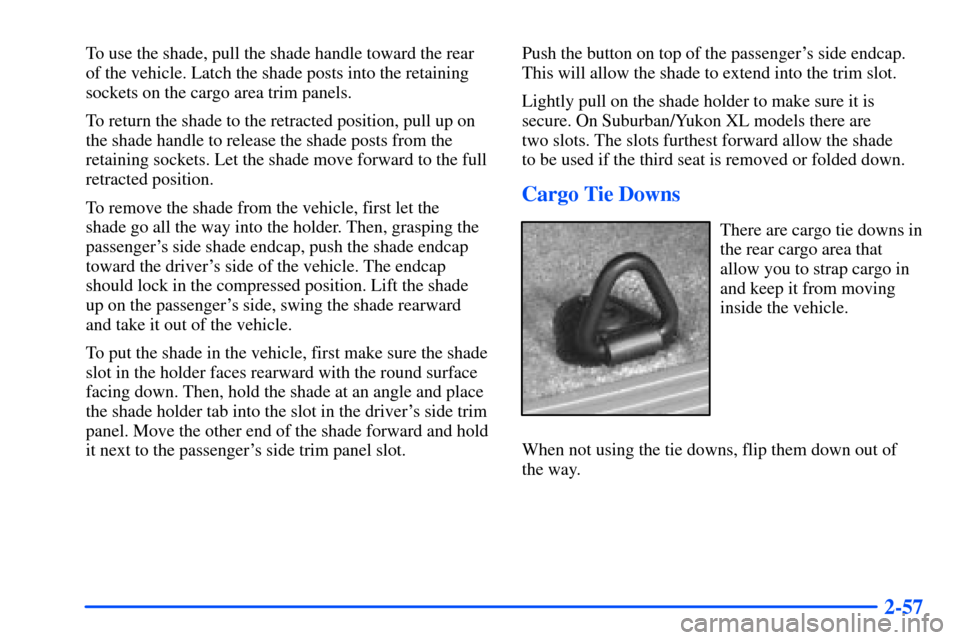
Cargo Tie Downs
There are cargo tie downs in
the rear cargo area that
allow you to strap cargo in
and keep it from moving
inside the vehicle.
When not using the tie downs, flip them down out of
the way.
Page 136 of 407

2-60
To remove the front ashtray, press the retainer spring
and pull the ashtray toward you. To replace the ashtray,
place the ashtray on the slides at the side of its location
in the instrument panel. Then slide the ashtray back to
its original position.
To use the cigarette lighter, push it in all the way, and let
go. When it's ready, it will pop back out by itself.
NOTICE:
Holding a cigarette lighter in with your hand
while it's heating can make it overload, damaging
the lighter and the heating element. Just push the
lighter all the way in and let go. When it's done,
it will pop back by itself.
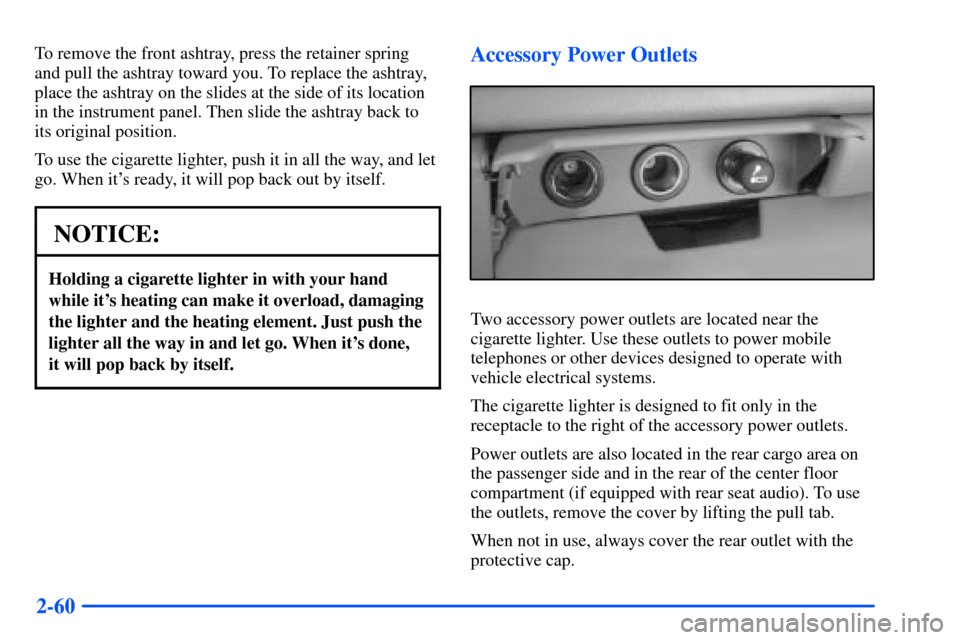
Accessory Power Outlets
Two accessory power outlets are located near the
cigarette lighter. Use these outlets to power mobile
telephones or other devices designed to operate with
vehicle electrical systems.
The cigarette lighter is designed to fit only in the
receptacle to the right of the accessory power outlets.
Power outlets are also located in the rear cargo area on
the passenger side and in the rear of the center floor
compartment (if equipped with rear seat audio). To use
the outlets, remove the cover by lifting the pull tab.
When not in use, always cover the rear outlet with the
protective cap.
Page 143 of 407
2-67
A. Dome Lamp Switch
B. Lamp Controls
C. Air Outlets
D. Automatic Transfer Case/Traction Assist System
(If Equipped)
E. Multifunction Lever
F. Instrument Cluster
G. Gearshift Lever
H. Tow/Haul Selector Switch
I. Audio System
J. Comfort Control SystemK. Instrument Panel Fuse Block
L. Hood Release
M. Center Instrument Panel Utility Block
N. Tilt Lever (If Equipped)
O. Parking Brake Release
P. Lighter and Accessory Power Outlets
Q. Rear Window Defogger Switch (If Equipped)
R. Storage Area or Compact Disc Player (If Equipped)
S. Ashtray
T. Glove Box