Page 265 of 407
4-64
The seven-wire harness contains the following
trailer circuits:
�Yellow: Left Stop/Turn Signal
�Dark Green: Right Stop/Turn Signal
�Brown: Taillamps
�White: Ground
�Light Green: Back
-up Lamps
�Red: Battery Feed
�Dark Blue: Trailer Brake
A jumper harness for an electric trailer brake controller
and a trailer battery feed fuse are included with this
trailering package. (See ªInstrument Panel Jumper
Wiring Harnessº later in this section.)
If you need to tow a light
-duty trailer with a standard
four
-way round pin connector, an adapter connector is
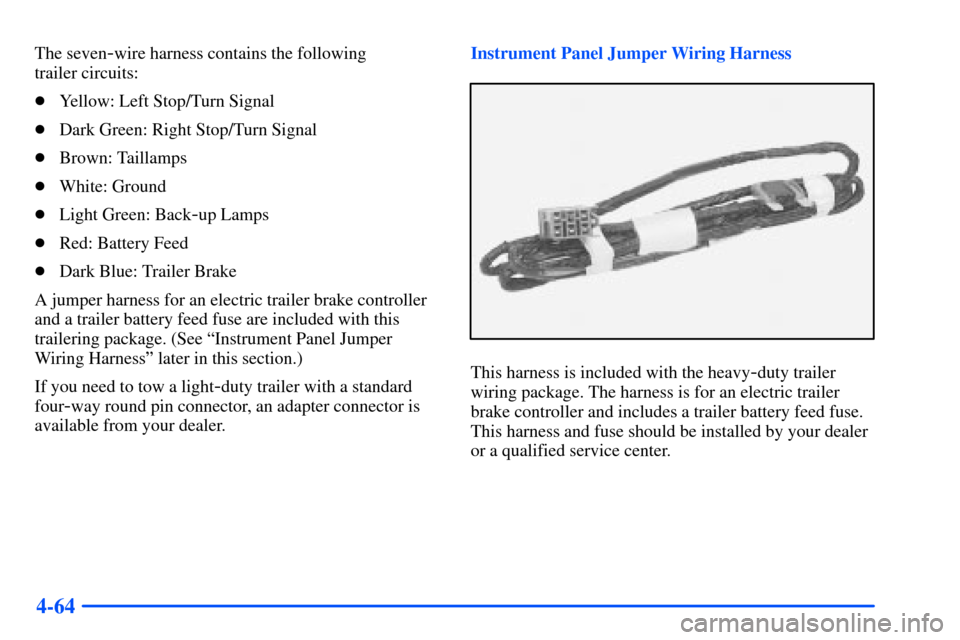
available from your dealer.Instrument Panel Jumper Wiring Harness
This harness is included with the heavy-duty trailer
wiring package. The harness is for an electric trailer
brake controller and includes a trailer battery feed fuse.
This harness and fuse should be installed by your dealer
or a qualified service center.
Page 268 of 407
5-2
Hazard Warning Flashers
Your hazard warning flashers let you warn others. They
also let police know you have a problem. Your front and
rear turn signal lamps will flash on and off.
But they won't flash if you're braking.
Press the button at the top
of the steering column all
the way down to make your
front and rear turn signal
lamps flash on and off.
Your hazard warning flashers work no matter what
position your key is in, and even if the key isn't in.
To turn off the flashers, press the button until the first
click and release.
When the hazard warning flashers are on, your turn
signals won't work.
Other Warning Devices
If you carry reflective triangles, you can use them to
warn others. Set one up at the side of the road about
300 feet (100 m) behind your vehicle.
Page 333 of 407
6-34 Front Turn Signal, Sidemarker and
Daytime Running Lamps
A. Sidemarker Lamp
B. Retainer Clip
C. Front Turn Signal Lamp
D. Daytime Running Lamp1. Remove the headlamp lens assembly as
mentioned previously.
2. Press the retainer clip, located behind the turn
signal housing, towards the outside of the vehicle.
3. Pull the turn signal housing out from the vehicle.
4. Press the locking release lever, turn the bulb socket
counterclockwise and remove it from the turn signal
lens housing.
5. Remove the bulb from the bulb socket.
6. Put the new bulb into the bulb socket. Use care
not to touch the bulb with your fingers or hands.
7. Put the bulb socket into the turn signal housing
and turn it clockwise until it locks.
8. Put the turn signal housing back onto the vehicle
placing the hook and posts on the inner side into the
alignment holes first and then the outer side into the
retainer bracket until you hear a click.
9. Put the headlamp lens assembly back into the vehicle.
Page 334 of 407
6-35 Taillamps
A. Turn Signal Lamp
B. Back
-up Lamp
C. Stoplamp
1. Use a Phillips
screwdriver to remove
the two screws from
the lamp assembly.2. Remove the lamp assembly.
3. Lift the lens off the lamp assembly.
4. Pull the bulb straight
out from the socket.
5. Put a new bulb into the socket and press it in until
it is tight.
6. Reinstall the lens and the lens seal.
Page 356 of 407
6-57
NAME Usage
LOCK Power Door Lock Relay
HVAC 1 Climate Control System
CRUISE Cruise Control, Instrument Cluster
IGN 3 Ignition, Power Seats
4WD Four
-Wheel Drive System,
Auxiliary Battery
CRANK Starting System
INT PRK Parking Lamps, Sidemarker
Lamps, Interior Lamps
L DOOR Power Door Lock Relay
BRAKE Anti
-Lock Brake System
RR WIPER Rear Window Wiper
ILLUM Interior Lamps
SEAT Power Seat Circuit Breaker
TURN Exterior Lamps, Turn Signals,
Hazard Lamps
UNLOCK Power Door LocksNAME Usage
HTR A/C Climate Control System
WS WPR Windshield Wipers
IGN 1 Ignition, Instrument Panel
AIR BAG Air Bag
MIR/LOCK Power Mirrors, Power Door Locks
DR LOCK Power Door Locks
PWR WDO Power Window Circuit Breaker
UNLOCK Power Door Lock Relay
IGN 0 PRND321 Display, Odometer,
VCM/PCM
SEO IGN Special Equipment Option,
Ignition
SEO ACCY Special Equipment Option
Accessory, Cellular Telephone
RAP #1 Retained Accessory Power Relay
RDO 1 Audio System
RAP #2 Rear Power Windows,
Sunroof, Radio
Page 360 of 407

6-61
Name Usage
STUD #1 Accessory Power/Trailer
Wiring Feed/Load Leveling
ABS Anti
-Lock Brakes
IGN A Ignition Switch
AIR A.I.R. System
RAP #1 Retained Accessory Power,
Power Mirrors, Power Door
Locks, Power Seat(s)
IGN B Ignition Switch
RAP #2 Retained Accessory Power/Rear
Power Windows, Sunroof, Radio
STUD #2 Accessory Power/Trailer Wiring
Brake Feed
TRL R TRN Right Turn Signal Trailer Wiring
TRL L TRN Left Turn Signal Trailer Wiring
IGN 1 Ignition, Fuel Controls
INJ B Ignition, Fuel Controls (Relay)
STARTER Starter (Relay)
PARK LP Parking LampsName Usage
FRT HVAC Climate Control System
STOP LP Exterior Lamps, Stoplamps
ECM 1 VCM/PCM
CHMSL Center High Mounted Stoplamp
VEH STOP Stoplamps, Cruise Control
TRL B/U Backup Lamps Trailer Wiring
INJ A Fuel Controls, Ignition
RR HVAC Rear HVAC
VEH B/U Vehicle Backup Lamps
ENG 1 Engine Controls, Canister Purge,
Fuel System
ETC Electronic Throttle Control
IGN E A/C Compressor Relay, Rear
Window Defogger, Daytime
Running Lamps, A.I.R. System
B/U LP Backup Lamps, Automatic
Transmission Shift Lock
Control System
ATC Automatic Transfer Case
Page 361 of 407

RTD Autoride� (Real Time Damping)
RR PRK Right Rear Parking Lamps
ECM B VCM/PCM
F/PMP Fuel Pump (Relay)
O2 A Oxygen Sensors
O2 B")
6-62
Name Usage
RR DEFOG Rear Window Defogger,
Heated Mirrors (Relay)
RTD Autoride� (Real Time Damping)
RR PRK Right Rear Parking Lamps
ECM B VCM/PCM
F/PMP Fuel Pump (Relay)
O2 A Oxygen Sensors
O2 B Oxygen Sensors
LR PRK Left Rear Parking Lamps
RR DEFOG Rear Window Defogger,
Heated Mirrors
HDLP Headlamps (Relay)
TRL PRK Parking Lamps Trailer Wiring
PRIME Not Used
RT HDLP Right Headlamps
DRL Daytime Running Lamps (Relay)
HTD MIR Heated Mirrors
LT HDLP Left HeadlampsName Usage
A/C Air Conditioning
AUX PWR Cigarette Lighter, Auxiliary
Power Outlets
SEO 2 Special Equipment Option Power,
Power Seats, Aux Roof Mnt Lamp
SEO 1 Special Equipment Option Power,
Aux Roof Mnt Lamp, Cell Phone
DRL Daytime Running Lamps
A/C A/C (Relay)
FOG LP Fog Lamps
FOG LP Fog Lamps (Relay)
RADIO Audio System, Instrument Cluster,
Climate Control System
CIGAR Cigarette Lighter, Auxiliary
Power Outlets
RT TURN Right Turn Signals
BTSI Automatic Transmission Shift
Lock Control System
LT TURN Left Turn Signals
Page:
< prev 1-8 9-16 17-24