Page 188 of 421

yellowblue
3-20
P.SCAN: The preset scan button lets you scan through
your favorite stations stored on your pushbuttons.
Select either the AM, FM1 or FM2 mode and then press
P.SCAN. It will scan through each station stored on
your pushbuttons and stop for a few seconds before
continuing to scan through all of the pushbuttons.
Press P.SCAN again or one of the pushbuttons to stop
scanning to listen to a specific stored station. P.SCAN
will light up on the display while in this mode. If one of
the stations stored on a pushbutton is too weak for the
location you are in, the radio display will show the
channel number (P1
-P6) for several seconds before
advancing to the next preset station.
Setting the Tone
BASS: Press lightly on this knob to release it from its
stored position. Turn the knob clockwise to increase bass
and counterclockwise to decrease bass. When the BASS
control is rotated, the AUTO TONE display will go blank.
TREB: Press lightly on this knob to release it from its
stored position. Turn the knob clockwise to increase
treble and counterclockwise to decrease treble. When
the TREB control is rotated, the AUTO TONE display
will go blank. If a station is weak or noisy, you may
want to decrease the treble.
Push these knobs back into their stored positions when
you're not using them.AUTO TONE: Press this button to select among the
six preset equalization settings and tailor the sound to
the music or voice being heard. Each time you press the
button, the selection will switch to one of the preset
settings of CLASSIC, NEWS, ROCK, POP, C/W
(Country/Western) or JAZZ. To return to the manual
mode, press and release this button until the AUTO
TONE display goes blank. This will return the tone
adjustment to the BASS and TREB controls. If a
BASS or TREB control is rotated, the AUTO TONE
display will go blank. Use PUSHBUTTONS to program
AUTO TONE.
Adjusting the Speakers
BAL: Press lightly on this knob to release it from its
stored position. Turn the control clockwise to adjust
sound to the right speakers and counterclockwise to
adjust sound to the left speakers. The middle position
balances the sound between the speakers.
FADE: Press lightly on this knob to release it from its
stored position. Turn the control clockwise to adjust the
sound to the front speakers and counterclockwise for the
rear speakers. The middle position balances the sound
between the speakers.
Push these knobs back into their stored positions when
you're not using them.
Page 207 of 421

yellowblue
4-11
Off-Road Recovery
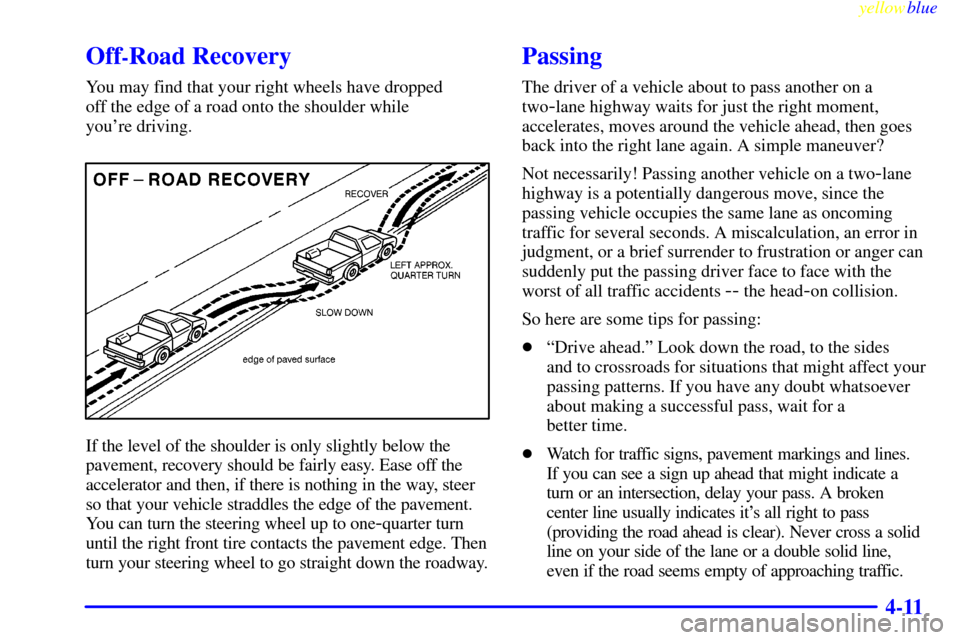
You may find that your right wheels have dropped
off the edge of a road onto the shoulder while
you're driving.
If the level of the shoulder is only slightly below the
pavement, recovery should be fairly easy. Ease off the
accelerator and then, if there is nothing in the way, steer
so that your vehicle straddles the edge of the pavement.
You can turn the steering wheel up to one
-quarter turn
until the right front tire contacts the pavement edge. Then
turn your steering wheel to go straight down the roadway.
Passing
The driver of a vehicle about to pass another on a
two
-lane highway waits for just the right moment,
accelerates, moves around the vehicle ahead, then goes
back into the right lane again. A simple maneuver?
Not necessarily! Passing another vehicle on a two
-lane
highway is a potentially dangerous move, since the
passing vehicle occupies the same lane as oncoming
traffic for several seconds. A miscalculation, an error in
judgment, or a brief surrender to frustration or anger can
suddenly put the passing driver face to face with the
worst of all traffic accidents
-- the head-on collision.
So here are some tips for passing:
�ªDrive ahead.º Look down the road, to the sides
and to crossroads for situations that might affect your
passing patterns. If you have any doubt whatsoever
about making a successful pass, wait for a
better time.
�Watch for traffic signs, pavement markings and lines.
If you can see a sign up ahead that might indicate a
turn or an intersection, delay your pass. A broken
center line usually indicates it's all right to pass
(providing the road ahead is clear). Never cross a solid
line on your side of the lane or a double solid line,
even if the road seems empty of approaching traffic.
Page 265 of 421

yellowblue
4-69
Camper/Fifth-Wheel Trailer Wiring Package
(If Equipped)
The eight
-wire camper harness is located under the front
edge of the pickup box on the driver's side of the
vehicle, attached to the frame bracket. A connector will
have to be added to the wiring harness which connects
to the camper.
The eight
-wire harness contains the following
camper/trailer circuits:
�Yellow: Left Stop/Turn Signal
�Dark Green: Right Stop/Turn Signal
�Brown: Taillamps
�White: Ground
�Light Green: Back
-up Lamps
�Light Blue: Center High
-Mounted
Stoplamp (CHMSL)
�Red: Battery Feed
�Dark Blue: Trailer Brake
A jumper harness for an electric trailer brake controller
and a trailer battery feed fuse are included with this
trailering package. (SeeªInstrument Panel Jumper
Wiring Harnessº later in this section.)
If your vehicle is equipped with the ªHeavy-Duty
Traileringº option, please refer to ªHeavy
-Duty Trailer
Wiring Packageº, earlier in this section.
When the camper
-wiring harness is ordered without the
heavy
-duty trailering package, an eight-wire harness
with a seven
-pin connector and separate CHMSL
connector are located at the rear of the vehicle and are
tied to the vehicle's frame.
Page 302 of 421

yellowblue
5-35 Rocking Your Vehicle To Get It Out
First, turn your steering wheel left and right. That will
clear the area around your front wheels. If you have a
four
-wheel drive vehicle, shift into 4HI. Then shift back
and forth between REVERSE (R) and a forward gear
(or with a manual transmission, between FIRST (1) or
SECOND (2) and REVERSE (R)), spinning the wheels
as little as possible. Release the accelerator pedal while
you shift, and press lightly on the accelerator pedal
when the transmission is in gear. By slowly spinning
your wheels in the forward and reverse directions, you
will cause a rocking motion that may free your vehicle.
If that doesn't get you out after a few tries, you may
need to be towed out. Or, you can use your recovery
hooks if your vehicle has them. If you do need to be
towed out, see ªTowing Your Vehicleº in the Index.
Using the Recovery Hooks
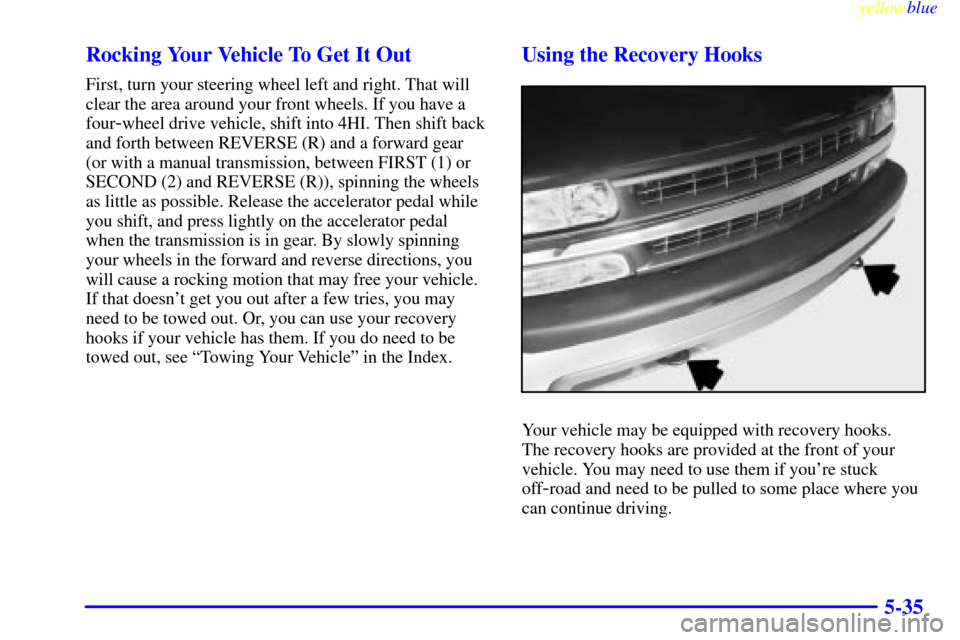
Your vehicle may be equipped with recovery hooks.
The recovery hooks are provided at the front of your
vehicle. You may need to use them if you're stuck
off
-road and need to be pulled to some place where you
can continue driving.
Page 340 of 421

yellowblue
6-37
Some driving conditions or climates may cause a brake
squeal when the brakes are first applied or lightly
applied. This does not mean something is wrong with
your brakes.
Properly torqued wheel nuts are necessary to help
prevent brake pulsation. When tires are rotated, inspect
brake pads for wear and evenly torque wheel nuts in the
proper sequence to GM specifications.
Brake linings should always be replaced as complete
axle sets.
See ªBrake System Inspectionº in Section 7 of this manual
under Part C ªPeriodic Maintenance Inspections.º
Brake Pedal Travel
See your dealer if the brake pedal does not return to
normal height, or if there is a rapid increase in pedal
travel. This could be a sign of brake trouble.
Brake Adjustment
Every time you make a brake stop, your disc brakes
adjust for wear.
Replacing Brake System Parts
The braking system on a vehicle is complex. Its many
parts have to be of top quality and work well together if
the vehicle is to have really good braking. Your vehicle
was designed and tested with top
-quality GM brake
parts. When you replace parts of your braking
system
-- for example, when your brake linings wear
down and you have to have new ones put in
-- be sure
you get new approved GM replacement parts. If you
don't, your brakes may no longer work properly. For
example, if someone puts in brake linings that are wrong
for your vehicle, the balance between your front and
rear brakes can change
-- for the worse. The braking
performance you've come to expect can change in many
other ways if someone puts in the wrong replacement
brake parts.
Page 373 of 421

yellowblue
6-70
Name Usage
TRL PRK Parking Lamps Trailer Wiring
RT HDLP Right Headlamps
DRL Daytime Running Lamps (Relay)
HTD MIR Heated Mirrors
LT HDLP Left Headlamps
A/C Air Conditioning
AUX PWR Cigarette Lighter, Auxiliary
Power Outlets
SEO 2 Special Equipment Option Power,
Power Seats, Aux Roof Mnt Lamp
SEO 1 Special Equipment Option Power,
Aux Roof Mnt Lamp, Cell Phone
DRL Daytime Running Lamps
A/C A/C (Relay)
FOG LP Fog Lamps
FOG LP Fog Lamps (Relay)
RADIO Audio System, Instrument Cluster,
Climate Control System
CIGAR Cigarette Lighter, Auxiliary
Power OutletsName Usage
RT TURN Right Turn Signals
BTSI Automatic Transmission Shift
Lock Control System
LT TURN Left Turn Signals
FR PRK Front Parking Lamps,
Sidemarker Lamps
W/W PMP Windshield Washer Pump
HORN Horn (Relay)
IGN C Ignition Switch, Fuel Pump,
PRND321 Display, Crank
RDO AMP Not Used
HAZ LP Exterior Lamps, Hazard Lamps
EXP LPS Not Used
HORN Horn
CTSY LP Interior Lamps
RR WPR Not Used
TBC Body Control Module, Remote
Keyless Entry, Headlamps
Page:
< prev 1-8 9-16 17-24