Page 59 of 421
yellowblue
1-47
A rear-facing infant restraint (B) positions an infant
to face the rear of the vehicle. Rear
-facing infant
restraints are designed for infants of up to about
20 lbs. (9 kg) and about one year of age. This type
of restraint faces the rear so that the infant's head,
neck and body can have the support they need in
a frontal crash. Some infant seats come in
two parts
-- the base stays secured in the vehicle
and the seat part is removable.
Page 61 of 421
yellowblue
1-49
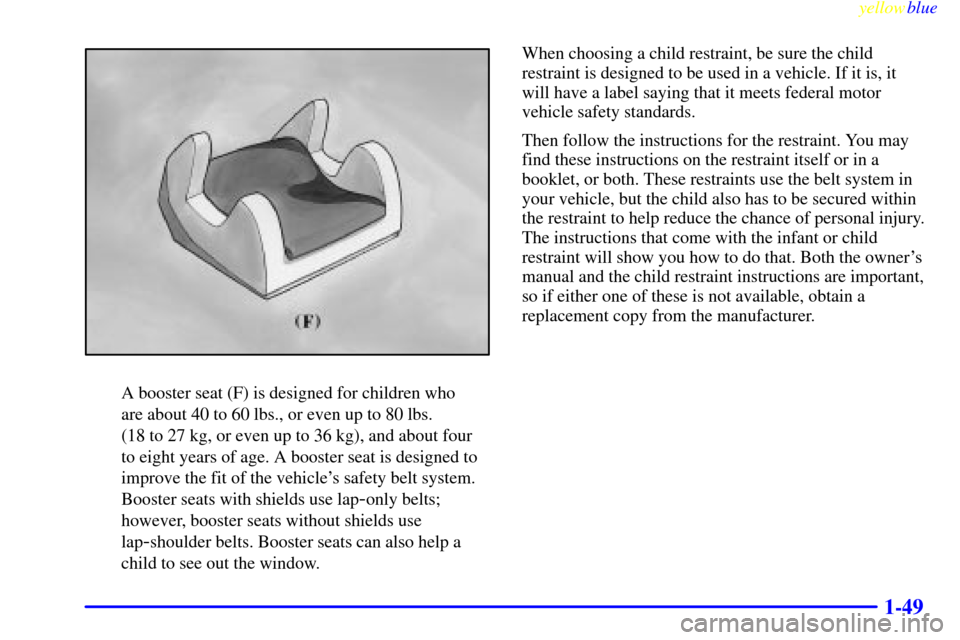
A booster seat (F) is designed for children who
are about 40 to 60 lbs., or even up to 80 lbs.
(18 to 27 kg, or even up to 36 kg), and about four
to eight years of age. A booster seat is designed to
improve the fit of the vehicle's safety belt system.
Booster seats with shields use lap
-only belts;
however, booster seats without shields use
lap
-shoulder belts. Booster seats can also help a
child to see out the window.When choosing a child restraint, be sure the child
restraint is designed to be used in a vehicle. If it is, it
will have a label saying that it meets federal motor
vehicle safety standards.
Then follow the instructions for the restraint. You may
find these instructions on the restraint itself or in a
booklet, or both. These restraints use the belt system in
your vehicle, but the child also has to be secured within
the restraint to help reduce the chance of personal injury.
The instructions that come with the infant or child
restraint will show you how to do that. Both the owner's
manual and the child restraint instructions are important,
so if either one of these is not available, obtain a
replacement copy from the manufacturer.
Page 71 of 421
yellowblue
1-59
CAUTION:
If the air bag readiness light ever comes on when
you have turned off the air bag, it means that
something may be wrong with the air bag system.
The right front passenger's air bag could inflate
even though the switch is off.
If your vehicle is a regular cab pickup and this
ever happens, don't let anyone whom the
national government has identified as a member
of a passenger air bag risk group sit in the right
front passenger's position (for example, don't
secure a rear
-facing child restraint in your
vehicle) until you have your vehicle serviced. See
ªAIR BAG OFF Switchº in the Index.
If your vehicle is an extended cab pickup and this
ever happens, don't let anyone whom the national
government has identified as a member of a
passenger air bag risk group sit in the right front
passenger's position (for example, don't secure a
rear
-facing child restraint in the right front
passenger's seat) until you have your vehicle
serviced. See ªAIR BAG OFF Switchº in the Index.
You'll be using the lap-shoulder belt. See the earlier part
about the top strap if the child restraint has one. Be sure
to follow the instructions that came with the child
restraint. Secure the child in the child restraint when and
as the instructions say.
1. Your vehicle has a right front passenger's air bag.
If you are using a rear
-facing child restraint in this
seat, make sure the air bag is turned off. (See ªAIR
BAG OFF Switchº in the Index.) If your child
restraint is forward
-facing, always move the seat as
far back as it will go before securing it in this seat.
(See ªSeatsº in the Index.)
2. Put the restraint on the seat.
3. Pick up the latch plate, and run the lap and shoulder
portions of the vehicle's safety belt through or
around the restraint. The child restraint instructions
will show you how.
If the shoulder belt goes in front of the child's face or
neck, put it behind the child restraint.
Page 143 of 421
yellowblue
2-65 Center Console Storage Area (If Equipped)
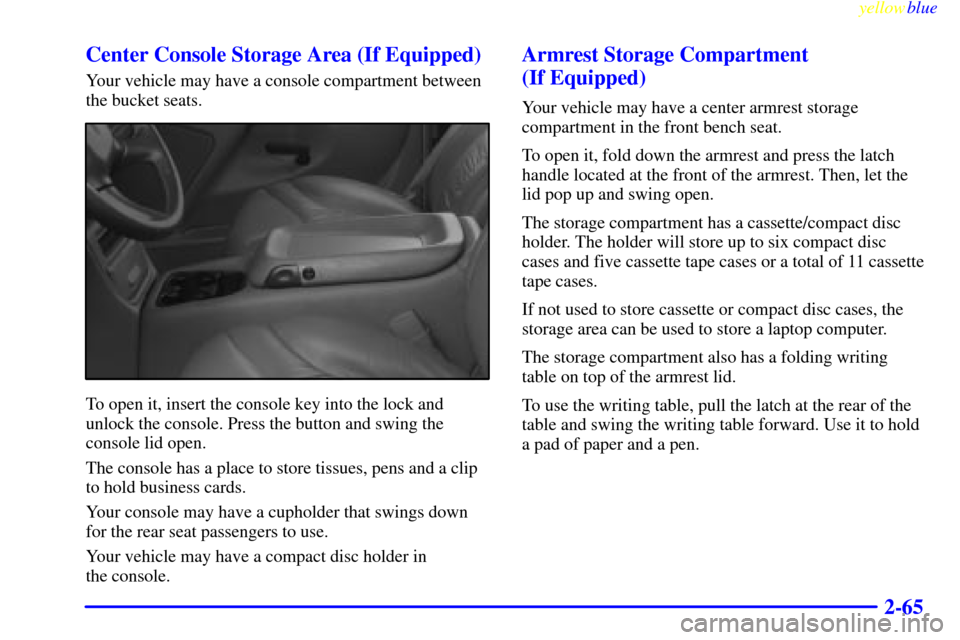
Your vehicle may have a console compartment between
the bucket seats.
To open it, insert the console key into the lock and
unlock the console. Press the button and swing the
console lid open.
The console has a place to store tissues, pens and a clip
to hold business cards.
Your console may have a cupholder that swings down
for the rear seat passengers to use.
Your vehicle may have a compact disc holder in
the console.
Armrest Storage Compartment
(If Equipped)
Your vehicle may have a center armrest storage
compartment in the front bench seat.
To open it, fold down the armrest and press the latch
handle located at the front of the armrest. Then, let the
lid pop up and swing open.
The storage compartment has a cassette/compact disc
holder. The holder will store up to six compact disc
cases and five cassette tape cases or a total of 11 cassette
tape cases.
If not used to store cassette or compact disc cases, the
storage area can be used to store a laptop computer.
The storage compartment also has a folding writing
table on top of the armrest lid.
To use the writing table, pull the latch at the rear of the
table and swing the writing table forward. Use it to hold
a pad of paper and a pen.
Page 176 of 421

yellowblue
3-8
Ventilation Tips
�Keep the hood and front air inlet free of ice, snow or
any other obstruction (such as leaves). The heater
and defroster will work far better, reducing the
chance of fogging the inside of your windows.
�When you enter a vehicle in cold weather, turn the
blower fan all the way to the right for a few moments
before driving. This helps clear the intake ducts of
snow and moisture, and reduces the chance of
fogging the inside of your windows.
�Keep the air path under the front seats clear of
objects. This helps air to circulate throughout
your vehicle.
�The use of hood air deflectors may adversely
affect the performance of the heating and air
conditioning system.Audio Systems
Your audio system has been designed to operate easily
and give years of listening pleasure. You will get the
most enjoyment out of it if you acquaint yourself with it
first. Find out what your audio system can do and how
to operate all its controls, to be sure you're getting the
most out of the advanced engineering that went into it.
Setting the Clock for Systems with
SET Button
Press SET. Within five seconds, press and hold the
SEEK right arrow until the correct minute appears on
the display. Press and hold the SEEK left arrow until the
correct hour appears on the display.
Setting the Clock for Systems with HR and
MN Buttons
Press and hold HR until the correct hour appears on the
display. Press and hold MN until the correct minute
appears on the display. To display the clock with the
ignition off, press RECALL or HR/MN and the time
will be displayed for a few seconds. There is an initial
two
-second delay before the clock goes into the
time
-set mode.
Page 246 of 421
yellowblue
4-50
Your warranty does not cover parts or components that
fail because of overloading.
This will help you decide how much cargo and installed
equipment your truck can carry.
Using heavier suspension components to get added
durability might not change your weight ratings. Ask
your dealer to help you load your vehicle the right way.
If you put things inside your vehicle
-- like suitcases,
tools, packages, or anything else
-- they go as fast as the
vehicle goes. If you have to stop or turn quickly, or if
there is a crash, they'll keep going.
CAUTION:
Things you put inside your vehicle can strike
and injure people in a sudden stop or turn, or
in a crash.
�Put things in the cargo area of your vehicle.
Try to spread the weight evenly.
�Never stack heavier things, like suitcases,
inside the vehicle so that some of them are
above the tops of the seats.
�Don't leave an unsecured child restraint in
your vehicle.
�When you carry something inside the
vehicle, secure it whenever you can.
�Don't leave a seat folded down unless you
need to.
There's also important loading information for off-road
driving in this manual. See ªLoading Your Vehicle for
Off
-Road Drivingº in the Index.
Page 288 of 421
yellowblue
5-21
The equipment you'll need is behind the
passenger's seat.
1. If there is a cover, move the seats forward and turn
the wing nut on the cover counterclockwise to
remove it.
2. The wheel blocks and the wheel block retainer
can be removed by turning the wing
nut counterclockwise.
3. To release the bottle jack from it's holder, turn the
knob on the bottle jack counterclockwise to lower
the jack head slightly.
4. There is also a wing nut used to retain the storage
bag and tools. To remove it, turn the wing
nut counterclockwise.
You'll use the jack handle and the wheel wrench to
remove the underbody
-mounted spare tire.A. Hoist Assembly
B. Wheel Wrench
C. Extensions
D. Hoist Shaft
E. Valve Stem,
Pointed Down
F. Spare TireG. Tire Retainer
H. Hoist Cable
I. Hoist Lock
J. Hoist Shaft
Access Hole
K. Hoist End
Page 364 of 421
yellowblue
6-61
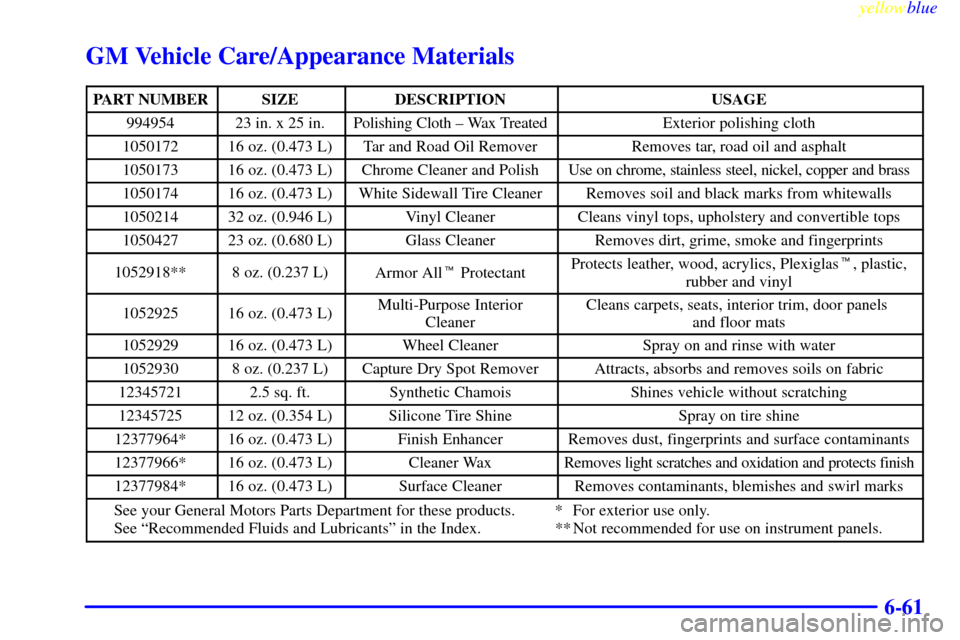
GM Vehicle Care/Appearance Materials
PART NUMBERSIZEDESCRIPTIONUSAGE
99495423 in. x 25 in.Polishing Cloth ± Wax TreatedExterior polishing cloth
105017216 oz. (0.473 L)Tar and Road Oil RemoverRemoves tar, road oil and asphalt
105017316 oz. (0.473 L)Chrome Cleaner and PolishUse on chrome, stainless steel, nickel, copper and brass
105017416 oz. (0.473 L)White Sidewall Tire CleanerRemoves soil and black marks from whitewalls
105021432 oz. (0.946 L)Vinyl CleanerCleans vinyl tops, upholstery and convertible tops
105042723 oz. (0.680 L)Glass CleanerRemoves dirt, grime, smoke and fingerprints
1052918**8 oz. (0.237 L)Armor All� ProtectantProtects leather, wood, acrylics, Plexiglas�, plastic,
rubber and vinyl
105292516 oz. (0.473 L)Multi-Purpose Interior
CleanerCleans carpets, seats, interior trim, door panels
and floor mats
105292916 oz. (0.473 L)Wheel CleanerSpray on and rinse with water
10529308 oz. (0.237 L)Capture Dry Spot RemoverAttracts, absorbs and removes soils on fabric
123457212.5 sq. ft.Synthetic ChamoisShines vehicle without scratching
1234572512 oz. (0.354 L)Silicone Tire ShineSpray on tire shine
12377964*16 oz. (0.473 L)Finish EnhancerRemoves dust, fingerprints and surface contaminants
12377966*16 oz. (0.473 L)Cleaner WaxRemoves light scratches and oxidation and protects finish
12377984*16 oz. (0.473 L)Surface CleanerRemoves contaminants, blemishes and swirl marks
See your General Motors Parts Department for these products. * For exterior use only.
See ªRecommended Fluids and Lubricantsº in the Index. ** Not recommended for use on instrument panels.