Page 4 of 326
ii
Table of Contents
Keys and Door Locks
Remote Keyless Entry (RKE) System
Trunk Release
Automatic Transmission
Parking Brake
Windows
Tilt Wheel
Turn Signal/Multifunction LeverWindshield Wipers
Cruise Control
Interior and Exterior Lamps
Mirrors
Storage Compartments
Convenience Net (If Equipped)
Sunroof (If Equipped)
Instrument Panel, Warning Lights and Gages Seats and Seat Controls
Safety BeltsAir Bag Systems
Child Restraints
Section
1
Section
2
Seats and Restraint Systems
Features and Controls
Page 101 of 326

2-38
To reactivate the interior lamps, either:
�the ignition must be turned on,
�the activated lamp switch must be turned off and
then on,
�a door must be opened,
�press any remote keyless entry transmitter button
(if you have this feature) or
�press the remote trunk release button.
The battery saver feature will also be activated when
any door of your vehicle is left open and the ignition is
to OFF.
Mirrors
Inside Day/Night Rearview Mirror
This mirror can be adjusted two ways. First, to adjust
the angle of the mirror, move the mirror to a position
that allows you see to out the back window. To adjust
the height of the mirror, adjust the arm that connects the
mirror to the windshield.
To reduce glare from lights behind you, move the lever
toward you to the night position.
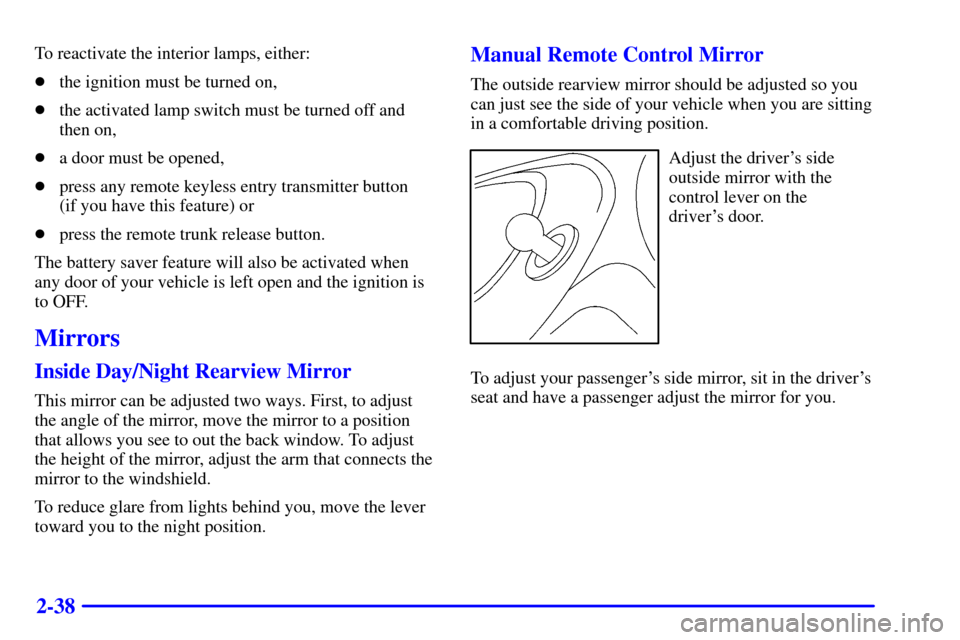
Manual Remote Control Mirror
The outside rearview mirror should be adjusted so you
can just see the side of your vehicle when you are sitting
in a comfortable driving position.
Adjust the driver's side
outside mirror with the
control lever on the
driver's door.
To adjust your passenger's side mirror, sit in the driver's
seat and have a passenger adjust the mirror for you.
Page 102 of 326
2-39 Power Remote Control Mirror (If Equipped)
This selector switch is located on the armrest of the
driver's door. Move this switch to the left or right
depending on which mirror you need to adjust (center is
the off position.) Then adjust the direction of the mirror
using the pad marked with arrows just below the
selector switch.
Convex Outside Mirror
Your passenger's side mirror is convex. A convex
mirror's surface is curved so you can see more from the
driver's seat.
CAUTION:
A convex mirror can make things (like other
vehicles) look farther away than they really are.
If you cut too sharply into the right lane, you
could hit a vehicle on your right. Check your
inside mirror or glance over your shoulder
before changing lanes.
Page 108 of 326
2-45
The main components of your instrument panel are:
A. Instrument Panel Brightness Control
B. Fog Lamp Switch (If Equipped)
C. Turn Signal Multifunction Lever
D. Cruise Control Switches (If Equipped)
E. Instrument Cluster
F. Windshield Wiper/Washer Lever
G. Ignition Switch
H. Hazard Switch
I. Fuse Panels
J. Climate Control SystemK. Accessory Power Outlet
L. Ashtray
M. Lighter
N. Audio System
O. Horn
P. Parking Brake
Q. Tilt Wheel Lever
R. Hood Release
S. Remote Trunk Release Switch
T. Instrument Panel Cupholder
Page 123 of 326

3-
3-1
Section 3 Comfort Controls and Audio Systems
In this section, you'll find out how to operate the comfort control and audio systems offered with your vehicle.
Be sure to read about the particular systems supplied with your vehicle.
3
-2 Comfort Controls
3
-2 Climate Control System with Air
Conditioning
3
-4 Air Conditioning
3
-4 Heating
3
-5 Defogging and Defrosting Windows
3
-6 Rear Window Defogger (If Equipped)
3
-6 Ventilation System
3
-7 Audio Systems
3
-7 Setting the Clock for Systems without
Automatic Tone Control
3
-7 Setting the Clock for Systems with
Automatic Tone Control3
-8 AM-FM Stereo
3
-10 AM-FM Stereo with Cassette Tape Player and
Automatic Tone Control (If Equipped)
3
-15 AM-FM Stereo with Compact Disc Player and
Automatic Tone Control (If Equipped)
3
-19 Remote Cassette Tape Player (If Equipped)
3
-20 Theft-Deterrent Feature (If Equipped)
3
-23 Understanding Radio Reception
3
-23 Tips About Your Audio System
3
-24 Care of Your Cassette Tape Player
3
-25 Care of Your Compact Discs
3
-25 Care of Your Compact Disc Player
3
-25 Fixed Mast Antenna
Page 141 of 326

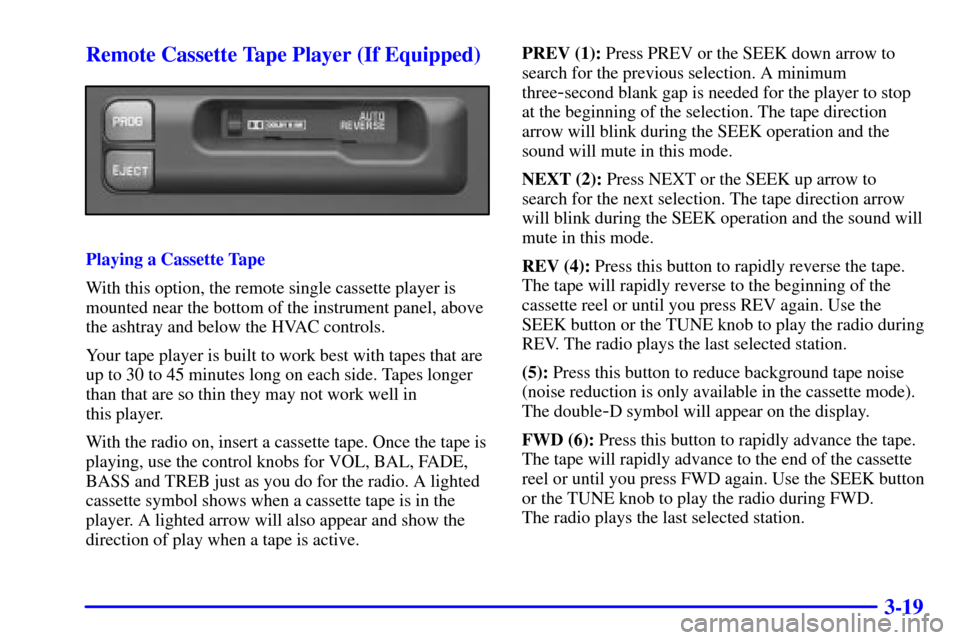
3-19 Remote Cassette Tape Player (If Equipped)
Playing a Cassette Tape
With this option, the remote single cassette player is
mounted near the bottom of the instrument panel, above
the ashtray and below the HVAC controls.
Your tape player is built to work best with tapes that are
up to 30 to 45 minutes long on each side. Tapes longer
than that are so thin they may not work well in
this player.
With the radio on, insert a cassette tape. Once the tape is
playing, use the control knobs for VOL, BAL, FADE,
BASS and TREB just as you do for the radio. A lighted
cassette symbol shows when a cassette tape is in the
player. A lighted arrow will also appear and show the
direction of play when a tape is active.PREV (1): Press PREV or the SEEK down arrow to
search for the previous selection. A minimum
three
-second blank gap is needed for the player to stop
at the beginning of the selection. The tape direction
arrow will blink during the SEEK operation and the
sound will mute in this mode.
NEXT (2): Press NEXT or the SEEK up arrow to
search for the next selection. The tape direction arrow
will blink during the SEEK operation and the sound will
mute in this mode.
REV (4): Press this button to rapidly reverse the tape.
The tape will rapidly reverse to the beginning of the
cassette reel or until you press REV again. Use the
SEEK button or the TUNE knob to play the radio during
REV. The radio plays the last selected station.
(5): Press this button to reduce background tape noise
(noise reduction is only available in the cassette mode).
The double
-D symbol will appear on the display.
FWD (6): Press this button to rapidly advance the tape.
The tape will rapidly advance to the end of the cassette
reel or until you press FWD again. Use the SEEK button
or the TUNE knob to play the radio during FWD.
The radio plays the last selected station.
Page 270 of 326

6-56
Instrument Panel Fuse Block-LeftFuse Usage
A Radio. . . . . . . . . . . . . . . . . . . . . . . . . . . . . . . . . . .
B Wipers. . . . . . . . . . . . . . . . . . . . . . . . . . . . . . . . . .
C Trunk Release and Remote Lock Control. . . . . . .
D Turn Signals. . . . . . . . . . . . . . . . . . . . . . . . . . . . .
E Power Mirrors. . . . . . . . . . . . . . . . . . . . . . . . . . . .
F Air Bag. . . . . . . . . . . . . . . . . . . . . . . . . . . . . . . . .
G Body Function Control Module. . . . . . . . . . . . . .
H Powertrain Control Module. . . . . . . . . . . . . . . . .
J Door Locks. . . . . . . . . . . . . . . . . . . . . . . . . . . . . . .
K Body Function Control Module, Cluster. . . . . . .
STOP LPS Stoplamps. . . . . . . . . . . . . . . . . . . . . . . .
HAZARD LPS Hazard Lamps. . . . . . . . . . . . . . . . .
IPC/HVAC BATT Cluster, Climate Control. . . . . . .
MICRO RELAY
TRUNK REL Remote Trunk Release. . . . . . . . .
CIRCUIT BRKR PWR SEATS Power Seats. . . . . .
MICRO RELAY DR UNLOCK Door Locks. . . . . .
MICRO RELAY DR LOCK Door Locks. . . . . . . . .
MICRO RELAY DRIVERS
DR UNLOCK Door Locks. . . . . . . . . . . . . . . . . .
Page 272 of 326

6-58
Fuse Usage
Maxi
-Fuses
1 Ignition Switch. . . . . . . . . . . . . . . . . . . . . . . . . . . .
2 Right Electrical Center
-Fog Lamps, Radio, . . . . . .
Body Function Control Module, Interior LampsFuse Usage
Maxi
-Fuses
3 Left Electrical Center
-Stoplamps, . . . . . . . . . . . . .
Hazard Lamps, Body Function Control Module,
Cluster, Climate Control System
4 Anti
-Lock Brakes . . . . . . . . . . . . . . . . . . . . . . . . . .
5 Ignition Switch. . . . . . . . . . . . . . . . . . . . . . . . . . . .
6 A.I.R.. . . . . . . . . . . . . . . . . . . . . . . . . . . . . . . . . . .
7 Left Electrical Center
-Power Seats, . . . . . . . . . . . .
Power Mirrors, Door Locks, Trunk Release
and Remote Lock Control
8 Cooling Fan #1. . . . . . . . . . . . . . . . . . . . . . . . . . . .
Mini
-Relays
9 Rear Defog. . . . . . . . . . . . . . . . . . . . . . . . . . . . . . .
10 A.I.R.. . . . . . . . . . . . . . . . . . . . . . . . . . . . . . . . . .
11 Not Used. . . . . . . . . . . . . . . . . . . . . . . . . . . . . . . .
12 Cooling Fan #1. . . . . . . . . . . . . . . . . . . . . . . . . . .
13 HVAC Blower (Climate Control). . . . . . . . . . . . .
14 Cooling Fan #2. . . . . . . . . . . . . . . . . . . . . . . . . . .
15 Cooling Fan. . . . . . . . . . . . . . . . . . . . . . . . . . . . .