2000 CADILLAC SEVILLE display
[x] Cancel search: displayPage 149 of 359
2-89 Key in Recall (If Equipped)
Enter FEATURE PROGRAMMING by following the
previous instructions and then press the down arrow on
the INFO button one or more times until the KEY IN
RECALL prompt appears on the DIC display. To turn
the feature on, press the ON/OFF button until ON
appears. The seat and mirror memory settings that have
been previously programmed will be recalled when the
key is inserted in the ignition. The steering column
(if equipped) will move when the key is turned to ON.
To turn the feature off, press the ON/OFF button until
OFF appears.
Auto Exit Seat (If Equipped)
Enter FEATURE PROGRAMMING by following the
previous instructions and then press the down arrow on
the INFO button one or more times until the AUTO
EXIT SEAT prompt shows on the DIC display. This
feature will move the seat to the driver's exit position
when the key is turned out of ON (away from START)
and the driver's door is opened. To turn this feature on,
press the ON/OFF button until ON appears on the DIC.
To turn this feature off, press the ON/OFF button until
OFF shows.
Auto Exit Steering Wheel (If Equipped)
Enter FEATURE PROGRAMMING by following the
previous instructions and then press the down arrow on
the INFO button one or more times until the AUTO
EXIT STRG WHEEL prompt appears on the DIC
display. This feature will move the column to the
driver's exit position when the key is turned out of ON
(away from START) and the driver's door is opened.
Lights Flash at Unlock
Enter FEATURE PROGRAMMING by following the
previous instructions and then press the down arrow on
the INFO button one or more times until the LIGHTS
FLASH AT UNLOCK prompt appears. To turn this
feature on, press the ON/OFF button until ON is
displayed on the DIC. If all the doors are closed, the
parking lamps will flash twice when the unlock button
on the RKE transmitter is pressed. The lamps will not
flash if the manual parking lamps or headlamps are
active. To turn the feature off, press the ON/OFF
button until the OFF prompt appears.
This feature will not work if any door is open.
Page 150 of 359
2-90 Lights Flash at Lock
Enter FEATURE PROGRAMMING by following the
previous instructions and then press the down arrow on
the INFO button one or more times until the LIGHTS
FLASH AT LOCK prompt appears on the DIC display.
To turn the feature on, press the ON/OFF button until
ON appears. If all the doors are closed, the parking
lamps will flash once when the lock button on the RKE
transmitter is pressed. The lamps will not flash if the
manual parking lamps are active. To turn the feature off,
press the ON/OFF button until OFF appears.
This feature will not work if any door is open.
Horn Sounds at Lock
Enter FEATURE PROGRAMMING by following the
previous instructions and then press the down arrow on
the INFO button one or more times until the HORN
SOUNDS AT LOCK prompt appears on the DIC
display. To turn the feature on, press the ON/OFF
button until ON appears. If all the doors are closed,
the horn will sound once when the lock button on the
RKE transmitter is pressed. To turn the feature off,
press the ON/OFF button until OFF appears.
This feature will not work if any door is open.
Exterior Lights at Unlock
This personalization feature enables the driver to
program the exterior lamps to turn on or to remain off
when using the RKE transmitter to unlock the vehicle.
During dark or night conditions, if exterior lighting is
selected, the parking lamps, taillamps, reverse lamps,
high
-beam headlamps, etc. will turn on for about
20 seconds or until a door is opened, the key is turned
out of OFF or the RKE transmitter is used to lock
the vehicle.
Enter FEATURE PROGRAMMING by following
the previous instructions and then press the INFO
button one or more times until the FEATURE
PROGRAMMING prompt appears on the DIC
display. Press the ON/OFF button to enter FEATURE
PROGRAMMING. To exit, press the INFO RESET
button. Press the down arrow on the INFO button one
or more times until the EXT LIGHTS AT UNLOCK
prompt appears.
To turn the feature on, press the ON/OFF button until
ON is displayed. To turn the feature off, press the
ON/OFF button until OFF is displayed.
Page 151 of 359
2-91 Doors Lock in Gear
Enter FEATURE PROGRAMMING by following the
previous instructions and then press the down arrow on
the INFO button one or more times until the DOORS
LOCK IN GEAR prompt appears. This feature will
automatically lock all doors when the vehicle is shifted
out of PARK (P) and all the doors are closed. To turn
the feature on, press ON/OFF until ON is displayed on
the DIC. To turn the feature off, press ON/OFF until
OFF is displayed.
Driver Unlock in PARK (P)
Enter FEATURE PROGRAMMING by following the
previous instructions and then press the down arrow on
the INFO button one or more times until the DRIVER
UNLOCK IN PARK (P) prompt appears. This feature
will automatically unlock only the driver's door when the
vehicle is shifted into PARK (P). To turn the feature on,
press ON/OFF until ON is displayed on the DIC. To turn
the feature off, press ON/OFF until OFF is displayed.
Driver Unlock Key Off
Enter FEATURE PROGRAMMING by following the
previous instructions and then press the down arrow on
the INFO button one or more times until the DRIVER
UNLOCK KEY OFF prompt appears. This feature will automatically unlock only the driver's
door when the ignition key is turned to OFF. To turn the
feature on, press ON/OFF until ON is displayed on the
DIC. To turn the feature off, press ON/OFF until OFF
is displayed.
Doors Unlock in PARK (P)
Enter FEATURE PROGRAMMING by following the
previous instructions and then press the down arrow on
the INFO button one or more times until the DOORS
UNLOCK IN PARK prompt appears. This feature
will automatically unlock all doors when the vehicle is
shifted into PARK (P). To turn the feature on, press
ON/OFF until ON is displayed on the DIC. To turn
the feature off, press ON/OFF until OFF is displayed.
Doors Unlock Key Off
Enter FEATURE PROGRAMMING by following the
previous instructions and then press the down arrow on
the INFO button one or more times until the DOORS
UNLOCK KEY OFF prompt appears. This feature will
automatically unlock all doors when the ignition key is
turned to OFF. To turn the feature on, press ON/OFF
until ON is displayed on the DIC. To turn the feature
off, press ON/OFF until OFF is displayed.
Page 152 of 359
2-92 Mirror To Curb In Reverse (If Equipped)
Press the down arrow on the INFO button one or
more times until the MIRROR TO CURB IN REV
prompts appears on the DIC display. This feature will
move the passenger's outside rearview mirror to a curb
view position when the console shifter is placed in
REVERSE (R) and it will return the mirror to the last
known driving position when the console shifter is
moved out of REVERSE (R). To turn this feature on,
press the ON/OFF button until ON is displayed on the
DIC. To turn the feature off, press the ON/OFF button
until OFF is displayed. For more information, see
ªCurb View Assist Mirrorº in the Index.
Driver's Names Set/Recall (If Equipped)
After the FEATURE PROGRAMMING prompt is
displayed on the DIC and the ON/OFF button is pressed,
the prompts DRIVER NO 1 or DRIVER NO 2 will
appear. These prompts correspond to which RKE
transmitter button or memory recall button has been
pressed on the driver's door armrest. You may have
your name and a second driver's name displayed here, replacing the prompts DRIVER NO 1 and DRIVER
NO 2. A dealership can program your vehicle to display
the names you want. The names will appear whenever
the key is turned to ON only if RKE transmitters 1 or 2
are used to enter the vehicle or buttons 1 or 2 on the
driver's door are pressed.
Comfort Controls and Radio System
Personalization
These features allow both drivers to personalize their own
climate control settings as well as their radio settings. For
more information, see ªClimate Control Personalizationº
and ªRadio Personalizationº in the Index.
The outside temperature is always available for display
if it has been selected for a DIC display when your
vehicle is running unless an overriding DIC message
appears. You can change the temperature from
Fahrenheit to Celsius by pressing the ENG/MET
(English/metric) button on the instrument panel. For
more information on the DIC, see ªDIC Messagesº
in the Index.
Page 153 of 359

2-93
The electronic sensor can be affected by road or engine
heat during idling, slow driving or when the engine is
first stared after a short trip. To ensure proper automatic
climate control operation, the outside air temperature
display may not update as quickly as expected. This is to
allow the air surrounding the outside temperature sensor
to be as close to the actual outside conditions as possible.
This is determined by how much time has elapsed since
the vehicle has been turned off and by vehicle speed.
Continuous Variable Road Sensing
Suspension (CVRSS)
The CVRSS automatically adjusts the ride of your
vehicle. Automatic ride control is achieved through a
computer used to control and monitor the suspension
system. The controller receives input from various
sensors to determine the proper system response.
If the controller detects a problem within the system,
the DIC will display a SERVICE SUSPENSION SYS
message. If this message appears, have your vehicle
serviced at your dealership.
Oil Life Indicator
This feature lets you know when to change the engine
oil. It's based on the engine oil temperatures and your
driving patterns. To see the display, press the INFO
button several times until ENGINE OIL LIFE appears.
If you see 99% ENGINE OIL LIFE, 99 percent of your
current oil life remains.
The DIC may display a CHANGE ENGINE OIL message.
Always keep a written record of the mileage and date
when you changed your oil. For more information, see
the Maintenance Schedule booklet. If you see CHANGE
ENGINE OIL, it means the oil life is gone and you should
change the oil right away. The system doesn't check how
much oil you have, so you'll still have to check for that.
To see how, see ªEngine Oilº in the Index.
When the oil is changed, you'll need to reset the system.
See ªOil Life Indicator, How to Resetº in the Index.
Page 154 of 359
2-94
Navigation (Option)
Navigation Display and Controls
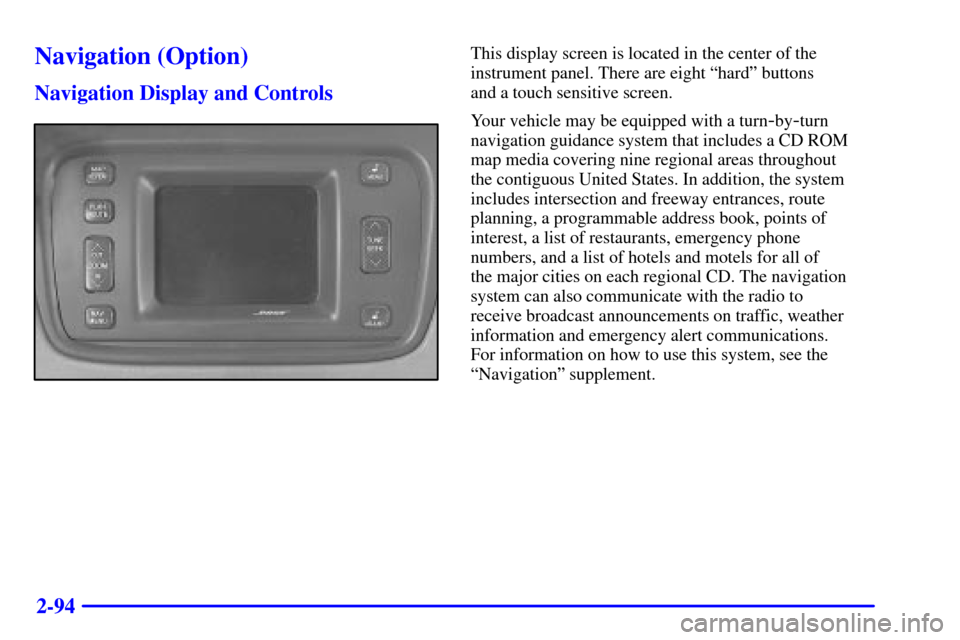
This display screen is located in the center of the
instrument panel. There are eight ªhardº buttons
and a touch sensitive screen.
Your vehicle may be equipped with a turn
-by-turn
navigation guidance system that includes a CD ROM
map media covering nine regional areas throughout
the contiguous United States. In addition, the system
includes intersection and freeway entrances, route
planning, a programmable address book, points of
interest, a list of restaurants, emergency phone
numbers, and a list of hotels and motels for all of
the major cities on each regional CD. The navigation
system can also communicate with the radio to
receive broadcast announcements on traffic, weather
information and emergency alert communications.
For information on how to use this system, see the
ªNavigationº supplement.
Page 159 of 359

3-5
A/C: Press this button to turn the air conditioning
compressor on and off. When you press the button,
an A/C OFF message appears on the climate control
panel's display. Press the button again and the air
conditioner will return to automatic control. The
system will cool and dehumidify the air inside the
vehicle. In the automatic mode, the air conditioning
compressor only operates when the system determines it
is needed. The A/C OFF function is not available in the
defrost mode.
MODE: Press this button (the right or left arrow)
to deliver air through the floor, instrument panel or
windshield outlets. The climate control system will
stay in the selected mode until the MODE button, the
DEFROST button or the AUTO button is pressed again.
Press the left or right arrow to cycle through the
following available modes.
UPPER: This setting directs airflow through
the middle instrument panel outlets. Your vehicle is
equipped with a driver's side lap cooler which will also
come on when the upper vents are being used.
BI-LEVEL: This setting directs air into your
vehicle in two ways. Cool air is directed to the upper
portion of your body through the four instrument panel
outlets while warmed air is directed to the floor.
DEFOG: This setting directs air to the floor
outlets and toward the windshield.
HEATER: This setting directs warmed air
through the floor outlets. Some warm air is diverted
to the windshield to minimize fogging.
FAN: The button with the fan symbol adjusts the
fan speed. Press the up arrow to increase fan speed and
the down arrow to decrease fan speed. Press the AUTO
button to set the fan speed for automatic operation.
If it is cold outside, the blower may not run in the
maximum high fan speed right away. The system
checks the temperature of the engine coolant to assure
it is warm enough to provide heat. When the engine
coolant is warm, the controller allows the fan to
gradually increase to a higher speed. This prevents cold
air from blowing into the passenger's compartment.
Selecting a manual fan speed will override this feature.
Page 165 of 359
3-11
Audio Systems
Your audio system has been designed to operate easily
and give years of listening pleasure. You will get the
most enjoyment out of it if you acquaint yourself with it
first. Find out what your audio system can do and how
to operate all its controls, to be sure you're getting the
most out of the advanced engineering that went into it.
Setting the Clock
Press and hold HR or MN until the time display begins
to change. Release the button as you get close to the
correct time. The time may be set anytime the clock is
displayed. There is a two
-second delay before the clock
goes into time
-set mode.
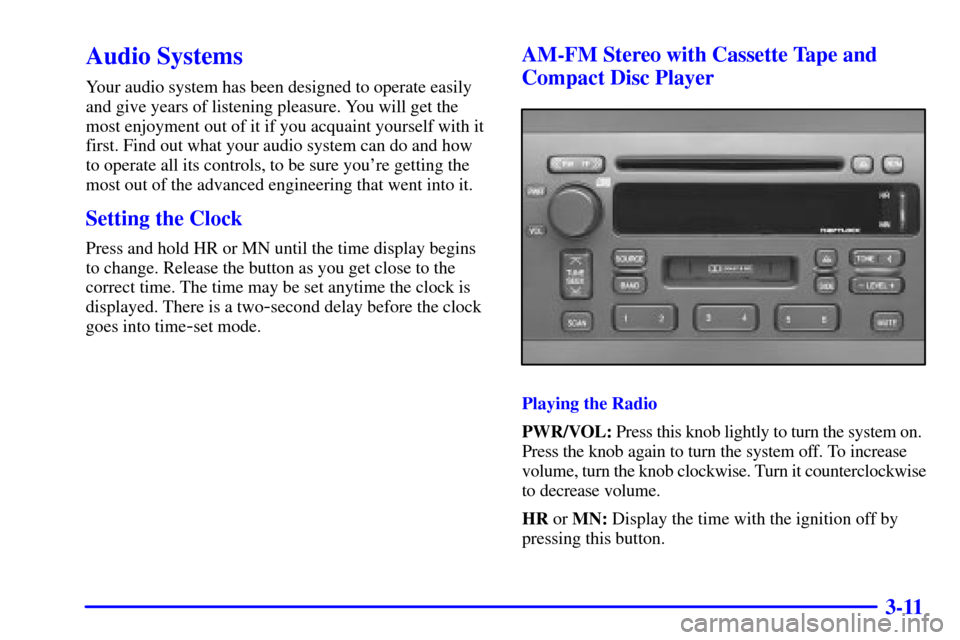
AM-FM Stereo with Cassette Tape and
Compact Disc Player
Playing the Radio
PWR/VOL: Press this knob lightly to turn the system on.
Press the knob again to turn the system off. To increase
volume, turn the knob clockwise. Turn it counterclockwise
to decrease volume.
HR or MN: Display the time with the ignition off by
pressing this button.