Page 51 of 359

1-39
CAUTION:
A child in a rear-facing child restraint can be
seriously injured or killed if the right front
passenger's air bag inflates. This is because the
back of the rear
-facing child restraint would be
very close to the inflating air bag. Always secure
a rear
-facing child restraint in a rear seat.
You may secure a forward-facing child restraint
in the right front seat, but before you do, always
move the front passenger seat as far back as it
will go. It's better to secure the child restraint in
a rear seat.
Wherever you install it, be sure to secure the child
restraint properly.
Keep in mind that an unsecured child restraint can move
around in a collision or sudden stop and injure people
in the vehicle. Be sure to properly secure any child
restraint in your vehicle
-- even when no child is in it.
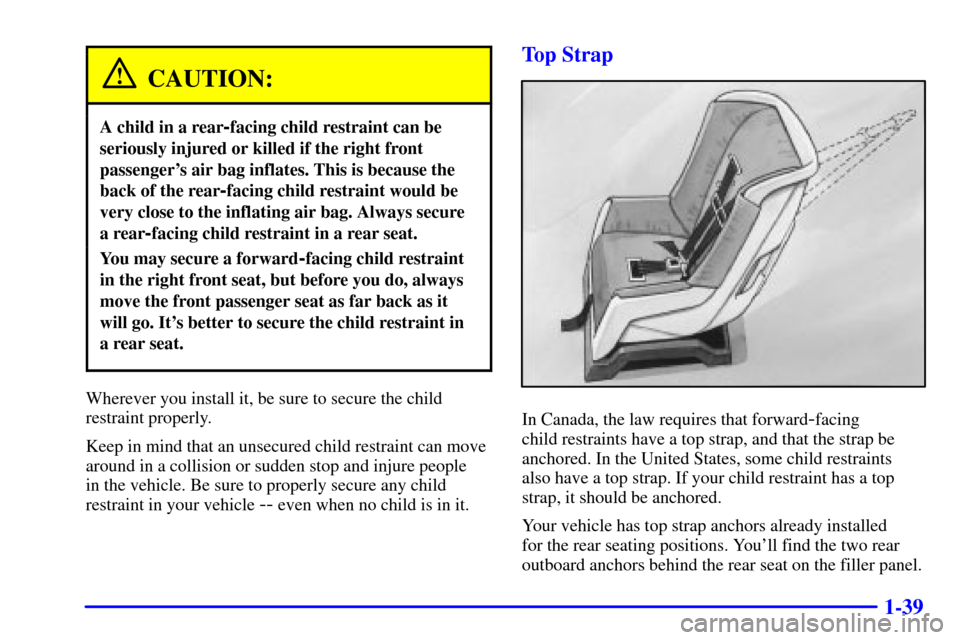
Top Strap
In Canada, the law requires that forward-facing
child restraints have a top strap, and that the strap be
anchored. In the United States, some child restraints
also have a top strap. If your child restraint has a top
strap, it should be anchored.
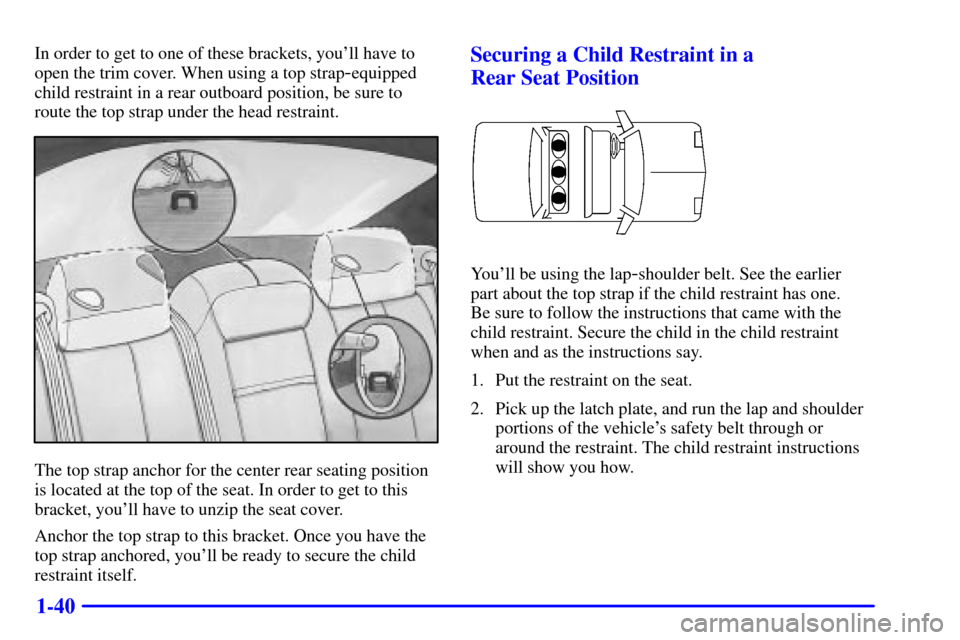
Your vehicle has top strap anchors already installed
for the rear seating positions. You'll find the two rear
outboard anchors behind the rear seat on the filler panel.
Page 52 of 359

1-40
In order to get to one of these brackets, you'll have to
open the trim cover. When using a top strap
-equipped
child restraint in a rear outboard position, be sure to
route the top strap under the head restraint.
The top strap anchor for the center rear seating position
is located at the top of the seat. In order to get to this
bracket, you'll have to unzip the seat cover.
Anchor the top strap to this bracket. Once you have the
top strap anchored, you'll be ready to secure the child
restraint itself.
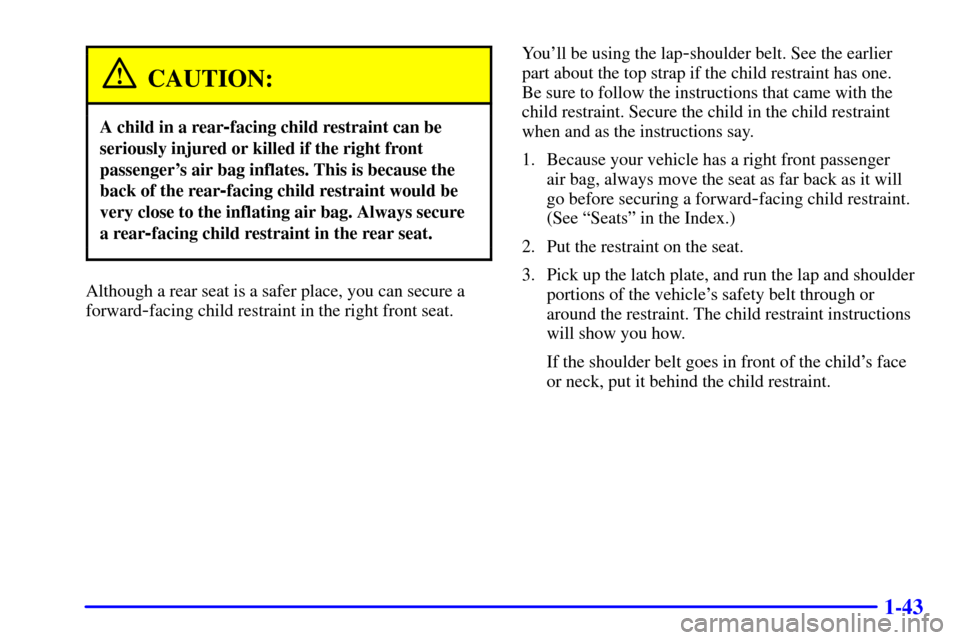
Securing a Child Restraint in a
Rear Seat Position
You'll be using the lap-shoulder belt. See the earlier
part about the top strap if the child restraint has one.
Be sure to follow the instructions that came with the
child restraint. Secure the child in the child restraint
when and as the instructions say.
1. Put the restraint on the seat.
2. Pick up the latch plate, and run the lap and shoulder
portions of the vehicle's safety belt through or
around the restraint. The child restraint instructions
will show you how.
Page 54 of 359
1-42
4. To tighten the belt, pull up on the shoulder belt while
you push down on the child restraint. If you're using
a forward
-facing child restraint, you may find it
helpful to use your knee to push down on the child
restraint as you tighten the belt.5. Push and pull the child restraint in different
directions to be sure it is secure.
To remove the child restraint, just unbuckle the vehicle's
safety belt and let it go back all the way. The safety belt
will move freely again and be ready to work for an adult
or larger child passenger.
Securing a Child Restraint in the
Right Front Seat Position
Your vehicle has a right front passenger air bag. Never
put a rear
-facing child restraint in this seat. Here's why:
Page 55 of 359

1-43
CAUTION:
A child in a rear-facing child restraint can be
seriously injured or killed if the right front
passenger's air bag inflates. This is because the
back of the rear
-facing child restraint would be
very close to the inflating air bag. Always secure
a rear
-facing child restraint in the rear seat.
Although a rear seat is a safer place, you can secure a
forward
-facing child restraint in the right front seat.You'll be using the lap
-shoulder belt. See the earlier
part about the top strap if the child restraint has one.
Be sure to follow the instructions that came with the
child restraint. Secure the child in the child restraint
when and as the instructions say.
1. Because your vehicle has a right front passenger
air bag, always move the seat as far back as it will
go before securing a forward
-facing child restraint.
(See ªSeatsº in the Index.)
2. Put the restraint on the seat.
3. Pick up the latch plate, and run the lap and shoulder
portions of the vehicle's safety belt through or
around the restraint. The child restraint instructions
will show you how.
If the shoulder belt goes in front of the child's face
or neck, put it behind the child restraint.
Page 57 of 359
1-45
6. To tighten the belt, feed the lap belt back into the
retractor while you push down on the child restraint.
You may find it helpful to use your knee to push
down on the child restraint as you tighten the belt.
7. Push and pull the child restraint in different
directions to be sure it is secure.
To remove the child restraint, just unbuckle the vehicle's
safety belt and let it go back all the way. The safety belt
will move freely again and be ready to work for an adult
or larger child passenger.
Larger Children
Children who have outgrown child restraints should
wear the vehicle's safety belts.
Page 63 of 359
2-3
Master Key Valet Key
There is a master key that works in all of the lock
cylinders (driver's door, trunk, ignition and glove box).
There is also a valet key which only operates the
driver's door and the ignition.Both the master and valet keys have a transponder
embedded into the key for security and theft deterrence.
The keys also come with a bar code tag. Keep the bar
code tag in a safe place. If you lose your key you will be
able to have a new one made using the bar code tag. The
replacement key must have a transponder embedded in it.
NOTICE:
Your vehicle has a number of new features that
can help prevent theft. You can have a lot of
trouble getting into your vehicle if you ever lock
your key inside and you may have to damage your
vehicle to get in. Be sure you have an extra key.
Page 66 of 359

2-6 Rear Door Security Lock
Your vehicle is equipped
with rear door security
locks that help prevent
passengers from opening
the rear doors of your
vehicle from the inside.
The locks are located on
the inside edge of each
rear door.
To Use One of These Locks
1. Move the lever on the door all the way up to the
ENGAGED position.
2. Close the door.
3. Do the same thing to the other rear door lock.
The rear doors of your vehicle cannot be opened from
the inside when this feature is in use.
To Open a Rear Door with the Security Lock
1. You may unlock the door by using the Remote Keyless
Entry (RKE) transmitter, the front door power lock
switch or by lifting the rear door manual lock.
2. Then open the door from the outside.To Cancel the Rear Door Lock
1. You may unlock the rear door by using the RKE
transmitter, the front door power lock switch or by
lifting the rear door manual lock. Open the door
from the outside.
2. Move the lever all the way down.
3. Do the same for the other rear door.
The rear door locks will now work normally.
Anti-Lockout Feature
Leaving your key in any ignition position with any door
open will disable the use of the power door locks and
the Remote Keyless Entry (RKE) lock function. If you
close the doors, you can lock them using the power door
locks or the RKE system. It is always recommended that
you remove the ignition key when locking your vehicle.
The anti
-lockout feature can be overridden by holding
the power door lock switch for three seconds or longer.
Leaving Your Vehicle
If you are leaving the vehicle, open the door, set the
locks from the inside, get out and close the door.
Page 72 of 359

2-12 Trunk Lid Tie Down (If Equipped)
CAUTION:
Driving with the trunk lid open can allow
dangerous CO (carbon monoxide) gas to come
into your vehicle. You can't see or smell CO.
It can cause unconsciousness and even death.
If you ever need to drive with your trunk lid
open, then:
�Make sure all windows, the rear seat
pass
-through and sunroof are closed.
�Turn the fan on your heating and cooling
system to its highest speed, with the setting
on VENT. This forces fresh outside air into
your vehicle.
�Open all air ducts on the instrument panel.
Don't use the trunk lid tie down if you are towing
a trailer because of the danger of CO.
This feature is used to secure the trunk lid if it will not
close completely, such as when carrying large packages
in the trunk.
1. Attach the end loop of the tie down to the retainer
located at the center of the trunk sill (see view B).
2. Attach the clip end of the tie down to the D
-ring on
the trunk lid (see view A).
3. Tighten the tie down by pulling the free end of the
cord until secure.
4. To remove the tie down, press the clip end to release
and loosen the cord.