Page 99 of 321
2-34
Rear Window Lockout
Moving this switch to the
left will disable the rear
passenger window controls.
A red indicator light in
the control will illuminate
as a reminder the rear
passenger window
controls are disabled.
Move the switch to the right to enable the rear passenger
window controls again. A green indicator light in the
control will illuminate to indicate the rear passenger
window controls are active.
Horn
The horn can be sounded by pressing either horn symbol
on the steering wheel. The symbols are located at about
the 9 and 3 o'clock positions.
Tilt Wheel
Tilt steering allows you to adjust the steering wheel
before you begin driving. Raising the steering wheel to
the highest level gives your legs more room when you
enter and exit your vehicle.
Hold the steering wheel and pull the lever toward
you to tilt the wheel. Adjust the steering wheel to a
comfortable position and then release the lever to lock
the wheel in place.
Page 101 of 321

2-36 Headlamp High/Low Beam
With the Twilight Sentinel� on or with the lamp control
dial turned to the headlamp position, push the turn
signal lever on the driver's side of the steering wheel
away from you to turn on the high
-beam headlamps.
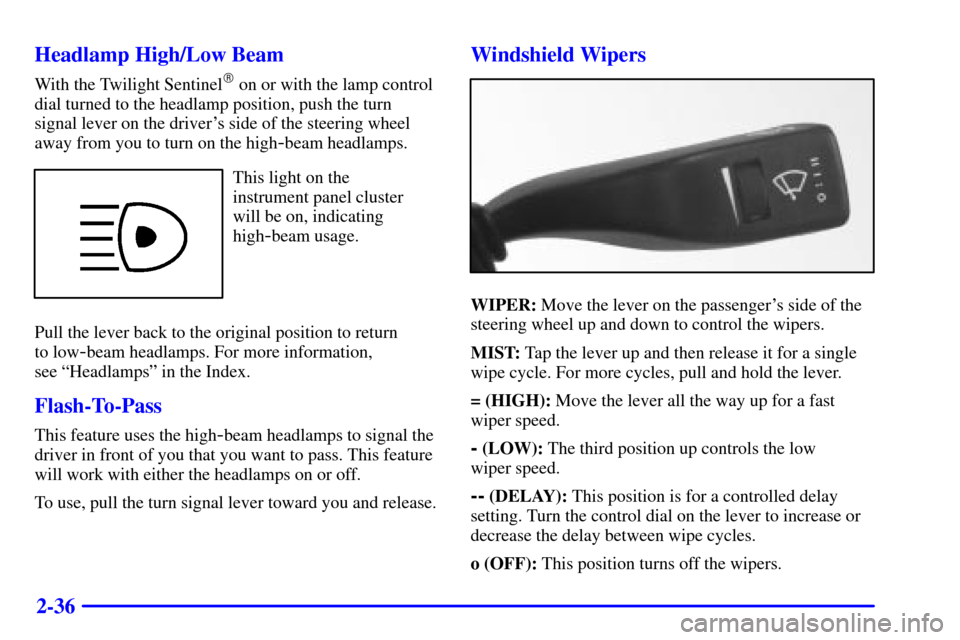
This light on the
instrument panel cluster
will be on, indicating
high
-beam usage.
Pull the lever back to the original position to return
to low
-beam headlamps. For more information,
see ªHeadlampsº in the Index.
Flash-To-Pass
This feature uses the high-beam headlamps to signal the
driver in front of you that you want to pass. This feature
will work with either the headlamps on or off.
To use, pull the turn signal lever toward you and release.
Windshield Wipers
WIPER: Move the lever on the passenger's side of the
steering wheel up and down to control the wipers.
MIST: Tap the lever up and then release it for a single
wipe cycle. For more cycles, pull and hold the lever.
= (HIGH): Move the lever all the way up for a fast
wiper speed.
- (LOW): The third position up controls the low
wiper speed.
-- (DELAY): This position is for a controlled delay
setting. Turn the control dial on the lever to increase or
decrease the delay between wipe cycles.
o (OFF): This position turns off the wipers.
Page 107 of 321

2-42
Headlamps.
Fog lamps.
Twilight Sentinel.
Turns the Twilight Sentinel system off.
Instrument panel brightness control.
Turn the lamp control dial clockwise (to the first
position) to turn on the parking lamps, front and rear
sidemarker lamps, taillamps, license plate lamps, ashtray
lamps, instrument panel lights and backlighting to the
center console controls. Turn the lamp control dial all
the way clockwise (to the second position) to turn on
the low
-beam headlamps.
Turn the lamp control dial counterclockwise to turn
the lamps off.
Headlamps
Turn the lamp control dial all the way to the right to turn
on the low
-beam headlamps.
To turn on the high
-beam headlamps, the low-beam
headlamps must already be on. Push the turn signal lever on
the left side of the steering wheel away from you to engage
the high
-beam headlamps. Pull the lever toward you to
return to the low
-beam headlamps. For more information,
see ªHeadlamp High/Low Beamº in the Index.
Turn the lamp control dial all the way to the left to turn
the headlamps off.
Please note that if the headlamps are activated while
driving and then you turn your vehicle's ignition off
while the lamp dial is still turned on, the headlamps will
turn off. If, however, you open the driver's door while
the lamp dial is still turned on, a warning chime will
sound reminding you to turn the lamp control dial to
OFF. This will stop the warning chime from sounding.
(If you want the headlamps to remain on, you must
manually turn the lamp control dial off and then back
on to the headlamp position. The headlamps will stay
on until manually turned off again.)
Page 128 of 321
2-63
The instrument panel is designed to let you know at a glance how your vehicle is running. You'll know how fast
you're going, how much fuel you're using and many of the other things you'll need to know to drive safely and
economically. The main components of the instrument panel are:
A. Air Outlets
B. Turn Signal/Multifunction Lever
C. Instrument Panel Cluster
D. Windshield Wiper/Washer Lever
E. Comfort Controls
F. Lamp Controls
G. Horn
H. Steering Wheel Touch Controls for Audio System
I. Hood ReleaseJ. Heated Front Seat Control (Option)
K. Hazard Warning Flasher Button
L. Fuel Door Release Button
M. Ashtray
N. Radio
O. Trunk Release Button
P. Rear Power Sunshade Button
Q. Traction Control On/Off Button
R. Glove Box
Page 145 of 321

3-
3-1
Section 3 Comfort Controls and Audio Systems
In this section, you'll find out how to operate the comfort control and audio systems offered with your vehicle.
Be sure to read about the particular systems supplied with your vehicle.
3
- 2 Comfort Controls
3
- 2 Electronic Climate Control (ECC)
3
- 3 Automatic Operation
3
- 4 Manual Operation
3
- 6 Air Conditioning
3
- 6 Heating
3
- 6 Defrosting
3
- 7 Rear Window Defogger
3
- 7 Ventilation System
3
- 8 Audio Systems
3
- 8 Setting the Clock
3
- 9AM-FM Stereo with Cassette Tape Player
3
- 13 AM-FM Stereo with Cassette Tape and
Compact Disc Player with Radio Data
Systems (RDS) (If Equipped)3
- 21 Radio Data Systems (RDS) Program
Type (PTY) Selections
3
- 22 CD Adapter Kits
3
- 22 Trunk-Mounted CD Changer (Option)
3
- 26 Theft-Deterrent Feature
3
- 27 Audio Steering Wheel Controls
3
- 27 Understanding Radio Reception
3
- 28 Tips About Your Audio System
3
- 29 Care of Your Cassette Tape Player
3
- 30 Care of Your Compact Discs
3
- 30 Care of Your Compact Disc Player
3
- 31 Heated Backlite Antenna
Page 171 of 321

3-27 Audio Steering Wheel Controls
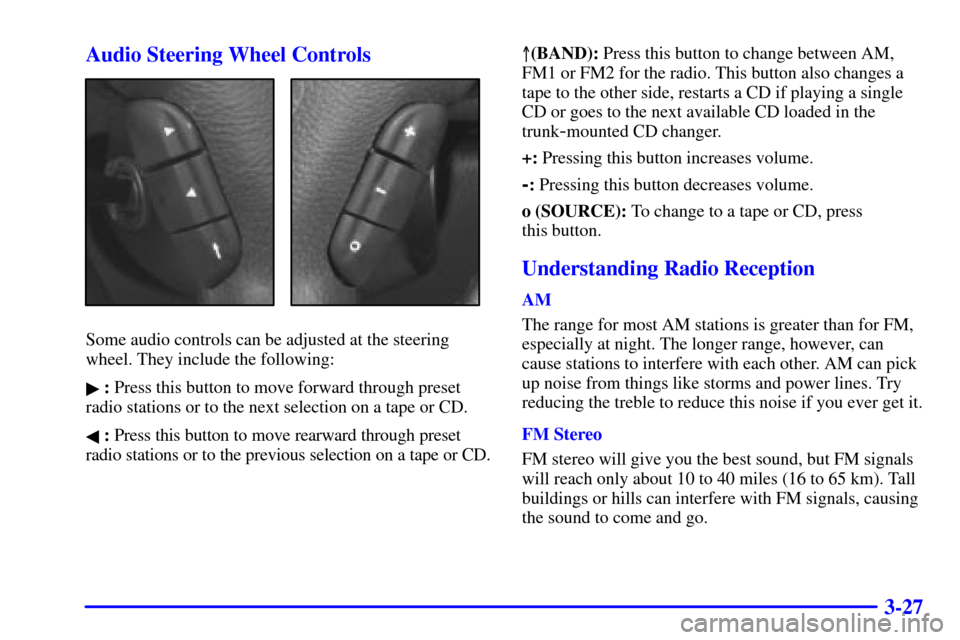
Some audio controls can be adjusted at the steering
wheel. They include the following:
� : Press this button to move forward through preset
radio stations or to the next selection on a tape or CD.
� : Press this button to move rearward through preset
radio stations or to the previous selection on a tape or CD.�(BAND): Press this button to change between AM,
FM1 or FM2 for the radio. This button also changes a
tape to the other side, restarts a CD if playing a single
CD or goes to the next available CD loaded in the
trunk
-mounted CD changer.
+: Pressing this button increases volume.
-: Pressing this button decreases volume.
o (SOURCE): To change to a tape or CD, press
this button.
Understanding Radio Reception
AM
The range for most AM stations is greater than for FM,
especially at night. The longer range, however, can
cause stations to interfere with each other. AM can pick
up noise from things like storms and power lines. Try
reducing the treble to reduce this noise if you ever get it.
FM Stereo
FM stereo will give you the best sound, but FM signals
will reach only about 10 to 40 miles (16 to 65 km). Tall
buildings or hills can interfere with FM signals, causing
the sound to come and go.
Page 176 of 321
4-
4-1
Section 4 Your Driving and the Road
Here you'll find information about driving on different kinds of roads and in varying weather conditions. We've also
included many other useful tips on driving.
4
- 2 Defensive Driving
4
- 3 Drunken Driving
4
- 6 Control of a Vehicle
4
- 6 Braking
4
- 10 Steering
4
- 13 Off-Road Recovery
4
- 13 Passing
4
- 14 Loss of Control
4
- 16 Driving at Night
4
- 18 Driving in Rain and on Wet Roads4
- 21 City Driving
4
- 22 Freeway Driving
4
- 23 Before Leaving on a Long Trip
4
- 23 Highway Hypnosis
4
- 24 Hill and Mountain Roads
4
- 25 Winter Driving
4
- 29 Recreational Vehicle Towing
4
- 30 Loading Your Vehicle
4
- 32 Towing a Trailer
Page 181 of 321

4-6
Control of a Vehicle
You have three systems that make your vehicle go where
you want it to go. They are the brakes, the steering and
the accelerator. All three systems have to do their work
at the places where the tires meet the road.
Sometimes, as when you're driving on snow or ice, it's
easy to ask more of those control systems than the tires
and road can provide. That means you can lose control
of your vehicle. (Also see ªTraction Control Systemº
in the Index.)
Braking
Braking action involves perception time and
reaction time.
First, you have to decide to push on the brake pedal.
That's perception time. Then you have to bring up
your foot and do it. That's reaction time.
Average reaction time is about 3/4 of a second.
But that's only an average. It might be less with one
driver and as long as two or three seconds or more with
another. Age, physical condition, alertness, coordination
and eyesight all play a part. So do alcohol, drugs and
frustration. But even in 3/4 of a second, a vehicle
moving at 60 mph (100 km/h) travels 66 feet (20 m).
That could be a lot of distance in an emergency, so
keeping enough space between your vehicle and others
is important.
And, of course, actual stopping distances vary greatly
with the surface of the road (whether it's pavement or
gravel); the condition of the road (wet, dry, icy); tire
tread; the condition of your brakes; the weight of the
vehicle and the amount of brake force applied.