Page 233 of 392

4-38 Following Distance
Stay at least twice as far behind the vehicle ahead as you
would when driving your vehicle without a trailer. This
can help you avoid situations that require heavy braking
and sudden turns.
Passing
You'll need more passing distance up ahead when
you're towing a trailer. And, because you're a good deal
longer, you'll need to go much farther beyond the
passed vehicle before you can return to your lane.
Backing Up
Hold the bottom of the steering wheel with one hand.
Then, to move the trailer to the left, just move that hand
to the left. To move the trailer to the right, move your
hand to the right. Always back up slowly and, if
possible, have someone guide you.
Making Turns
NOTICE:
Making very sharp turns while trailering could
cause the trailer to come in contact with the
vehicle. Your vehicle could be damaged. Avoid
making very sharp turns while trailering.
When you're turning with a trailer, make wider turns
than normal. Do this so your trailer won't strike soft
shoulders, curbs, road signs, trees or other objects.
Avoid jerky or sudden maneuvers. Signal well
in advance.
Turn Signals When Towing a Trailer
When you tow a trailer, your vehicle may need a
different turn signal flasher and/or extra wiring. Check
with your dealer. The arrows on your instrument panel
will flash whenever you signal a turn or lane change.
Properly hooked up, the trailer lamps will also flash,
telling other drivers you're about to turn, change lanes
or stop.
Page 234 of 392

4-39
When towing a trailer, the arrows on your instrument
panel will flash for turns even if the bulbs on the trailer
are burned out. Thus, you may think drivers behind you
are seeing your signal when they are not. It's important
to check occasionally to be sure the trailer bulbs are
still working.
Your vehicle has bulb warning lights. When you plug
a trailer lighting system into your vehicle's lighting
system, its bulb warning lights may not let you know if
one of your lamps goes out. So, when you have a trailer
lighting system plugged in, be sure to check your
vehicle and trailer lamps from time to time to be sure
they're all working. Once you disconnect the trailer
lamps, the bulb warning lights again can tell you if one
of your vehicle lamps is out.
Driving On Grades
Reduce speed and shift to a lower gear before you start
down a long or steep downgrade. If you don't shift
down, you might have to use your brakes so much that
they would get hot and no longer work well.
On a long uphill grade, shift down to THIRD (3)
and reduce your speed to around 45 mph (70 km/h)
to reduce the possibility of engine and
transaxle overheating.
Parking on Hills
CAUTION:
You really should not park your vehicle, with a
trailer attached, on a hill. If something goes
wrong, your rig could start to move. People can
be injured, and both your vehicle and the trailer
can be damaged.
But if you ever have to park your rig on a hill, here's
how to do it:
1. Apply your regular brakes, but don't shift into
PARK (P) yet.
2. Have someone place chocks under the trailer wheels.
3. When the wheel chocks are in place, release the
regular brakes until the chocks absorb the load.
4. Reapply the regular brakes. Then apply your parking
brake, and then shift to PARK (P).
5. Release the regular brakes.
Page 243 of 392
5-8
NOTICE:
Use the proper towing equipment to avoid
damage to the bumper, fascia or fog lamp areas
of the vehicle.
With current trends in automotive styles and design, it is
essential that the correct towing equipment is used to
tow a vehicle. Your vehicle can be towed with wheel
-lift
or car
-carrier equipment.
Consult your dealer or a professional towing service if
you need to have your vehicle towed. See ªRoadside
Assistanceº in the Index.
Engine Overheating
You will find a warning light about a hot engine, as well
as a coolant temperature gage, on your instrument panel.
If Steam Is Coming From Your Engine
CAUTION:
Steam from an overheated engine can burn you
badly, even if you just open the hood. Stay away
from the engine if you see or hear steam coming
from it. Just turn it off and get everyone away from
the vehicle until it cools down. Wait until there is no
sign of steam or coolant before you open the hood.
CAUTION: (Continued)
Page 251 of 392

5-16
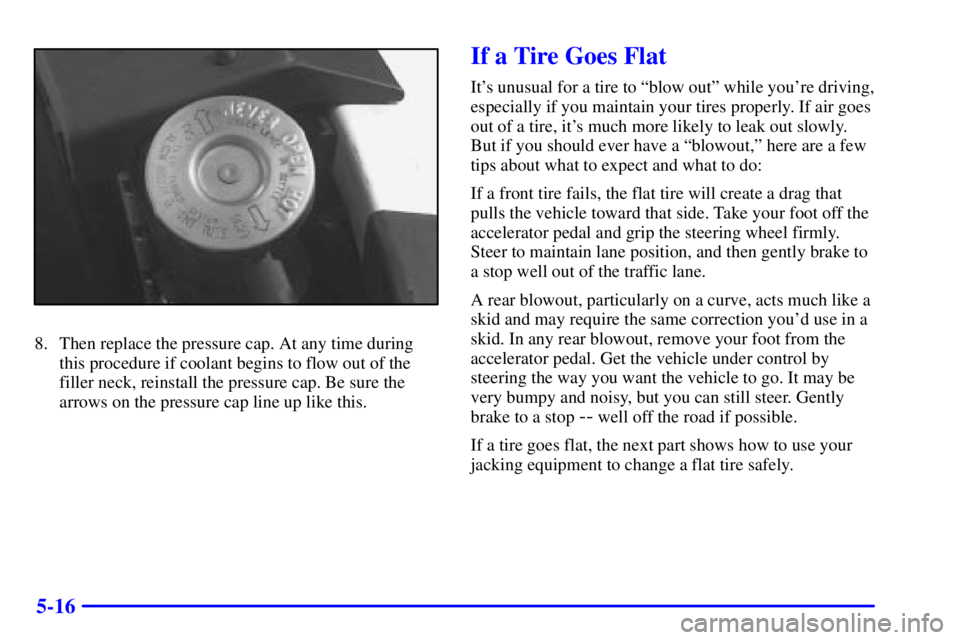
8. Then replace the pressure cap. At any time during
this procedure if coolant begins to flow out of the
filler neck, reinstall the pressure cap. Be sure the
arrows on the pressure cap line up like this.
If a Tire Goes Flat
It's unusual for a tire to ªblow outº while you're driving,
especially if you maintain your tires properly. If air goes
out of a tire, it's much more likely to leak out slowly.
But if you should ever have a ªblowout,º here are a few
tips about what to expect and what to do:
If a front tire fails, the flat tire will create a drag that
pulls the vehicle toward that side. Take your foot off the
accelerator pedal and grip the steering wheel firmly.
Steer to maintain lane position, and then gently brake to
a stop well out of the traffic lane.
A rear blowout, particularly on a curve, acts much like a
skid and may require the same correction you'd use in a
skid. In any rear blowout, remove your foot from the
accelerator pedal. Get the vehicle under control by
steering the way you want the vehicle to go. It may be
very bumpy and noisy, but you can still steer. Gently
brake to a stop
-- well off the road if possible.
If a tire goes flat, the next part shows how to use your
jacking equipment to change a flat tire safely.
Page 252 of 392
5-17
Changing a Flat Tire
If a tire goes flat, avoid further tire and wheel damage
by driving slowly to a level place. Turn on your hazard
warning flashers.
CAUTION:
Changing a tire can cause an injury. The vehicle
can slip off the jack and roll over you or other
people. You and they could be badly injured.
Find a level place to change your tire. To help
prevent the vehicle from moving:
1. Set the parking brake firmly.
2. Put the shift lever in PARK (P).
3. Turn off the engine.
To be even more certain the vehicle won't move,
you can put blocks at the front and rear of the
tire farthest away from the one being changed.
That would be the tire on the other side of the
vehicle, at the opposite end.
The following steps will tell you how to use the jack and
change a tire.
Page 253 of 392
5-18 Removing the Spare Tire and Tools
The equipment you'll need is located in the trunk.
Instructions for changing your tires are on the inside of
the tire cover. You can rest the cover near you for easy
reference while you change the tire.
1. Lift the tire cover to gain access to the spare tire and
jacking equipment.
2. Remove the wheel wrench and jack from the
jack container.3. Remove the spare tire from the trunk. See ªCompact
Spare Tireº later in this section for more information
about the compact spare.
The tools you'll be using include the jack (A) and the
wheel wrench (B).
Page 254 of 392

5-19 Removing Wheel Covers and Wheel
Nut Caps
The following steps are necessary if you have the alloy
(aluminum) wheel with a center cover that conceals
the wheel nuts.
1. Insert the flat end of the wheel wrench in the notch
and pry off the center cover. Do not drop the
cover or lay it face down, as it could be scratched
or damaged.
2. If your vehicle has this
aluminum wheel, you
may have plastic wheel
nut caps. Use the wheel
nut wrench to remove
the wheel nut caps and
to loosen the wheel nuts.
3. When reinstalling the decorative nut caps, tighten the
caps snugly with the wheel wrench, then continue
one
-eighth turn for steel caps and one-quarter turn
for plastic caps.
It is not required to remove the center cover on this
wheel; however, if it should be necessary, it should
be removed from the back side by pushing out with a
blunt tool and not pried off from the front.
When reinstalling the cap, there is a plastic
alignment pin which must be aligned with the notch
in the wheel to assure proper installation.
4. After the wheel is put back on the vehicle, reinstall
the cover. Apply pressure around the edge of the
cover to snap it in place. Do not use a hammer or
mallet to install the cover.
Page 255 of 392
5-20 Removing the Flat Tire and Installing the
Spare Tire
1. Use the wheel wrench to loosen the wheel nuts, but
don't remove them yet.
2. The jack has a bolt at the
end. Attach the wheel
wrench to the bolt to
create a jack handle.
3. Turn the wheel wrench counterclockwise to lower
the jack head until it fits under the vehicle.
4. Near each wheel well is a notch in the plastic trim
panel to position the jack head. You'll find the word
JACK and an arrow stamped into the plastic near
each notch. Position the jack under the vehicle and
raise the jack head until it fits firmly against the
sheet metal next to the word JACK. Do not raise the
vehicle yet. Put the compact spare tire near you.