2000 BMW 328i SEDAN wheel
[x] Cancel search: wheelPage 30 of 189
30n
Controls Locks and security systems:
Keys32
Electronic vehicle
immobilizer33
Central locking system34
Opening and closing Ð from
outside34
Opening and closing Ð from
inside38
Luggage compartment lid39
Luggage compartment41
Alarm system42
Electric power windows44
Sliding/Tilt sunroof45
Adjustments:
Seats47
Seat and mirror memory50
Steering wheel51
Mirrors52
Car Memory, Key Memory53
Passenger safety systems:
Safety belts54
Child restraint systems55
Child-safety locks56
Airbags56
Child restraints59
Installing a child restraint
system60
Page 42 of 189

42n
Alarm system
*
The conceptThe vehicle's alarm system responds:
>When a door, the hood or the lug-
gage compartment lid is opened
>To movement inside the vehicle
(interior motion sensor)
>To a change of the vehicle's tilt Ð if
someone attempts to steal the wheels
or tow the vehicle without authoriza-
tion, for example
>If there is an interruption of battery
voltage.
The alarm system signals unauthorized
access to the vehicle or an attempted
theft in different ways:
>Sounding an acoustical alarm for
30 seconds
>The hazard warning flashers are acti-
vated for approx. five minutes.
To activate and deactivate the
alarm systemWhen the vehicle is locked or unlocked
by using a key or with the remote con-
trol, the alarm system is also simulta-
neously armed or disarmed.
The interior motion sensor is activated
approx. 30 seconds after you have fin-
ished locking the car.
If the alarm system has been armed
correctly, the hazard warning flashers
flash once. An acoustic warning signal
sounds at the same time.
You can have different acknow-
ledgment messages set to confirm
arming and disarming.<
You can also open the luggage com-
partment lid when the system is armed
by pressing button 3 of the remote con-
trol (refer to page 37). When it is closed,
the lid is once again secured.
Indicator lamp displaysThe indicator lamp is located under the
interior rearview mirror.
>When the indicator lamp flashes con-
tinuously: The system is armed.
>If the indicator lamp flashes during
arming of the system: The door(s),
the hood or luggage compartment lid
are not completely closed. Even if
you do not close the alerted area, the
system begins to monitor the remain-
ing areas, and the indicator lamp
flashes continuously after 10 sec-
onds. However, the interior motion
sensor is not activated.
>If the indicator lamp goes out when
the system is disarmed: No manipu-
lation or attempted intrusions have
been detected in the period since the
system was armed.460de105
Page 48 of 189
48n
Mechanical seat Head restraints Correct sitting postureTo reduce strain on the spinal column,
sit all the way back in the seat and rest
your back fully against the backrest.
In the ideal sitting posture, your head is
positioned along a straight line in rela-
tionship to your spinal column.
For long-distance driving, you may wish
to increase the backrest angle slightly
to reduce muscular tension. You should
be able to grasp the steering wheel at
its highest point with your arms slightly
bent.
After a seat adjustment, adjust the
height of the safety belt also. Refer to
page 54.
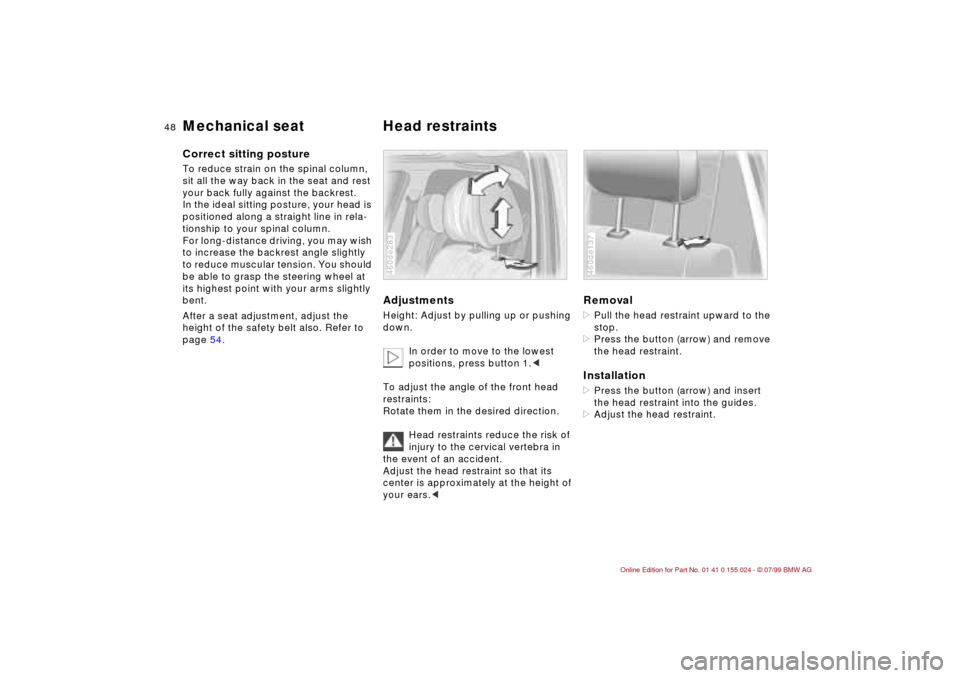
Adjustments Height: Adjust by pulling up or pushing
down.
In order to move to the lowest
positions, press button 1.<
To adjust the angle of the front head
restraints:
Rotate them in the desired direction.
Head restraints reduce the risk of
injury to the cervical vertebra in
the event of an accident.
Adjust the head restraint so that its
center is approximately at the height of
your ears.<460de283
Removal>Pull the head restraint upward to the
stop.
>Press the button (arrow) and remove
the head restraint.Installation>Press the button (arrow) and insert
the head restraint into the guides.
>Adjust the head restraint.460de137
Page 51 of 189
51n
IndexDataTechnologyRepairsCar careControlsOverview
Seat and mirror memory
*
Adjusting steering wheel
Your BMW center can adjust your
vehicle's systems in such a man-
ner that your personalized settings are
automatically set for the seat and out-
side mirror positions when you unlock
the vehicle with your personal remote
control.<
If you make use of this method of
adjustment, be sure that the foot-
well behind the driver's seat is unob-
structed before unlocking the vehicle.
If you fail to do so, persons or objects
could be injured or damaged if the seat
should move backward.<
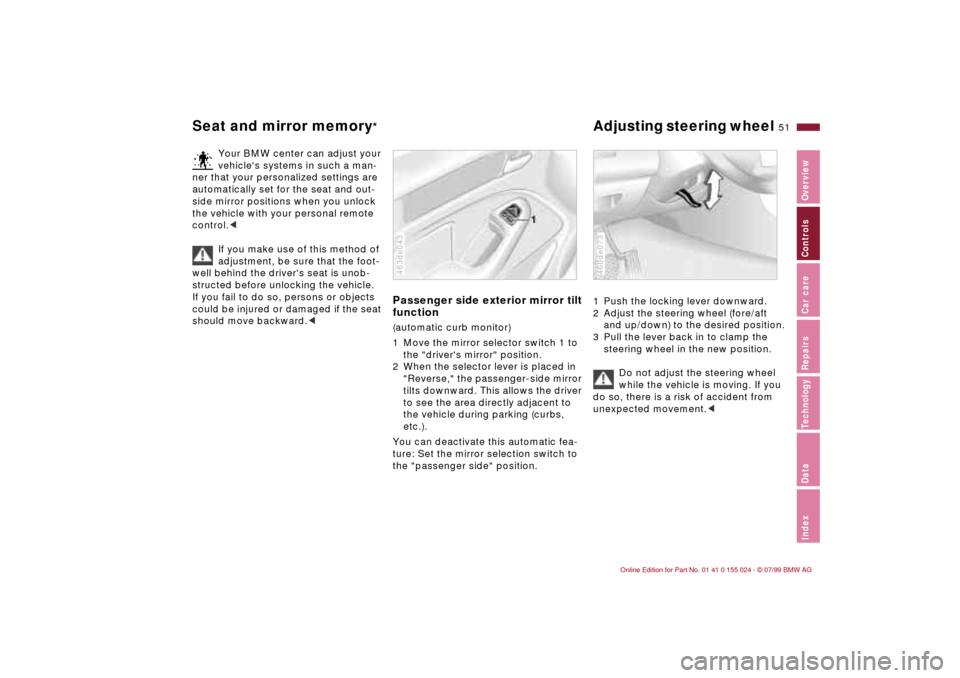
Passenger side exterior mirror tilt
function(automatic curb monitor)
1 Move the mirror selector switch 1 to
the "driver's mirror" position.
2 When the selector lever is placed in
"Reverse," the passenger-side mirror
tilts downward. This allows the driver
to see the area directly adjacent to
the vehicle during parking (curbs,
etc.).
You can deactivate this automatic fea-
ture: Set the mirror selection switch to
the "passenger side" position.463de043
1 Push the locking lever downward.
2 Adjust the steering wheel (fore/aft
and up/down) to the desired position.
3 Pull the lever back in to clamp the
steering wheel in the new position.
Do not adjust the steering wheel
while the vehicle is moving. If you
do so, there is a risk of accident from
unexpected movement.<460de073
Page 57 of 189

57n
IndexDataTechnologyRepairsCar careControlsOverview
AirbagsIndicator lamp
The indicator lamp displays the
operational status of the airbag
system when the ignition key is
in position 1 and higher.
System operational:
>The indicator lamp comes on briefly
then goes out.
System malfunction:
>The indicator lamp fails to come on.
>The indicator lamp comes on briefly
before going out, and then lights up
again.
If there is a system malfunction, there is
a risk that the airbags will not be trig-
gered within their normal response
range, even if the level of impact would
normally have triggered them.
Have your BMW center inspect and
repair the system immediately.
The airbag indicator lamp also
comes on if the safety belt ten-
sioners have been triggered.<
For your own safety, please com-
ply with the following precautions
concerning airbags. If you do not, their
protective function may be impaired
and your personal safety endangered.
The following information pertains to all
occupants:
The airbags are supplemental restraint
devices designed to provide extra pro-
tection; they are not a substitute for
safety belts. Wear your safety belt at all
times. The airbags will not be triggered
in the event of a minor accident, a vehi-
cle roll-over, or collisions from the rear.
In these instances, the safety belt offers
the best protection.
Airbags are located under the cover
panels in the steering wheel, in the in-
strument panel, in the side trim panels
in the front and rear
*, in the roof panels,
and in the sides of the inside roof lining.
Select a seat position that is comfort-
able and allows the greatest possible
distance from each of the applicable air-
bags. Hold the steering wheel at the rim
(hands at the "9 o'clock and 3 o'clock"
positions) in order to avoid injuries to
your hands or arms if the airbag is trig-
gered.
Never allow any objects to obstruct the
area between the airbag and an occu-
pant.
Do not use the cover panel above the
front passenger airbag as a storage
area.
Never tape the airbag cover panels,
cover them over or alter them in any
other way.
Never install a rear-facing child restraint
device on the front passenger seat. Chil-
dren under 13 years of age and children
who are smaller than 5 feet (150 cm),
should only travel in the rear seat.
If your vehicle is equipped with side air-
bags in the rear, be sure that child seats
are installed correctly and with the
greatest possible distance from the side
trim panels. Do not allow children to
lean out of the child's seat in the direc-
tion of the side trim panels. Otherwise,
serious injuries could occur if the airbag
is triggered.
At all times, occupants should sit up-
right and be properly restrained (infants
and small children in appropriate child
restraint systems; larger children and
adults using the safety belts). Never let
an occupant's head rest near or on a
side airbag because the inflating airbag
could cause a serious or fatal injury.
Please note that the word "Airbag" im-
printed on the door trim panel indicates
the airbag's location.
Page 61 of 189
61n
IndexDataTechnologyRepairsCar careControlsOverview
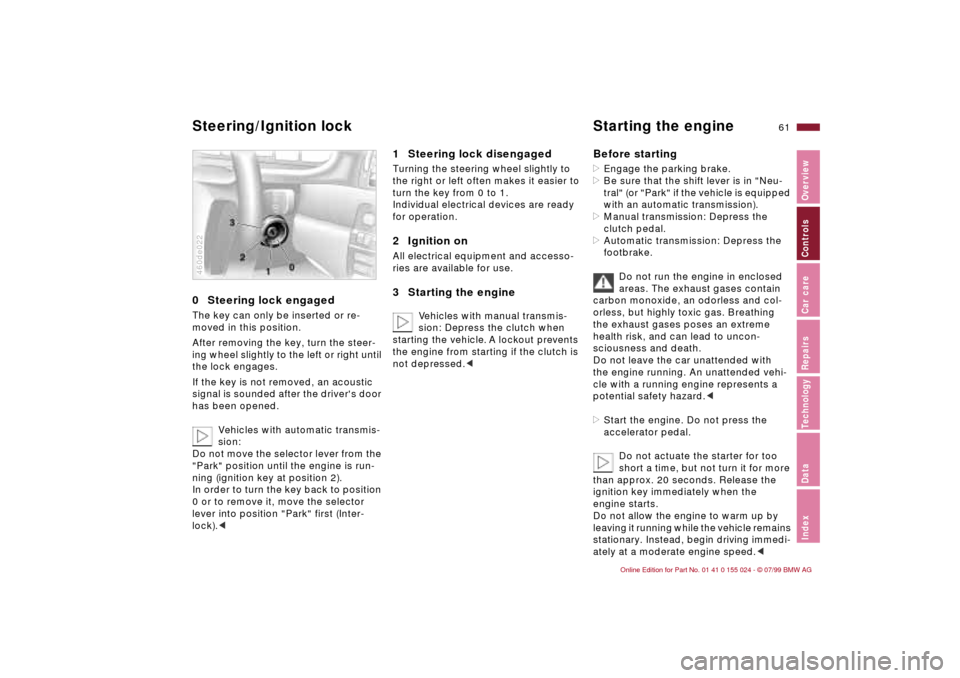
0 Steering lock engaged The key can only be inserted or re-
moved in this position.
After removing the key, turn the steer-
ing wheel slightly to the left or right until
the lock engages.
If the key is not removed, an acoustic
signal is sounded after the driver's door
has been opened.
Vehicles with automatic transmis-
sion:
Do not move the selector lever from the
"Park" position until the engine is run-
ning (ignition key at position 2).
In order to turn the key back to position
0 or to remove it, move the selector
lever into position "Park" first (Inter-
lock).<460de022
1 Steering lock disengaged Turning the steering wheel slightly to
the right or left often makes it easier to
turn the key from 0 to 1.
Individual electrical devices are ready
for operation.2 Ignition onAll electrical equipment and accesso-
ries are available for use.3 Starting the engine
Vehicles with manual transmis-
sion: Depress the clutch when
starting the vehicle. A lockout prevents
the engine from starting if the clutch is
not depressed.c
Before starting>Engage the parking brake.
>Be sure that the shift lever is in "Neu-
tral" (or "Park" if the vehicle is equipped
with an automatic transmission).
>Manual transmission: Depress the
clutch pedal.
>Automatic transmission: Depress the
footbrake.
Do not run the engine in enclosed
areas. The exhaust gases contain
carbon monoxide, an odorless and col-
orless, but highly toxic gas. Breathing
the exhaust gases poses an extreme
health risk, and can lead to uncon-
sciousness and death.
Do not leave the car unattended with
the engine running. An unattended vehi-
cle with a running engine represents a
potential safety hazard.<
>Start the engine. Do not press the
accelerator pedal.
Do not actuate the starter for too
short a time, but not turn it for more
than approx. 20 seconds. Release the
ignition key immediately when the
engine starts.
Do not allow the engine to warm up by
leaving it running while the vehicle remains
stationary. Instead, begin driving immedi-
ately at a moderate engine speed.<
Steering/Ignition lock Starting the engine
Page 62 of 189

62n
Starting the engine Switching off the engine If the engine does not start on the first
attempt (if it is very hot or cold, for in-
stance):
>Press the accelerator pedal halfway
down while engaging the starter.
Cold start at extremely low tempera-
tures, from approx. + 5 7 (Ð 15 6)
and at elevations above 3,300 feet
(1,000 meters):
>On the first start attempt, engage the
starter for a longer period (approx.
10 seconds)
>Press the accelerator pedal halfway
down while engaging the starter.Turn the ignition key to position 1 or 0.
Do not remove the ignition key
while the vehicle is still moving.
If you did so, the steering lock would
engage when the steering wheel is
turned.
When you leave the vehicle, always re-
move the ignition key and engage the
steering lock.
Vehicles with manual transmission:
Always engage the parking brake when
parking on slopes and inclined sur-
faces. Placing the lever in 1st gear or
reverse may not provide adequate
resistance to rolling.
Vehicles with automatic transmission:
Place the selector lever in "Park."<
Page 63 of 189
63n
IndexDataTechnologyRepairsCar careControlsOverview
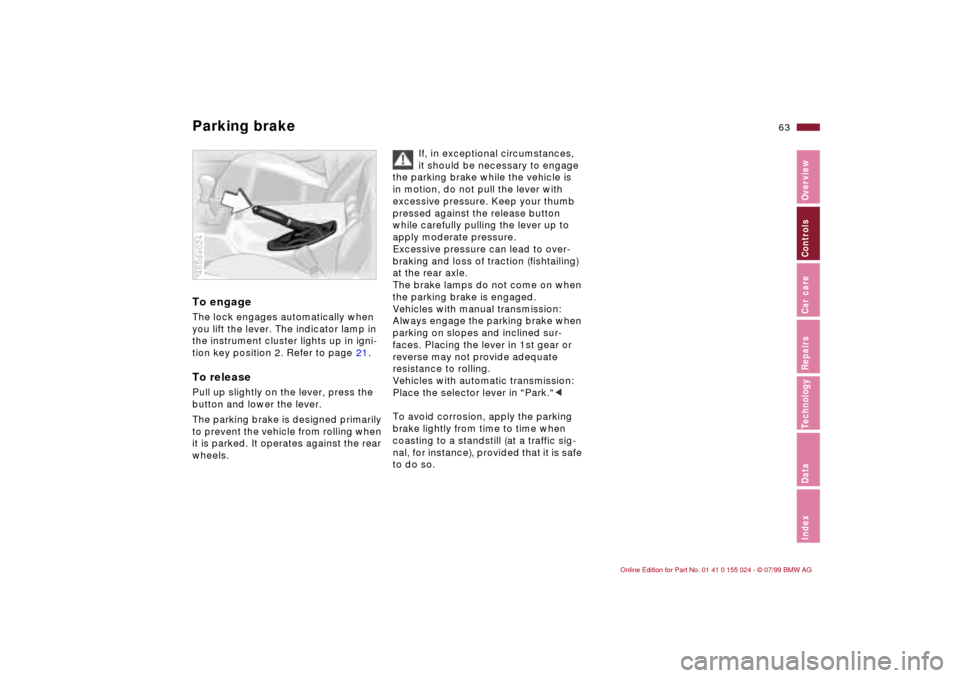
Parking brake To engageThe lock engages automatically when
you lift the lever. The indicator lamp in
the instrument cluster lights up in igni-
tion key position 2. Refer to page 21.To releasePull up slightly on the lever, press the
button and lower the lever.
The parking brake is designed primarily
to prevent the vehicle from rolling when
it is parked. It operates against the rear
wheels.460de024
If, in exceptional circumstances,
it should be necessary to engage
the parking brake while the vehicle is
in motion, do not pull the lever with
excessive pressure. Keep your thumb
pressed against the release button
while carefully pulling the lever up to
apply moderate pressure.
Excessive pressure can lead to over-
braking and loss of traction (fishtailing)
at the rear axle.
The brake lamps do not come on when
the parking brake is engaged.
Vehicles with manual transmission:
Always engage the parking brake when
parking on slopes and inclined sur-
faces. Placing the lever in 1st gear or
reverse may not provide adequate
resistance to rolling.
Vehicles with automatic transmission:
Place the selector lever in "Park."<
To avoid corrosion, apply the parking
brake lightly from time to time when
coasting to a standstill (at a traffic sig-
nal, for instance), provided that it is safe
to do so.