2000 BMW 328I ECU
[x] Cancel search: ECUPage 151 of 189
151n
IndexDataTechnologyRepairsCar careControlsOverview
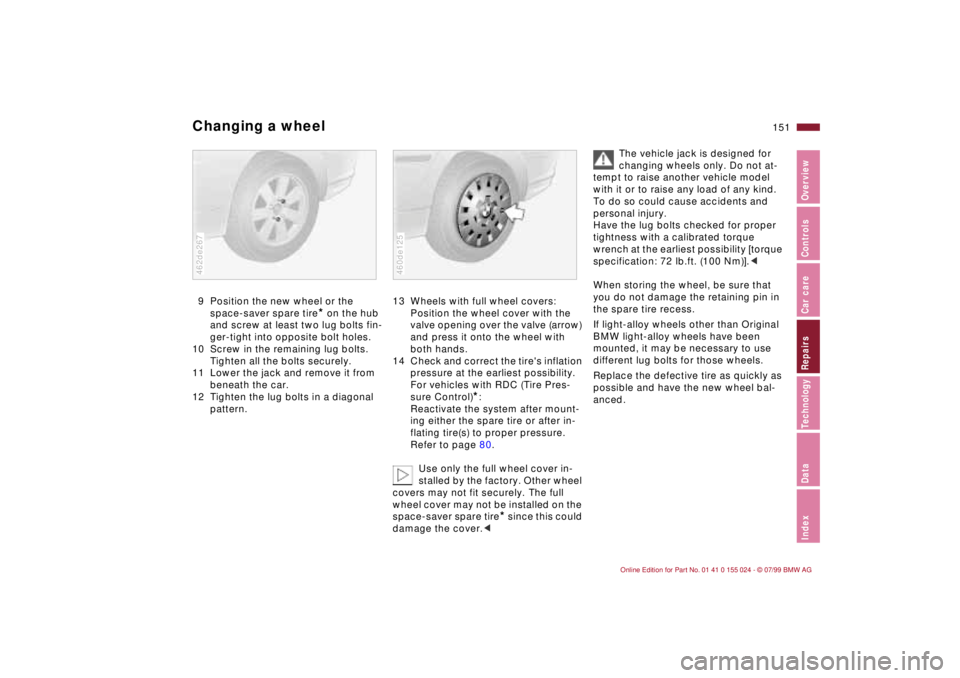
Changing a wheel9 Position the new wheel or the
space-saver spare tire
* on the hub
and screw at least two lug bolts fin-
ger-tight into opposite bolt holes.
10 Screw in the remaining lug bolts.
Tighten all the bolts securely.
11 Lower the jack and remove it from
beneath the car.
12 Tighten the lug bolts in a diagonal
pattern.
462de267
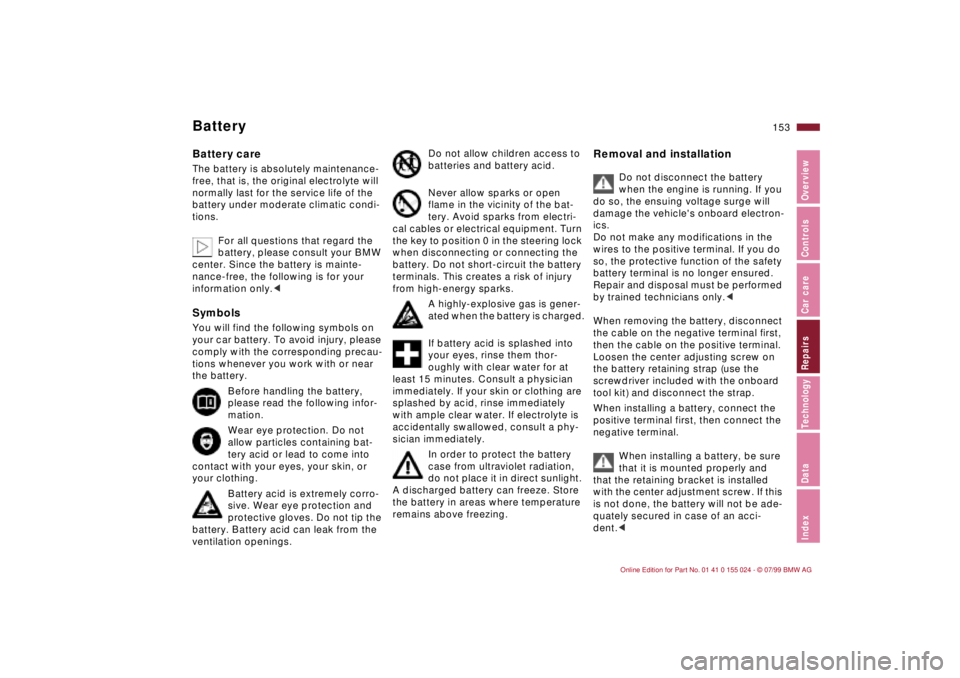
13 Wheels with full wheel covers:
Position the wheel cover with the
valve opening over the valve (arrow)
and press it onto the wheel with
both hands.
14 Check and correct the tire's inflation
pressure at the earliest possibility.
For vehicles with RDC (Tire Pres-
sure Control)
*:
Reactivate the system after mount-
ing either the spare tire or after in-
flating tire(s) to proper pressure.
Refer to page 80.
Use only the full wheel cover in-
stalled by the factory. Other wheel
covers may not fit securely. The full
wheel cover may not be installed on the
space-saver spare tire
* since this could
damage the cover.<
460de125
The vehicle jack is designed for
changing wheels only. Do not at-
tempt to raise another vehicle model
with it or to raise any load of any kind.
To do so could cause accidents and
personal injury.
Have the lug bolts checked for proper
tightness with a calibrated torque
wrench at the earliest possibility [torque
specification: 72 lb.ft. (100 Nm)].<
When storing the wheel, be sure that
you do not damage the retaining pin in
the spare tire recess.
If light-alloy wheels other than Original
BMW light-alloy wheels have been
mounted, it may be necessary to use
different lug bolts for those wheels.
Replace the defective tire as quickly as
possible and have the new wheel bal-
anced.
Page 153 of 189
153n
IndexDataTechnologyRepairsCar careControlsOverview
BatteryBattery careThe battery is absolutely maintenance-
free, that is, the original electrolyte will
normally last for the service life of the
battery under moderate climatic condi-
tions.
For all questions that regard the
battery, please consult your BMW
center. Since the battery is mainte-
nance-free, the following is for your
information only.
comply with the corresponding precau-
tions whenever you work with or near
the battery.
Before handling the battery,
please read the following infor-
mation.
Wear eye protection. Do not
allow particles containing bat-
tery acid or lead to come into
contact with your eyes, your skin, or
your clothing.
Battery acid is extremely corro-
sive. Wear eye protection and
protective gloves. Do not tip the
battery. Battery acid can leak from the
ventilation openings.
Do not allow children access to
batteries and battery acid.
Never allow sparks or open
flame in the vicinity of the bat-
tery. Avoid sparks from electri-
cal cables or electrical equipment. Turn
the key to position 0 in the steering lock
when disconnecting or connecting the
battery. Do not short-circuit the battery
terminals. This creates a risk of injury
from high-energy sparks.
A highly-explosive gas is gener-
ated when the battery is charged.
If battery acid is splashed into
your eyes, rinse them thor-
oughly with clear water for at
least 15 minutes. Consult a physician
immediately. If your skin or clothing are
splashed by acid, rinse immediately
with ample clear water. If electrolyte is
accidentally swallowed, consult a phy-
sician immediately.
In order to protect the battery
case from ultraviolet radiation,
do not place it in direct sunlight.
A discharged battery can freeze. Store
the battery in areas where temperature
remains above freezing.
Removal and installation
Do not disconnect the battery
when the engine is running. If you
do so, the ensuing voltage surge will
damage the vehicle's onboard electron-
ics.
Do not make any modifications in the
wires to the positive terminal. If you do
so, the protective function of the safety
battery terminal is no longer ensured.
Repair and disposal must be performed
by trained technicians only.<
When removing the battery, disconnect
the cable on the negative terminal first,
then the cable on the positive terminal.
Loosen the center adjusting screw on
the battery retaining strap (use the
screwdriver included with the onboard
tool kit) and disconnect the strap.
When installing a battery, connect the
positive terminal first, then connect the
negative terminal.
When installing a battery, be sure
that it is mounted properly and
that the retaining bracket is installed
with the center adjustment screw. If this
is not done, the battery will not be ade-
quately secured in case of an acci-
dent.<
Page 154 of 189
154n
Battery FusesCharging the battery Charge the battery in the vehicle only
when the engine is not running.
Before doing any work on the elec-
trical system, be sure to unclamp
the cable from the battery's negative
terminal. Failure to do so can result in
short-circuits, a fire or personal injury.<
If the vehicle is to be parked longer than
four weeks, disconnect the battery from
the vehicle's electrical system by dis-
connecting the negative terminal cable
and then recharge using a suitable
charging device.
If you intend to store your car for longer
than twelve weeks: Remove the battery,
charge it and store it in a cool (but frost-
and dust-free) room. Every three months
and before reinstalling the battery, have
it recharged. If it is not recharged, it will
not be serviceable. Every time the bat-
tery is discharged, especially over ex-
tended periods, its service life is re-
duced.
Return used batteries to a recy-
cling center or your BMW center.
Maintain the battery in an upright posi-
tion for transport and storage. Secure
the battery to prevent it from tilting dur-
ing transport.<
Storage periods during which the
battery is disconnected are not
taken into consideration by the Service
Interval Display for changing the brake
fluid.
For this reason, be sure that the brake
fluid is changed every two years, re-
gardless of the information displayed.
Read and comply with the information
on page 129 covering this subject.<
If an electrical accessory should fail,
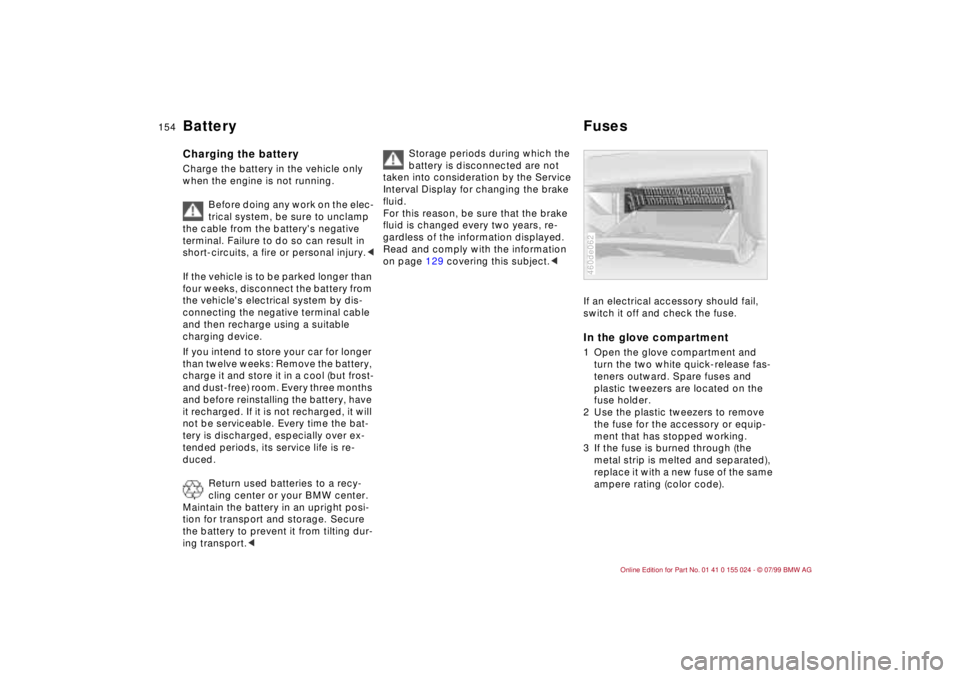
switch it off and check the fuse. In the glove compartment1 Open the glove compartment and
turn the two white quick-release fas-
teners outward. Spare fuses and
plastic tweezers are located on the
fuse holder.
2 Use the plastic tweezers to remove
the fuse for the accessory or equip-
ment that has stopped working.
3 If the fuse is burned through (the
metal strip is melted and separated),
replace it with a new fuse of the same
ampere rating (color code).460de062
Page 155 of 189
155n
IndexDataTechnologyRepairsCar careControlsOverview
Fuses Microfilter The fuses, their respective ampere rat-
ings and the equipment in their circuits
are all indicated below the fuse holder.
To close the fuse holder, snap it into
position at the top and turn the two fas-
teners inward.
Do not attempt to repair a burned
fuse or replace it with a fuse hav-
ing a different color or amperage rating.
To do this could cause a fire in the vehi-
cle resulting from a circuit overload.<
If a fuse blows repeatedly, refer the
problem to your BMW center for repair.
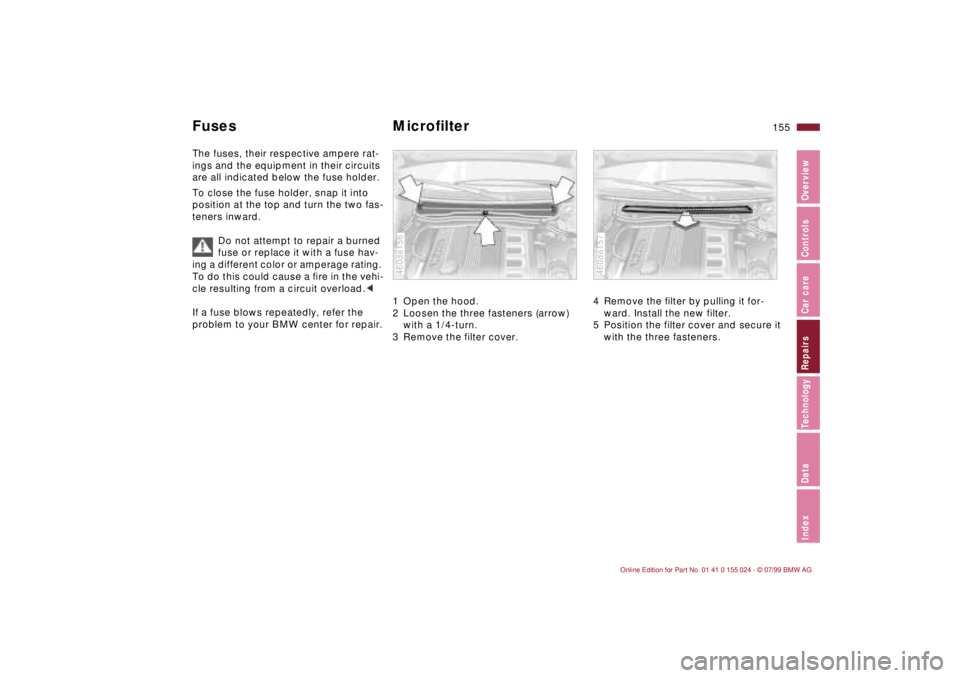
1 Open the hood.
2 Loosen the three fasteners (arrow)
with a 1/4-turn.
3 Remove the filter cover. 460de156
4 Remove the filter by pulling it for-
ward. Install the new filter.
5 Position the filter cover and secure it
with the three fasteners. 460de157
Page 182 of 189
Everything from A to ZGlove compartment lamp
bulb replacement148
Gross vehicle weight174HHandbrake63
Handsfree system95
Hazard warning flashers25
Hazard warning triangle25
Head restraint48
Headlamp covers,
care132, 143
Headlamp flasher83
Headlamp washer
system124, 175
Headlamp washers70
Heated seats91
Heavy loads99
Height173
HiFi system Ð harman
kardon92
High beams23, 68, 83
bulb replacement143
Hood release120
Horn17
Hubcap150IIce warning76
Icy roads76
Identification, tires116Ignition key32
Ignition lock61
Indicator lamps20
Inflated pressure27, 113
Inflation pressure
monitoring80, 167
INSPECTION74
Installing a child restraint
system60
Instrument cluster18
Instrument lighting82
Instrument panel18
Interaxle tire rotation115
Interface socket96
for Onboard
Diagnostics139
Interference
cellular phones112
Interior lamps36, 83
bulb replacement147
remote control36
Interior motion sensor42
Interior rearview mirror52
automatic dimming
feature53, 165
Interlock61
Intermittent wipe68
JJack149
Jump-starting157
KKey Memory53
Keys32
with remote control32LLAMPS ON warning82
Lashing eyes99
Leather care136
Length173
License plate lamp
bulb replacement147
Light switch82
Light-alloy wheels118
Lighter96
Load-securing devices99
Louvers86
Low beam headlamps82
Low beams
bulb replacement143
Lug bolts150
Lug wrench149
Luggage compartment41
capacity174
floor mat41
floor panel41
remote control37
Luggage compartment
lamps
bulb replacement148Luggage compartment
lid39
emergency release39
securing separately39
Luggage compartment
lighting39
Luggage rack100
Lumbar support49
MM+S tires117
Maintenance74, 131
Malfunction displays75
Manual transmission64
Manually controlled
recirculated-air89
Memory50
MFL (Multifunction steering
wheel)24
Microfilter90, 155
Mirror memory50
Mirrors52
Mobile phones112
Modifications,
technical6, 138
Multifunction steering wheel
(MFL)24NNeckrest48
Page 183 of 189
Everything from A to Z
183n
IndexDataTechnologyRepairsCar careControlsOverview
OOBD interface socket139
Obstruction protection44
Odometer73
Oil
capacity175
consumption125
dipstick125
quality126
specifications126
viscosity126
Oil additives125
Oil change intervals, see the
Service and Warranty
Information Booklet
Oil filter change175
Oil level
check125
indicator lamp20
Oil pressure, indicator
lamp20
OILSERVICE74
Onboard computer76
Onboard tool kit142
Outside temperature
display76PPaint blemishes133
Paint, care133
Paintwork, minor
repairs134Paintwork, waxing134
Park Distance Control
(PDC)78
Parking brake63
Parking help78
Parking lamps83
Parking, winter111
PDC (Park Distance
Control)78
Performance172
Pocket flashlight92
Pollen90
Power seat49
Power steering111
Power windows44
safety switch45
Pressure monitoring,
tires80, 167
Pressure, tires27, 113
RRadiator175
Radio
refer to the separate
Owner's Manual
Radio Data System
(RDS)164
Radio reception112, 164
Rain sensor69, 166
RDC (Tire Pressure
Control)80, 167
RDS (Radio Data
System)164Reading lamps84
Rear backrest, folding97
Rear lamps145
Rear window
defroster70, 90
Rearview mirror52
Reclining seat47
Refueling26
Remote control35
Removing condensation,
windows89
Replacement key32
Reporting safety defects7
Restraint system59
Reverse17, 64
Roller blind, sun
protection91
Roller sun blind91
Roof load capacity174
Roof-mounted luggage
rack100
Rubber parts110
SSafety belt tensioner164
Safety belts54
height adjustment54
Safety feature44
Safety lock buttons38
Seat
mechanical47
power49
Seat adjustment47Seat heating91
Seat memory50
Securing cargo99
Securing loads99
Selector lever, automatic
transmission65
Self-defrosting mirrors52
Self-diagnostics168
Service and Warranty
Information Booklet131
Service Interval
Display74, 131
Shiftlock65
Side airbags56
Side impact Head Protection
System56
Side lamps82
bulb replacement144
Ski bag98
Skid control111
Sliding/Tilt sunroof45
closing following an
electrical malfunction156
convenience operation34
Slippery roads110
Snow chains110, 118
Space-saver spare tire149
Spare key32
Spare tire149
Spare wheel149
Spark plugs176
Speaker95
Speed control71