2000 BMW 328Ci COUPE seat adjustment
[x] Cancel search: seat adjustmentPage 12 of 189

Contents
Overview
Controls and features
Cockpit 16
Instrument cluster 18
Indicator and warning lamps 20
Multi-function steering wheel 24
Hazard warning system 25
Warning triangle 25
First-aid kit 25
Refueling 26
Fuel specifications 26
Tire inflation pressure 27
Locks and security systems:
Keys32
Electronic vehicle immobilizer 33
Central locking system 34
Door locks – from outside 34
Using the key 34
Using the remote control 35
Door locks – from inside 38
Luggage compartment lid 39
Luggage compartment 41
Alarm system 42
Electric power windows 44
Sliding/tilt sunroof 45
Adjustments:
Seats47
Seat and mirror memory 50
Steering wheel 51
Mirrors 52
Car Memory, Key Memory 54
Passenger safety systems:
Safety belts55
Child restraint systems 56
Airbags 57
Driving:
Steering/ignition lock 62
Starting the engine 62
Switching off the engine 63
Parking brake 64 Manual transmission
65
Automatic transmission with Steptronic 66
Turn signal/Headlamp flasher 69
Wiper/washer system/Rain sensor 69
Rear window defroster 71
Cruise control 72
Everything under control:
Odometer74
Tachometer 74
Energy control 74
Fuel gauge 75
Temperature gauge 75
Service Interval Display 76
Check Control 77
Clock 77
Onboard computer 77
Technology for safety and
convenience:
Park Distance Control (PDC) 80
Dynamic Stability Control (DSC) 81
Tire Pressure Control (RDC) 82
Page 32 of 189

30n
Locks and security systems:
Keys32
Electronic vehicle
immobilizer33
Central locking system34
Door locks – from outside34
Using the key34
Using the remote control35
Door locks – from inside38
Luggage compartment lid39
Luggage compartment41
Alarm system42
Electric power windows44
Sliding/tilt sunroof45
Adjustments:
Seats47
Seat and mirror memory50
Steering wheel51
Mirrors52
Car Memory, Key Memory54
Passenger safety systems:
Safety belts55
Child restraint systems56
Airbags57
Driving:
Steering/ignition lock62
Starting the engine62
Switching off the engine63
Parking brake64
Page 49 of 189
47n
RepairsIndexOverview Controls Car care Technology Data
For maximum safety when adjusting the
seat position, please observe the fol-
lowing:
Never try to adjust your seat while
operating the vehicle. The seat
could respond with an unexpected
movement, and the ensuing loss of ve-
hicle control could lead to an accident.
Be sure that the safety belt remains
firmly against your body at all times. In
the event of a frontal impact, a loose lap
belt could slide over the hips, leading to
abdominal injury. In addition, the safety
belt's restraint effectiveness is reduced
if the belt is worn loosely.
Never ride with the backrest reclined to
an extreme horizontal angle (especially
important for front passengers to re-
member). Keep the backrest relatively
upright to minimize the risk of "sliding
under" the safety belt and sustaining in-
jury in a crash.<
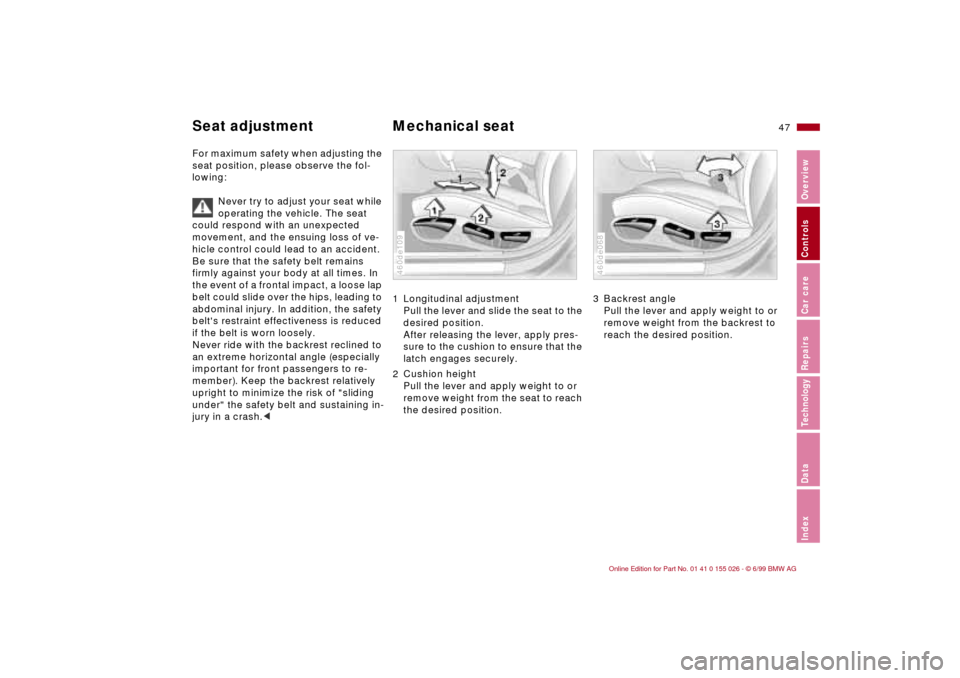
1 Longitudinal adjustment
Pull the lever and slide the seat to the
desired position.
After releasing the lever, apply pres-
sure to the cushion to ensure that the
latch engages securely.
2 Cushion height
Pull the lever and apply weight to or
remove weight from the seat to reach
the desired position.460de109
3 Backrest angle
Pull the lever and apply weight to or
remove weight from the backrest to
reach the desired position.460de068
Seat adjustment Mechanical seat
Page 50 of 189
48n
Mechanical seat Head restraints Correct sitting postureTo reduce strain on the spinal column,
sit all the way back in the seat and rest
your back fully against the backrest.
Ideal sitting posture is achieved with
your head extending from your spine in
a straight line.
For long-distance driving, you may wish
to to increase the backrest angle slightly
to reduce muscular tension. You should
be able to grab the steering wheel at its
highest point with your arms slightly
bent.
After a seat adjustment, adjust the
height of the safety belt also. Refer to
page 55.
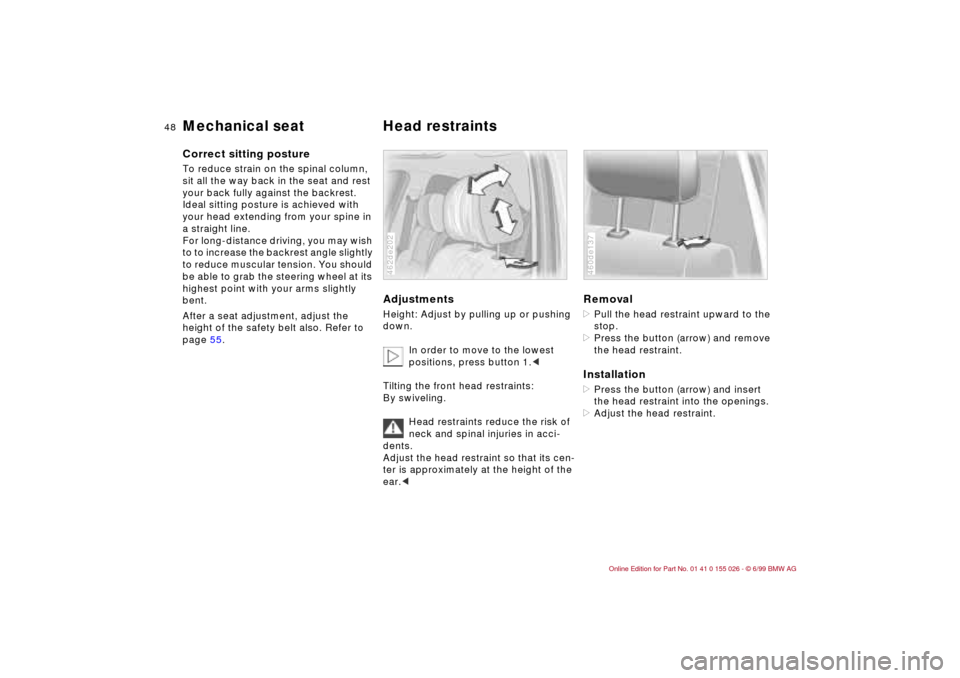
Adjustments Height: Adjust by pulling up or pushing
down.
In order to move to the lowest
positions, press button 1.<
Tilting the front head restraints:
By swiveling.
Head restraints reduce the risk of
neck and spinal injuries in acci-
dents.
Adjust the head restraint so that its cen-
ter is approximately at the height of the
ear.<462de202
Removal>Pull the head restraint upward to the
stop.
>Press the button (arrow) and remove
the head restraint.Installation>Press the button (arrow) and insert
the head restraint into the openings.
>Adjust the head restraint.460de137
Page 52 of 189
50n
Electric power seat
*
Seat and mirror memory
*
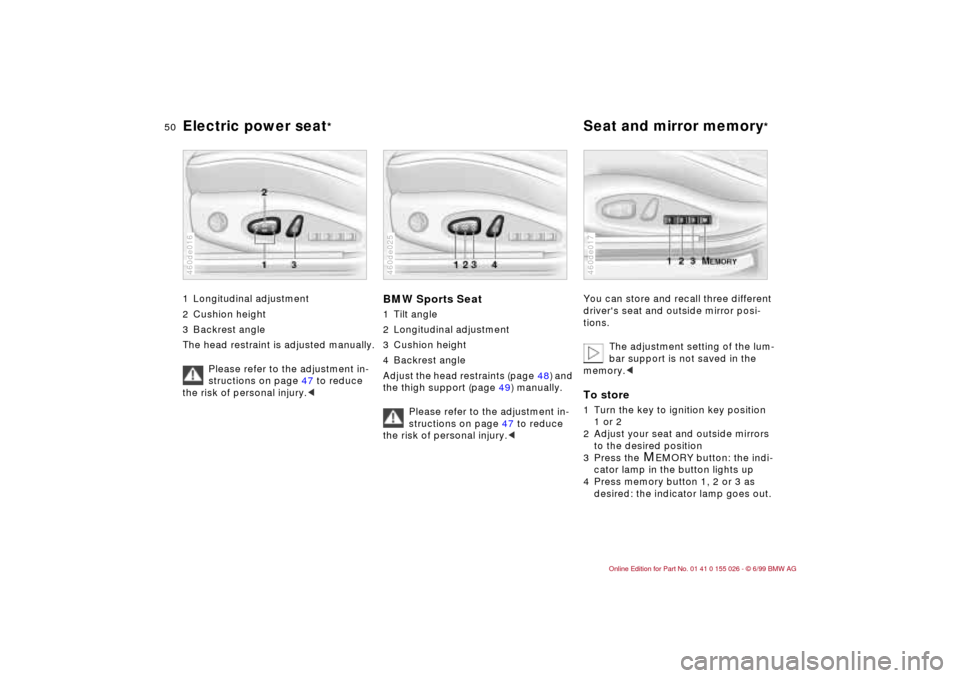
1 Longitudinal adjustment
2 Cushion height
3 Backrest angle
The head restraint is adjusted manually.
Please refer to the adjustment in-
structions on page 47 to reduce
the risk of personal injury.<460de016
BMW Sports Seat1 Tilt angle
2 Longitudinal adjustment
3 Cushion height
4 Backrest angle
Adjust the head restraints (page 48) and
the thigh support (page 49) manually.
Please refer to the adjustment in-
structions on page 47 to reduce
the risk of personal injury.<460de025
You can store and recall three different
driver's seat and outside mirror posi-
tions.
The adjustment setting of the lum-
bar support is not saved in the
memory.
2 Adjust your seat and outside mirrors
to the desired position
3 Press the
M
EMORY button: the indi-
cator lamp in the button lights up
4 Press memory button 1, 2 or 3 as
desired: the indicator lamp goes out.
460de017
Page 53 of 189
51n
RepairsIndexOverview Controls Car care Technology Data
Seat and mirror memory
*
Adjusting steering wheel
To select a stored setting:Automatic:
1 Open driver's door after unlocking or
ignition key in position 1
2 Briefly press memory button 1, 2 or 3
as desired.
The adjustment cycle is canceled im-
mediately if you press a seat adjust-
ment switch or one of the memory
buttons.
Manual:
1 With driver's door closed and ignition
key either removed or in position
0 or 2
2 Maintain pressure on desired mem-
ory button 1, 2 or 3 until the adjust-
ment process is completed.
If you press the
M
EMORY button acci-
dentally: Press the button a second
time, the indicator lamp goes out.
Do not select a memory position
while the vehicle is moving. There
is a risk of accident from unexpected
seat movement.<
You can adapt the vehicle settings
so that your own personalized
seat setting is initiated when you unlock
the car using your personalized remote
control key.<
When this setting is used, be sure
that the footwell behind the driver's
seat is clear before unlocking the vehi-
cle. Otherwise, persons or objects could
be injured or damaged should the seat
move backward.<
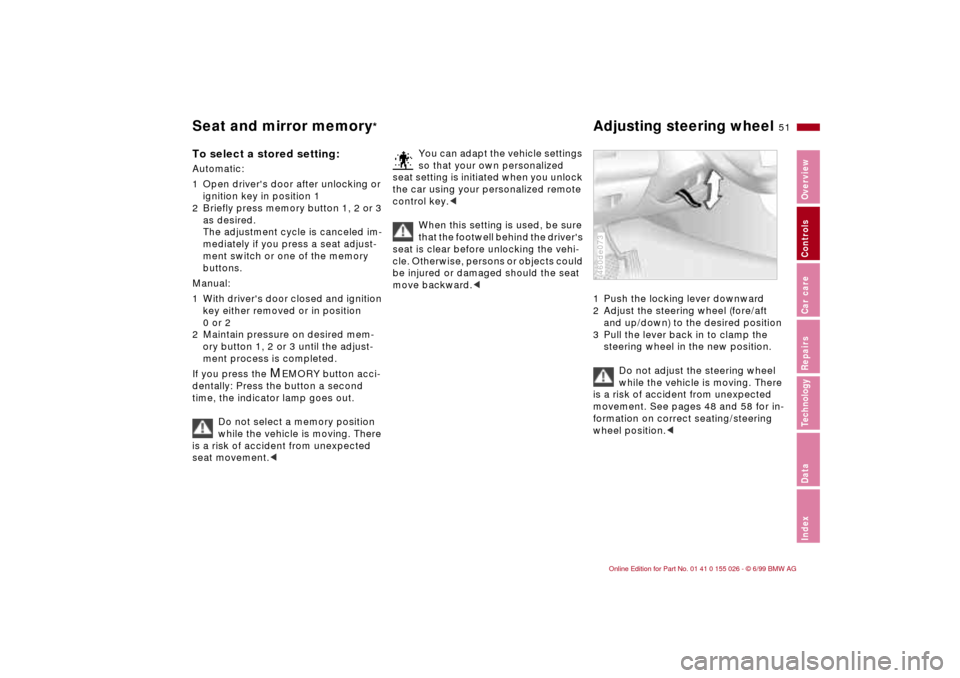
1 Push the locking lever downward
2 Adjust the steering wheel (fore/aft
and up/down) to the desired position
3 Pull the lever back in to clamp the
steering wheel in the new position.
Do not adjust the steering wheel
while the vehicle is moving. There
is a risk of accident from unexpected
movement. See pages 48 and 58 for in-
formation on correct seating/steering
wheel position.<460de073
Page 56 of 189
54n
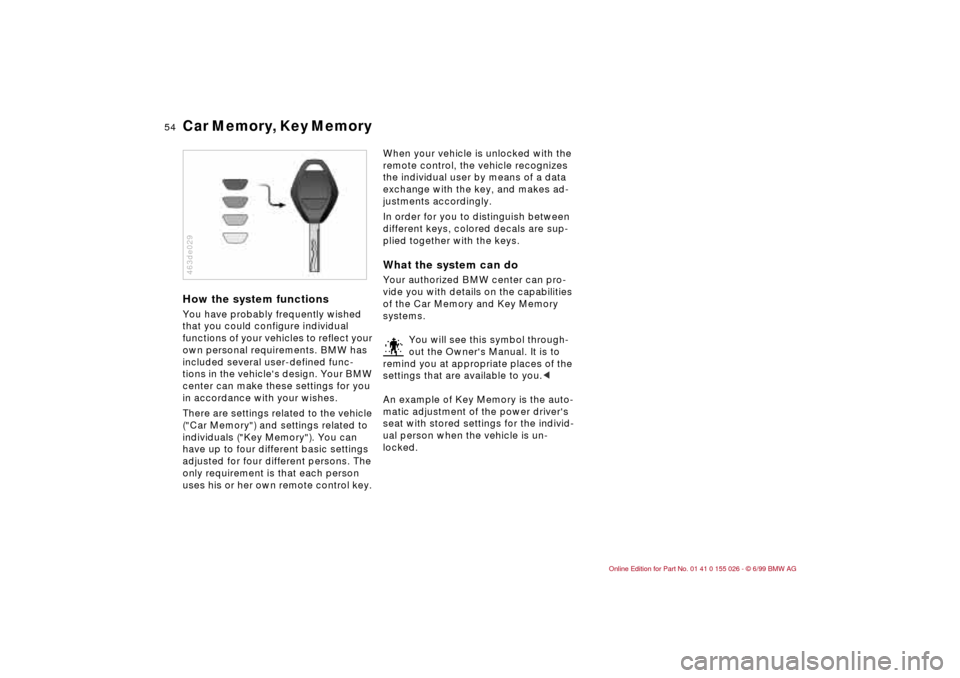
Car Memory, Key Memory How the system functionsYou have probably frequently wished
that you could configure individual
functions of your vehicles to reflect your
own personal requirements. BMW has
included several user-defined func-
tions in the vehicle's design. Your BMW
center can make these settings for you
in accordance with your wishes.
There are settings related to the vehicle
("Car Memory") and settings related to
individuals ("Key Memory"). You can
have up to four different basic settings
adjusted for four different persons. The
only requirement is that each person
uses his or her own remote control key. 463de029
When your vehicle is unlocked with the
remote control, the vehicle recognizes
the individual user by means of a data
exchange with the key, and makes ad-
justments accordingly.
In order for you to distinguish between
different keys, colored decals are sup-
plied together with the keys.What the system can doYour authorized BMW center can pro-
vide you with details on the capabilities
of the Car Memory and Key Memory
systems.
You will see this symbol through-
out the Owner's Manual. It is to
remind you at appropriate places of the
settings that are available to you.<
An example of Key Memory is the auto-
matic adjustment of the power driver's
seat with stored settings for the individ-
ual person when the vehicle is un-
locked.
Page 168 of 189
166n
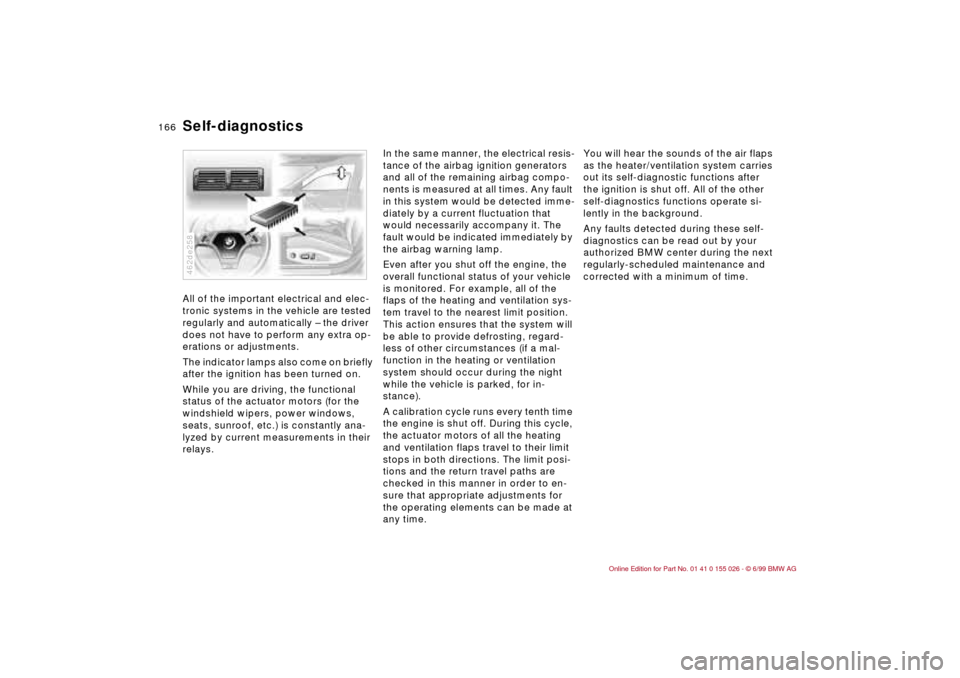
Self-diagnostics All of the important electrical and elec-
tronic systems in the vehicle are tested
regularly and automatically – the driver
does not have to perform any extra op-
erations or adjustments.
The indicator lamps also come on briefly
after the ignition has been turned on.
While you are driving, the functional
status of the actuator motors (for the
windshield wipers, power windows,
seats, sunroof, etc.) is constantly ana-
lyzed by current measurements in their
relays. 462de258
In the same manner, the electrical resis-
tance of the airbag ignition generators
and all of the remaining airbag compo-
nents is measured at all times. Any fault
in this system would be detected imme-
diately by a current fluctuation that
would necessarily accompany it. The
fault would be indicated immediately by
the airbag warning lamp.
Even after you shut off the engine, the
overall functional status of your vehicle
is monitored. For example, all of the
flaps of the heating and ventilation sys-
tem travel to the nearest limit position.
This action ensures that the system will
be able to provide defrosting, regard-
less of other circumstances (if a mal-
function in the heating or ventilation
system should occur during the night
while the vehicle is parked, for in-
stance).
A calibration cycle runs every tenth time
the engine is shut off. During this cycle,
the actuator motors of all the heating
and ventilation flaps travel to their limit
stops in both directions. The limit posi-
tions and the return travel paths are
checked in this manner in order to en-
sure that appropriate adjustments for
the operating elements can be made at
any time.You will hear the sounds of the air flaps
as the heater/ventilation system carries
out its self-diagnostic functions after
the ignition is shut off. All of the other
self-diagnostics functions operate si-
lently in the background.
Any faults detected during these self-
diagnostics can be read out by your
authorized BMW center during the next
regularly-scheduled maintenance and
corrected with a minimum of time.