2000 BMW 328Ci COUPE buttons
[x] Cancel search: buttonsPage 39 of 189

37n
RepairsIndexOverview Controls Car care Technology Data
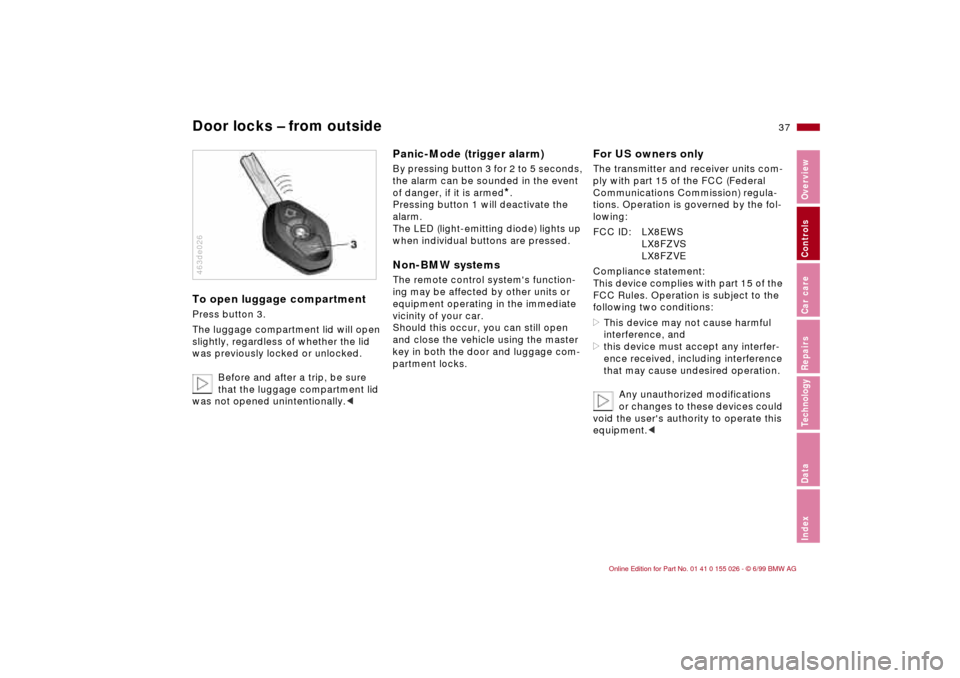
Door locks – from outsideTo open luggage compartmentPress button 3.
The luggage compartment lid will open
slightly, regardless of whether the lid
was previously locked or unlocked.
Before and after a trip, be sure
that the luggage compartment lid
was not opened unintentionally.<463de026
Panic-Mode (trigger alarm)By pressing button 3 for 2 to 5 seconds,
the alarm can be sounded in the event
of danger, if it is armed
*.
Pressing button 1 will deactivate the
alarm.
The LED (light-emitting diode) lights up
when individual buttons are pressed.
Non-BMW systemsThe remote control system's function-
ing may be affected by other units or
equipment operating in the immediate
vicinity of your car.
Should this occur, you can still open
and close the vehicle using the master
key in both the door and luggage com-
partment locks.
For US owners onlyThe transmitter and receiver units com-
ply with part 15 of the FCC (Federal
Communications Commission) regula-
tions. Operation is governed by the fol-
lowing:
FCC ID: LX8EWS
LX8FZVS
LX8FZVE
Compliance statement:
This device complies with part 15 of the
FCC Rules. Operation is subject to the
following two conditions:
>This device may not cause harmful
interference, and
>this device must accept any interfer-
ence received, including interference
that may cause undesired operation.
Any unauthorized modifications
or changes to these devices could
void the user's authority to operate this
equipment.<
Page 40 of 189

38n
Door locks – from inside Use this button to operate the central
locking system when the doors are
closed. The doors and luggage com-
partment lid are unlocked or locked
only. The anti-theft alarm system is not
activated.
After opening the driver's door by acti-
vating the remote control once, the
front passenger door can also be
opened by pressing the button. When
the driver's door is closed, it is auto-
matically locked.
If you desire, the central locking
system will secure the locks as
soon as you start to drive. This can be
adjusted to be key-specific.<460us007
To unlock and open the doors>Either unlock the doors together with
the button for the central locking sys-
tem and then pull each of the release
handles above the armrests or
>pull the release handle for each door
twice: The first pull unlocks the door,
and the second one opens it.
Doors locked from outside can be
opened from inside by first press-
ing the button and then pulling a re-
lease handle twice.<
To engage locks>Either use the central locking button
to lock all doors at once, or
>press down the individual door lock
buttons. The fuel filler door then re-
mains unlocked. As an added design
feature to prevent the driver from be-
ing inadvertently locked out of the ve-
hicle, the driver's door lock button
will not engage as long as the door
is open.
Children might be able to lock the
doors from the inside. For this rea-
son, take the vehicle's keys with you so
that the vehicle can be opened again
from the outside at any time.<
Page 53 of 189

51n
RepairsIndexOverview Controls Car care Technology Data
Seat and mirror memory
*
Adjusting steering wheel
To select a stored setting:Automatic:
1 Open driver's door after unlocking or
ignition key in position 1
2 Briefly press memory button 1, 2 or 3
as desired.
The adjustment cycle is canceled im-
mediately if you press a seat adjust-
ment switch or one of the memory
buttons.
Manual:
1 With driver's door closed and ignition
key either removed or in position
0 or 2
2 Maintain pressure on desired mem-
ory button 1, 2 or 3 until the adjust-
ment process is completed.
If you press the
M
EMORY button acci-
dentally: Press the button a second
time, the indicator lamp goes out.
Do not select a memory position
while the vehicle is moving. There
is a risk of accident from unexpected
seat movement.<
You can adapt the vehicle settings
so that your own personalized
seat setting is initiated when you unlock
the car using your personalized remote
control key.<
When this setting is used, be sure
that the footwell behind the driver's
seat is clear before unlocking the vehi-
cle. Otherwise, persons or objects could
be injured or damaged should the seat
move backward.<
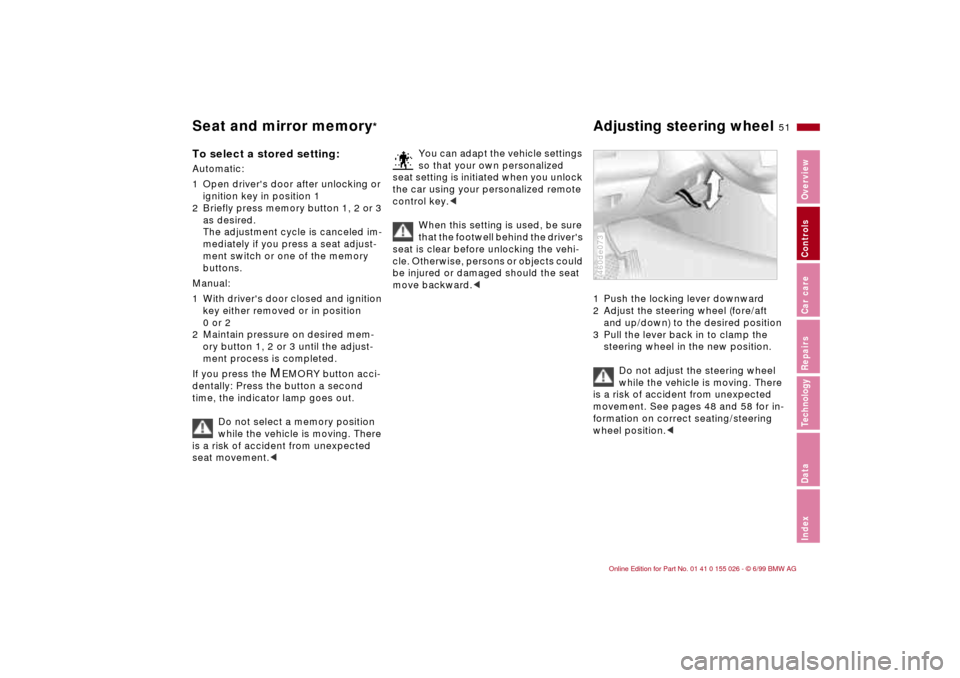
1 Push the locking lever downward
2 Adjust the steering wheel (fore/aft
and up/down) to the desired position
3 Pull the lever back in to clamp the
steering wheel in the new position.
Do not adjust the steering wheel
while the vehicle is moving. There
is a risk of accident from unexpected
movement. See pages 48 and 58 for in-
formation on correct seating/steering
wheel position.<460de073
Page 83 of 189

81n
RepairsIndexOverview Controls Car care Technology Data
DSC Dynamic Stability Control (DSC) This system provides enhanced driving
stability, especially when you are just
starting off or accelerating, and provide
increased traction on curves.
In addition to optimizing road traction
and vehicle stability when the vehicle is
accelerating or starting, the system also
provides enhanced stability when cor-
nering within physically feasible limits.
The system starts up automatically
each time you start the engine.462us026
Indicator lamp
The indicator lamp in the instru-
ment cluster goes out shortly
after you switch on the ignition.
Refer to pages 21 and 22.
Indicator lamp flashes:
The system is actively regulating drive
torque in response to monitored vehicle
operating conditions.
If the indicator lamp fails to go out after
the engine is started, or comes on dur-
ing the course of normal vehicle opera-
tion:
If the system has not been deactivated,
there is a system malfunction. The vehi-
cle remains operational, but without
DSC.
Please consult your authorized BMW
center for repairs.
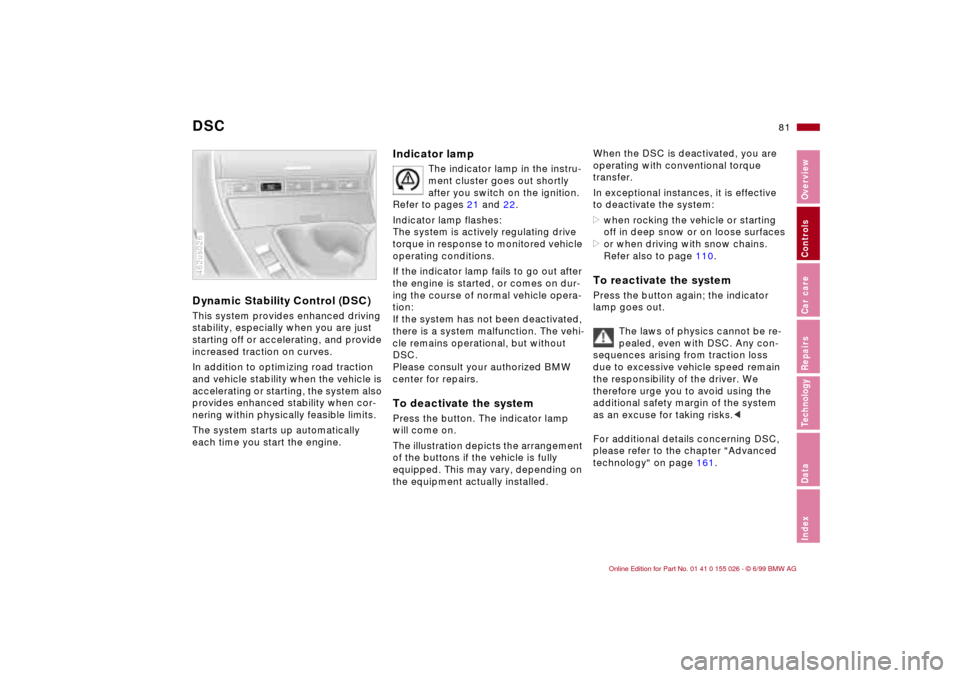
To deactivate the systemPress the button. The indicator lamp
will come on.
The illustration depicts the arrangement
of the buttons if the vehicle is fully
equipped. This may vary, depending on
the equipment actually installed.
When the DSC is deactivated, you are
operating with conventional torque
transfer.
In exceptional instances, it is effective
to deactivate the system:
>when rocking the vehicle or starting
off in deep snow or on loose surfaces
>or when driving with snow chains.
Refer also to page 110.To reactivate the systemPress the button again; the indicator
lamp goes out.
The laws of physics cannot be re-
pealed, even with DSC. Any con-
sequences arising from traction loss
due to excessive vehicle speed remain
the responsibility of the driver. We
therefore urge you to avoid using the
additional safety margin of the system
as an excuse for taking risks.<
For additional details concerning DSC,
please refer to the chapter "Advanced
technology" on page 161.
Page 95 of 189

93n
RepairsIndexOverview Controls Car care Technology Data
Automatic climate control Heated seats
*
Roller sun blind
*
Microfilter, activated charcoal
filter
*
A microfilter traps dust and pollen from
the outside air. The activated-charcoal
filter provides additional protection by
filtering gaseous pollutants from the
outside air. Your BMW center replaces
this combined filter
* as a standard part
of your scheduled maintenance. A sub-
stantial reduction in air flow indicates
that the filter needs to be replaced
early.
For additional details on the filter
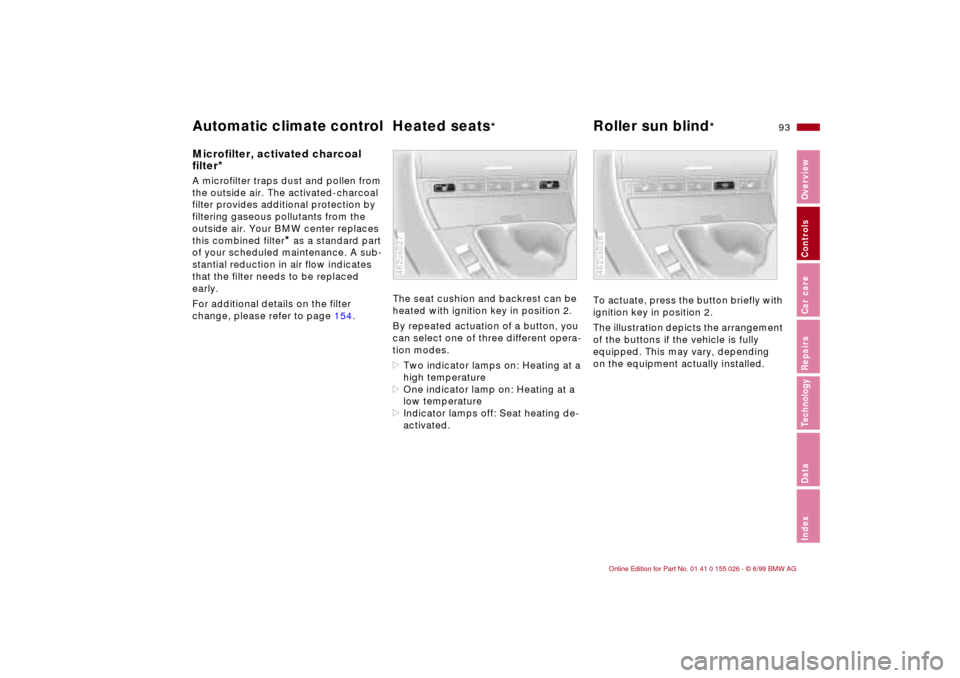
change, please refer to page 154.The seat cushion and backrest can be
heated with ignition key in position 2.
By repeated actuation of a button, you
can select one of three different opera-
tion modes.
>Two indicator lamps on: Heating at a
high temperature
>One indicator lamp on: Heating at a
low temperature
>Indicator lamps off: Seat heating de-
activated.
462us027
To actuate, press the button briefly with
ignition key in position 2.
The illustration depicts the arrangement
of the buttons if the vehicle is fully
equipped. This may vary, depending
on the equipment actually installed.462us028
Page 183 of 189

Everything from A to Z
181n
RepairsIndexOverview Controls Car care Technology Data
NNavigation system, refer to
the radio operating
instructions
Neckrest 48
New transmitter, radio
remote control 147
Non-smokers package 96
Nozzles 122OOBD connector 137
Obstruction protection 44
Odometer 74
Oil
filling capacity 173
quality 124
viscosity 124
Oil additives 123
Oil change intervals, see the
Service and Warranty
Information Booklet
Oil consumption 123
Oil dipstick 123
Oil filter change 173
Oil level
check 123
indicator lamp 21
Oil pressure, indicator
lamp 20
Oil specifications 124
OILSERVICE 76Onboard computer 77
Onboard computer, refer to
the radio operating
instructions
Onboard tool kit 140
Opening and closing
from inside 38
from outside 34
Outlets, ventilation 88
Outside temperature
display 78
PPaint blemishes 131
Paint, care 131
Paintwork
minor repairs 132
waxing 132
Park Distance Control
(PDC) 80
Parking brake 64
Parking help 80
Parking lamps 84, 85
bulb replacement 142
Parking, winter 111
PDC (Park Distance
Control) 80
Performance 170
Pocket lamp 94
Pollen 93
Power steering 112
Power windows 44Preheat 62
Pressure monitoring,
tires 82, 164
Pressure, tires 27, 113
RRadiator 173
Radio Data System
(RDS) 162
Radio reception 112, 162
Radio remote control, new
transmitter 147
Radio, refer also to the radio
operating instructions
Rain sensor 70, 165
RDC (Tire Pressure
Control) 82, 164
RDS (Radio Data
System) 162
Reading lamps 86
Rear backrest, folding 98
Rear lamps 143
Rear window
defroster 71, 92
Rear-view mirror 52
Reclining seat 47
Refueling 26
Remote control 35
Removal of the vehicle from
service 136
Remove condensation,
windows 91Replenish washer fluid 122
Reporting safety defects 7
Reserve control lamp 75
Restraint system 56, 60
Reverse 17, 65
Roller blind, sun
protection 93
Roof load 172
Roof luggage rack 101
Rubber parts 110
SSafety belt height
adjustment 55
Safety belt tensioner 162
Safety belts 55
safety belt height
adjustment 55
Safety buttons 38
Safety feature 44
Seat
electric power 50
mechanical 47
Seat adjustment 47
Seat heating 93
Seat memory 51
Securing cargo 100
Securing loads 100
Selector lever, automatic
transmission 66
Self-diagnostics 166