2000 BMW 328Ci COUPE brake light
[x] Cancel search: brake lightPage 13 of 189

11n
Controls and features
Operation, care and maintenance
Lamps:
Parking lamps/Headlamps84
Instrument panel rheostat84
High beams/Parking lamps85
Fog lamps85
Interior lamps85
Reading lamps86
Controlling the climate
for pleasant driving:
Automatic climate control88
Heated seats93
Roller sun blind93
Cabin convenience:
HiFi System94
Glove compartment94
Storage compartments95
Cellular phones95
Ashtray96
Cigarette lighter96
Clothes hooks97
Loading and transporting:
Through-loading facility98
Ski bag99
Cargo loading100
Roof-mounted luggage rack101
Special operating instructions:
Break-in procedures104
Driving notes104
Catalytic converter105
Antilock Brake System
(ABS)106
Disc brakes108
Brake system109
Winter operation110
Power steering112
Cellular phones112
Radio reception112
Wheels and tires:
Tire inflation pressures113
Tire condition113
Tire replacement114
Tire rotation114
Wheel and tire
combinations115
Winter tires116
Snow chains116
Approved wheel and tire
specifications117
Under the hood:
Hood119
Engine compartment120
Washer fluids122
Washer nozzles122
Engine oil123
Coolant126
Brake fluid127
Vehicle Identification
Number128
Care and maintenance:
The BMW Maintenance
System129
Caring for your car130
Airbags135
Vehicle storage136
Laws and regulations:
Technical modifications
to the vehicle136
OBD connector137
Page 22 of 189
20n
Indicator and warning lamps
Technology that monitors itself
Many of the systems of your BMW mon-
itor themselves automatically, both dur-
ing engine starts and while you are driv-
ing. Indicator and warning lamps that
are identified by "
l
" are tested for
proper functioning whenever the igni-
tion key is turned. They each light up
once for different periods of time.
If a fault should occur in one of these
systems, the corresponding lamp does
not go out after the engine is started or
it lights up while the vehicle is moving.
You will see how to react to this below.
Red: Stop immediately
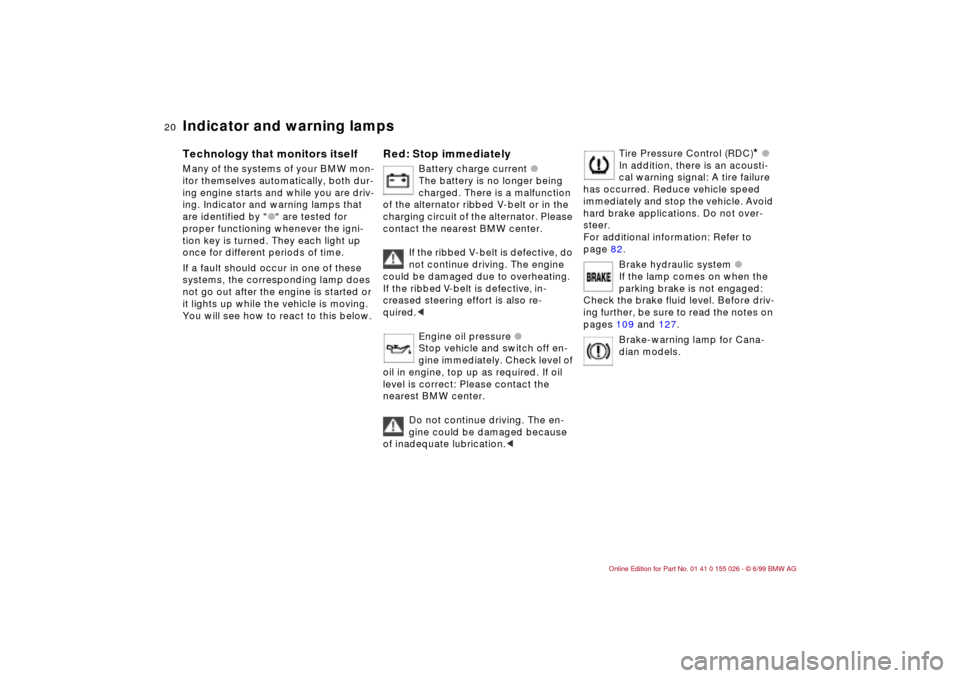
Battery charge current
l
The battery is no longer being
charged. There is a malfunction
of the alternator ribbed V-belt or in the
charging circuit of the alternator. Please
contact the nearest BMW center.
If the ribbed V-belt is defective, do
not continue driving. The engine
could be damaged due to overheating.
If the ribbed V-belt is defective, in-
creased steering effort is also re-
quired.
<
Engine oil pressure
l
Stop vehicle and switch off en-
gine immediately. Check level of
oil in engine, top up as required. If oil
level is correct: Please contact the
nearest BMW center.
Do not continue driving. The en-
gine could be damaged because
of inadequate lubrication.
<
Tire Pressure Control (RDC)
* l
In addition, there is an acousti-
cal warning signal: A tire failure
has occurred. Reduce vehicle speed
immediately and stop the vehicle. Avoid
hard brake applications. Do not over-
steer.
For additional information: Refer to
page 82.
Brake hydraulic system l
If the lamp comes on when the
parking brake is not engaged:
Check the brake fluid level. Before driv-
ing further, be sure to read the notes on
pages 109 and 127.
Brake-warning lamp for Cana-
dian models.
Page 23 of 189
21n
RepairsIndexOverview Controls Car care Technology Data
Indicator and warning lampsYellow: Stop immediately
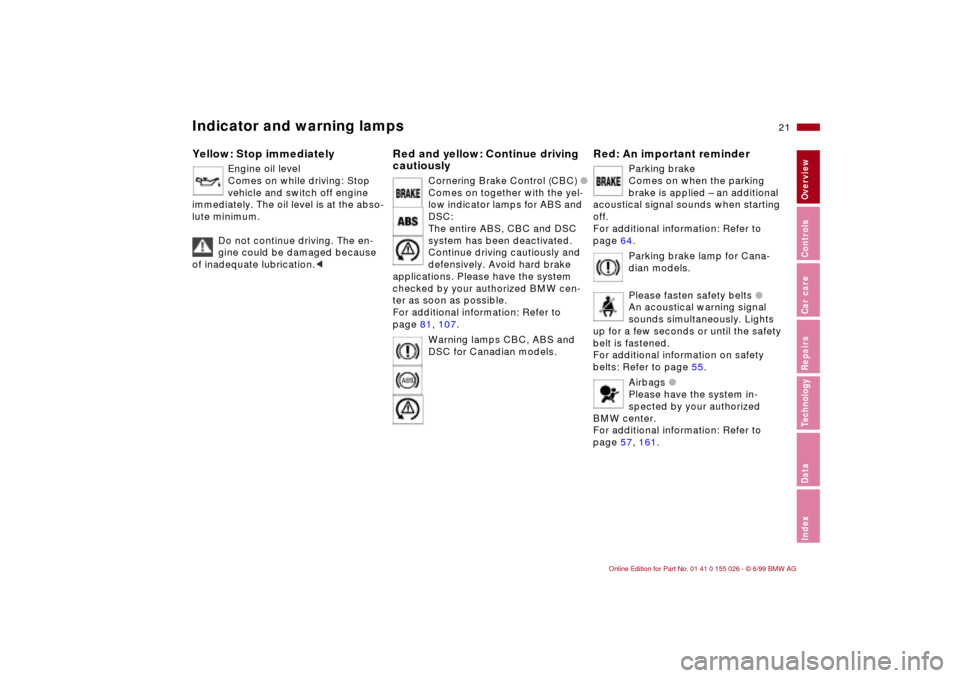
Engine oil level
Comes on while driving: Stop
vehicle and switch off engine
immediately. The oil level is at the abso-
lute minimum.
Do not continue driving. The en-
gine could be damaged because
of inadequate lubrication.<
Red and yellow: Continue driving
cautiously
Cornering Brake Control (CBC) l
Comes on together with the yel-
low indicator lamps for ABS and
DSC:
The entire ABS, CBC and DSC
system has been deactivated.
Continue driving cautiously and
defensively. Avoid hard brake
applications. Please have the system
checked by your authorized BMW cen-
ter as soon as possible.
For additional information: Refer to
page 81, 107.
Warning lamps CBC, ABS and
DSC for Canadian models.
Red: An important reminder
Parking brake
Comes on when the parking
brake is applied – an additional
acoustical signal sounds when starting
off.
For additional information: Refer to
page 64.
Parking brake lamp for Cana-
dian models.
Please fasten safety belts l
An acoustical warning signal
sounds simultaneously. Lights
up for a few seconds or until the safety
belt is fastened.
For additional information on safety
belts: Refer to page 55.
Airbags l
Please have the system in-
spected by your authorized
BMW center.
For additional information: Refer to
page 57, 161.
Page 25 of 189
23n
RepairsIndexOverview Controls Car care Technology Data
Indicator and warning lamps
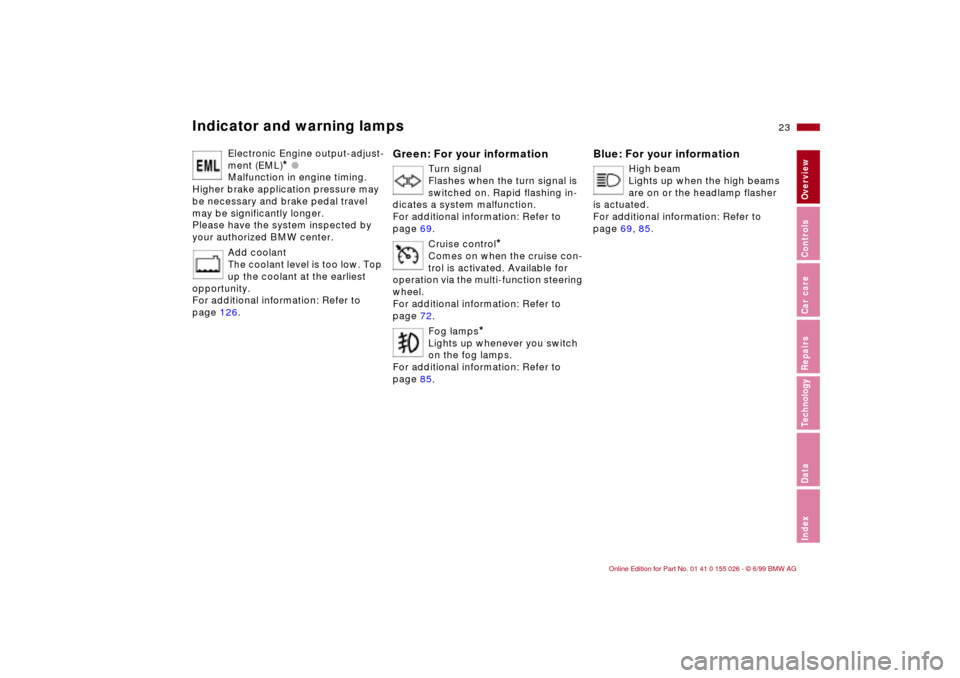
Electronic Engine output-adjust-
ment (EML)
* l
Malfunction in engine timing.
Higher brake application pressure may
be necessary and brake pedal travel
may be significantly longer.
Please have the system inspected by
your authorized BMW center.
Add coolant
The coolant level is too low. Top
up the coolant at the earliest
opportunity.
For additional information: Refer to
page 126.
Green: For your information
Turn signal
Flashes when the turn signal is
switched on. Rapid flashing in-
dicates a system malfunction.
For additional information: Refer to
page 69.
Cruise control
*
Comes on when the cruise con-
trol is activated. Available for
operation via the multi-function steering
wheel.
For additional information: Refer to
page 72.
Fog lamps
*
Lights up whenever you switch
on the fog lamps.
For additional information: Refer to
page 85.
Blue: For your information
High beam
Lights up when the high beams
are on or the headlamp flasher
is actuated.
For additional information: Refer to
page 69, 85.
Page 64 of 189
62n
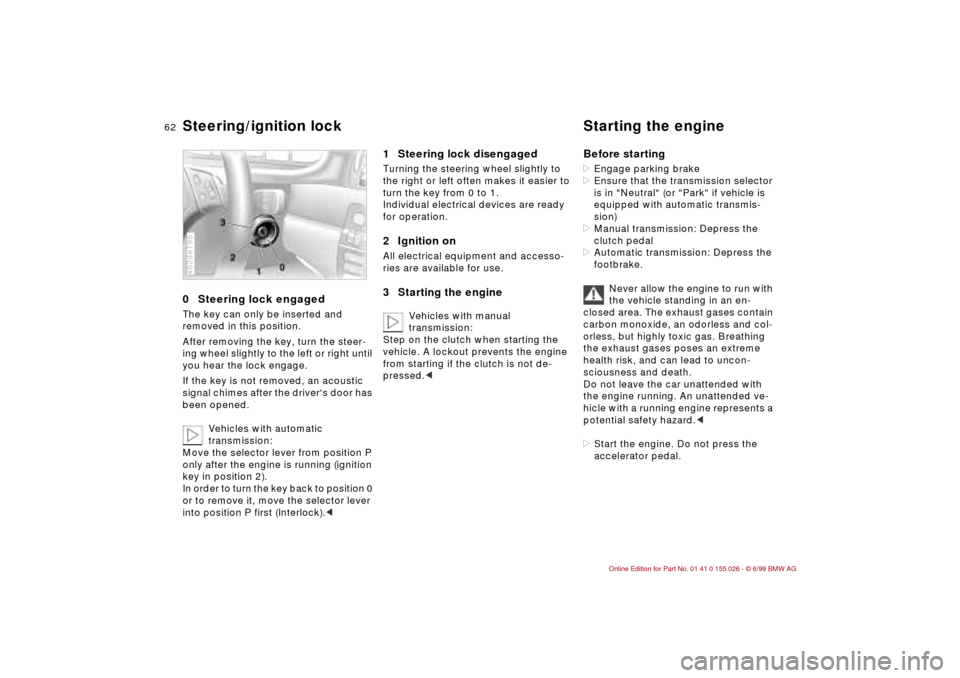
0 Steering lock engaged The key can only be inserted and
removed in this position.
After removing the key, turn the steer-
ing wheel slightly to the left or right until
you hear the lock engage.
If the key is not removed, an acoustic
signal chimes after the driver's door has
been opened.
Vehicles with automatic
transmission:
Move the selector lever from position P
only after the engine is running (ignition
key in position 2).
In order to turn the key back to position 0
or to remove it, move the selector lever
into position P first (Interlock).<462de195
1 Steering lock disengaged Turning the steering wheel slightly to
the right or left often makes it easier to
turn the key from 0 to 1.
Individual electrical devices are ready
for operation.2 Ignition onAll electrical equipment and accesso-
ries are available for use.3 Starting the engine
Vehicles with manual
transmission:
Step on the clutch when starting the
vehicle. A lockout prevents the engine
from starting if the clutch is not de-
pressed.c
Before starting>Engage parking brake
>Ensure that the transmission selector
is in "Neutral" (or "Park" if vehicle is
equipped with automatic transmis-
sion)
>Manual transmission: Depress the
clutch pedal
>Automatic transmission: Depress the
footbrake.
Never allow the engine to run with
the vehicle standing in an en-
closed area. The exhaust gases contain
carbon monoxide, an odorless and col-
orless, but highly toxic gas. Breathing
the exhaust gases poses an extreme
health risk, and can lead to uncon-
sciousness and death.
Do not leave the car unattended with
the engine running. An unattended ve-
hicle with a running engine represents a
potential safety hazard.<
>Start the engine. Do not press the
accelerator pedal.
Steering/ignition lock Starting the engine
Page 66 of 189
64n
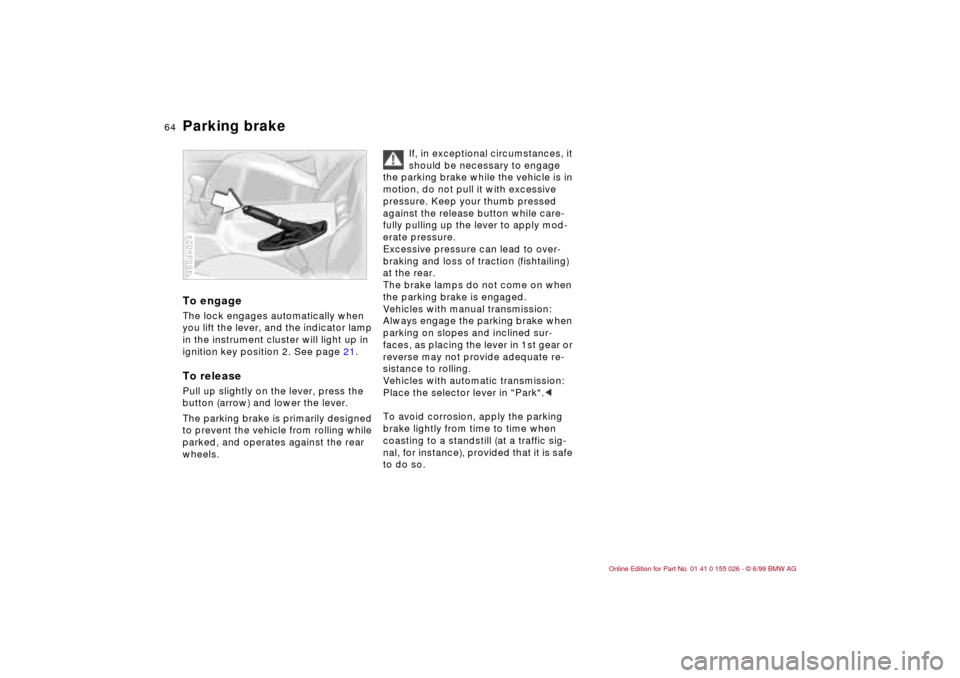
Parking brake To engageThe lock engages automatically when
you lift the lever, and the indicator lamp
in the instrument cluster will light up in
ignition key position 2. See page 21.To releasePull up slightly on the lever, press the
button (arrow) and lower the lever.
The parking brake is primarily designed
to prevent the vehicle from rolling while
parked, and operates against the rear
wheels.460de024
If, in exceptional circumstances, it
should be necessary to engage
the parking brake while the vehicle is in
motion, do not pull it with excessive
pressure. Keep your thumb pressed
against the release button while care-
fully pulling up the lever to apply mod-
erate pressure.
Excessive pressure can lead to over-
braking and loss of traction (fishtailing)
at the rear.
The brake lamps do not come on when
the parking brake is engaged.
Vehicles with manual transmission:
Always engage the parking brake when
parking on slopes and inclined sur-
faces, as placing the lever in 1st gear or
reverse may not provide adequate re-
sistance to rolling.
Vehicles with automatic transmission:
Place the selector lever in "Park".<
To avoid corrosion, apply the parking
brake lightly from time to time when
coasting to a standstill (at a traffic sig-
nal, for instance), provided that it is safe
to do so.
Page 67 of 189

65n
RepairsIndexOverview Controls Car care Technology Data
Manual transmission The shift lever's neutral plane (dot in the
illustration) is located between 3rd and
4th gears.
When shifting from each gear into
"Neutral," the shift lever returns auto-
matically to this neutral position be-
cause of its spring loading.360de044
Reverse Select only with the vehicle stationary.
Press the shift lever to the left to over-
come the slight resistance.
As you do this, the backup lamps will
turn on automatically when the ignition
key is in position 2.
Do not hold the vehicle in place on
slopes by slipping or "riding" the
clutch. Use the parking brake instead.
A slipping clutch increases clutch
wear.<
Page 100 of 189

98n
Through-loading facility The rear backrest is divided into two
sections, one-third and two-thirds of
the seat respectively. For carrying
longer objects, you can fold down either
section of the backrest separately.
To unlock, pull the lever corresponding
to the section (arrow).460de154
The rear backrest section will move for-
ward slightly when it is unlocked. Reach
into the gap and pull the backrest down.
When you close the backrest, be
sure that the retainer engages cor-
rectly. If it is not correctly engaged,
transported cargo could enter the pas-
senger compartment from the luggage
compartment during brake applications
or evasive maneuvers and endanger the
vehicle occupants.<462de240
The fittings at the corners of the lug-
gage compartment provide you with a
convenient means of attaching luggage
nets
* and flexible straps for securing
suitcases and luggage.
Refer also to "Cargo loading" on
page 100.