2000 BMW 328Ci COUPE wheel
[x] Cancel search: wheelPage 118 of 189

116n
Winter tiresChoosing the right tireBMW recommends winter tires (M+S
radial tires) for driving in adverse winter
road conditions. Although all-season
M+S tires provide better winter traction
than standard summer tires with H, V,
W, Y and ZR speed ratings, they gener-
ally fail to provide the same levels of
performance as standard snow tires in
winter driving.
For of safe tracking and steering re-
sponse, install winter tires made by the
same manufacturer having the same
tread configuration on all four wheels.
Mount only winter tires approved by
BMW. Any BMW center will be glad to
provide you with information on the
best winter tires for your particular driv-
ing conditions.Never exceed the maximum speed
for that the tires are rated.
Unprofessional attempts by laymen to
service tires can lead to damage and
accidents.
Have this work performed by skilled
professionals only. Your BMW center
will be glad to assist you with both their
expertise and the proper equipment for
your vehicle.<
Tire condition, tire pressureWinter tires display a perceptible loss in
their ability to cope with winter driving
conditions once the tread wears to be-
low 0.16 in (4 mm), and should thus be
replaced.
Comply with the specified tire inflation
pressures – and be sure to have the
wheel and tire assemblies balanced
every time you change the tires.
StorageStore tires in a cool, dry place, away
from light whenever possible. Protect
the tires against contact with oil, grease
and fuel.Snow chains
*
Use narrow-link BMW snow chains on
summer or winter tires only in pairs and
only on the rear wheels. Comply with all
manufacturer's safety precautions when
mounting the chains.
Page 119 of 189

117n
RepairsIndexOverview Controls Car care Technology Data
Approved wheel and tire specifications Tire specifications Steel rim (wheel rim) Light-alloy wheel
BMW 323Ci
All-Season
195/65 R 15 91 H – 6.5Jx15
Summer tires
195/65 R 15 91 H – 6.5Jx15
205/60 R 15 91 H – 6.5Jx15
7Jx15
205/55 R 16 91 H
225/50 R 16 92 W
225/50 ZR 16– 7Jx16
225/45 R 17 91 W – 8Jx17
Front: 225/45 ZR 17 – 7.5Jx17
Rear: 245/40 ZR 17 – 8.5Jx17
Winter tires
195/65 R 15 91 Q M+S 6.5Jx15 6.5Jx15
205/60 R 15 91 Q M+S 6.5Jx15 6.5Jx15
7Jx15
205/55 R 16 91 Q M + S
225/50 R 16 92 Q M + S7Jx16 7Jx16
225/45 R 17 91 Q M + S – 8Jx17
Space-saver spare tire
T 125/90 R 15 96 M 3.5Bx15 –
T 125/90 R 16 98 M 3.5Bx16 –
Pay attention to the specifications for tires and wheels in the vehicle's
manuals. If you install tire sizes not approved by the manufacturer,
you are required to enter this in the vehicle documents.
Snow chains
*
Snow chains cannot be mounted on the
following tires:
225/50 R 16 92 W
225/50 ZR 16
225/45 R 17 91 W
225/50 R 16 92 Q/T/H
225/45 R 17 91 Q/T/HMixed tiresFor details concerning tire manufactur-
ers for mixed tires, refer to the original-
equipment specifications.
Page 120 of 189

118n
Approved wheel and tire specifications Tire specifications Steel rim (wheel rim) Light-alloy wheel
BMW 328Ci
All-Season
205/55 R 16 91 H – 7Jx16
Summer tires
205/55 R 16 91 H
225/50 R 16 92 H
225/50 ZR 16– 7Jx16
225/45 R 17 91 H – 8Jx17
Front: 225/45 ZR 17 – 7.5Jx17
Rear: 245/40 ZR 17 – 8.5Jx17
Winter tires
205/55 R 16 91 Q M + S
225/50 R 16 92 Q M + S7Jx16 7Jx16
225/45 R 17 91 Q M + S – 8Jx17
Space-saver spare tire
T 125/90 R 16 98 M 3.5Bx16 –
Pay attention to the specifications for tires and wheels in the vehicle's
manuals. If you install tire sizes not approved by the manufacturer, you
are required to enter this in the vehicle documents.
Snow chains
*
Snow chains cannot be mounted on the
following tires:
225/50 R 16 92 W
225/50 ZR 16
225/45 R 17 91 W
225/50 R 16 92 Q/T/H
225/45 R 17 91 Q/T/HMixed tiresFor details concerning tire manufactur-
ers for mixed tires, refer to the original-
equipment specifications.
Page 132 of 189

130n
Washing your car Right from the start, you can wash your
new BMW in an automatic car wash.
Car wash systems that do not employ
brushes are preferable.
Wipe away tough dirt and loosen and
remove dead insects before washing
the car.
To prevent spots, avoid washing when
the hood is still warm, or immediately
after and during exposure to strong
sunlight.
When using an automatic car wash, be
sure that:
>The car wash system is suited for the
dimensions of your vehicle
>No damage will occur on vehicles
with attached body accessories (such
as spoilers or antennas). Consult the
car wash operator if necessary
>The wheels and tires of your vehicle
cannot be damaged by the convey-
ance devices of the car wash system
>The vehicle is cleaned with minimum
brush pressure, and that ample water
is available for washing and rinsing.Vehicles with rain sensor:
Clean the windshield regularly. Wax
from car washes or the presence of
dead insects can cause rain sensor
malfunctions.
Switch the rain sensor off when
the vehicle passes through the car
wash (refer to page 70). Damage could
occur by an undesired actuation of the
wipers if the system is not deacti-
vated.<
Parts of the car that are inaccessible
to the automatic washer – such as door
sills, door and hood edges, etc. –
should be cleaned by hand.
In the winter months, it is especially im-
portant to ensure that the car is washed
on a regular basis. Large quantities of
dirt and road salt are difficult to remove,
and they also cause damage to the ve-
hicle.
If spray wands or high-pressure
washers are used, be sure to
maintain an adequate distance between
the spray source and the vehicle's sur-
face. Inadequate distance and exces-
sive pressure can damage or weaken
the finish, making it more susceptible to
subsequent attack. In addition, mois-
ture could penetrate to vehicle compo-
nents, leading to long-term damage.<
When cleaning the headlamps,
please observe the following:
>Do not rub dry. Never use abrasives
or strong cleaning agents to clean the
covers
>Remove dirt and contamination
(such as insects) by soaking with
BMW Car Shampoo and then rinsing
with plenty of water
>Always use a deicer spray to remove
accumulated ice and snow – never
use a scraper.<
After washing the car, apply the
brakes briefly to dry them. Braking
efficiency might otherwise be reduced
by the moisture and the brake rotors
could also be corroded.<
Caring for your car
Page 134 of 189

132n
Caring for your carWaxing your car Protect the finish using carnauba or
synthetic-based waxes only.
The best way to determine when the
finish needs to be waxed is by noting
when water stops beading on the sur-
face.
You can use a glass cleaner to remove
any wax or silicone that may have been
left on the windows during waxing.
A full range of car-care products is
available from your BMW center.<
Paint damageYou can touch up small areas of paint
damage with a BMW spray paint or a
BMW touch-up stick.
The paint color code for your car is pro-
vided on a sticker located next to the
type plate and on the first page of your
Service and Warranty Information
Booklet.
Damage caused by flying stones,
scratches, etc., must be touched up
without delay to prevent rust from form-
ing.
If corrosion has started to form in an
area with paint damage, remove all rust
and clean the area. Then prime the area
with a BMW Primer Stick. Finally, apply
the finish coat. Wait a few days, then
polish the repaired area. Finish by ap-
plying a wax preservative.
More extensive paint damage should be
professionally repaired in accordance
with the manufacturer's instructions.
Your BMW center uses original BMW
finish materials in accordance with offi-
cial repair procedures.
Caring for other vehicle
components and materials Light-alloy wheels should be treated
with alloy wheel cleaner, especially dur-
ing the winter months. However, do not
use aggressive products containing ac-
ids, strong alkalis or abrasives. Do not
use steam cleaners operating at tem-
peratures above 1407 (606). Follow
the manufacturer's instructions.
If your vehicle has chrome parts
* such
as the window frames and door handles,
be especially careful about cleaning
them with plenty of water and possibly a
shampoo supplement as well after the
roads have been salted. Use chrome
polish as an additional treatment.
You can use window and glass cleaner
to clean inside window surfaces and
mirrors without smearing and streaking.
Never use polishing pastes or abrasive
(quartz) cleansers on mirror lenses.
Page 137 of 189

135n
RepairsIndexOverview Controls Car care Technology Data
Caring for your car Airbags
Cleaning agents can contain sub-
stances that are dangerous or
pose health risks. Therefore always
comply with the warnings and danger
notices on the package.
Open the doors or windows on your
vehicle when cleaning the interior.
Never clean your vehicle with solvents
or other materials not specifically in-
tended for this application.<
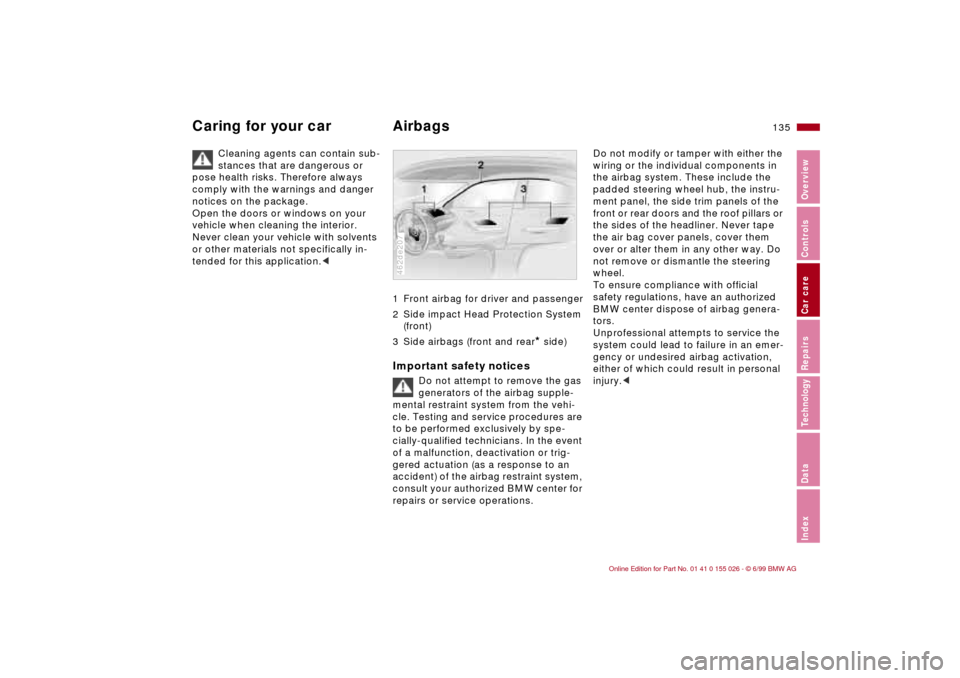
1 Front airbag for driver and passenger
2 Side impact Head Protection System
(front)
3 Side airbags (front and rear
* side)
Important safety notices
Do not attempt to remove the gas
generators of the airbag supple-
mental restraint system from the vehi-
cle. Testing and service procedures are
to be performed exclusively by spe-
cially-qualified technicians. In the event
of a malfunction, deactivation or trig-
gered actuation (as a response to an
accident) of the airbag restraint system,
consult your authorized BMW center for
repairs or service operations.
462de207
Do not modify or tamper with either the
wiring or the individual components in
the airbag system. These include the
padded steering wheel hub, the instru-
ment panel, the side trim panels of the
front or rear doors and the roof pillars or
the sides of the headliner. Never tape
the air bag cover panels, cover them
over or alter them in any other way. Do
not remove or dismantle the steering
wheel.
To ensure compliance with official
safety regulations, have an authorized
BMW center dispose of airbag genera-
tors.
Unprofessional attempts to service the
system could lead to failure in an emer-
gency or undesired airbag activation,
either of which could result in personal
injury.<
Page 150 of 189

148n
Changing tires
Take these precautionary mea-
sures if you have either a flat tire
or are changing the tire:
Park the vehicle as far from the flow of
traffic as possible and on firm ground.
Switch on the hazard flashers. Turn the
steering wheel to the straight-ahead
position, remove the key and engage
the steering lock. Shift into 1st or re-
verse (selector lever in "Park" with auto-
matic) and engage the parking brake.
All passengers should be outside the
car and well away from your immediate
working area (behind the guardrail, for
instance).
If a warning triangle or portable hazard
warning lamp is available, set it up on
the roadside at an appropriate distance
from the rear of the vehicle. Comply
with all safety guidelines and regula-
tions.
Change the wheel only on a level, firm
surface that is not slippery. Avoid jack-
ing the car on a soft or slippery support
surface (snow, ice, loose gravel, etc.),
as it could slide sideways.
Ensure that the jack is positioned on a
solid support surface.
Do not place wooden blocks or similar
objects under the jack. If this done, the
jack might not be able to reach its full
support capacity because of the limited
height.
Do not lie under the vehicle or start the
engine when the vehicle is supported
by the jack – risk of fatal injury.<
Your BMW has either a spare
* or
space-saver tire
* for temporary use and
to ensure your mobility.
Take the luggage compartment
floor panel completely out to
remove the spare tire
* (refer to
page 41).<
You will the need the followingIn order to avoid rattling noises later,
note the position of the tools when you
remove them and return them to their
original position when you are through
using them.
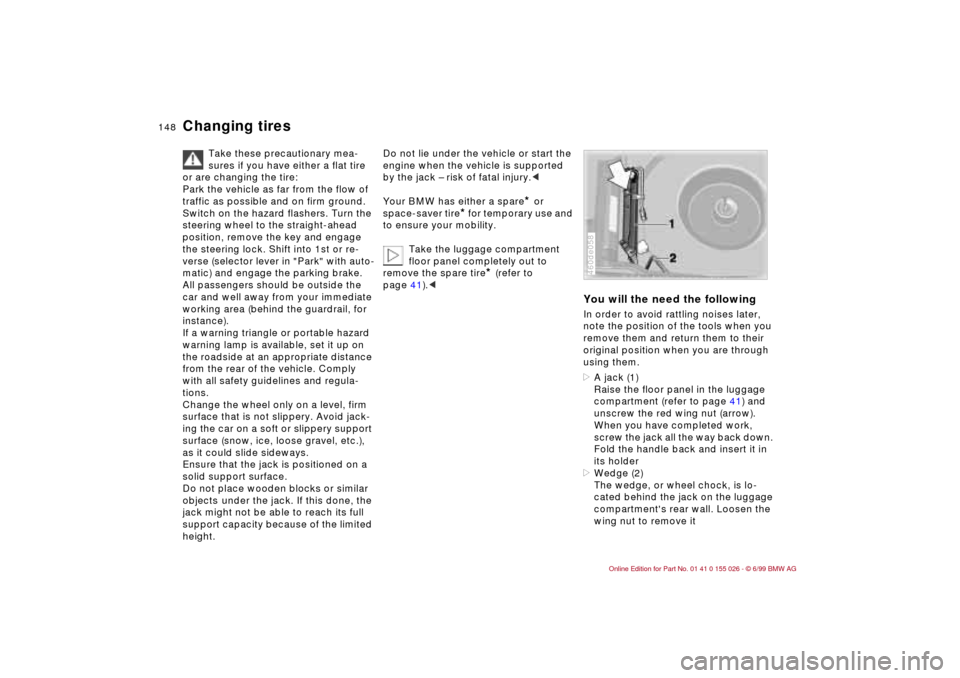
>A jack (1)
Raise the floor panel in the luggage
compartment (refer to page 41) and
unscrew the red wing nut (arrow).
When you have completed work,
screw the jack all the way back down.
Fold the handle back and insert it in
its holder
>Wedge (2)
The wedge, or wheel chock, is lo-
cated behind the jack on the luggage
compartment's rear wall. Loosen the
wing nut to remove it460de058
Page 151 of 189

149n
RepairsIndexOverview Controls Car care Technology Data
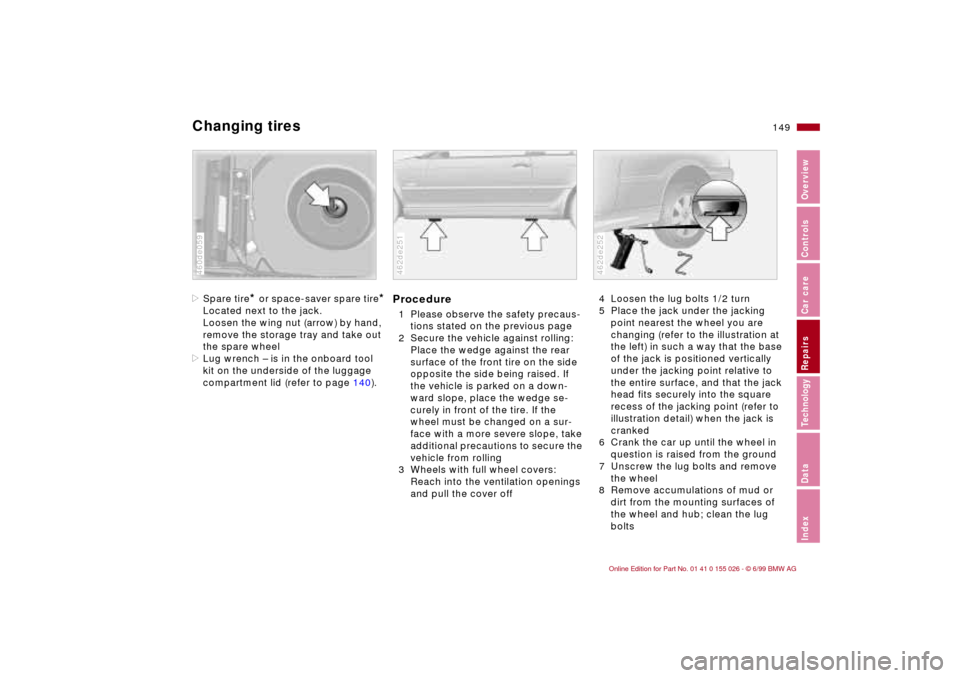
Changing tires>Spare tire
* or space-saver spare tire
*
Located next to the jack.
Loosen the wing nut (arrow) by hand,
remove the storage tray and take out
the spare wheel
>Lug wrench – is in the onboard tool
kit on the underside of the luggage
compartment lid (refer to page 140).460de059
Procedure1 Please observe the safety precaus-
tions stated on the previous page
2 Secure the vehicle against rolling:
Place the wedge against the rear
surface of the front tire on the side
opposite the side being raised. If
the vehicle is parked on a down-
ward slope, place the wedge se-
curely in front of the tire. If the
wheel must be changed on a sur-
face with a more severe slope, take
additional precautions to secure the
vehicle from rolling
3 Wheels with full wheel covers:
Reach into the ventilation openings
and pull the cover off462de251
4 Loosen the lug bolts 1/2 turn
5 Place the jack under the jacking
point nearest the wheel you are
changing (refer to the illustration at
the left) in such a way that the base
of the jack is positioned vertically
under the jacking point relative to
the entire surface, and that the jack
head fits securely into the square
recess of the jacking point (refer to
illustration detail) when the jack is
cranked
6 Crank the car up until the wheel in
question is raised from the ground
7 Unscrew the lug bolts and remove
the wheel
8 Remove accumulations of mud or
dirt from the mounting surfaces of
the wheel and hub; clean the lug
bolts462de252