2000 BMW 328Ci COUPE lock
[x] Cancel search: lockPage 56 of 189
54n
Car Memory, Key Memory How the system functionsYou have probably frequently wished
that you could configure individual
functions of your vehicles to reflect your
own personal requirements. BMW has
included several user-defined func-
tions in the vehicle's design. Your BMW
center can make these settings for you
in accordance with your wishes.
There are settings related to the vehicle
("Car Memory") and settings related to
individuals ("Key Memory"). You can
have up to four different basic settings
adjusted for four different persons. The
only requirement is that each person
uses his or her own remote control key. 463de029
When your vehicle is unlocked with the
remote control, the vehicle recognizes
the individual user by means of a data
exchange with the key, and makes ad-
justments accordingly.
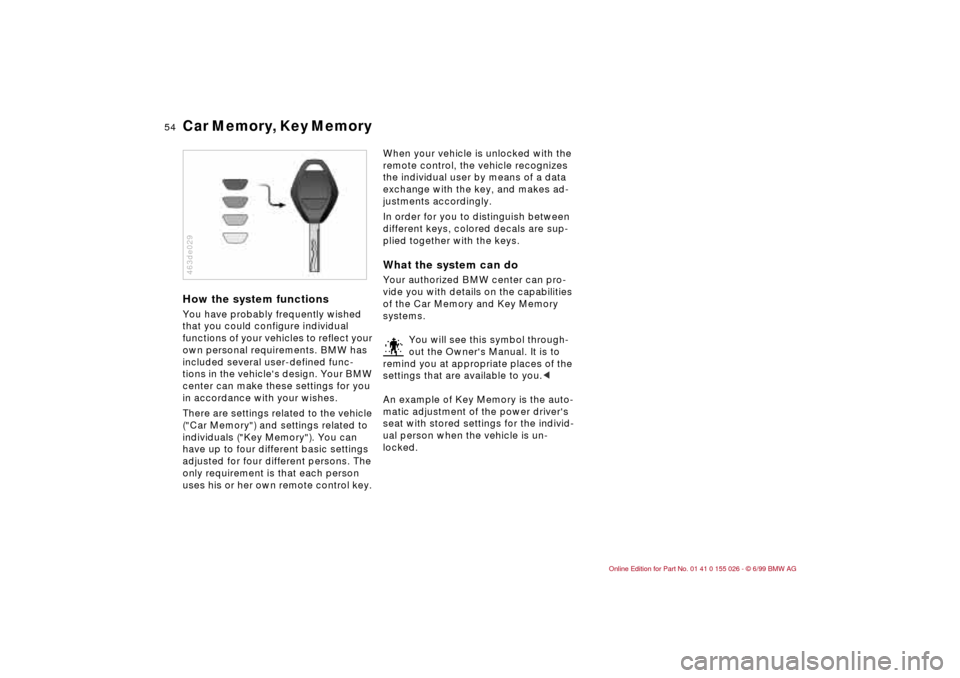
In order for you to distinguish between
different keys, colored decals are sup-
plied together with the keys.What the system can doYour authorized BMW center can pro-
vide you with details on the capabilities
of the Car Memory and Key Memory
systems.
You will see this symbol through-
out the Owner's Manual. It is to
remind you at appropriate places of the
settings that are available to you.<
An example of Key Memory is the auto-
matic adjustment of the power driver's
seat with stored settings for the individ-
ual person when the vehicle is un-
locked.
Page 60 of 189

58n
Airbags
For your own safety, please ob-
serve the following precautions
concerning airbags, as otherwise their
protective function may be impaired
and your personal safety endangered.
The following information pertains to all
occupants:
The airbags are supplemental restraint
devices designed to provide extra pro-
tection; they are not a substitute for
safety belts. Wear your safety belt at all
times. The airbags will not be triggered
in the event of a minor accident, a vehi-
cle roll-over, or collisions from the rear.
In this case, the safety belt offers the
best protection.
Airbags are located under the cover
panels in the steering wheel, in the in-
strument panel, in the side trim panels
in the front and rear
*, in the roof panels,
and in the sides of the inside roof lining.
Select a seat position that is comfort-
able and allows the greatest possible
distance from each of the applicable
airbags. Hold the steering wheel at the
rim (hands at the "9 o'clock and
3 o'clock" positions) in order to avoid
injuries to the hands or arms if the air-
bag is triggered.
Never allow any objects to obstruct the
area between the airbag and an occu-
pant.
Do not use the cover panel above the
front passenger airbag as a storage
area.
Never tape the airbag cover panels,
cover them over or alter them in any
other way.
Never install a rear-facing child restraint
device on the front passenger seat.
Children under 13 years of age and
children who are smaller than 5 feet
(150 cm), should only travel in the rear
seat.
If your vehicle is equipped with side air-
bags in the rear, be sure that child seats
are installed correctly and with the
greatest possible distance from the side
trim panels. Do not allow children to
lean out of the child's seat in the direc-
tion of the side trim panels. Otherwise,
serious injuries could occur if the airbag
is triggered.
At all times, occupants should sit up-
right and be properly restrained (infants
and small children in appropriate child
restraint systems; larger children and
adults using the safety belts). Never let
an occupant's head rest near or on a
side airbag because the inflating airbag
could cause a serious or fatal injury.
Please note that the word "Airbag" im-
printed on the door trim panel indicates
the airbag's location.Accident research shows that the saf-
est place for children in an automobile
is in the rear seat. However, a child
sitting in the rear seat and not properly
restrained may place his or her head on
or near the side airbag, if so equipped.
For example, a child – even though
belted – may fall asleep with his or her
head against the side airbag. It may be
difficult for a driver to ensure that chil-
dren in the rear seat will remain prop-
erly positioned at all times and not
place their heads on or near the side
airbag. Therefore, we recommend that
the rear seat side airbags, if provided,
be deactivated if you plan to transport
children in the rear seat.
The rear seat side airbags may already
have been deactivated, either at the
time of manufacture or by a BMW cen-
ter. Labels in the rear door opening
should indicate the status of your rear
seat side airbags. If you are uncertain of
their status, or wish to have the airbags
activated or deactivated, please contact
your BMW center.<
Page 63 of 189
61n
RepairsIndexOverview Controls Car care Technology Data
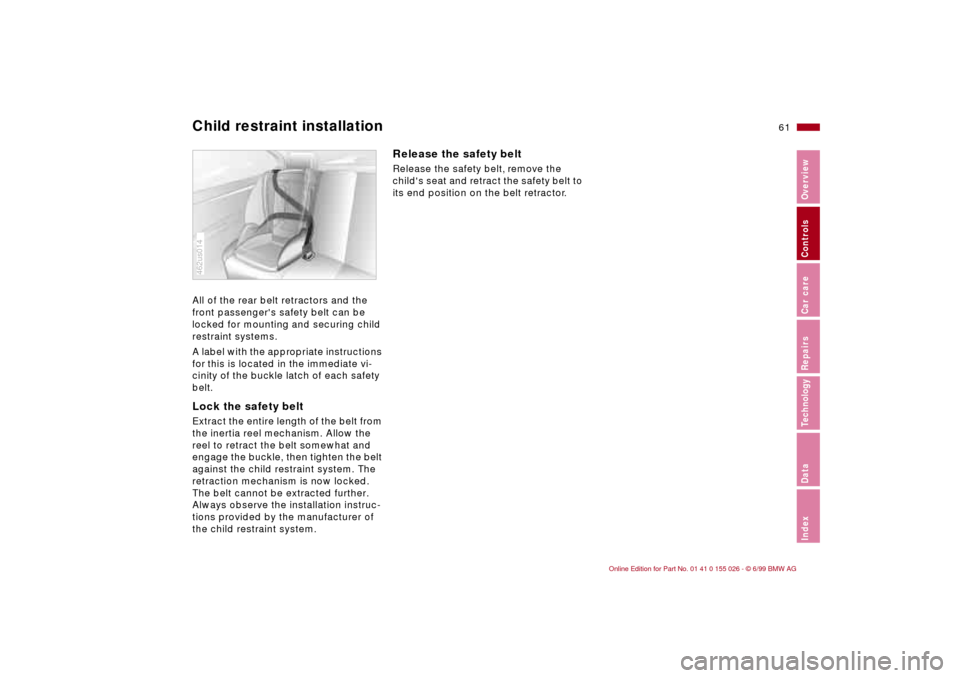
Child restraint installationAll of the rear belt retractors and the
front passenger's safety belt can be
locked for mounting and securing child
restraint systems.
A label with the appropriate instructions
for this is located in the immediate vi-
cinity of the buckle latch of each safety
belt.Lock the safety beltExtract the entire length of the belt from
the inertia reel mechanism. Allow the
reel to retract the belt somewhat and
engage the buckle, then tighten the belt
against the child restraint system. The
retraction mechanism is now locked.
The belt cannot be extracted further.
Always observe the installation instruc-
tions provided by the manufacturer of
the child restraint system.462us014
Release the safety beltRelease the safety belt, remove the
child's seat and retract the safety belt to
its end position on the belt retractor.
Page 64 of 189
62n
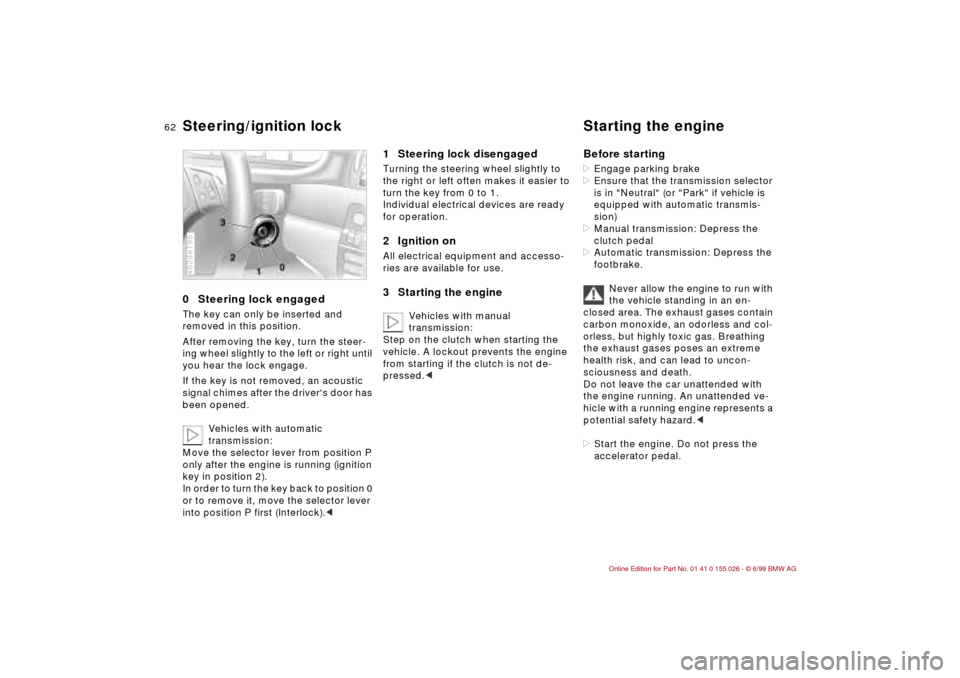
0 Steering lock engaged The key can only be inserted and
removed in this position.
After removing the key, turn the steer-
ing wheel slightly to the left or right until
you hear the lock engage.
If the key is not removed, an acoustic
signal chimes after the driver's door has
been opened.
Vehicles with automatic
transmission:
Move the selector lever from position P
only after the engine is running (ignition
key in position 2).
In order to turn the key back to position 0
or to remove it, move the selector lever
into position P first (Interlock).<462de195
1 Steering lock disengaged Turning the steering wheel slightly to
the right or left often makes it easier to
turn the key from 0 to 1.
Individual electrical devices are ready
for operation.2 Ignition onAll electrical equipment and accesso-
ries are available for use.3 Starting the engine
Vehicles with manual
transmission:
Step on the clutch when starting the
vehicle. A lockout prevents the engine
from starting if the clutch is not de-
pressed.c
Before starting>Engage parking brake
>Ensure that the transmission selector
is in "Neutral" (or "Park" if vehicle is
equipped with automatic transmis-
sion)
>Manual transmission: Depress the
clutch pedal
>Automatic transmission: Depress the
footbrake.
Never allow the engine to run with
the vehicle standing in an en-
closed area. The exhaust gases contain
carbon monoxide, an odorless and col-
orless, but highly toxic gas. Breathing
the exhaust gases poses an extreme
health risk, and can lead to uncon-
sciousness and death.
Do not leave the car unattended with
the engine running. An unattended ve-
hicle with a running engine represents a
potential safety hazard.<
>Start the engine. Do not press the
accelerator pedal.
Steering/ignition lock Starting the engine
Page 65 of 189
63n
RepairsIndexOverview Controls Car care Technology Data
Starting the engine Switching off the engine
Do not operate the starter too
briefly, but not longer than
approx. 20 seconds. Release the igni-
tion key immediately as soon as the
engine starts.
Do not allow the engine to warm up by
leaving it running while the vehicle re-
mains stationary. Instead, drive off
immediately at a moderate engine
speed.<
Should the engine fail to start on the
first attempt, e.g. if it is very hot or cold:
>Press the accelerator pedal halfway
down while engaging the starter.
Cold start at extremely low tempera-
tures, from approx. + 57 (– 156)
and at elevations above 3300 feet
(1000 meters):
>On the first start attempt, engage the
starter for a longer period (approx.
10 seconds)
>Press the accelerator pedal halfway
down while engaging the starter.
Turn the ignition key to position 1 or 0.
Do not pull the ignition key out of a
rolling vehicle, otherwise the igni-
tion switch could lock and it is impossi-
ble to steer the vehicle.
When you leave the vehicle, always
remove the ignition key and engage the
steering lock.
Vehicles with manual transmission:
Always engage the parking brake when
parking on slopes and inclined sur-
faces, as placing the lever in 1st gear or
reverse may not provide adequate re-
sistance to rolling.
Vehicles with automatic transmission:
Place the selector lever in "Park".<
Page 66 of 189
64n
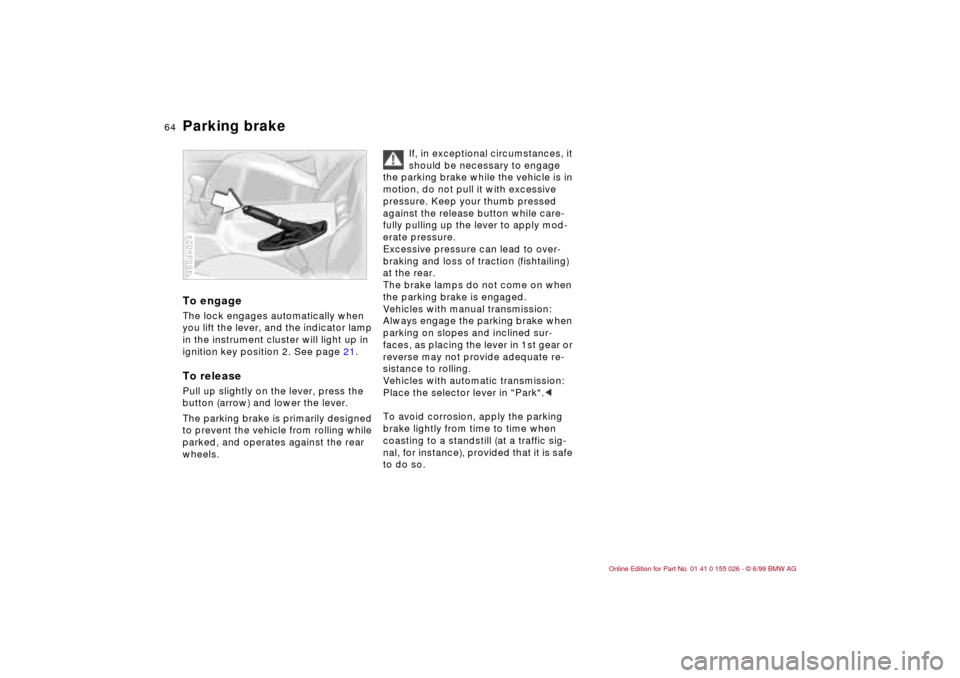
Parking brake To engageThe lock engages automatically when
you lift the lever, and the indicator lamp
in the instrument cluster will light up in
ignition key position 2. See page 21.To releasePull up slightly on the lever, press the
button (arrow) and lower the lever.
The parking brake is primarily designed
to prevent the vehicle from rolling while
parked, and operates against the rear
wheels.460de024
If, in exceptional circumstances, it
should be necessary to engage
the parking brake while the vehicle is in
motion, do not pull it with excessive
pressure. Keep your thumb pressed
against the release button while care-
fully pulling up the lever to apply mod-
erate pressure.
Excessive pressure can lead to over-
braking and loss of traction (fishtailing)
at the rear.
The brake lamps do not come on when
the parking brake is engaged.
Vehicles with manual transmission:
Always engage the parking brake when
parking on slopes and inclined sur-
faces, as placing the lever in 1st gear or
reverse may not provide adequate re-
sistance to rolling.
Vehicles with automatic transmission:
Place the selector lever in "Park".<
To avoid corrosion, apply the parking
brake lightly from time to time when
coasting to a standstill (at a traffic sig-
nal, for instance), provided that it is safe
to do so.
Page 68 of 189
66n
Automatic transmission with Steptronic
*
You have the option of driving a normal
automatic transmission or switching to
manual.
Whenever you shift the selector lever
out of position D toward the left and
into the M/S gate, the automatic trans-
mission's sports-emphasized shift pro-
gram activates. As soon as you even
begin to move the selector lever in the
direction "+" or "–", Steptronic shifts the
gear and manual operation becomes
active. Whenever you want to use auto-
matic again, just shift the selector lever
toward the right to position D.
The Steptronic automatic transmission
is equipped with ATC (Adaptive Trans-
mission Control). ATC reacts with preci-
sion to your individual driving style and
the current driving conditions. This is
the reason why various shift programs
are used.
For details concerning ATC, please
refer to the chapter "Advanced Tech-
nology" on page 160.
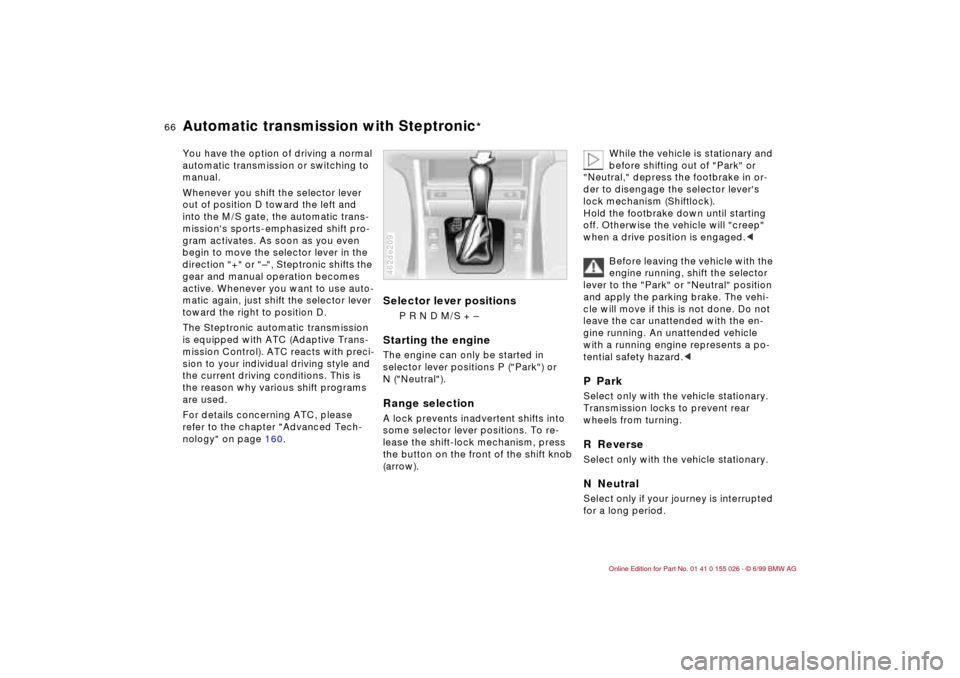
Selector lever positions
P R N D M/S + –
Starting the engineThe engine can only be started in
selector lever positions P ("Park") or
N ("Neutral").Range selectionA lock prevents inadvertent shifts into
some selector lever positions. To re-
lease the shift-lock mechanism, press
the button on the front of the shift knob
(arrow).462de209
While the vehicle is stationary and
before shifting out of "Park" or
"Neutral," depress the footbrake in or-
der to disengage the selector lever's
lock mechanism (Shiftlock).
Hold the footbrake down until starting
off. Otherwise the vehicle will "creep"
when a drive position is engaged.<
Before leaving the vehicle with the
engine running, shift the selector
lever to the "Park" or "Neutral" position
and apply the parking brake. The vehi-
cle will move if this is not done. Do not
leave the car unattended with the en-
gine running. An unattended vehicle
with a running engine represents a po-
tential safety hazard.<
P ParkSelect only with the vehicle stationary.
Transmission locks to prevent rear
wheels from turning.R ReverseSelect only with the vehicle stationary.N NeutralSelect only if your journey is interrupted
for a long period.
Page 79 of 189
77n
RepairsIndexOverview Controls Car care Technology Data
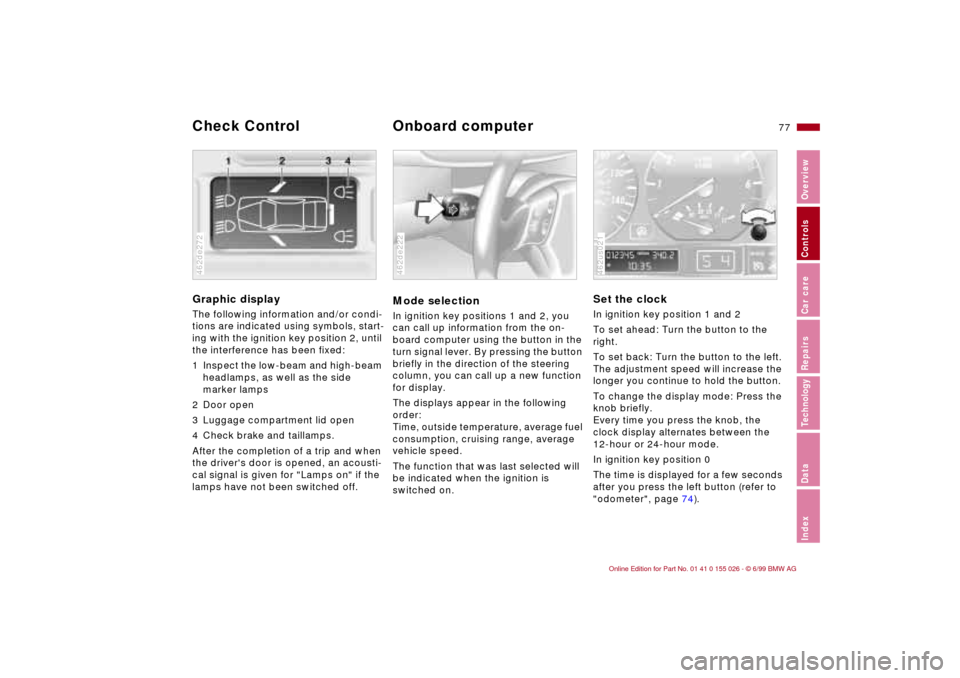
Graphic display
The following information and/or condi-
tions are indicated using symbols, start-
ing with the ignition key position 2, until
the interference has been fixed:
1 Inspect the low-beam and high-beam
headlamps, as well as the side
marker lamps
2 Door open
3 Luggage compartment lid open
4 Check brake and taillamps.
After the completion of a trip and when
the driver's door is opened, an acousti-
cal signal is given for "Lamps on" if the
lamps have not been switched off.462de272
Mode selectionIn ignition key positions 1 and 2, you
can call up information from the on-
board computer using the button in the
turn signal lever. By pressing the button
briefly in the direction of the steering
column, you can call up a new function
for display.
The displays appear in the following
order:
Time, outside temperature, average fuel
consumption, cruising range, average
vehicle speed.
The function that was last selected will
be indicated when the ignition is
switched on.462de222
Set the clockIn ignition key position 1 and 2
To set ahead: Turn the button to the
right.
To set back: Turn the button to the left.
The adjustment speed will increase the
longer you continue to hold the button.
To change the display mode: Press the
knob briefly.
Every time you press the knob, the
clock display alternates between the
12-hour or 24-hour mode.
In ignition key position 0
The time is displayed for a few seconds
after you press the left button (refer to
"odometer", page 74).462us021
Check Control
Onboard computer