2000 BMW 328Ci CONVERTIBLE tow
[x] Cancel search: towPage 76 of 199

76n
Automatic transmission with Steptronic
*
In the following situations, the Step-
tronic "thinks" for you in the manual
mode:
>In order to prevent the engine from
overrevving, the transmission shifts
automatically to the next higher gear
just before the RPM cutoff point
>If you do not do anything to inter-
vene, it will automatically downshift
at lower speeds
>In the "Kickdown" mode, the trans-
mission shifts down to the lowest
gear which is possible, depending on
the engine speed
>Depending on the situation – when
driving in adverse winter conditions,
for example – you may also start out
in 2nd or 3rd gear.
Available displays
P R N D SD M1 M2 M3 M4 M5
Electronic transmission control
module
If the indicator lamp comes on,
there is a malfunction in the
transmission system.
46cus005
Bring the vehicle to a stop. Move the
transmission selector lever to "P". Set
the parking brake and turn the engine
off (ignition key to position 0).
Wait a few seconds, then start the
engine.
If the indicator lamp goes out after a
few seconds, normal transmission per-
formance has been restored. You may
continue to drive as usual. If the indica-
tor lamp does not go out, you can put
the selector lever in all positions. How-
ever, the vehicle will now only operate
in 3rd and 4th gear.
If this happens, avoid extreme engine
loads and consult the nearest BMW
center.
Do not work in the engine com-
partment when a drive gear (for-
ward or reverse) is engaged. If you do
this, the vehicle could move.<
For towing and jump-starting the
vehicle, refer to page 168
Page 87 of 199

87n
IndexDataTechnologyRepairsCar careControlsOverview
The PDC assists you when you are park-
ing. A signal warns you of the real dis-
tance to an obstacle. To do this, four
ultrasonic sensors in the rear bumper
measure the distance to the nearest ob-
ject. The range for the sensors at the two
rear corners ends approx. 2 feet (60 cm)
from the bumper. The range for the
two center sensors is approx. 4.9 feet
(1.50 meters) wide.
The system starts to operate automati-
cally about one second after you select
"Reverse" with the ignition key in posi-
tion 2. PDC is deactivated when you shift
back out of reverse.
Acoustical signalsThe distance to the nearest object is in-
dicated by a tone sounding at various
intervals. As the distance between vehi-
cle and object decreases, the intervals
between the tones become shorter.
A continuous tone indicates the pres-
ence of an object less than approx.
1 foot (30 cm) away.
The warning signal is canceled after
approx. three seconds if the distance
to the obstacle remains constant during
this time (if you are moving parallel to
a wall, for instance).
System malfunctions are indicated by a
continuous high-pitched tone when the
system is activated the first time.
Please refer the problem to your BMW
center.The PDC does not remove the
driver's personal responsibility for
evaluating the distance between the
vehicle and any obstacles. Even when
sensors are involved, there is a blind
spot in which objects cannot be de-
tected. This applies especially in those
cases where the system approaches
the physical limits of ultrasonic mea-
surement, as occurs with tow bars and
trailer couplings, and in the vicinity of
thin and painted objects.
Certain sources of sound, such as a
loud radio, could drown out the PDC
signal tone.<
Keep the sensors clean and free of
ice or snow in order to ensure that
they continue to operate effectively.
Do not apply high pressure spray to the
sensors for a prolonged period of time.
Maintain a distance of more than
4 inches (10 cm).<
Park Distance Control (PDC)
*
Page 95 of 199

95n
IndexDataTechnologyRepairsCar careControlsOverview
Automatic climate control 1 Air onto the windshield and the side
windows
2 Air flow toward the upper body
The side rotary dials provide infi-
nitely variable regulation of the air
supply, while the levers change the
air flow direction. The center rotary
dial controls the temperature of the
air as it flows out, refer to page 98
3 Front footwell ventilation
There are corresponding air vents in
the rear footwell as well
4 Recirculated air mode/Automatic
recirculated air control (AUC)97
5 Air supply97
6 Temperature96
7 Automatic air distribution96
8 Individual air distribution96
9 Air grill for interior temperature
sensor – please keep clear and
unobstructed
10 Display for temperature and air
supply96
11 Defrost the windshield and side
windows97
12 Air conditioner97
13 Rear window defroster79, 98
Page 96 of 199

96n
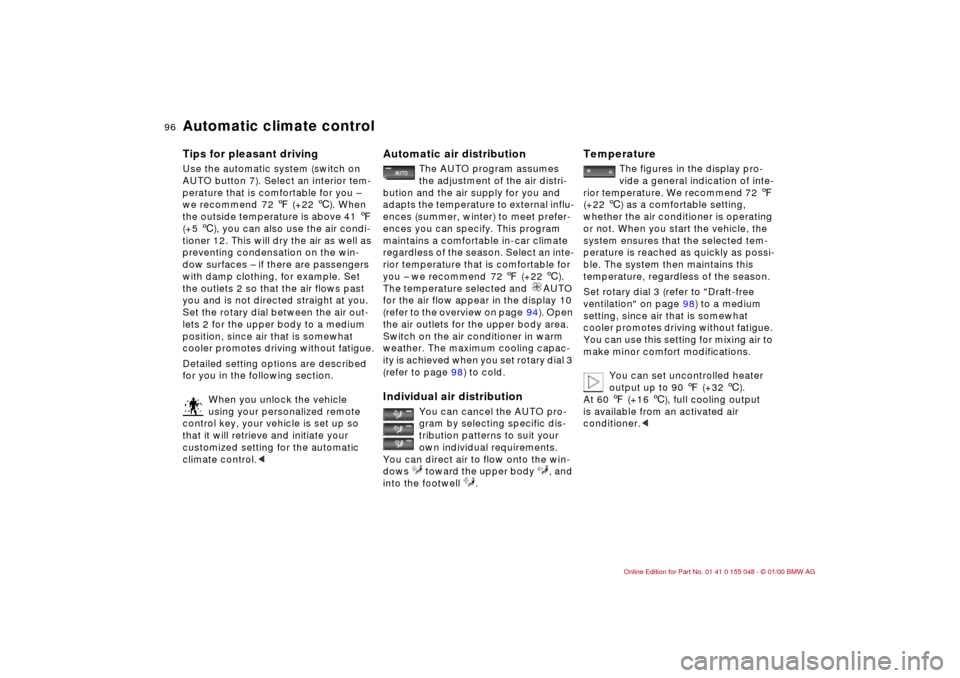
Automatic climate controlTips for pleasant drivingUse the automatic system (switch on
AUTO button 7). Select an interior tem-
perature that is comfortable for you –
we recommend 72 7 (+22 6). When
the outside temperature is above 41 7
(+5 6), you can also use the air condi-
tioner 12. This will dry the air as well as
preventing condensation on the win-
dow surfaces – if there are passengers
with damp clothing, for example. Set
the outlets 2 so that the air flows past
you and is not directed straight at you.
Set the rotary dial between the air out-
lets 2 for the upper body to a medium
position, since air that is somewhat
cooler promotes driving without fatigue.
Detailed setting options are described
for you in the following section.
When you unlock the vehicle
using your personalized remote
control key, your vehicle is set up so
that it will retrieve and initiate your
customized setting for the automatic
climate control.<
Automatic air distribution
The AUTO program assumes
the adjustment of the air distri-
bution and the air supply for you and
adapts the temperature to external influ-
ences (summer, winter) to meet prefer-
ences you can specify. This program
maintains a comfortable in-car climate
regardless of the season. Select an inte-
rior temperature that is comfortable for
you – we recommend 72 7 (+22 6).
The temperature selected and AUTO
for the air flow appear in the display 10
(refer to the overview on page 94). Open
the air outlets for the upper body area.
Switch on the air conditioner in warm
weather. The maximum cooling capac-
ity is achieved when you set rotary dial 3
(refer to page 98) to cold.
Individual air distribution
You can cancel the AUTO pro-
gram by selecting specific dis-
tribution patterns to suit your
own individual requirements.
You can direct air to flow onto the win-
dows toward the upper body , and
into the footwell .
Temperature
The figures in the display pro-
vide a general indication of inte-
rior temperature. We recommend 72 7
(+22 6) as a comfortable setting,
whether the air conditioner is operating
or not. When you start the vehicle, the
system ensures that the selected tem-
perature is reached as quickly as possi-
ble. The system then maintains this
temperature, regardless of the season.
Set rotary dial 3 (refer to "Draft-free
ventilation" on page 98) to a medium
setting, since air that is somewhat
cooler promotes driving without fatigue.
You can use this setting for mixing air to
make minor comfort modifications.
You can set uncontrolled heater
output up to 90 7 (+32 6).
At 60 7 (+16 6), full cooling output
is available from an activated air
conditioner.<
Page 106 of 199

106n
Ski bag
*
Cargo loading
4 Press the button in the luggage com-
partment (arrow)
5 Use the magnetic retainer to fasten
the cover panel to the back wall.Securing the load
Secure the skis or other objects in
the bag by tightening down the re-
taining strap at the buckle.<
Please ensure that the skis are clean
before loading them into the bag. Take
care to avoid damage from sharp
edges.
46cde065
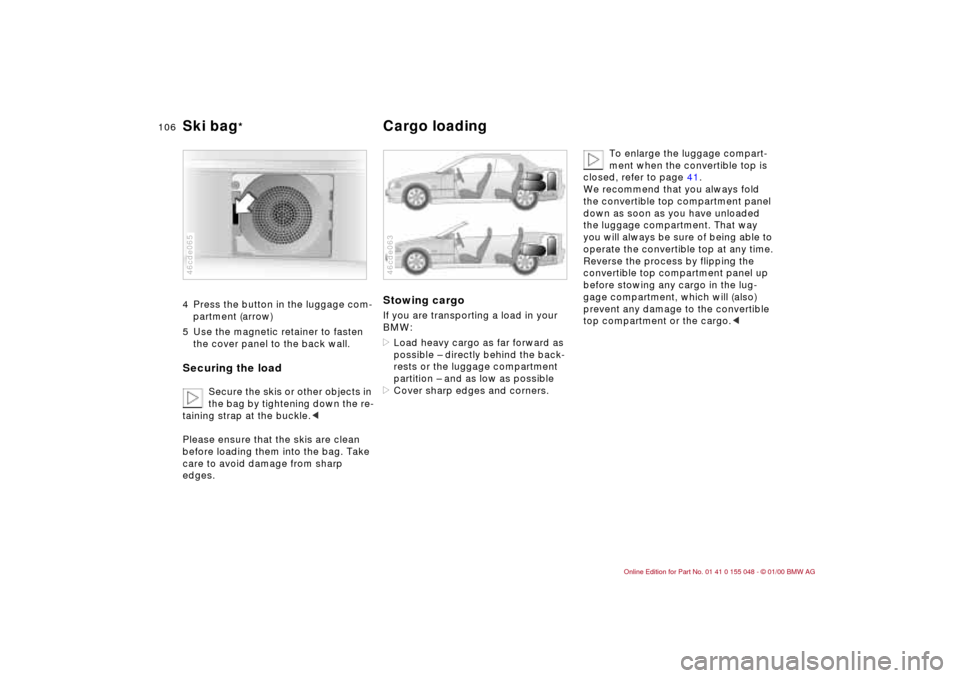
Stowing cargo If you are transporting a load in your
BMW:
>Load heavy cargo as far forward as
possible – directly behind the back-
rests or the luggage compartment
partition – and as low as possible
>Cover sharp edges and corners.46cde063
To enlarge the luggage compart-
ment when the convertible top is
closed, refer to page 41.
We recommend that you always fold
the convertible top compartment panel
down as soon as you have unloaded
the luggage compartment. That way
you will always be sure of being able to
operate the convertible top at any time.
Reverse the process by flipping the
convertible top compartment panel up
before stowing any cargo in the lug-
gage compartment, which will (also)
prevent any damage to the convertible
top compartment or the cargo.<
Page 112 of 199

112n
To ensure that your vehicle provides
maximum economy throughout a long
service life, we request that you comply
with the following recommendations.
Engine and differentialUp to 1,200 miles (2,000 km):
Drive at varying engine and road
speeds, but do not exceed 4,500 rpm
or 100 mph (160 km/h) during this time.
Obey your local and state maximum
speed limits.
Refrain from using full throttle and avoid
pressing the accelerator beyond the
"kickdown" point.
After you have driven 1,200 miles
(2,000 km), you can gradually increase
the engine and road speed.
You should also comply with these
break-in procedures if the engine or
differential is replaced at a later point.
TiresDue to technical factors associated
with their manufacture, tires do not
achieve their full traction potential until
an initial break-in period has elapsed.
Thus, drive with extra care during the
initial 200 miles (300 km).
Obey your local and state maximum
speed limits.
When the vehicle is operated on
wet or slushy roads, a wedge of
water may form between the tire and
the road surface. This phenomenon is
referred to as aquaplaning, or hydro-
planing, and can lead to partial or com-
plete loss of traction, vehicle control
and braking effectiveness. Reduce your
speed on wet roads.
tact patterns until you have driven
approx. 300 miles (500 km).
To break in the separate parking brake
drums, apply the parking brake lightly
when coasting to a standstill (at a traffic
signal, for instance), provided that traf-
fic conditions allow you to do so.
To avoid corrosion, repeat this proce-
dure from time to time.
The brake lamps do not come on
when the parking brake is applied.
Vacuum for the brake system servo unit
on your BMW is available only when the
engine is running. When you move the
vehicle with the engine shut off – when
towing, for example – substantially
higher levels of pedal force will be
required to brake the vehicle.<
Break-in procedures
Page 113 of 199

113n
IndexDataTechnologyRepairsCar careControlsOverview
Brakes:
Do not drive with your foot resting
on the brake pedal. Even light but con-
sistent pedal pressure can lead to high
temperatures, brake wear, and possibly
to brake failure.
Aquaplaning:
When driving on wet or slushy roads,
reduce vehicle speed. If you do not, a
wedge of water may form between the
tires and the road surface. This phe-
nomenon is referred to as aquaplaning
or hydroplaning. It is characterized by a
partial or complete loss of contact be-
tween the tires and the road surface.
The ultimate results are loss of steering
and braking control.
Driving through water:
Do not drive through water over the
road if it is deeper than 1 ft (30 cm), and
then only at walking speed, otherwise
the engine, electrical system and trans-
mission could be damaged.
Clothes hooks (when hardtop
* is
mounted):
When suspending clothing from the
hooks, ensure that they will not obstruct
the driver's vision. Do not hang heavy
objects on the hooks. If you do, they
could cause personal injury during
braking or evasive maneuvers.<
The catalytic converter reduces harmful
exhaust emissions. It is designed for
use with unleaded fuel only.
Even minute quantities of lead would be
enough to permanently damage both
the catalytic converter and the system
oxygen sensor.To ensure efficient, trouble-free engine
operation and to avoid potential damage:>Be sure to comply with the scheduled
maintenance requirements
>Fill the fuel tank well before it is
empty
>Tow-start only when the engine is
cold. If you attempt to tow-start with
a warm engine, unburned residual
fuel in the catalytic converter could
ignite and cause damage. It is better
to jump-start the vehicle with outside
assistance
>Avoid other situations in which the
fuel is not burned, or burns incom-
pletely, such as engaging the starter
frequently or for extended periods, or
repeated start attempts in which the
engine does not start (stopping and
restarting an engine which is running
properly does not present a problem).
Never allow the engine to run with
any of the spark plug cables
disconnected.Be sure to observe the instruc-
tions above to prevent unburned
fuel from reaching the catalytic con-
verter, otherwise, the catalytic con-
verter could overheat and be damaged.
High temperatures occur in every vehi-
cle equipped with a catalytic converter.
Heat shields are installed adjacent to
some sections of the exhaust system.
Never remove these shields; do not
apply undercoating to their surfaces.
When driving, standing at idle, and
parking the vehicle, take extra care to
avoid contact between the exhaust sys-
tem and flammable materials (grass,
hay, leaves, etc.). Such contact could
lead to a fire, resulting in serious per-
sonal injury and property damage.<
Driving notes Catalytic converter
Page 121 of 199

121n
IndexDataTechnologyRepairsCar careControlsOverview
Hardtop*It is not necessary to remove the fabric
top even in the winter, when the hard-
top is generally in constant use. But you
can take it off at any time with no prob-
lem. Before the fabric top is stored in
the convertible top compartment, it
must be absolutely dry in order to keep
water and mildew from forming.
The hardtop offers reading lamps as
well as clothes hooks in the rear, which
can be used simply by pressing on
them. In addition, a luggage rack sys-
tem can also be mounted on the hard-
top. If you have a problem in this re-
gard, please contact your BMW center.
When suspending clothing from
the hooks, ensure that they will
not obstruct the driver's vision. Do not
hang heavy objects on the hooks. If you
do so, they could cause personal injury
during braking or evasive maneuvers.<
Two persons are required for installing
or removing the hardtop. Work with
extreme caution in order to avoid paint
damage and damage to the body or
hardtop.
To facilitate the installation or removal of
the hardtop, you can purchase either a
specially designed hardtop lift
* or hard-
top roller carrier
* at your BMW center.
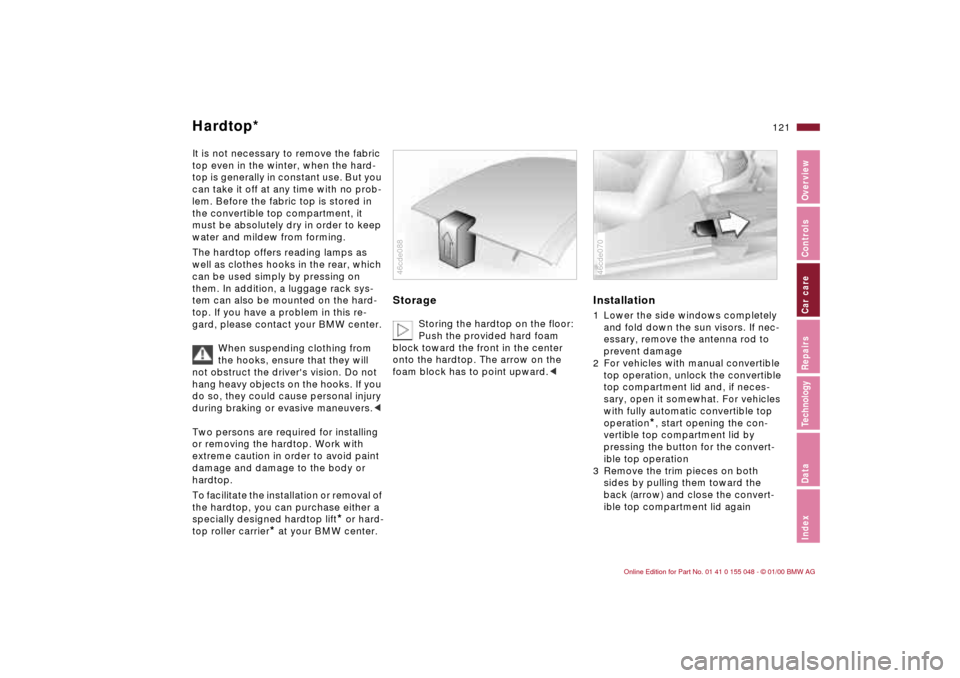
Storage
Storing the hardtop on the floor:
Push the provided hard foam
block toward the front in the center
onto the hardtop. The arrow on the
foam block has to point upward.<
46cde088
Installation1 Lower the side windows completely
and fold down the sun visors. If nec-
essary, remove the antenna rod to
prevent damage
2 For vehicles with manual convertible
top operation, unlock the convertible
top compartment lid and, if neces-
sary, open it somewhat. For vehicles
with fully automatic convertible top
operation
*, start opening the con-
vertible top compartment lid by
pressing the button for the convert-
ible top operation
3 Remove the trim pieces on both
sides by pulling them toward the
back (arrow) and close the convert-
ible top compartment lid again
46cde070