2000 BMW 323i SEDAN height adjustment
[x] Cancel search: height adjustmentPage 47 of 189
47n
IndexDataTechnologyRepairsCar careControlsOverview
For your personal safety when adjusting
the seat position, please follow the in-
structions below carefully:
Never try to adjust your seat while
operating the vehicle. The seat
could respond with an unexpected
movement, and the ensuing loss of ve-
hicle control could lead to an accident.
Be sure that the safety belt remains
firmly against your body at all times. In
the event of a frontal impact, a loose lap
belt could slide over the hips, leading to
abdominal injury. In addition, the safety
belt's restraint effectiveness is reduced
if the belt is worn loosely.
Never ride with the backrest reclined to
an extreme angle (especially important
for the front passenger to remember).
If you do so, there is a risk that you will
slide under the safety belt in an acci-
dent, thus reducing the protection pro-
vided by the safety belt.<
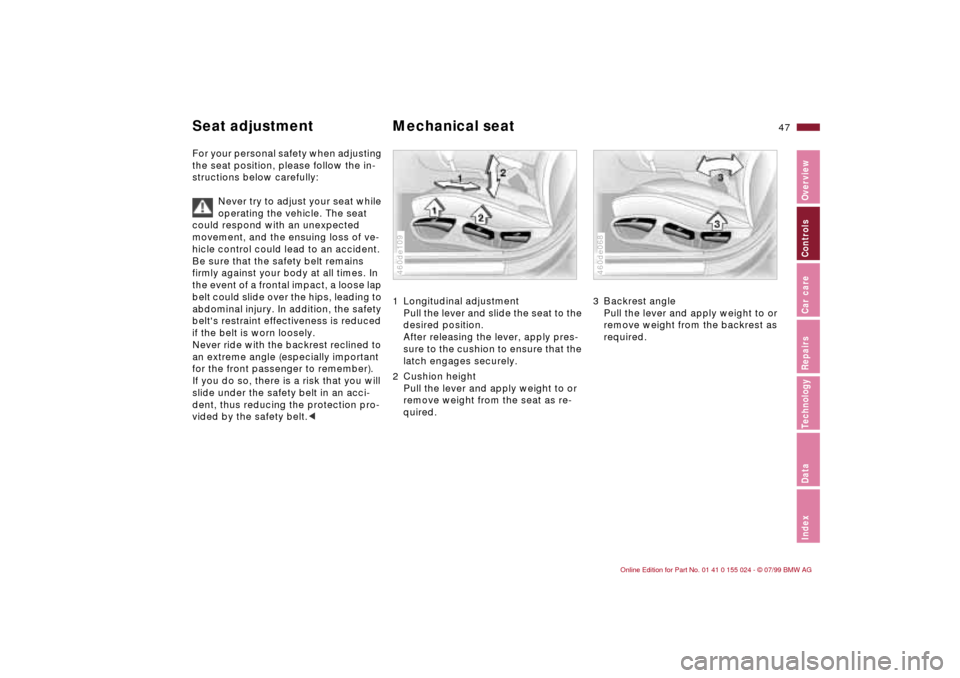
1 Longitudinal adjustment
Pull the lever and slide the seat to the
desired position.
After releasing the lever, apply pres-
sure to the cushion to ensure that the
latch engages securely.
2 Cushion height
Pull the lever and apply weight to or
remove weight from the seat as re-
quired.460de109
3 Backrest angle
Pull the lever and apply weight to or
remove weight from the backrest as
required.460de068
Seat adjustment Mechanical seat
Page 48 of 189
48n
Mechanical seat Head restraints Correct sitting postureTo reduce strain on the spinal column,
sit all the way back in the seat and rest
your back fully against the backrest.
In the ideal sitting posture, your head is
positioned along a straight line in rela-
tionship to your spinal column.
For long-distance driving, you may wish
to increase the backrest angle slightly
to reduce muscular tension. You should
be able to grasp the steering wheel at
its highest point with your arms slightly
bent.
After a seat adjustment, adjust the
height of the safety belt also. Refer to
page 54.
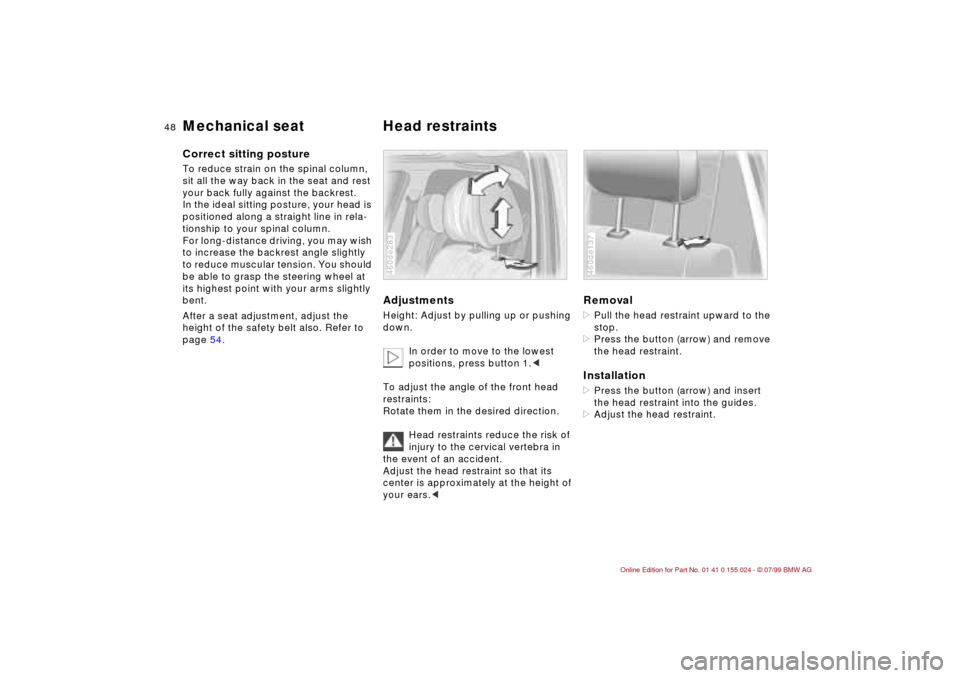
Adjustments Height: Adjust by pulling up or pushing
down.
In order to move to the lowest
positions, press button 1.<
To adjust the angle of the front head
restraints:
Rotate them in the desired direction.
Head restraints reduce the risk of
injury to the cervical vertebra in
the event of an accident.
Adjust the head restraint so that its
center is approximately at the height of
your ears.<460de283
Removal>Pull the head restraint upward to the
stop.
>Press the button (arrow) and remove
the head restraint.Installation>Press the button (arrow) and insert
the head restraint into the guides.
>Adjust the head restraint.460de137
Page 49 of 189
49n
IndexDataTechnologyRepairsCar careControlsOverview
BMW Sports Seat
*
Lumbar support
* Power seat
*
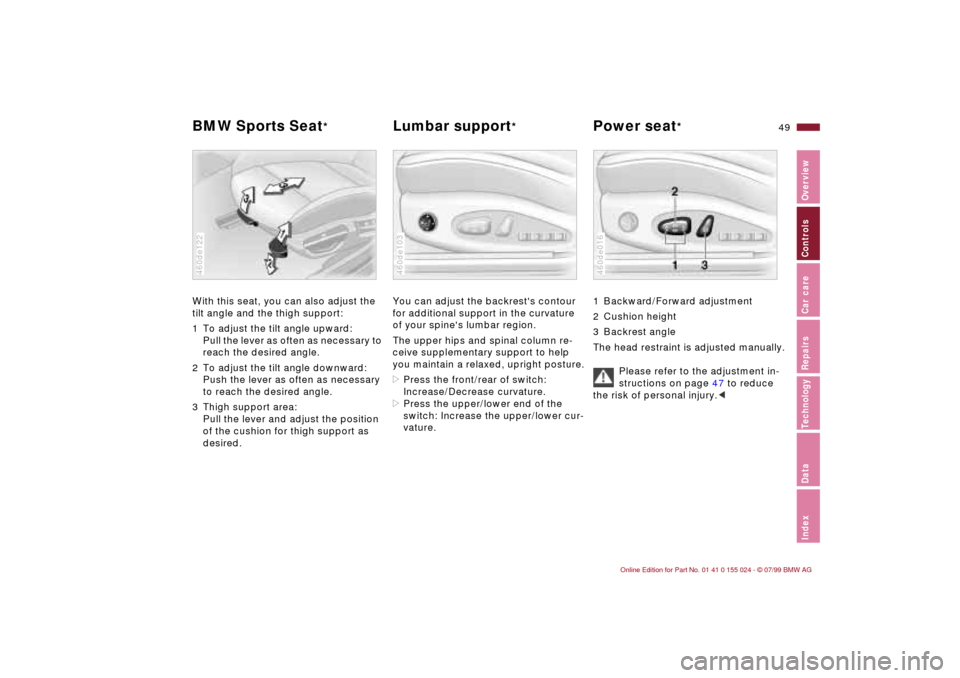
With this seat, you can also adjust the
tilt angle and the thigh support:
1 To adjust the tilt angle upward:
Pull the lever as often as necessary to
reach the desired angle.
2 To adjust the tilt angle downward:
Push the lever as often as necessary
to reach the desired angle.
3 Thigh support area:
Pull the lever and adjust the position
of the cushion for thigh support as
desired.460de122
You can adjust the backrest's contour
for additional support in the curvature
of your spine's lumbar region.
The upper hips and spinal column re-
ceive supplementary support to help
you maintain a relaxed, upright posture.
>Press the front/rear of switch:
Increase/Decrease curvature.
>Press the upper/lower end of the
switch: Increase the upper/lower cur-
vature.460de103
1 Backward/Forward adjustment
2 Cushion height
3 Backrest angle
The head restraint is adjusted manually.
Please refer to the adjustment in-
structions on page 47 to reduce
the risk of personal injury.<460de016
Page 50 of 189
50n
Power seat
*
Seat and mirror memory
*
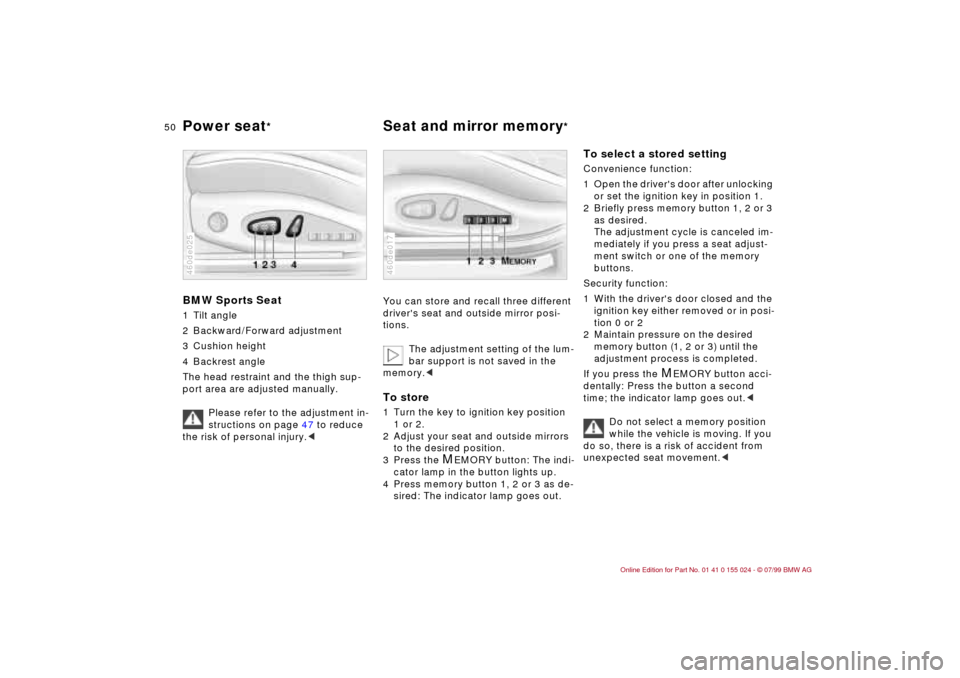
BMW Sports Seat1 Tilt angle
2 Backward/Forward adjustment
3 Cushion height
4 Backrest angle
The head restraint and the thigh sup-
port area are adjusted manually.
Please refer to the adjustment in-
structions on page 47 to reduce
the risk of personal injury.<460de025
You can store and recall three different
driver's seat and outside mirror posi-
tions.
The adjustment setting of the lum-
bar support is not saved in the
memory.
2 Adjust your seat and outside mirrors
to the desired position.
3 Press the
M
EMORY button: The indi-
cator lamp in the button lights up.
4 Press memory button 1, 2 or 3 as de-
sired: The indicator lamp goes out.
460de017
To select a stored setting Convenience function:
1 Open the driver's door after unlocking
or set the ignition key in position 1.
2 Briefly press memory button 1, 2 or 3
as desired.
The adjustment cycle is canceled im-
mediately if you press a seat adjust-
ment switch or one of the memory
buttons.
Security function:
1 With the driver's door closed and the
ignition key either removed or in posi-
tion 0 or 2
2 Maintain pressure on the desired
memory button (1, 2 or 3) until the
adjustment process is completed.
If you press the
M
EMORY button acci-
dentally: Press the button a second
time; the indicator lamp goes out.<
Do not select a memory position
while the vehicle is moving. If you
do so, there is a risk of accident from
unexpected seat movement.<
Page 54 of 189
54n
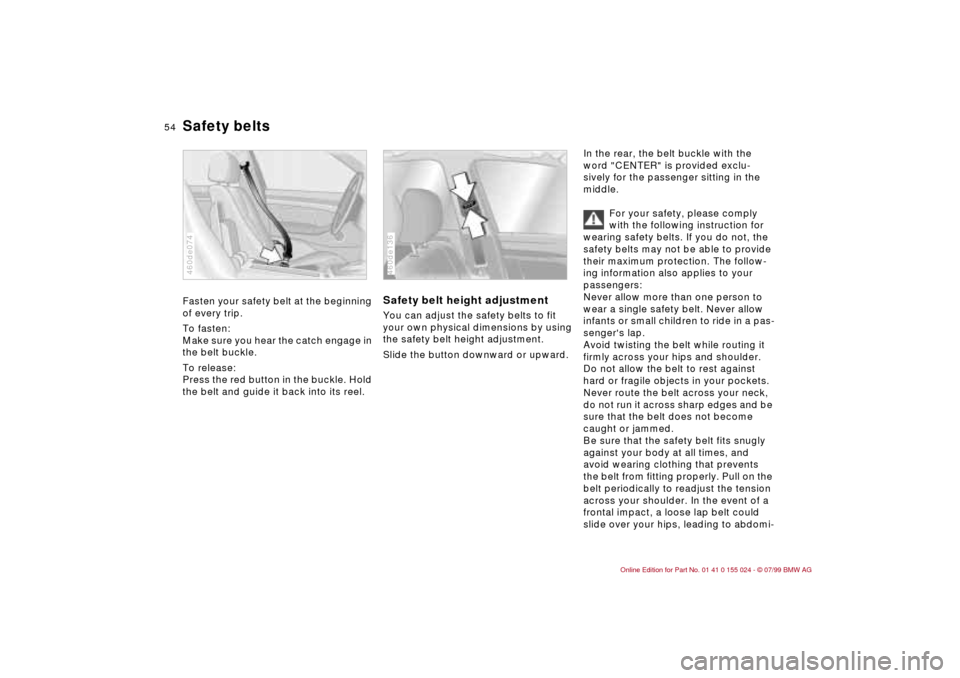
Fasten your safety belt at the beginning
of every trip.
To fasten:
Make sure you hear the catch engage in
the belt buckle.
To release:
Press the red button in the buckle. Hold
the belt and guide it back into its reel.
460de074
Safety belt height adjustmentYou can adjust the safety belts to fit
your own physical dimensions by using
the safety belt height adjustment.
Slide the button downward or upward.460de136
In the rear, the belt buckle with the
word "CENTER" is provided exclu-
sively for the passenger sitting in the
middle.
For your safety, please comply
with the following instruction for
wearing safety belts. If you do not, the
safety belts may not be able to provide
their maximum protection. The follow-
ing information also applies to your
passengers:
Never allow more than one person to
wear a single safety belt. Never allow
infants or small children to ride in a pas-
senger's lap.
Avoid twisting the belt while routing it
firmly across your hips and shoulder.
Do not allow the belt to rest against
hard or fragile objects in your pockets.
Never route the belt across your neck,
do not run it across sharp edges and be
sure that the belt does not become
caught or jammed.
Be sure that the safety belt fits snugly
against your body at all times, and
avoid wearing clothing that prevents
the belt from fitting properly. Pull on the
belt periodically to readjust the tension
across your shoulder. In the event of a
frontal impact, a loose lap belt could
slide over your hips, leading to abdomi-
Safety belts
Page 183 of 189

Everything from A to Z
183n
IndexDataTechnologyRepairsCar careControlsOverview
OOBD interface socket139
Obstruction protection44
Odometer73
Oil
capacity175
consumption125
dipstick125
quality126
specifications126
viscosity126
Oil additives125
Oil change intervals, see the
Service and Warranty
Information Booklet
Oil filter change175
Oil level
check125
indicator lamp20
Oil pressure, indicator
lamp20
OILSERVICE74
Onboard computer76
Onboard tool kit142
Outside temperature
display76PPaint blemishes133
Paint, care133
Paintwork, minor
repairs134Paintwork, waxing134
Park Distance Control
(PDC)78
Parking brake63
Parking help78
Parking lamps83
Parking, winter111
PDC (Park Distance
Control)78
Performance172
Pocket flashlight92
Pollen90
Power seat49
Power steering111
Power windows44
safety switch45
Pressure monitoring,
tires80, 167
Pressure, tires27, 113
RRadiator175
Radio
refer to the separate
Owner's Manual
Radio Data System
(RDS)164
Radio reception112, 164
Rain sensor69, 166
RDC (Tire Pressure
Control)80, 167
RDS (Radio Data
System)164Reading lamps84
Rear backrest, folding97
Rear lamps145
Rear window
defroster70, 90
Rearview mirror52
Reclining seat47
Refueling26
Remote control35
Removing condensation,
windows89
Replacement key32
Reporting safety defects7
Restraint system59
Reverse17, 64
Roller blind, sun
protection91
Roller sun blind91
Roof load capacity174
Roof-mounted luggage
rack100
Rubber parts110
SSafety belt tensioner164
Safety belts54
height adjustment54
Safety feature44
Safety lock buttons38
Seat
mechanical47
power49
Seat adjustment47Seat heating91
Seat memory50
Securing cargo99
Securing loads99
Selector lever, automatic
transmission65
Self-defrosting mirrors52
Self-diagnostics168
Service and Warranty
Information Booklet131
Service Interval
Display74, 131
Shiftlock65
Side airbags56
Side impact Head Protection
System56
Side lamps82
bulb replacement144
Ski bag98
Skid control111
Sliding/Tilt sunroof45
closing following an
electrical malfunction156
convenience operation34
Slippery roads110
Snow chains110, 118
Space-saver spare tire149
Spare key32
Spare tire149
Spare wheel149
Spark plugs176
Speaker95
Speed control71