Page 21 of 189

19n
RepairsIndexOverview Controls Car care Technology Data
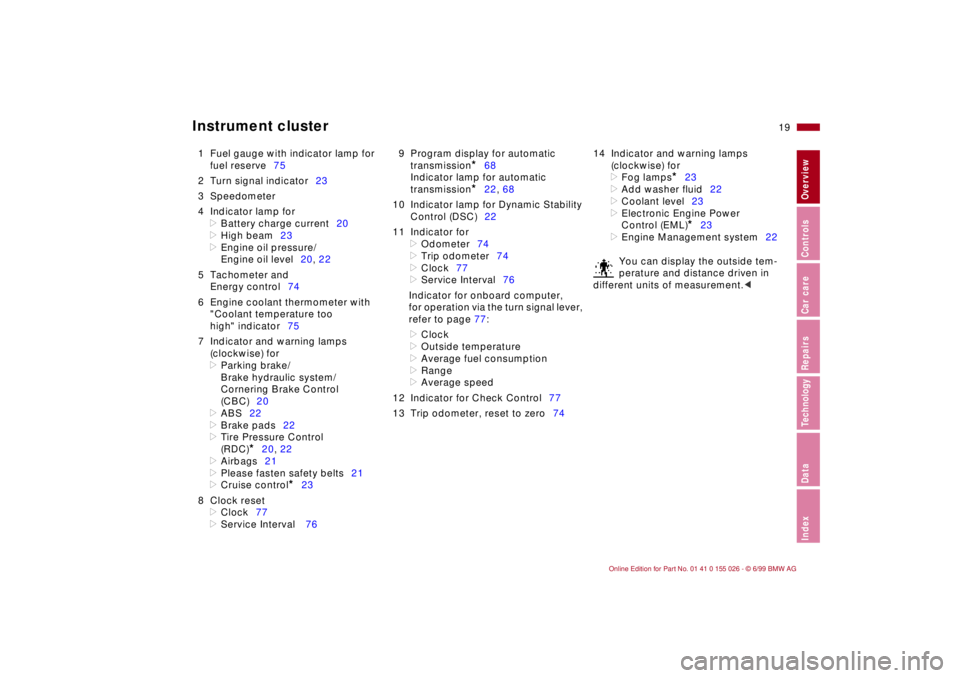
Instrument cluster
1 Fuel gauge with indicator lamp for
fuel reserve75
2 Turn signal indicator23
3 Speedometer
4 Indicator lamp for
>
Battery charge current20
>
High beam23
>
Engine oil pressure/
Engine oil level20, 22
5 Tachometer and
Energy control74
6 Engine coolant thermometer with
"Coolant temperature too
high" indicator75
7 Indicator and warning lamps
(clockwise) for
>
Parking brake/
Brake hydraulic system/
Cornering Brake Control
(CBC)20
>
ABS22
>
Brake pads22
>
Tire Pressure Control
(RDC)
*
20, 22
>
Airbags21
>
Please fasten safety belts21
>
Cruise control
*
23
8 Clock reset
>
Clock77
>
Service Interval 769 Program display for automatic
transmission
*
68
Indicator lamp for automatic
transmission
*
22, 68
10 Indicator lamp for Dynamic Stability
Control (DSC)22
11 Indicator for
>
Odometer74
>
Trip odometer74
>
Clock77
>
Service Interval76
Indicator for onboard computer,
for operation via the turn signal lever,
refer to page 77:
>
Clock
>
Outside temperature
>
Average fuel consumption
>
Range
>
Average speed
12 Indicator for Check Control77
13 Trip odometer, reset to zero7414 Indicator and warning lamps
(clockwise) for
>
Fog lamps
*
23
>
Add washer fluid22
>
Coolant level23
>
Electronic Engine Power
Control (EML)
*
23
>
Engine Management system22
You can display the outside tem-
perature and distance driven in
different units of measurement.
<
Page 28 of 189

26n
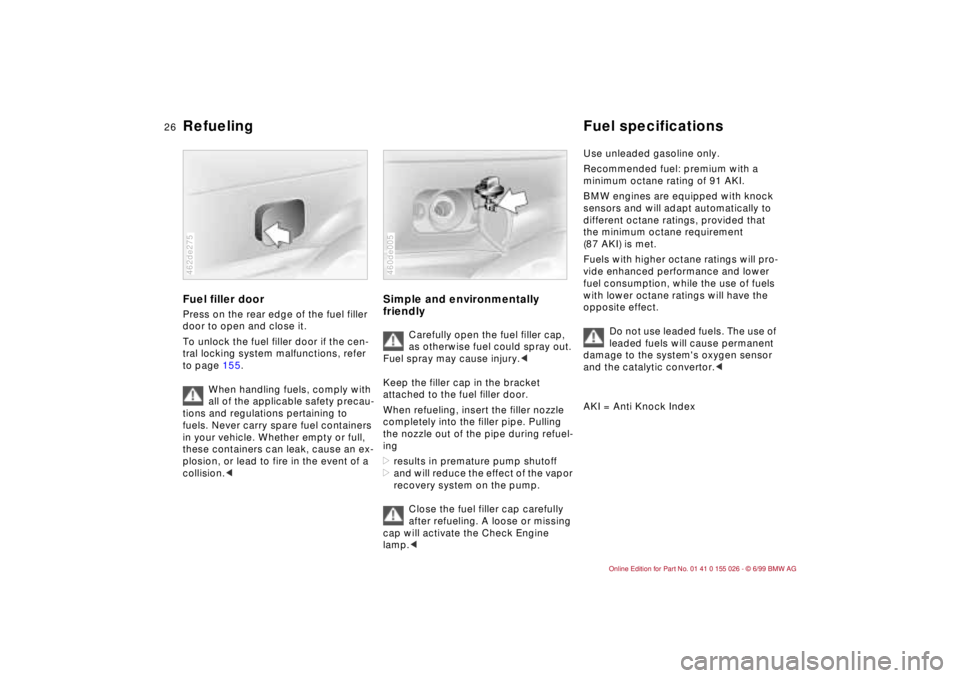
Refueling Fuel specificationsFuel filler doorPress on the rear edge of the fuel filler
door to open and close it.
To unlock the fuel filler door if the cen-
tral locking system malfunctions, refer
to page 155.
When handling fuels, comply with
all of the applicable safety precau-
tions and regulations pertaining to
fuels. Never carry spare fuel containers
in your vehicle. Whether empty or full,
these containers can leak, cause an ex-
plosion, or lead to fire in the event of a
collision.<462de275
Simple and environmentally
friendly
Carefully open the fuel filler cap,
as otherwise fuel could spray out.
Fuel spray may cause injury.<
Keep the filler cap in the bracket
attached to the fuel filler door.
When refueling, insert the filler nozzle
completely into the filler pipe. Pulling
the nozzle out of the pipe during refuel-
ing
>results in premature pump shutoff
>and will reduce the effect of the vapor
recovery system on the pump.
Close the fuel filler cap carefully
after refueling. A loose or missing
cap will activate the Check Engine
lamp.<
460de005
Use unleaded gasoline only.
Recommended fuel: premium with a
minimum octane rating of 91 AKI.
BMW engines are equipped with knock
sensors and will adapt automatically to
different octane ratings, provided that
the minimum octane requirement
(87 AKI) is met.
Fuels with higher octane ratings will pro-
vide enhanced performance and lower
fuel consumption, while the use of fuels
with lower octane ratings will have the
opposite effect.
Do not use leaded fuels. The use of
leaded fuels will cause permanent
damage to the system's oxygen sensor
and the catalytic convertor.<
AKI = Anti Knock Index
Page 76 of 189
74n
1 Odometer You can activate the displays shown in
the illustration with the ignition key in
position 0 by pressing the button in the
instrument cluster (arrow).2 Trip odometerTo reset the trip odometer to zero,
press the button (arrow) with the igni-
tion key in position 1 or 2.462us005
Avoid engine speeds in the red warning
zone of the gauge.
To protect the engine, the engine man-
agement system automatically inter-
rupts the fuel supply in this range; the
resulting effect resembles that associ-
ated with a sudden loss of power.462us017
Indicates the current fuel consumption in
mpg (on Canadian models in l/100 km).
This instrument clearly shows whether
your current driving style is conducive to
economy and minimum exhaust emis-
sions.
The needle goes back to zero when the
car is stationary. 462us018
Odometer Tachometer Energy control
Page 78 of 189
76n
Service Interval Display Remaining distance for serviceThe displays shown in the diagram
appear for a few seconds with the
ignition key in position 1 and 2 or for
a few seconds after starting the engine.
The next service due appears with the
message OILSERVICE or INSPECTION,
together with the remaining distance
before scheduled service.
The computer bases its calculations of
the remaining distance on the rate of
fuel consumption in the period immedi-
ately preceding your data request.
A flashing message and a "–" in front of
the number mean that the service inter-
val has already been exceeded by the
distance shown on the display. Please
contact your authorized BMW center for
an appointment.462us022
Page 79 of 189

77n
RepairsIndexOverview Controls Car care Technology Data
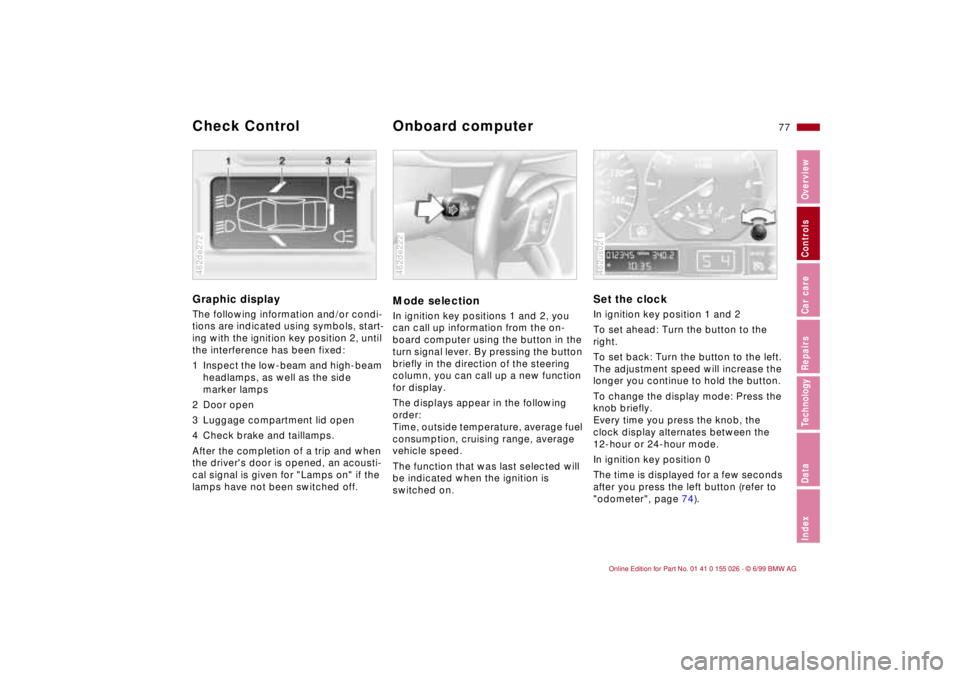
Graphic display
The following information and/or condi-
tions are indicated using symbols, start-
ing with the ignition key position 2, until
the interference has been fixed:
1 Inspect the low-beam and high-beam
headlamps, as well as the side
marker lamps
2 Door open
3 Luggage compartment lid open
4 Check brake and taillamps.
After the completion of a trip and when
the driver's door is opened, an acousti-
cal signal is given for "Lamps on" if the
lamps have not been switched off.462de272
Mode selectionIn ignition key positions 1 and 2, you
can call up information from the on-
board computer using the button in the
turn signal lever. By pressing the button
briefly in the direction of the steering
column, you can call up a new function
for display.
The displays appear in the following
order:
Time, outside temperature, average fuel
consumption, cruising range, average
vehicle speed.
The function that was last selected will
be indicated when the ignition is
switched on.462de222
Set the clockIn ignition key position 1 and 2
To set ahead: Turn the button to the
right.
To set back: Turn the button to the left.
The adjustment speed will increase the
longer you continue to hold the button.
To change the display mode: Press the
knob briefly.
Every time you press the knob, the
clock display alternates between the
12-hour or 24-hour mode.
In ignition key position 0
The time is displayed for a few seconds
after you press the left button (refer to
"odometer", page 74).462us021
Check Control
Onboard computer
Page 80 of 189
78n
Onboard computerOutside temperature You can change the units of measure
(6/7) for the outside temperature dis-
play by pressing the right-hand reset
button in the instrument cluster when
the temperature display is active.462us023
Ice warning If the outside temperature sinks to
approx. 37.57 (+ 36), a warning sig-
nal sounds and the display flashes
briefly.
The warning is repeated whenever the
temperature goes to at least 437
(+ 66) and then drops again to 37.57
(+ 36).
The ice warning does not alter the
fact that surface ice can form at
temperatures above 37.57 (+ 36),
e. g. on bridges or shaded road sur-
faces.<
Average fuel consumption If you continue to hold the button on the
turn signal lever, the average fuel con-
sumption last displayed is recalculated
from that point in time.462us007
Page 81 of 189
79n
RepairsIndexOverview Controls Car care Technology Data
Onboard computer Range The computer bases its calculations
of the cruising range on the rate of fuel
consumption in the period immediately
preceding your data request.462us024
Average speed If you continue to hold the button, the
average speed last displayed is recal-
culated from that point in time.
Any time spent when the vehicle is sta-
tionary and the engine is shut off is
ignored for the calculation.462us025
Page 125 of 189

123n
RepairsIndexOverview Controls Car care Technology Data
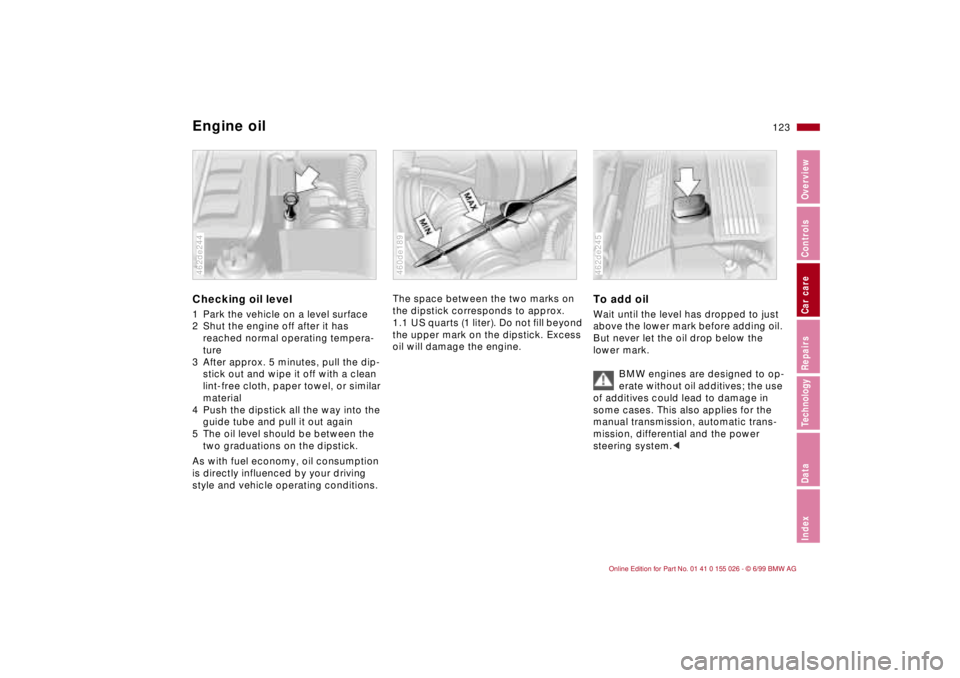
Engine oilChecking oil level 1 Park the vehicle on a level surface
2 Shut the engine off after it has
reached normal operating tempera-
ture
3 After approx. 5 minutes, pull the dip-
stick out and wipe it off with a clean
lint-free cloth, paper towel, or similar
material
4 Push the dipstick all the way into the
guide tube and pull it out again
5 The oil level should be between the
two graduations on the dipstick.
As with fuel economy, oil consumption
is directly influenced by your driving
style and vehicle operating conditions.462de244
The space between the two marks on
the dipstick corresponds to approx.
1.1 US quarts (1 liter). Do not fill beyond
the upper mark on the dipstick. Excess
oil will damage the engine.460de189
To add oil Wait until the level has dropped to just
above the lower mark before adding oil.
But never let the oil drop below the
lower mark.
BMW engines are designed to op-
erate without oil additives; the use
of additives could lead to damage in
some cases. This also applies for the
manual transmission, automatic trans-
mission, differential and the power
steering system.<462de245