2000 BMW 323Ci COUPE window
[x] Cancel search: windowPage 54 of 189

52n
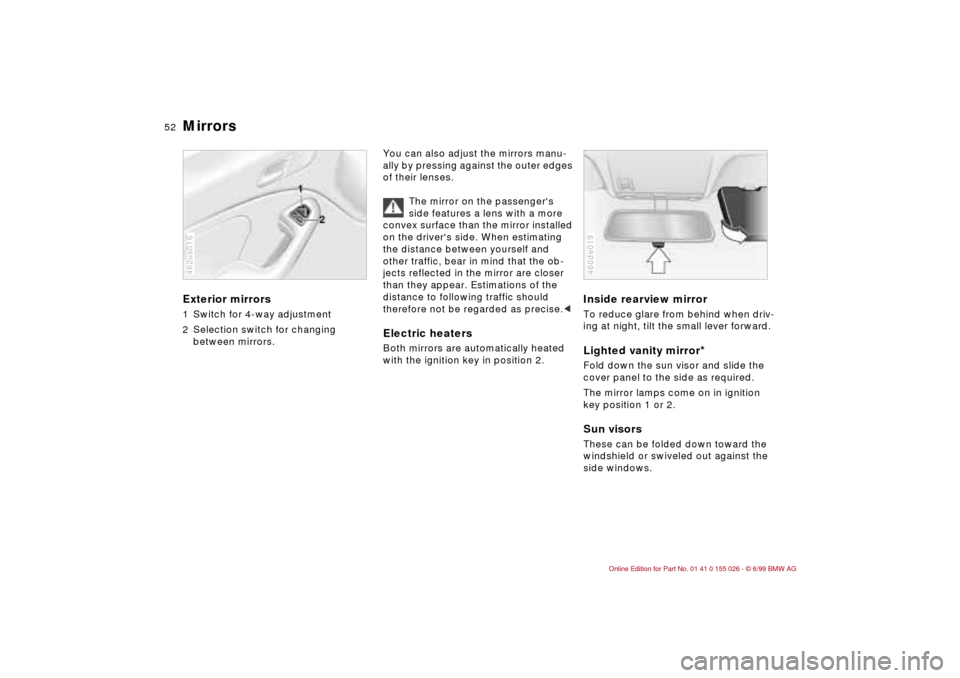
Mirrors Exterior mirrors1 Switch for 4-way adjustment
2 Selection switch for changing
between mirrors.462us016
You can also adjust the mirrors manu-
ally by pressing against the outer edges
of their lenses.
The mirror on the passenger's
side features a lens with a more
convex surface than the mirror installed
on the driver's side. When estimating
the distance between yourself and
other traffic, bear in mind that the ob-
jects reflected in the mirror are closer
than they appear. Estimations of the
distance to following traffic should
therefore not be regarded as precise.
Inside rearview mirror To reduce glare from behind when driv-
ing at night, tilt the small lever forward.Lighted vanity mirror
*
Fold down the sun visor and slide the
cover panel to the side as required.
The mirror lamps come on in ignition
key position 1 or 2.Sun visorsThese can be folded down toward the
windshield or swiveled out against the
side windows.460de019
Page 73 of 189

71n
RepairsIndexOverview Controls Car care Technology Data
Wiper/washer system Rear window defroster Headlamp washers
*
When the vehicle's lighting system is
switched on, the headlamps will also be
cleaned every fifth time the automatic
windshield washer is activated.
Do not use the washers if there is
any danger that the fluid will freeze
on the windshield, otherwise vision
could be obscured. Use an antifreeze
agent. Refer to page 122.
Do not use the washers when the reser-
voir is empty, otherwise damage to the
washer pump could result.
position 2
*.
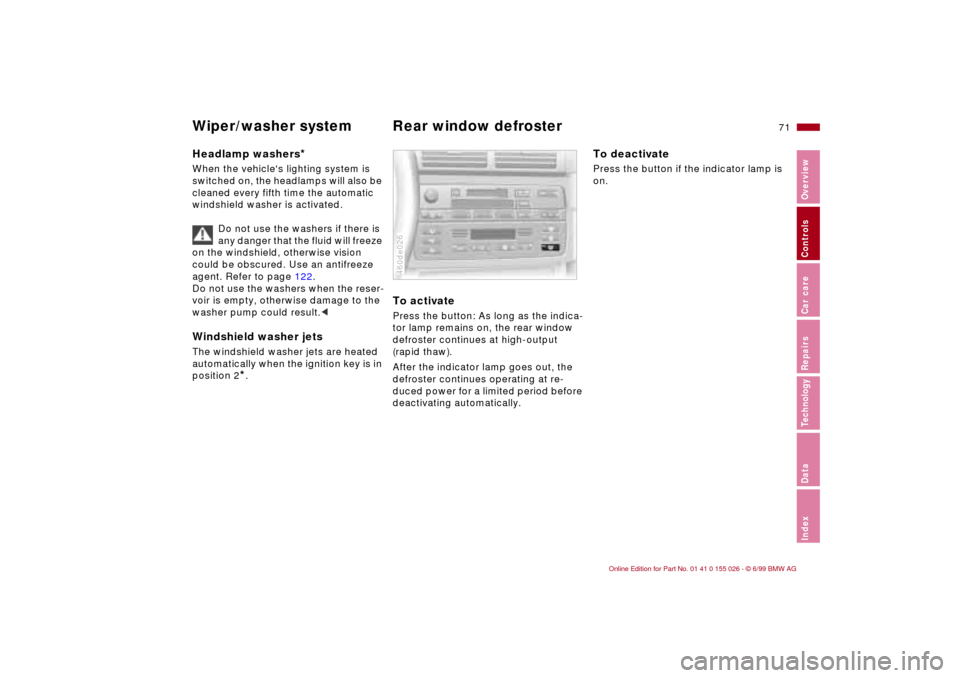
To activatePress the button: As long as the indica-
tor lamp remains on, the rear window
defroster continues at high-output
(rapid thaw).
After the indicator lamp goes out, the
defroster continues operating at re-
duced power for a limited period before
deactivating automatically. 460de026
To deactivatePress the button if the indicator lamp is
on.
Page 91 of 189

89n
RepairsIndexOverview Controls Car care Technology Data
Automatic climate control1 Air on the windshield and on the
side windows
2 Air flow toward upper body
The side rotary dials provide infi-
nitely-variable regulation of the air
supply, while the levers change the
air-flow direction. The center rotary
dial adjusts the temperature of the
air as it flows out, see page 92
3 Front footwell ventilation
There are corresponding air vents
in the rear footwell as well
4 Recirculated air mode/Automatic
recirculated-air control (AUC)
*
91, 92
5 Air supply91
6 Temperature90
7 Automatic air distribution90
8 Individual air distribution90
9 Air grill for interior temperature
sensor – please keep clear and
unobstructed
10 Display for temperature and air
supply90
11 Defrost the windows and remove
condensation91
12 Air conditioner91
13 Rear window defroster71, 92
Page 92 of 189

90n
Automatic climate controlTips for pleasant drivingUse the automatic system; switch on
AUTO-button 7. Select an interior tem-
perature that is comfortable for you
– we recommend 707 (226) as a
comfortable setting. When the outside
temperature is above 407 (+ 56), you
can also use the air conditioning system
(12). This system dries the air and pre-
vents condensation on the windows
(e.g. if persons are wearing damp cloth-
ing). Set the outlets (2) so that the air
flows past you and is not directed
straight at you. Set the rotary dial be-
tween the air outlets (2) for the upper
body to a medium position, since air
that is somewhat cooler promotes driv-
ing without fatigue.
Detailed setting options are described
for you in the following section.
You can make the settings of your
vehicle in such a manner that,
when you unlock the car with your per-
sonalized remote control, your own per-
sonalized setting of the automatic cli-
mate control is initiated.<
Automatic air distribution
The AUTO program assumes
the adjustment of the air distri-
bution and the air supply for you and in
addition adapts the temperature to
external influences (summer, winter) to
meet preferences you can specify. This
program maintains a comfortable in-car
climate regardless of the season. Select
an interior temperature that is comfort-
able for you – we recommend 707
(226). The temperature selected and
the word AUTO for the air supply
appear in display (10) (refer to the over-
view on page 88). Open the air outlets
for the upper body area. Switch on the
air conditioner in warm weather. The
maximum cooling capacity is achieved
when you set rotary dial (3) (refer to
page 92) to cold.
Individual air distribution
You can cancel the AUTO pro-
gram by selecting specific distri-
bution patterns to suit your own
individual requirements. You
can direct air to flow onto the windows
, toward the upper body , and into
the footwell .
Temperature
The figures in the display provide
a general indication of interior
temperature. We recommend 707
(226) as a comfortable setting, whether
the air conditioner is operating or not.
When you start the vehicle, the system
ensures that the selected temperature is
reached as quickly as possible. It then
maintains this temperature, regardless
of the season.
Set rotary dial 3 (refer to "Draft-free
ventilation" on page 92) to a medium
setting, since air that is somewhat
cooler promotes driving without fatigue.
You can use this setting for mixing air to
make minor comfort modifications.
The full, uncontrolled heater out-
put is available starting at an inte-
rior temperature setting of 907 (326).
At a setting of 607 (166), the full cool-
ing output is available when the air con-
ditioner is activated.<
Page 93 of 189

91n
RepairsIndexOverview Controls Car care Technology Data
Automatic climate control Air supply
By pressing the left or right half
of the button, you can vary the
air supply. By doing this, you switch off
the automatic control of the air supply.
Nevertheless, the automatic air distribu-
tion remains unchanged.
When you set the lowest blower speed
by pressing the left half of the button,
all of the displays are canceled: The
blower, heating and air conditioner are
switched off, and the air supply is
stopped. You can reactivate the system
by pressing any button of the automatic
climate control.
To defrost windshield and side
windows
This program quickly removes
ice and condensation from the
windshield and the side windows.
Air conditioner
The air is cooled and dehumidi-
fied and – depending on the
temperature setting – rewarmed when
the air conditioner system is switched
on.
Depending on the weather, the wind-
shield may fog over briefly when the
engine is started.
Use the button to switch off the air con-
ditioner at outside temperatures below
approx. + 407 (+ 56). This will help to
prevent the windows from fogging up.
If the windows fog over after switching
the air conditioner off, switch it back on.
Condensation forms in the air con-
ditioner system during operation,
that then exits under the vehicle. Traces
of condensed water of this kind are thus
normal.<
Recirculated-air mode
You can respond to unpleasant
external odors by temporarily
blocking outside air. The system then
recirculates the air already within the
vehicle.
If the windows fog over in the re-
circulated air mode, switch this
mode off and increase the air supply as
required.<
Page 94 of 189

92n
Automatic climate controlAutomatic recirculated-air control
(AUC)
*You can respond to unpleasant
external odors by temporarily
blocking outside air. The system then
recirculates the air already within the
vehicle. By repeated actuations of the
button, you can select one of three dif-
ferent operation modes.
>Indicator lamps off: Fresh air flows
into the vehicle
>Left-hand indicator lamp on – AUC
mode: The system detects pollutants
in the outside air and responds by
deactivating the outside air flow as
required. The system then recircu-
lates the air already within the vehi-
cle. Depending on air quality require-
ments, the system automatically
switches between outside air supply
and recirculation of the air already
within the vehicle.
>Right-hand indicator lamp on: The
flow of outside air into the vehicle is
permanently blocked. The system re-
circulates the air already within the
vehicle.
If the windows fog over in the re-
circulated air mode, switch this
mode off and increase the air supply as
required.<
Rear window defroster
When the rear window defroster
is activated, the indicator lamp
comes on. The rear window defroster
switches off automatically. Refer to
page 71.
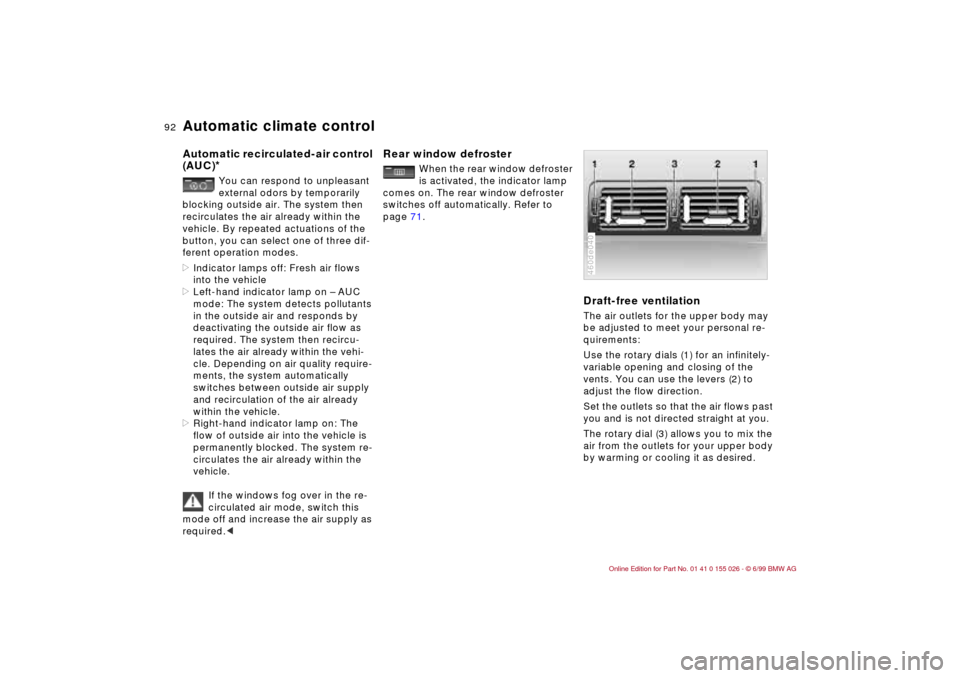
Draft-free ventilation The air outlets for the upper body may
be adjusted to meet your personal re-
quirements:
Use the rotary dials (1) for an infinitely-
variable opening and closing of the
vents. You can use the levers (2) to
adjust the flow direction.
Set the outlets so that the air flows past
you and is not directed straight at you.
The rotary dial (3) allows you to mix the
air from the outlets for your upper body
by warming or cooling it as desired.460de040
Page 134 of 189

132n
Caring for your carWaxing your car Protect the finish using carnauba or
synthetic-based waxes only.
The best way to determine when the
finish needs to be waxed is by noting
when water stops beading on the sur-
face.
You can use a glass cleaner to remove
any wax or silicone that may have been
left on the windows during waxing.
A full range of car-care products is
available from your BMW center.<
Paint damageYou can touch up small areas of paint
damage with a BMW spray paint or a
BMW touch-up stick.
The paint color code for your car is pro-
vided on a sticker located next to the
type plate and on the first page of your
Service and Warranty Information
Booklet.
Damage caused by flying stones,
scratches, etc., must be touched up
without delay to prevent rust from form-
ing.
If corrosion has started to form in an
area with paint damage, remove all rust
and clean the area. Then prime the area
with a BMW Primer Stick. Finally, apply
the finish coat. Wait a few days, then
polish the repaired area. Finish by ap-
plying a wax preservative.
More extensive paint damage should be
professionally repaired in accordance
with the manufacturer's instructions.
Your BMW center uses original BMW
finish materials in accordance with offi-
cial repair procedures.
Caring for other vehicle
components and materials Light-alloy wheels should be treated
with alloy wheel cleaner, especially dur-
ing the winter months. However, do not
use aggressive products containing ac-
ids, strong alkalis or abrasives. Do not
use steam cleaners operating at tem-
peratures above 1407 (606). Follow
the manufacturer's instructions.
If your vehicle has chrome parts
* such
as the window frames and door handles,
be especially careful about cleaning
them with plenty of water and possibly a
shampoo supplement as well after the
roads have been salted. Use chrome
polish as an additional treatment.
You can use window and glass cleaner
to clean inside window surfaces and
mirrors without smearing and streaking.
Never use polishing pastes or abrasive
(quartz) cleansers on mirror lenses.
Page 135 of 189

133n
RepairsIndexOverview Controls Car care Technology Data
Caring for your carPlastic components, vinyl upholstery,
headliners, lamp lenses, the clear cover
of the instrument panel and compo-
nents with a sprayed dull black surface
can be cleaned with water (add plastic
shampoo as required). Do not allow
moisture to soak through the seats or
headliner. Never use solvents such as
lacquer thinner, heavy-duty grease re-
mover, fuels, etc.
Rubber components should be cleaned
with water only; a rubber treatment or
silicone spray may also be applied.
Clean the wiper blades with soapy wa-
ter. The wiper blades should be re-
placed twice a year, before and after
the cold season. This especially impor-
tant for vehicles with a rain sensor.
Use only wiper blades approved
by BMW.<
The safety belts should be cleaned with
a mild soap and water solution without
removing them from the car. Never at-
tempt chemical or dry cleaning, as
damage to the belt fabric could result.
After cleaning, never allow the inertia
reel to retract the belts until they are
completely dry. Dirty safety belts pre-
vent the inertia reel mechanism from
retracting the strap properly, and thus
constitute a safety hazard.
Heavily soiled floor carpets and mats
*
can be cleaned with an interior cleaner.
The floor mats can be removed from the
vehicle for cleaning.
Please use only a damp cloth to clean
wooden fascia panels and components.
Follow up by drying with a soft cloth.
A full range of car-care products is
available from your BMW center.<
Care of upholstery materials Depressions in the upholstered materi-
als resulting from everyday use can be
brushed up by brushing "against the
nap" with a lightly dampened brush.
The tendency of the pile to lie in a par-
ticular direction on velour upholstery is
not a quality defect, and, just as on
home textiles or clothing, cannot be
avoided.
Lint on upholstery materials, textile or
leather remnants that have been worn
into the upholstery may be removed
with a lint brush or a Velcro
â brush. A
cleaning glove is available for particu-
larly "stubborn" lint. Stains and fairly
large areas of dirt should be cleaned off
without delay, using lukewarm water
and an interior cleaner, stain remover or
cleaning-grade benzene. Brush the fab-
ric afterwards to restore its appearance.
If the vehicle will be stored for an ex-
tended period, or if it is exposed to in-
tense sunlight, cover all seats or the
windows to prevent fading.
A full range of car-care products is
available from your BMW center.<