2000 BMW 323Ci CONVERTIBLE warning
[x] Cancel search: warningPage 25 of 199
25n
IndexDataTechnologyRepairsCar careControlsOverview
Hazard warning flashers Warning triangle
*
First-aid kit
*
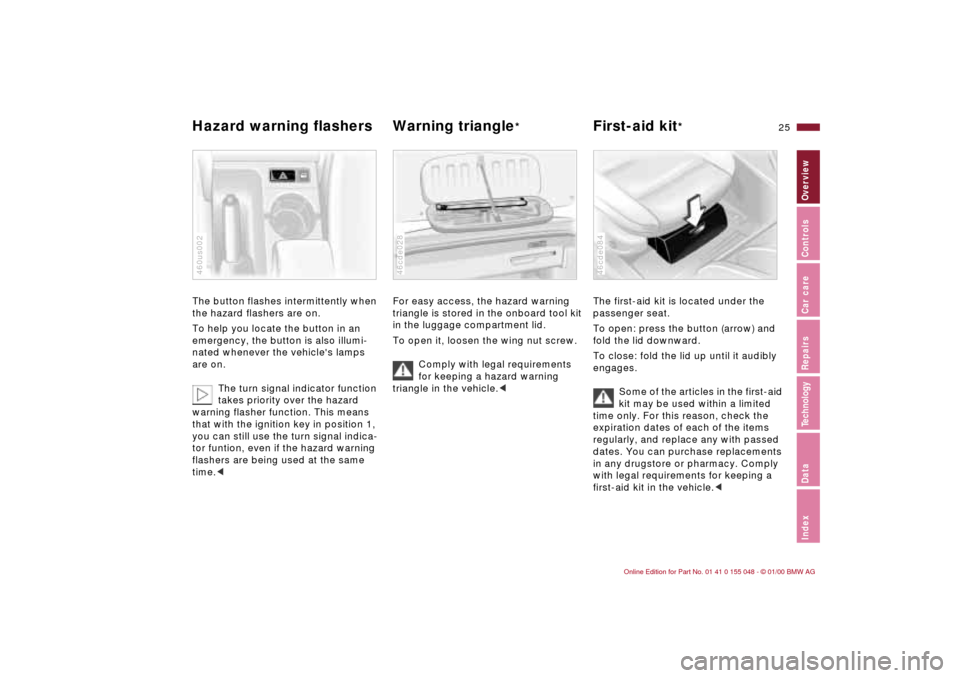
The button flashes intermittently when
the hazard flashers are on.
To help you locate the button in an
emergency, the button is also illumi-
nated whenever the vehicle's lamps
are on.
The turn signal indicator function
takes priority over the hazard
warning flasher function. This means
that with the ignition key in position 1,
you can still use the turn signal indica-
tor funtion, even if the hazard warning
flashers are being used at the same
time.< 460us002
For easy access, the hazard warning
triangle is stored in the onboard tool kit
in the luggage compartment lid.
To open it, loosen the wing nut screw.
Comply with legal requirements
for keeping a hazard warning
triangle in the vehicle.<46cde028
The first-aid kit is located under the
passenger seat.
To open: press the button (arrow) and
fold the lid downward.
To close: fold the lid up until it audibly
engages.
Some of the articles in the first-aid
kit may be used within a limited
time only. For this reason, check the
expiration dates of each of the items
regularly, and replace any with passed
dates. You can purchase replacements
in any drugstore or pharmacy. Comply
with legal requirements for keeping a
first-aid kit in the vehicle.< 46cde084
Page 34 of 199
34n
Central locking system Opening and closing – from outside The conceptThe central locking system is ready for
operation whenever the driver's door is
closed. The system engages and re-
leases the locks on the
>doors
>luggage compartment lid
>fuel filler door
>glove compartment.
The central locking system can be
operated
>from outside via the door lock and
using the remote control
>from inside by pressing a button.
Activating the central locking system
from inside does not lock the fuel filler
door (refer to page 38). Operating it
from the outside simultaneously acti-
vates the anti-theft protection. Both the
door locks and release handles remain
locked. The alarm system
* is also
armed or disarmed.
In the event of an accident, the central
locking system unlocks automatically
(only those doors that were not locked
separately with the safety lock buttons).
Refer to page 38. In addition, the ha-
zard warning flashers and interior lamps
come on.
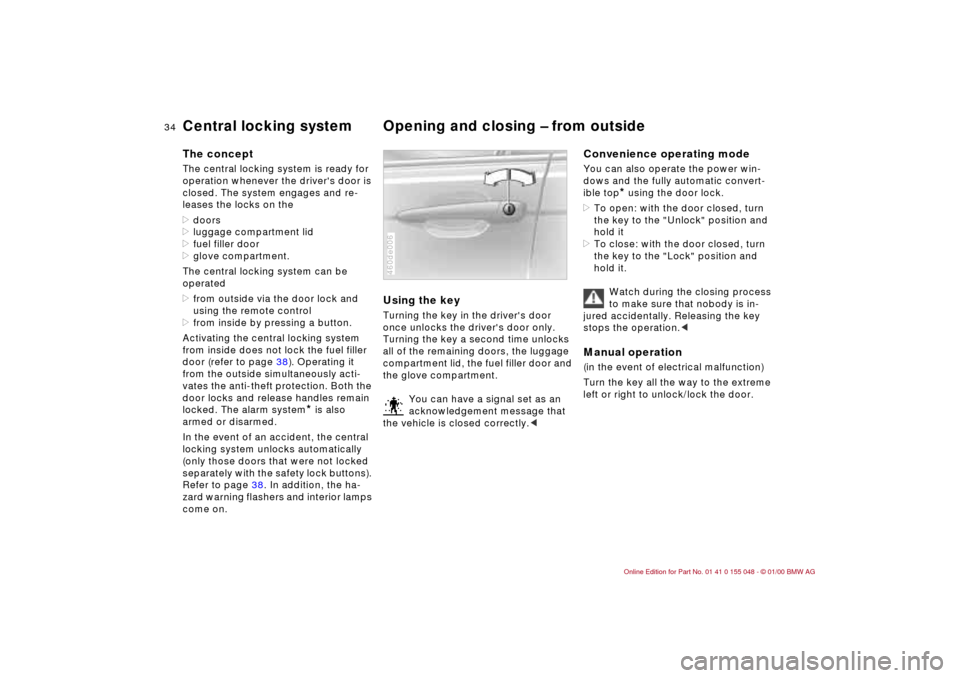
Using the keyTurning the key in the driver's door
once unlocks the driver's door only.
Turning the key a second time unlocks
all of the remaining doors, the luggage
compartment lid, the fuel filler door and
the glove compartment.
You can have a signal set as an
acknowledgement message that
the vehicle is closed correctly.<460de006
Convenience operating modeYou can also operate the power win-
dows and the fully automatic convert-
ible top
* using the door lock.
>To open: with the door closed, turn
the key to the "Unlock" position and
hold it
>To close: with the door closed, turn
the key to the "Lock" position and
hold it.
Watch during the closing process
to make sure that nobody is in-
jured accidentally. Releasing the key
stops the operation.<
Manual operation (in the event of electrical malfunction)
Turn the key all the way to the extreme
left or right to unlock/lock the door.
Page 42 of 199

42n
Alarm system
*
The conceptThe vehicle alarm system responds:
>When a door, the hood or the lug-
gage compartment lid is opened
>Movements inside the vehicle
>To a change in the vehicle's tilt –
if someone attempts to steal the
wheels or tow the vehicle without
authorization, for example
>If there is an interruption of battery
voltage.
The system responds to unauthorized
vehicle entry and attempted theft by
simultaneously activating the following:
>Sounding an acoustical alarm for
30 seconds
>Activating the hazard warning
flashers for approx. five minutes
>Flashing the high beams on and off in
tandem with the hazard warning
flashers.
To activate and deactivate the
alarm systemWhen the vehicle is locked or unlocked
by using a key or the remote control,
the alarm system is also armed or dis-
armed at the same time.
The interior protection and tilt sensor
alarm systems are activated approx.
30 seconds after you have shut the last
door.
If the alarm system has been armed
correctly, the hazard warning flashers
flash once.
You can have one signal set as
acknowledgment when arming
and disarming.<
You can also open the luggage com-
partment lid when the system is armed
by pressing button 3 of the remote con-
trol (refer to page 37). When it is closed,
the lid is once again secured.
Indicator lamp displaysThe indicator lamp is located under the
inside rearview mirror.
>When the indicator lamp flashes con-
tinuously, the system is armed>The indicator lamp flashes when it
is armed. Doors, the hood or luggage
compartment lid are not closed
properly. Even if you do not close the
alerted area, the remaining areas are
deadlocked, and the indicator lamp
flashes continuously after 10 seconds.
However, the interior protection
system is not activated>If the indicator lamp goes out when
the system is disarmed, no manipula-
tion or attempted intrusions have
been detected in the period since the
system was armed46cus033
Page 65 of 199
65n
IndexDataTechnologyRepairsCar careControlsOverview
Airbagsshould indicate the status of your rear
seat side airbags. If you are uncertain of
their status, or wish to have the airbags
activated or deactivated, please con-
tact your BMW center.<
Even when all these guidelines are ob-
served, there is still a small residual risk
of injuries to the face, hands and arms
occurring from airbag deployment in
isolated instances. The ignition and
inflation noise may provoke a mild
temporary hearing loss in extremely
sensitive individuals.
Airbag warning information is also
provided on the sun visors.
For additional information concerning
the airbag system, refer to pages 146
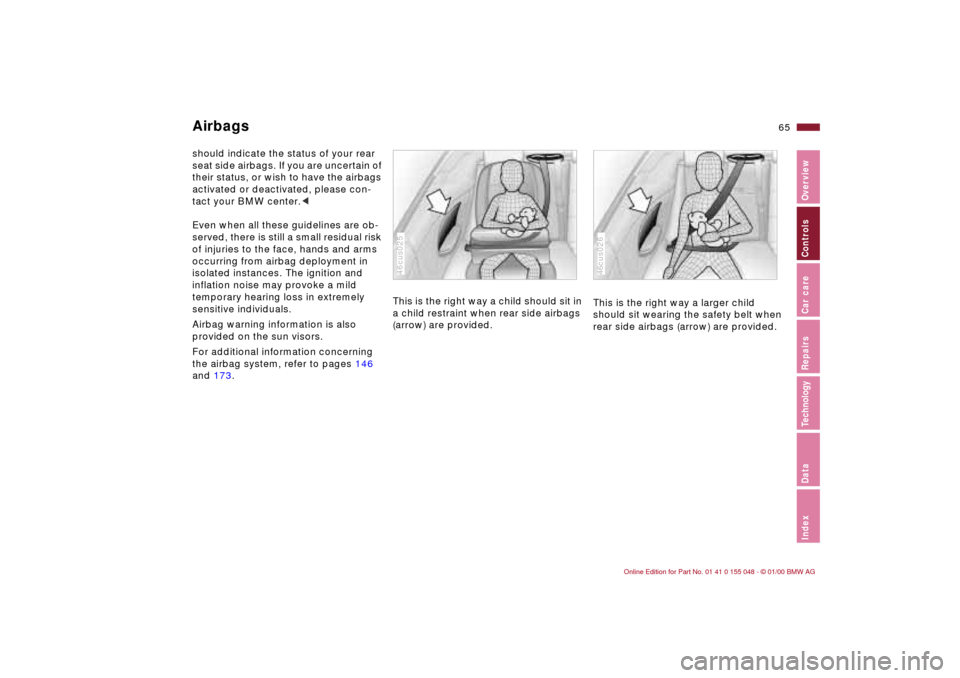
and 173.This is the right way a child should sit in
a child restraint when rear side airbags
(arrow) are provided.
46cus025
This is the right way a larger child
should sit wearing the safety belt when
rear side airbags (arrow) are provided.46cus026
Page 82 of 199

82n
1 Odometer You can activate the displays shown in
the illustration with the ignition key in
position 0 by pressing the button in the
instrument cluster (arrow).2 Trip odometerTo reset the trip odometer to zero,
press the button (arrow) with the
ignition key in position 1 and up.462us005
Avoid engine speeds that fall within the
gauge's red warning zone.
To protect the engine, the fuel supply is
automatically interrupted in this zone;
you will notice a loss of power.462us017
Indicates current fuel consumption in
mpg (in liters per 100 km on Canadian
models). You can check your current
driving style to see whether it is condu-
cive to economy and minimum exhaust
emissions.
When the vehicle is stationary, the
needle goes to "Maximum" (zero on
Canadian models).462us018
Odometer Tachometer Energy Control
Page 83 of 199
83n
IndexDataTechnologyRepairsCar careControlsOverview
Fuel gauge
Coolant temperature gauge
Service Interval Display
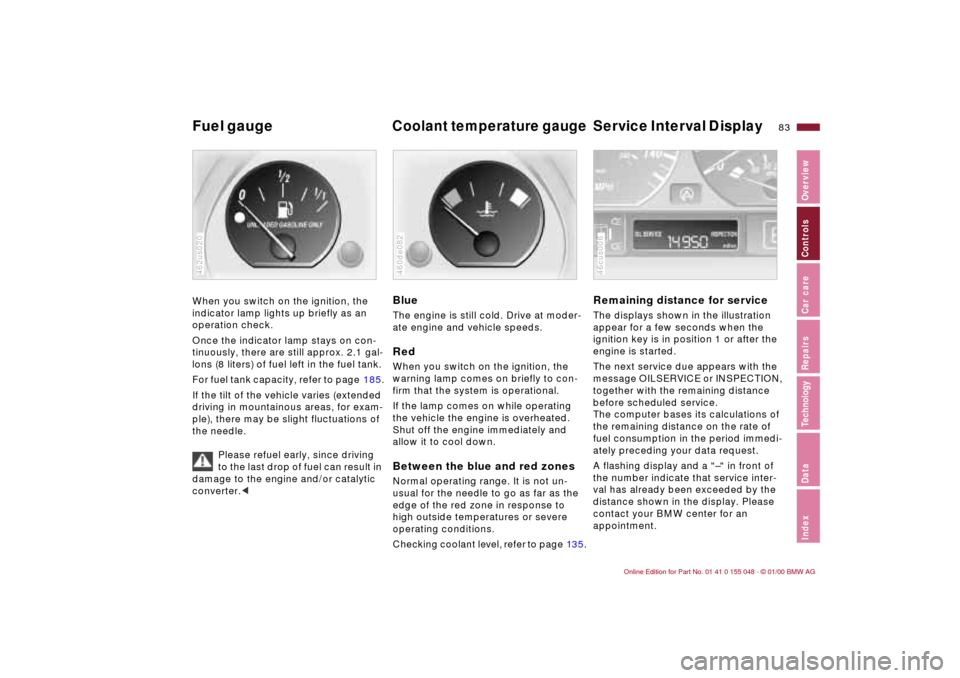
When you switch on the ignition, the
indicator lamp lights up briefly as an
operation check.
Once the indicator lamp stays on con-
tinuously, there are still approx. 2.1 gal-
lons (8 liters) of fuel left in the fuel tank.
For fuel tank capacity, refer to page 185.
If the tilt of the vehicle varies (extended
driving in mountainous areas, for exam-
ple), there may be slight fluctuations of
the needle.
Please refuel early, since driving
to the last drop of fuel can result in
damage to the engine and/or catalytic
converter.<462us020
BlueThe engine is still cold. Drive at moder-
ate engine and vehicle speeds.RedWhen you switch on the ignition, the
warning lamp comes on briefly to con-
firm that the system is operational.
If the lamp comes on while operating
the vehicle the engine is overheated.
Shut off the engine immediately and
allow it to cool down.Between the blue and red zonesNormal operating range. It is not un-
usual for the needle to go as far as the
edge of the red zone in response to
high outside temperatures or severe
operating conditions.Checking coolant level, refer to page 13 5.460de082
Remaining distance for serviceThe displays shown in the illustration
appear for a few seconds when the
ignition key is in position 1 or after the
engine is started.
The next service due appears with the
message OILSERVICE or INSPECTION,
together with the remaining distance
before scheduled service.
The computer bases its calculations of
the remaining distance on the rate of
fuel consumption in the period immedi-
ately preceding your data request.
A flashing display and a "–" in front of
the number indicate that service inter-
val has already been exceeded by the
distance shown in the display. Please
contact your BMW center for an
appointment.46cus006
Page 85 of 199
85n
IndexDataTechnologyRepairsCar careControlsOverview
Onboard computer
*
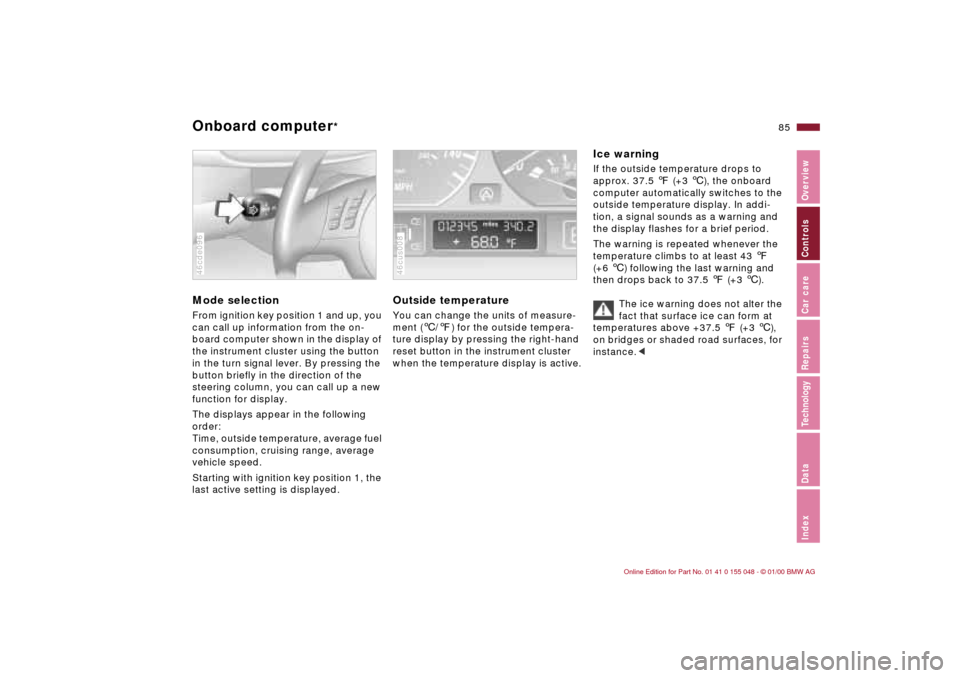
Mode selectionFrom ignition key position 1 and up, you
can call up information from the on-
board computer shown in the display of
the instrument cluster using the button
in the turn signal lever. By pressing the
button briefly in the direction of the
steering column, you can call up a new
function for display.
The displays appear in the following
order:
Time, outside temperature, average fuel
consumption, cruising range, average
vehicle speed.
Starting with ignition key position 1, the
last active setting is displayed.46cde096
Outside temperature You can change the units of measure-
ment (6/7) for the outside tempera-
ture display by pressing the right-hand
reset button in the instrument cluster
when the temperature display is active. 46cus008
Ice warning If the outside temperature drops to
approx. 37.5 7 (+3 6), the onboard
computer automatically switches to the
outside temperature display. In addi-
tion, a signal sounds as a warning and
the display flashes for a brief period.
The warning is repeated whenever the
temperature climbs to at least 43 7
(+6 6) following the last warning and
then drops back to 37.5 7 (+3 6).
The ice warning does not alter the
fact that surface ice can form at
temperatures above +37.5 7 (+3 6),
on bridges or shaded road surfaces, for
instance.<
Page 87 of 199

87n
IndexDataTechnologyRepairsCar careControlsOverview
The PDC assists you when you are park-
ing. A signal warns you of the real dis-
tance to an obstacle. To do this, four
ultrasonic sensors in the rear bumper
measure the distance to the nearest ob-
ject. The range for the sensors at the two
rear corners ends approx. 2 feet (60 cm)
from the bumper. The range for the
two center sensors is approx. 4.9 feet
(1.50 meters) wide.
The system starts to operate automati-
cally about one second after you select
"Reverse" with the ignition key in posi-
tion 2. PDC is deactivated when you shift
back out of reverse.
Acoustical signalsThe distance to the nearest object is in-
dicated by a tone sounding at various
intervals. As the distance between vehi-
cle and object decreases, the intervals
between the tones become shorter.
A continuous tone indicates the pres-
ence of an object less than approx.
1 foot (30 cm) away.
The warning signal is canceled after
approx. three seconds if the distance
to the obstacle remains constant during
this time (if you are moving parallel to
a wall, for instance).
System malfunctions are indicated by a
continuous high-pitched tone when the
system is activated the first time.
Please refer the problem to your BMW
center.The PDC does not remove the
driver's personal responsibility for
evaluating the distance between the
vehicle and any obstacles. Even when
sensors are involved, there is a blind
spot in which objects cannot be de-
tected. This applies especially in those
cases where the system approaches
the physical limits of ultrasonic mea-
surement, as occurs with tow bars and
trailer couplings, and in the vicinity of
thin and painted objects.
Certain sources of sound, such as a
loud radio, could drown out the PDC
signal tone.<
Keep the sensors clean and free of
ice or snow in order to ensure that
they continue to operate effectively.
Do not apply high pressure spray to the
sensors for a prolonged period of time.
Maintain a distance of more than
4 inches (10 cm).<
Park Distance Control (PDC)
*