Page 23 of 202
New L/C100(U)31
Part 1
OPERATION OF
INSTRUMENTS AND
CONTROLSÐ
Chapter 1- 3
Seats, Seat belts,
Steering wheel and Mirrors �
Seats
�Front seats
�Armrests
�Rear seat
�Head restraints
�Seat heaters
�Seat belts
�SRS driver and front passenger
airbags
�Child restraint
�Manual tilt steering wheel
�Power tilt and telescopic steering wheel
�Outside rear view mirrors
�Anti- glare inside rear view mirror
�Sun visors
Seats
While the vehicle is being driven, all ve-
hicle occupants should have the seatback
upright, sit well back in the seat and prop-
erly wear the seat belts provided.
CAUTION
�
Do not drive the vehicle unless the
occupants are properly seated. Do
not allow sitting on top of a
folded- down seatback, or in the
luggage compartment. Persons not
properly seated and not properly re-
strained by seat belts can be se-
verely injured in the event of emer-
gency braking or a collision.
� During driving, do not allow pas-
sengers to stand up or move
around between seats. Severe inju-
ries can occur in the event of emer-
gency braking or a collision.
Page 24 of 202
New L/C100(U)
32
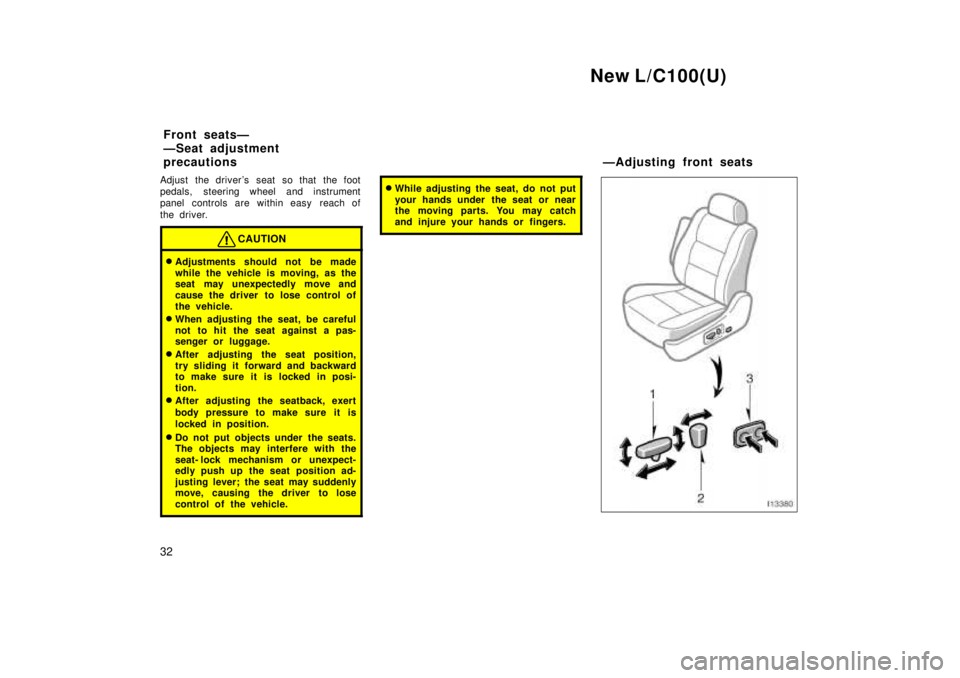
Adjust the driver's seat so that the foot
pedals, steering wheel and instrument
panel controls are within easy reach of
the driver.
CAUTION
�
Adjustments should not be made
while the vehicle is moving, as the
seat may unexpectedly move and
cause the driver to lose control of
the vehicle.
� When adjusting the seat, be careful
not to hit the seat against a pas-
senger or luggage.
� After adjusting the seat position,
try sliding it forward and backward
to make sure it is locked in posi-
tion.
� After adjusting the seatback, exert
body pressure to make sure it is
locked in position.
� Do not put objects under the seats.
The objects may interfere with the
seat- lock mechanism or unexpect-
edly push up the seat position ad-
justing lever; the seat may suddenly
move, causing the driver to lose
control of the vehicle.
�While adjusting the seat, do not put
your hands under the seat or near
the moving parts. You may catch
and injure your hands or fingers.
Front seatsÐ
ÐSeat adjustment
precautions ÐAdjusting front seats
Page 25 of 202
New L/C100(U)33
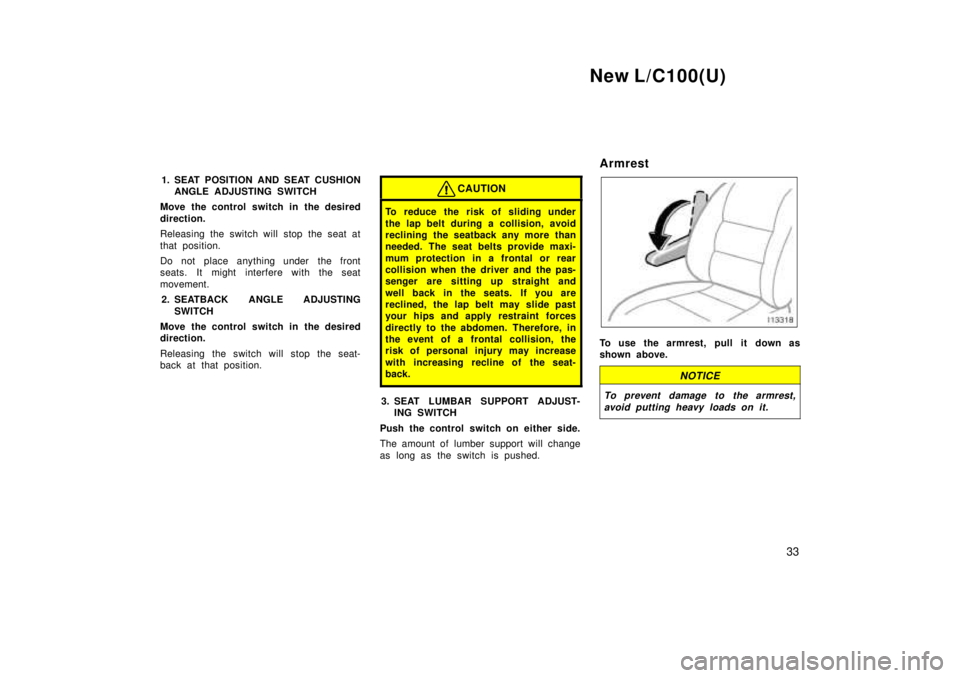
1. SEAT POSITION AND SEAT CUSHION
ANGLE ADJUSTING SWITCH
Move the control switch in the desired
direction.
Releasing the switch will stop the seat at
that position.
Do not place anything under the front
seats. It might interfere with the seat
movement. 2. SEATBACK ANGLE ADJUSTING SWITCH
Move the control switch in the desired
direction.
Releasing the switch will stop the seat-
back at that position.
CAUTION
To reduce the risk of sliding under
the lap belt during a collision, avoid
reclining the seatback any more than
needed. The seat belts provide maxi-
mum protection in a frontal or rear
collision when the driver and the pas-
senger are sitting up straight and
well back in the seats. If you are
reclined, the lap belt may slide past
your hips and apply restraint forces
directly to the abdomen. Therefore, in
the event of a frontal collision, the
risk of personal injury may increase
with increasing recline of the seat- back.
3. SEAT LUMBAR SUPPORT ADJUST- ING SWITCH
Push the control switch on either side.
The amount of lumber support will change
as long as the switch is pushed. Armrest
To use the armrest, pull it down as
shown above.
NOTICE
To prevent damage to the armrest,
avoid putting heavy loads on it.
Page 26 of 202
New L/C100(U)
34
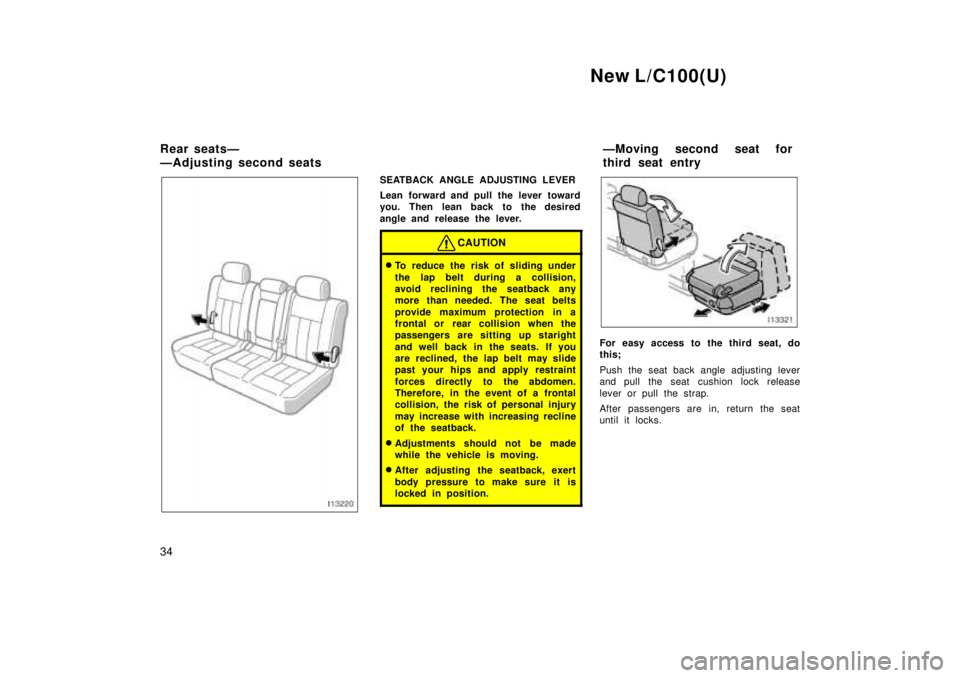
SEATBACK ANGLE ADJUSTING LEVER
Lean forward and pull the lever toward
you. Then lean back to the desired
angle and release the lever.
CAUTION
� To reduce the risk of sliding under
the lap belt during a collision,
avoid reclining the seatback any
more than needed. The seat belts
provide maximum protection in a
frontal or rear collision when the
passengers are sitting up staright
and well back in the seats. If you
are reclined, the lap belt may slide
past your hips and apply restraint
forces directly to the abdomen.
Therefore, in the event of a frontal
collision, the risk of personal injury
may increase with increasing recline
of the seatback.
� Adjustments should not be made
while the vehicle is moving.
� After adjusting the seatback, exert
body pressure to make sure it is
locked in position.
For easy access to the third seat, do
this;
Push the seat back angle adjusting lever
and pull the seat cushion lock release
lever or pull the strap.
After passengers are in, return the seat
until it locks.
Rear seatsÐ
ÐAdjusting second seats
ÐMoving second seat for
third seat entry
Page 28 of 202
New L/C100(U)
36
FOLDING UP SECOND SEAT 1. Lower the outer head restraint to the lowest position and pull up the cen-
ter head restraint. Unlock the seat-
back and fold it down.
Vehicles without third seatsÐFolding up
the rear seats will enlarge the luggage
compartment. See ºLuggage stowage pre-
cautionsº in Part 2 for precautions to ob-
serve for loading luggage.2. Unlock the seat cushion. Swing the whole seat up and forward.3. Hook the strap.
When returning the second seat to its
original position, put the holding strap into
the hole.
Page 29 of 202
New L/C100(U)37
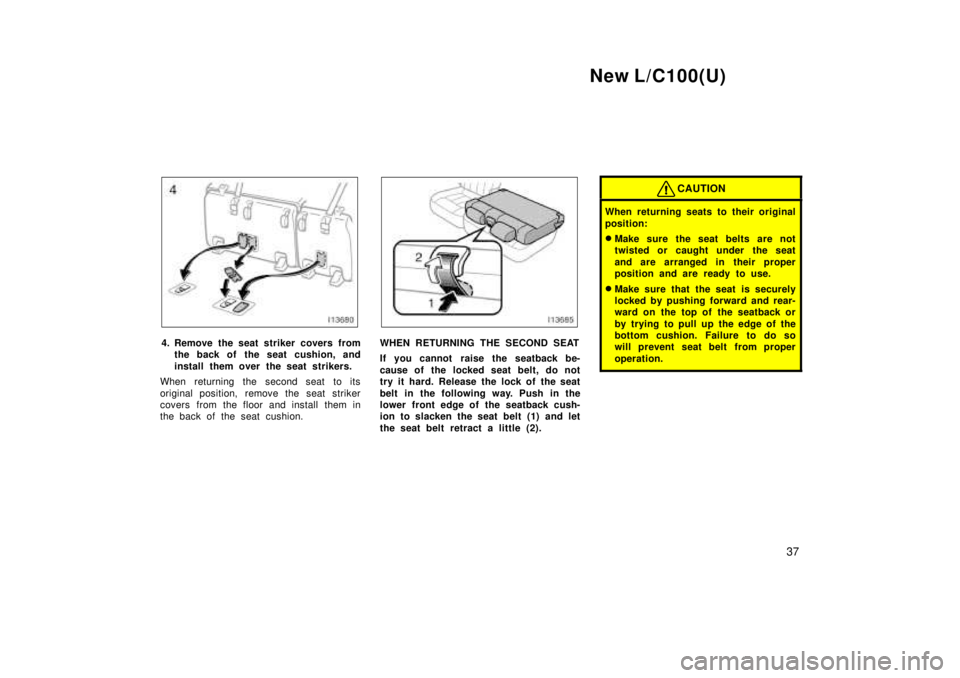
4. Remove the seat striker covers fromthe back of the seat cushion, and
install them over the seat strikers.
When returning the second seat to its
original position, remove the seat striker
covers from the floor and install them in
the back of the seat cushion.WHEN RETURNING THE SECOND SEAT
If you cannot raise the seatback be-
cause of the locked seat belt, do not
try it hard. Release the lock of the seat
belt in the following way. Push in the
lower front edge of the seatback cush-
ion to slacken the seat belt (1) and let
the seat belt retract a little (2).
CAUTION
When returning seats to their original
position: � Make sure the seat belts are not
twisted or caught under the seat
and are arranged in their proper
position and are ready to use.
� Make sure that the seat is securely
locked by pushing forward and rear-
ward on the top of the seatback or
by trying to pull up the edge of the
bottom cushion. Failure to do so
will prevent seat belt from proper
operation.
Page 30 of 202
New L/C100(U)
38
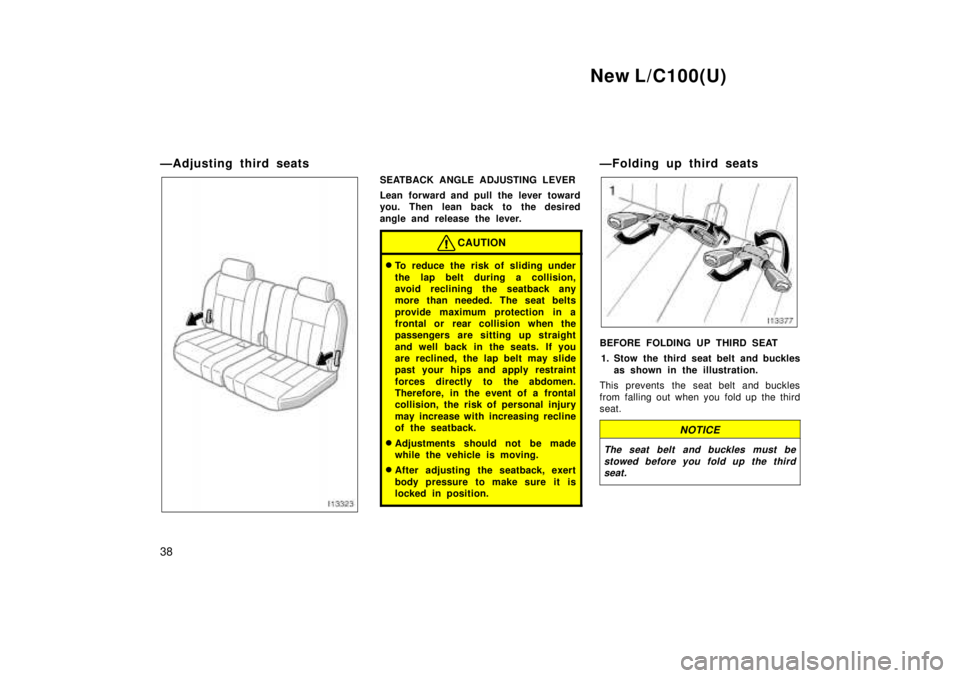
ÐAdjusting third seats
SEATBACK ANGLE ADJUSTING LEVER
Lean forward and pull the lever toward
you. Then lean back to the desired
angle and release the lever.
CAUTION
�
To reduce the risk of sliding under
the lap belt during a collision,
avoid reclining the seatback any
more than needed. The seat belts
provide maximum protection in a
frontal or rear collision when the
passengers are sitting up straight
and well back in the seats. If you
are reclined, the lap belt may slide
past your hips and apply restraint
forces directly to the abdomen.
Therefore, in the event of a frontal
collision, the risk of personal injury
may increase with increasing recline
of the seatback.
� Adjustments should not be made
while the vehicle is moving.
� After adjusting the seatback, exert
body pressure to make sure it is
locked in position.
ÐFolding up third seats
BEFORE FOLDING UP THIRD SEAT
1. Stow the third seat belt and buckles as shown in the illustration.
This prevents the seat belt and buckles
from falling out when you fold up the third
seat.
NOTICE
The seat belt and buckles must be stowed before you fold up the thirdseat.
Page 31 of 202
New L/C100(U)39
2. Make sure the shoulder belt passesthrough the hanger when folding the
third seat.
This prevents the shoulder belt from being
damaged.
CAUTION
The seat belt must be removed from
the hanger when the seat belt is in use.
FOLDING UP THIRD SEAT 1. Lower the head restraint to the low- est position. Unlock the seatback
and fold it down.
Folding up the third seats will enlarge the
luggage compartment. See ºLuggage stow-
age precautionsº in Part 2 for precautions
to observe for loading luggage.2. Unlock the seat cushion and slide the whole seat to the rear- most
position while pulling up the handle.