Page 62 of 202
New L/C100(U)
70
CAUTION
Push and pull the child restraint sys-
tem in different directions to be sure
it is secure. Follow all the installation
instructions provided by its manufac-
turer.
4. To remove the infant seat, press the buckle- release button and allow the
belt to retract completely. The belt will
move freely again and be ready to
work for an adult or older child passen-
ger.(B) CONVERTIBLE SEAT INSTALLATION
A convertible seat is used in forward-
facing and rear- facing position depend-
ing on the child's age and size. When
installing, follow the manufacturer's in-
structions about the applicable child's
age and size as well as directions for
installing a child restraint system.
Page 64 of 202
New L/C100(U)
72
1. Run the lap and shoulder belt through or around the convertible seat following
the instructions provided by its
manufacturer and insert the tab into
the buckle taking care not to twist the
belt. Keep the lap portion of the belt
tight.
CAUTION
�After inserting the tab, make sure
the tab and buckle are locked and
that the lap and shoulder portions
of the belt are not twisted.
� Do not insert coins, clips, etc. in
the buckle as this may prevent you
from properly latching the tab and
buckle.
� If the seat belt does not function
normally, it cannot protect your
child from injury. Contact your
Toyota dealer immediately. Do not
use the seat until the seat belt is
fixed.
2. Fully extend the shoulder belt to put it
in the lock mode. When the belt is
then retracted even slightly, it cannot
be extended.
To hold the convertible seat securely,
make sure the belt is in the lock mode
before letting the belt retract.
Page 65 of 202
New L/C100(U)73
3. While pressing the convertible seatfirmly against the seat cushion and
seatback, let the shoulder belt retract
as far as it will go to hold the convert-
ible seat securely.CAUTION
Push and pull the child restraint sys-
tem in different directions to be sure
it is secure. Follow all the installation
instructions provided by its manufac-
turer.
4. To remove the convertible seat, pressthe buckle- release button and allow the
belt to retract completely. The belt will
move freely again and be ready to
work for an adult or older child passen-
ger.
Page 94 of 202

New L/C100(U)
102
(c) Using º2º and ºLº positions
The º2º and ºLº positions are used for
strong engine braking as described pre-
viously.
With the selector lever in º2º or ºLº, you
can start the vehicle in motion as with the
lever in ºDº.
With the selector lever in º2º, the vehicle
will start in the first gear and automatical-
ly shift to the second gear.
With the selector lever in ºLº, the trans-
mission is engaged in the first gear.
NOTICE
�Be careful not to overrev the en-
gine. Watch the tachometer to keepengine rpm from going into the red zone. The approximate maximum al-
lowable speed for each position isgiven below for your reference:
km/h (mph)
Transmission Transfer L H
2 42 (26) 104 (65) . . . . . . .
L 23 (14) 57 (35) . . . . . . .
�Do not continue hill climbing or
hard towing for a long time in theº2º or ºLº position. This may causesevere automatic transmission dam-
age from overheating. To preventsuch damage, ºDº position shouldbe used in hill climbing or hard
towing.
(d) Backing up
1. Bring the vehicle to a complete stop.
2. With the brake pedal held down with your foot, shift the selector lever to the
ºRº position.
NOTICE
Never shift into reverse while the ve-
hicle is moving.
(e) Parking
1. Bring the vehicle to a complete stop.
2. Pull the parking brake lever up fully to securely apply the parking brake.
3. With the brake pedal pressed down, shift the selector lever to the ºPº posi-
tion. If the four±wheel drive control is in the
ºNº position while the selector lever is in
the ºPº position, the transmission will
damage and the wheels will not lock.
CAUTION
While the vehicle is moving, never
attempt to move the selector lever
into ºPº position under any circum-
stances. Serious mechanical damage
and loss of vehicle control may re-
sult.
(f) Good driving practice
� If the transmission is repeatedly up-
shifted and downshifted between third
gear and overdrive when climbing a
gentle slope, the overdrive switch
should be turned off. Be sure to turn
the switch on immediately afterward.
� When towing a trailer, in order to main-
tain engine braking efficiency, do not
use overdrive.
Page 135 of 202
New L/C100(U)143
4. Install the transmitter on the centerof the stay with Velcro.5. Remove the cover on the opening onthe lid.6. Reinstall the stay and secure it withthe screws. Before fixing it with the
screws, adjust the position of the
transmitter as it can be operated
through the opening on the lid.
Make sure that the transmitter can be
operated properly.
Page 136 of 202
New L/C100(U)
144
7. Close the lid securely.
Make sure that the lid is closed securely.
CAUTION
To reduce the chance of injury in
case of an accident or a sudden stop,
always keep the garage door opener
box closed while driving.
Auxiliary boxesÐ
To use the auxiliary bo xes, open the
lids as shown in the following illustra-
tions.
CAUTION
To reduce the chance of injury in
case of an accident or a sudden stop,
always keep the auxiliary box closed
while driving.
NOTICE
Auxiliary boxes on the ceilingÐIn hot
weather, inside of the vehicle ceilingbecomes very hot. Do not leave any- thing flammable or deformable such
as a lighter, the glasses, etc. inside.Type A (luggage compartment)
Type B (luggage compartment)
Page 138 of 202
New L/C100(U)
146
ÐFirst- aid kit holder
Type A auxiliary box
Type B auxiliary box
Types A and B auxiliary boxes are
equipped with a band or strap to hold
the first- aid kit.
Although the first- aid kit itself is not in-
cluded as an original equipment, this aux-
iliary box can be used to store the first-
aid kit.
Ty p e A Ð
Hold the first- aid kit with a strap.
1. To loosen: Pull the buckle forward.
2. To tighten: Pull on the belt.
Ty p e B Ð
Hold the first- aid kit with a band.
Make sure the first- aid kit is securely
held.
ÐWarning reflector holder
Type C auxiliary box
Type D auxiliary box
Page 139 of 202

New L/C100(U)147
Types C and D auxiliary boxes are
equipped with a band or straps to hold
the warning reflector.
Although the warning reflector itself is not
included as an original equipment, this
auxiliary box can be used to store the
warning reflector.
Ty p e C Ð
Hold the warning reflector kit with the
straps.
1. To loosen: Pull the buckle forward.
2. To tighten: Pull on the belt.
Ty p e D Ð
Hold the warning reflector with a band.
Make sure the warning reflector is secure-
ly held.
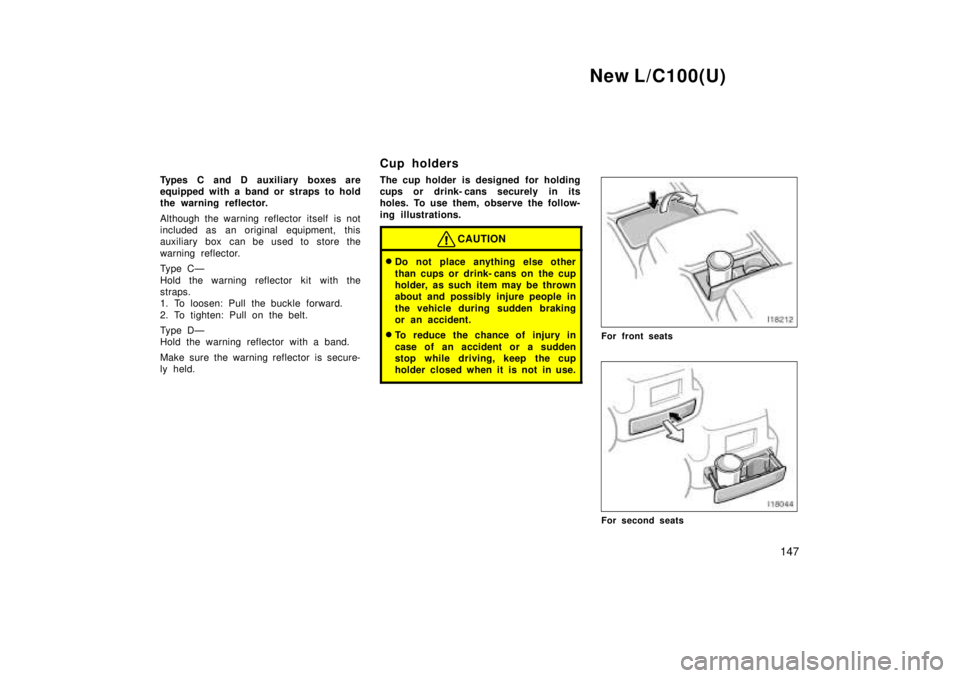
Cup holders
The cup holder is designed for holding
cups or drink- cans securely in its
holes. To use them, observe the follow-
ing illustrations.
CAUTION
�
Do not place anything else other
than cups or drink- cans on the cup
holder, as such item may be thrown
about and possibly injure people in
the vehicle during sudden braking
or an accident.
� To reduce the chance of injury in
case of an accident or a sudden
stop while driving, keep the cup
holder closed when it is not in use.
For front seats
For second seats