1999 SUZUKI GRAND VITARA Instrument
[x] Cancel search: InstrumentPage 1 of 656

Important
WARNING/CAUTION/NOTE
Please read this manual and follow its instructions carefully. To emphasize special information, the words
WARNING, CAUTION
and NOTE
have special meanings. Pay special attention to the messages highlighted by
these signal words.
WARNING:
Indicates a potential hazard that could result in death or injury.
CAUTION:
Indicates a potential hazard that could result in vehicle damage.
NOTE:
Indicates special information to make maintenance easier or instructions clearer.
WARNING:
This service manual is intended for authorized Suzuki dealers and qualified service mechanics only.
Inexperienced mechanics or mechanics without the proper tools and equipment may not be able to
properly perform the services described in this manual.
Improper repair may result in injury to the mechanic and may render the vehicle unsafe for the driver
and passengers.
WARNING:
For vehicles equipped with a Supplemental Restraint (Air Bag) System:
• Service on and around the air bag system components or wiring must be performed only by an
authorized SUZUKI dealer. Refer to “Air Bag System Components and Wiring Location View” under
“General Description” in air bag system section in order to confirm whether you are performing ser-
vice on or near the air bag system components or wiring. Please observe all WARNINGS and “Ser-
vice Precautions” under “On-Vehicle Service” in air bag system section before performing service
on or around the air bag system components or wiring. Failure to follow WARNINGS could result in
unintentional activation of the system or could render the system inoperative. Either of these two
conditions may result in severe injury.
If the air bag system and another vehicle system both need repair, Suzuki recommends that the air
bag system be repaired first, to help avoid unintended air bag system activation.
Do not modify the steering wheel, instrument panel or any other air bag system component (on or
around air bag system components or wiring). Modifications can adversely affect air bag system
performance and lead to injury.
If the vehicle will be exposed to temperatures over 93°C (200°F) (for example, during a paint baking
process), remove the air bag system components (air bag (inflator) modules, forward sensor(s),
SDM and/or seat belt pretensioners) beforehand to avoid component damage or unintended activa-
tion.
Page 4 of 656
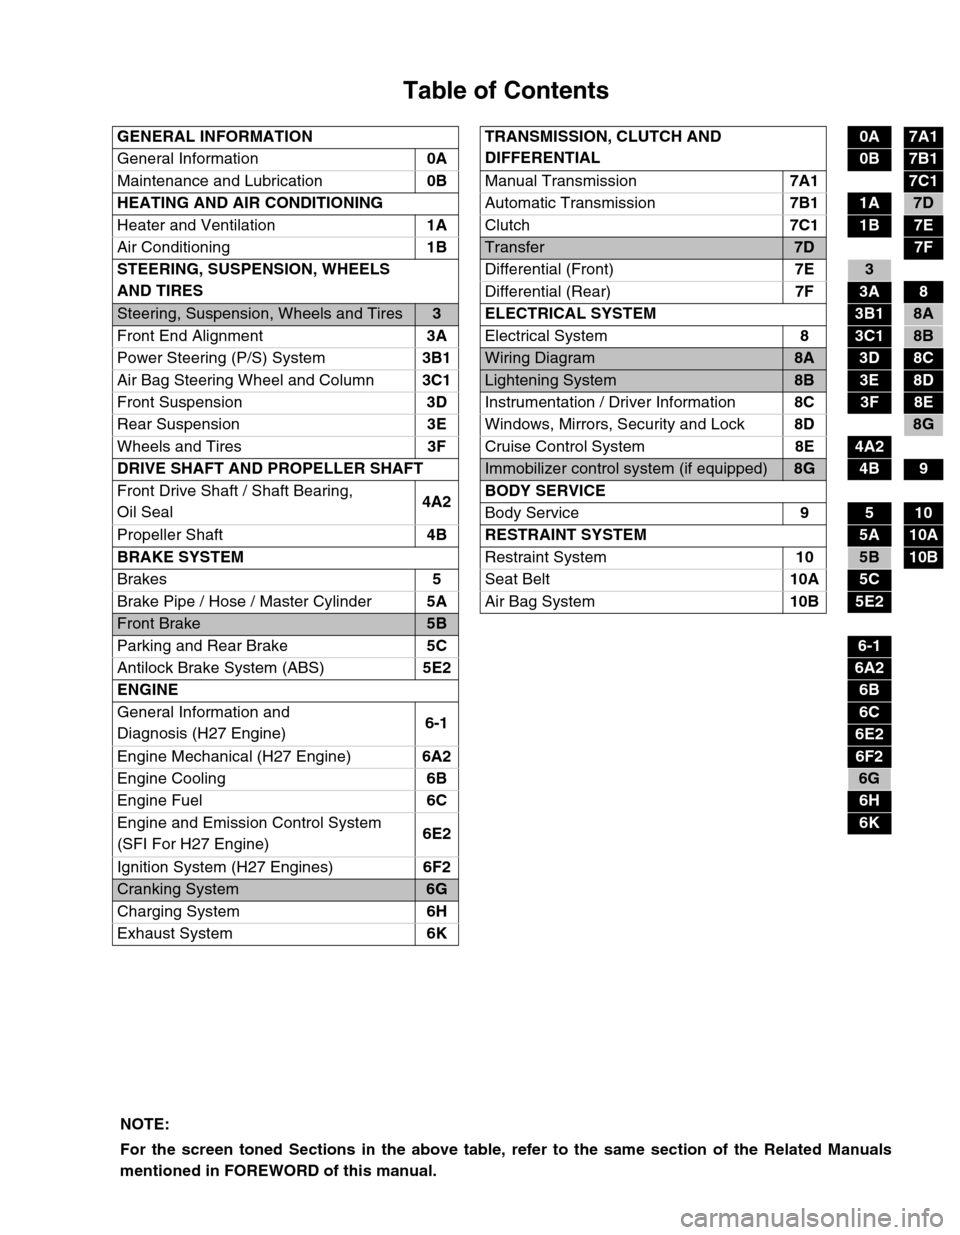
Table of Contents
GENERAL INFORMATION TRANSMISSION, CLUTCH AND
DIFFERENTIAL0A7A1
General Information0A
0B7B1
Maintenance and Lubrication0B
Manual Transmission7A1
7C1
HEATING AND AIR CONDITIONING
Automatic Transmission7B1
1A7D
Heater and Ventilation1A
Clutch7C1
1B7E
Air Conditioning1B
Transfer7D7F
STEERING, SUSPENSION, WHEELS
AND TIRESDifferential (Front)7E
3
Differential (Rear)7F
3A8
Steering, Suspension, Wheels and Tires3 ELECTRICAL SYSTEM3B18A
Front End Alignment3A
Electrical System8
3C18B
Power Steering (P/S) System3B1
Wiring Diagram8A3D8C
Air Bag Steering Wheel and Column3C1
Lightening System8B3E8D
Front Suspension3D
Instrumentation / Driver Information8C
3F8E
Rear Suspension3E
Windows, Mirrors, Security and Lock8D
8G
Wheels and Tires3F
Cruise Control System8E
4A2
DRIVE SHAFT AND PROPELLER SHAFT
Immobilizer control system (if equipped)8G4B9
Front Drive Shaft / Shaft Bearing,
Oil Seal4A2BODY SERVICE
Body Service9
510
Propeller Shaft4B RESTRAINT SYSTEM
5A10A
BRAKE SYSTEM
Restraint System10
5B10B
Brakes5
Seat Belt10A
5C
Brake Pipe / Hose / Master Cylinder5A
Air Bag System10B
5E2
Front Brake5B
Parking and Rear Brake5C
6-1
Antilock Brake System (ABS)5E2
6A2
ENGINE
6B
General Information and
Diagnosis (H27 Engine)6-1
6C
6E2
Engine Mechanical (H27 Engine)6A2
6F2
Engine Cooling6B
6G
Engine Fuel6C
6H
Engine and Emission Control System
(SFI For H27 Engine)6E2
6K
Ignition System (H27 Engines)6F2
Cranking System6G
Charging System6H
Exhaust System6K
NOTE:
For the screen toned Sections in the above table, refer to the same section of the Related Manuals
mentioned in FOREWORD of this manual.
Page 11 of 656
0A-6 GENERAL INFORMATION
Identification Information
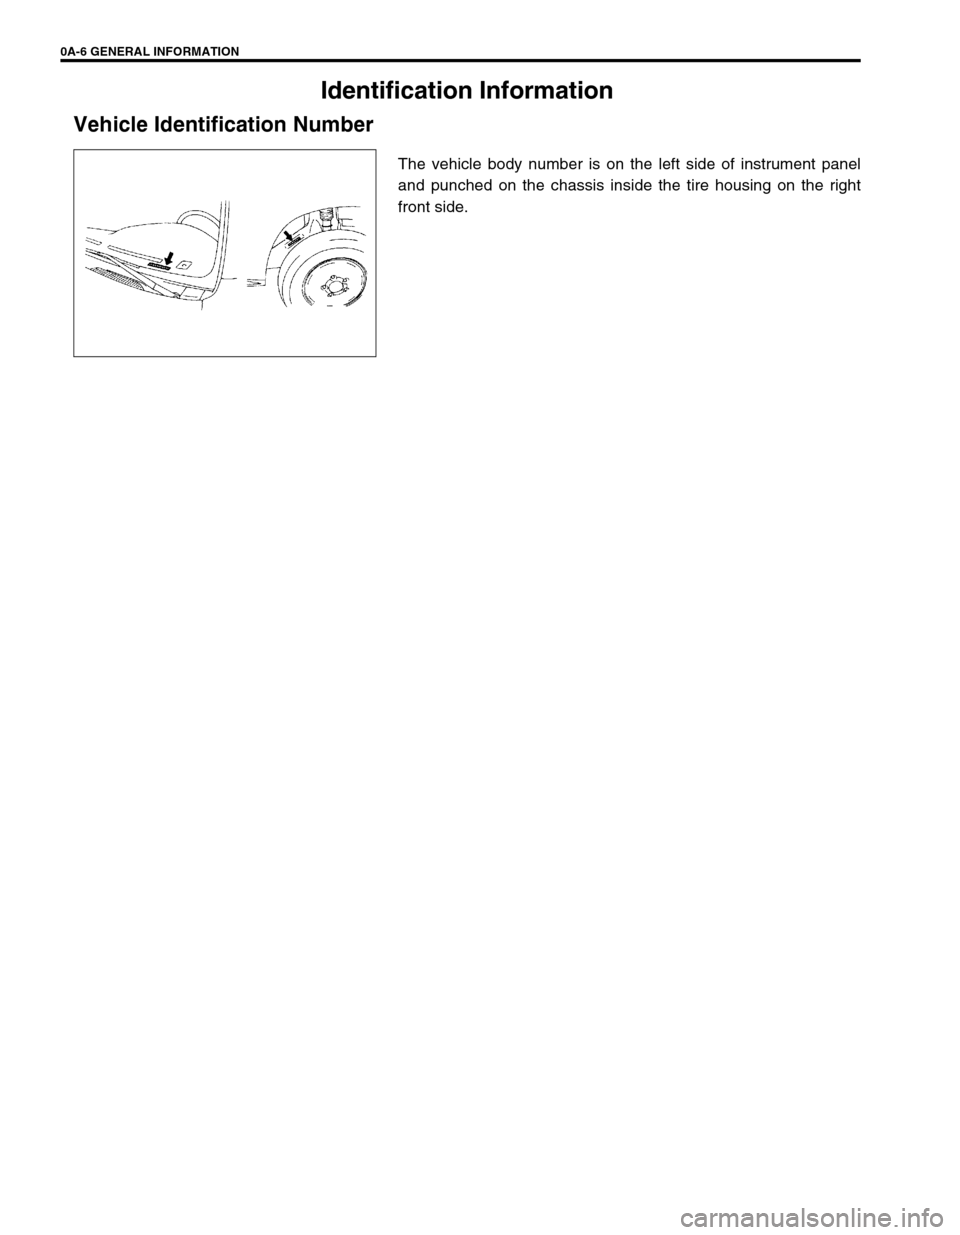
Vehicle Identification Number
The vehicle body number is on the left side of instrument panel
and punched on the chassis inside the tire housing on the right
front side.
Page 23 of 656
1A-2 HEATER AND VENTILATION
General Description
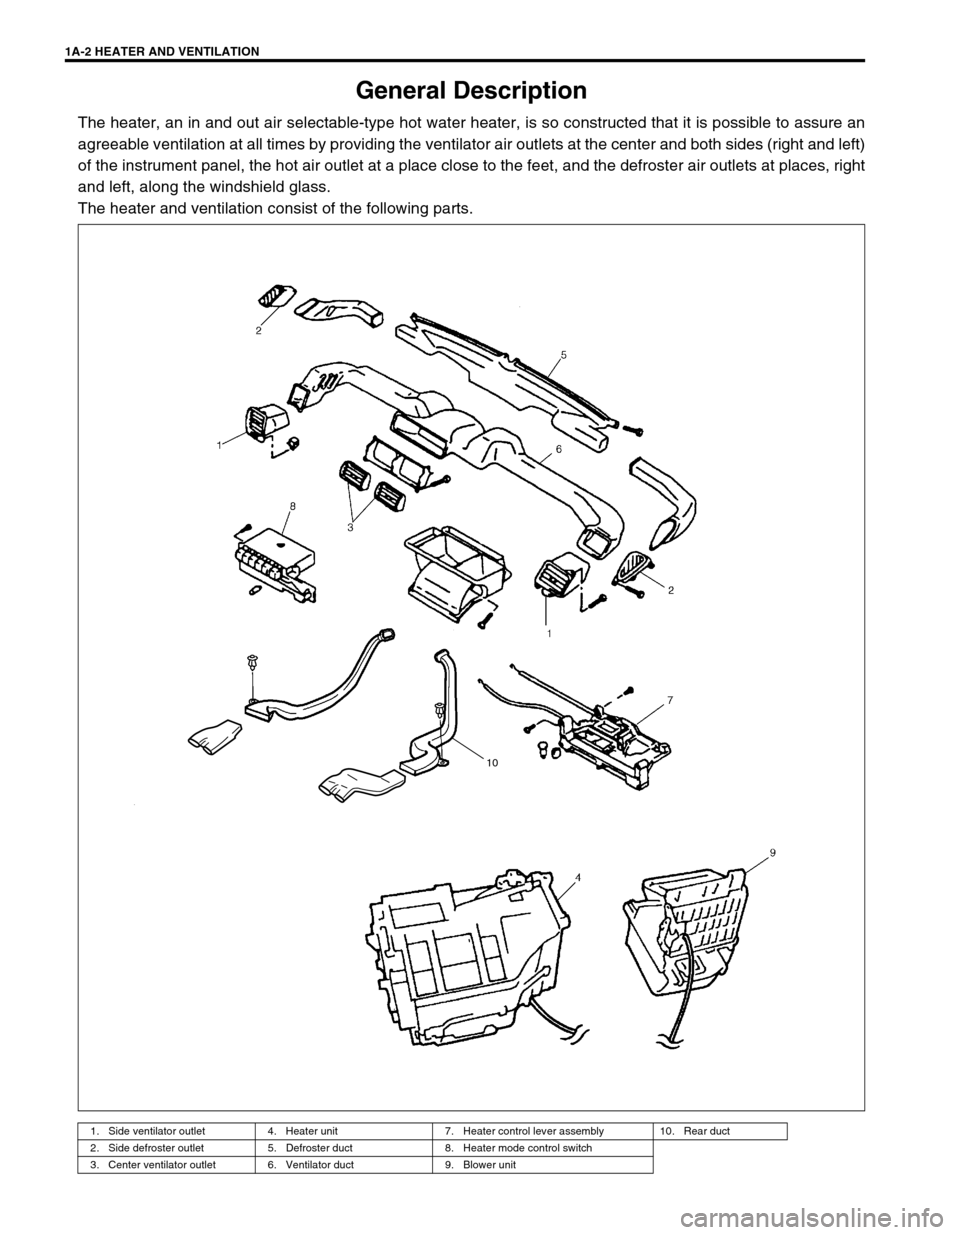
The heater, an in and out air selectable-type hot water heater, is so constructed that it is possible to assure an
agreeable ventilation at all times by providing the ventilator air outlets at the center and both sides (right and left)
of the instrument panel, the hot air outlet at a place close to the feet, and the defroster air outlets at places, right
and left, along the windshield glass.
The heater and ventilation consist of the following parts.
1. Side ventilator outlet 4. Heater unit 7. Heater control lever assembly 10. Rear duct
2. Side defroster outlet 5. Defroster duct 8. Heater mode control switch
3. Center ventilator outlet 6. Ventilator duct 9. Blower unit
10
Page 79 of 656
3C1-4 AIR BAG STEERING WHEEL AND COLUMN
Steering Column
REMOVAL
1) Disconnect negative (–) cable at battery.
2) Disable air bag system. Refer to “DISABLING AIR BAG SYSTEM” under “SERVICE PRECAUTIONS” in
Section 10B.
3) Remove steering wheel and contact coil and combination switch assembly, if necessary. Refer to “STEER-
ING WHEEL” and “CONTACT COIL AND COMBINATION SWITCH ASSEMBLY” in this section.
Perform the following procedure if not removing steering wheel and/or combination switch.
a) Turn steering wheel so that vehicle’s front tires are at straight-ahead position.
b) Turn ignition switch to “LOCK” position and remove key.
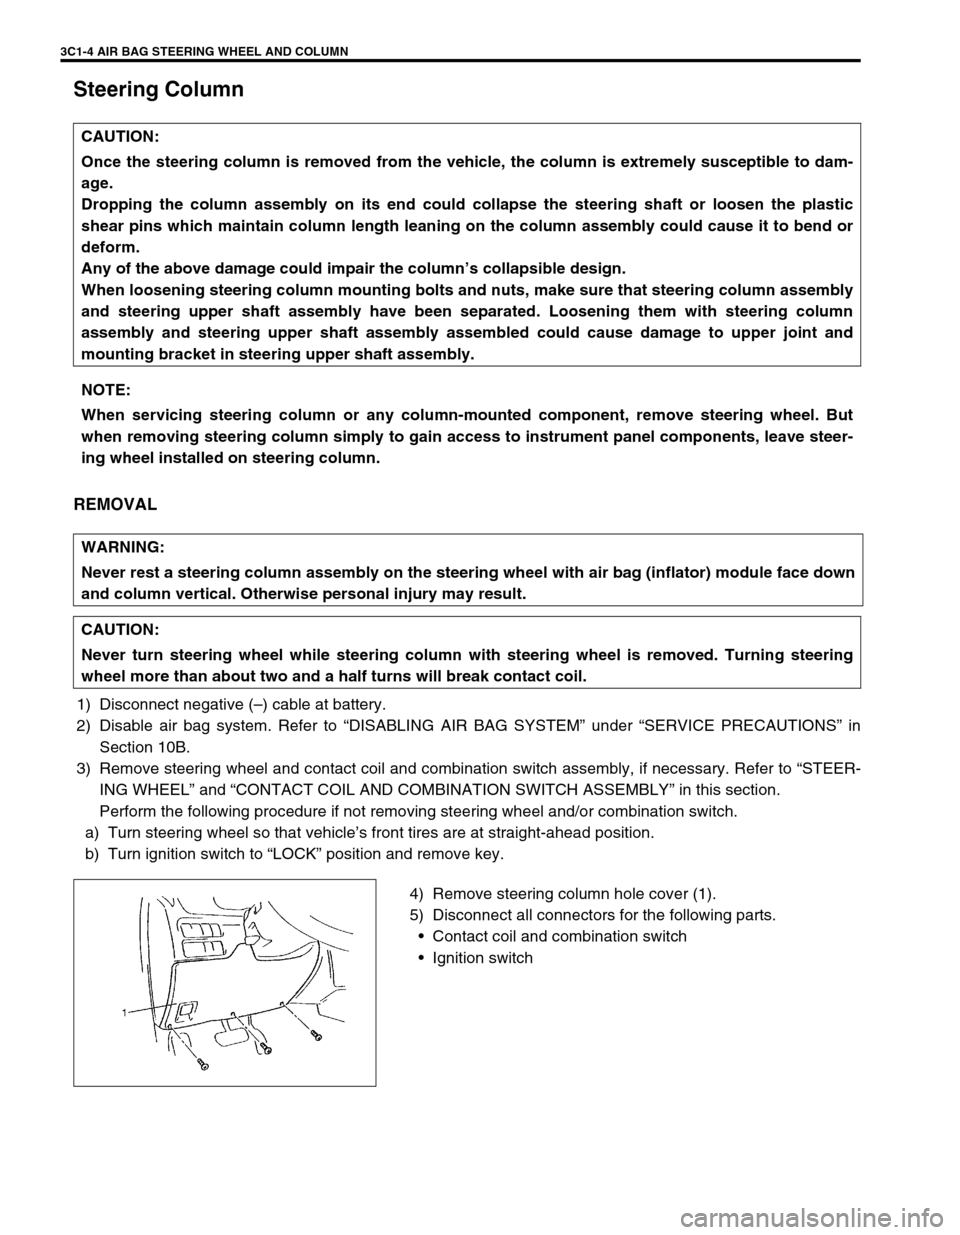
4) Remove steering column hole cover (1).
5) Disconnect all connectors for the following parts.
Contact coil and combination switch
Ignition switch CAUTION:
Once the steering column is removed from the vehicle, the column is extremely susceptible to dam-
age.
Dropping the column assembly on its end could collapse the steering shaft or loosen the plastic
shear pins which maintain column length leaning on the column assembly could cause it to bend or
deform.
Any of the above damage could impair the column’s collapsible design.
When loosening steering column mounting bolts and nuts, make sure that steering column assembly
and steering upper shaft assembly have been separated. Loosening them with steering column
assembly and steering upper shaft assembly assembled could cause damage to upper joint and
mounting bracket in steering upper shaft assembly.
NOTE:
When servicing steering column or any column-mounted component, remove steering wheel. But
when removing steering column simply to gain access to instrument panel components, leave steer-
ing wheel installed on steering column.
WARNING:
Never rest a steering column assembly on the steering wheel with air bag (inflator) module face down
and column vertical. Otherwise personal injury may result.
CAUTION:
Never turn steering wheel while steering column with steering wheel is removed. Turning steering
wheel more than about two and a half turns will break contact coil.
Page 167 of 656
6-1-6 ENGINE GENERAL INFORMATION AND DIAGNOSIS (H27 ENGINE)
Engine Diagnosis
General Description
This vehicle is equipped with an engine and emission control system which are under control of ECM (PCM).
The engine and emission control system in this vehicle are controlled by ECM (PCM). ECM (PCM) has an On-
Board Diagnostic system which detects a malfunction in this system and abnormality of those parts that influ-
ence the engine exhaust emission. When diagnosing engine troubles, be sure to have full understanding of the
outline of “ON-BOARD DIAGNOSTIC SYSTEM” and each item in “PRECAUTION IN DIAGNOSING TROUBLE”
and execute diagnosis according to “ENGINE DIAGNOSTIC FLOW TABLE” in this section.
There is a close relationship between the engine mechanical, engine cooling system, ignition system, exhaust
system, etc. and the engine and emission control system in their structure and operation. In case of an engine
trouble, even when the malfunction indicator lamp (MIL) doesn’t turn ON, it should be diagnosed according to
“ENGINE DIAGNOSTIC FLOW TABLE” in this section.
On-Board Diagnostic System (Vehicle without
Monitor Connector)
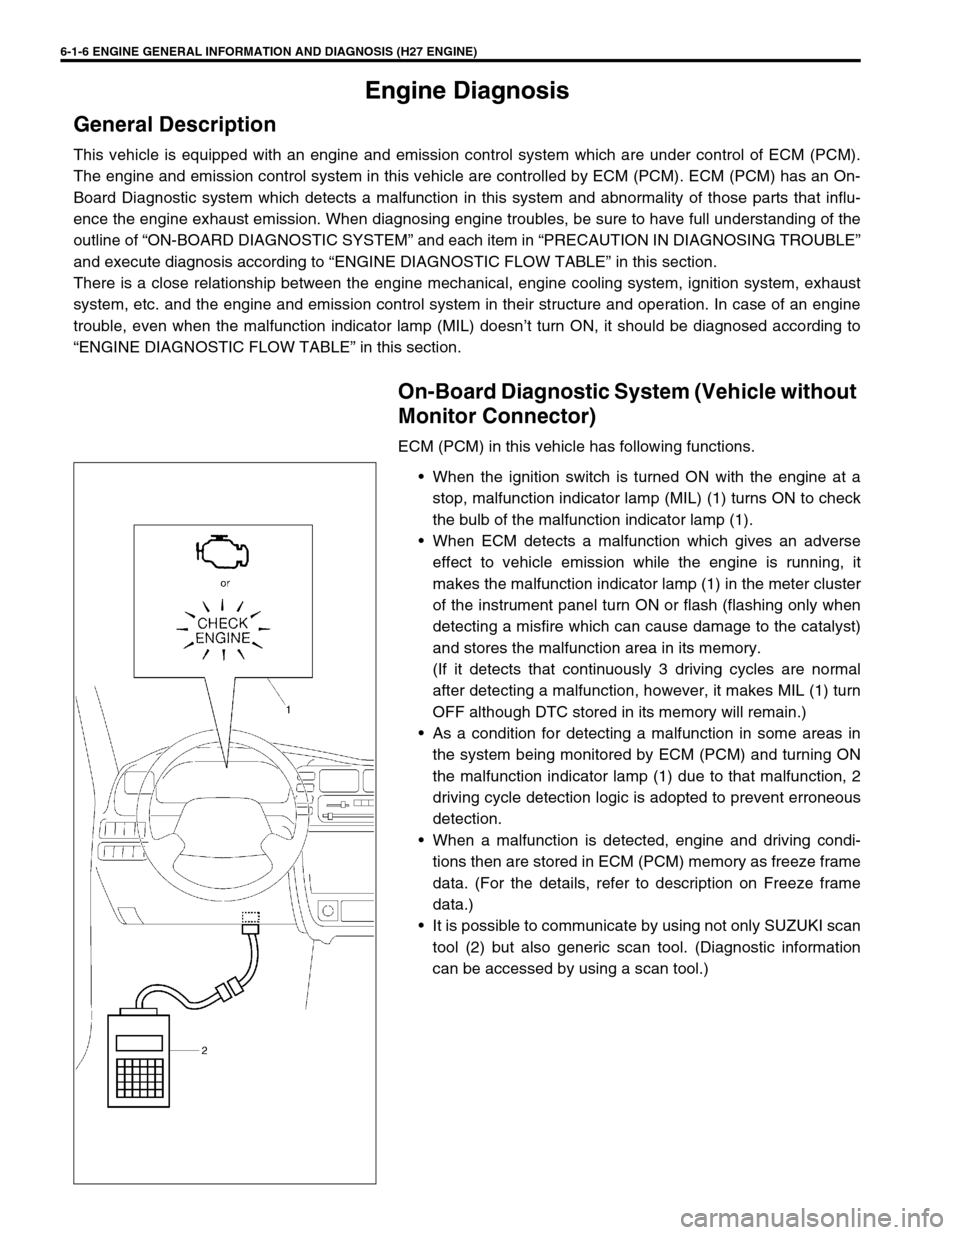
ECM (PCM) in this vehicle has following functions.
When the ignition switch is turned ON with the engine at a
stop, malfunction indicator lamp (MIL) (1) turns ON to check
the bulb of the malfunction indicator lamp (1).
When ECM detects a malfunction which gives an adverse
effect to vehicle emission while the engine is running, it
makes the malfunction indicator lamp (1) in the meter cluster
of the instrument panel turn ON or flash (flashing only when
detecting a misfire which can cause damage to the catalyst)
and stores the malfunction area in its memory.
(If it detects that continuously 3 driving cycles are normal
after detecting a malfunction, however, it makes MIL (1) turn
OFF although DTC stored in its memory will remain.)
As a condition for detecting a malfunction in some areas in
the system being monitored by ECM (PCM) and turning ON
the malfunction indicator lamp (1) due to that malfunction, 2
driving cycle detection logic is adopted to prevent erroneous
detection.
When a malfunction is detected, engine and driving condi-
tions then are stored in ECM (PCM) memory as freeze frame
data. (For the details, refer to description on Freeze frame
data.)
It is possible to communicate by using not only SUZUKI scan
tool (2) but also generic scan tool. (Diagnostic information
can be accessed by using a scan tool.)
Page 177 of 656
6-1-16 ENGINE GENERAL INFORMATION AND DIAGNOSIS (H27 ENGINE)
Malfunction Indicator Lamp (MIL) Check
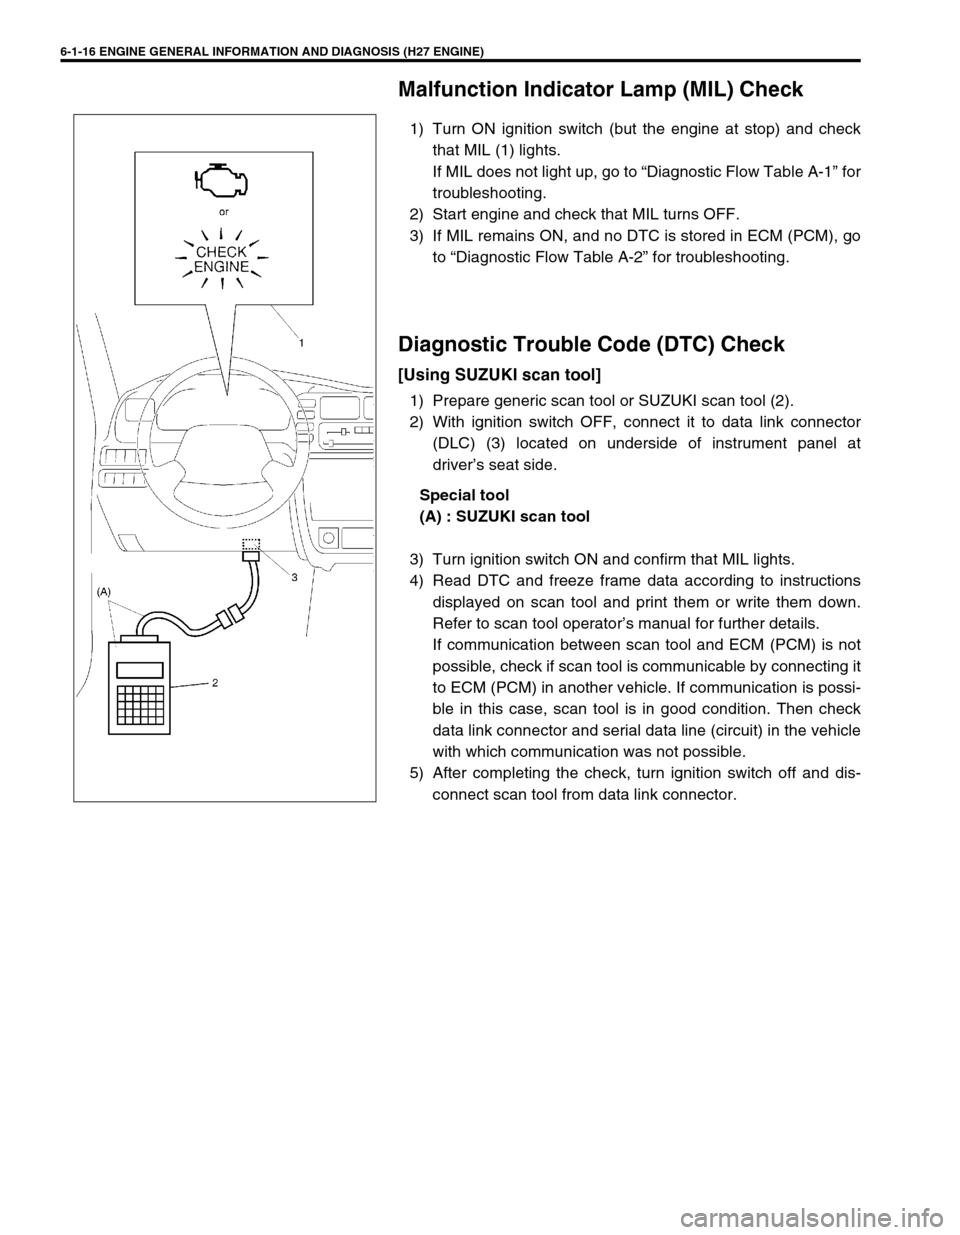
1) Turn ON ignition switch (but the engine at stop) and check
that MIL (1) lights.
If MIL does not light up, go to “Diagnostic Flow Table A-1” for
troubleshooting.
2) Start engine and check that MIL turns OFF.
3) If MIL remains ON, and no DTC is stored in ECM (PCM), go
to “Diagnostic Flow Table A-2” for troubleshooting.
Diagnostic Trouble Code (DTC) Check
[Using SUZUKI scan tool]
1) Prepare generic scan tool or SUZUKI scan tool (2).
2) With ignition switch OFF, connect it to data link connector
(DLC) (3) located on underside of instrument panel at
driver’s seat side.
Special tool
(A) : SUZUKI scan tool
3) Turn ignition switch ON and confirm that MIL lights.
4) Read DTC and freeze frame data according to instructions
displayed on scan tool and print them or write them down.
Refer to scan tool operator’s manual for further details.
If communication between scan tool and ECM (PCM) is not
possible, check if scan tool is communicable by connecting it
to ECM (PCM) in another vehicle. If communication is possi-
ble in this case, scan tool is in good condition. Then check
data link connector and serial data line (circuit) in the vehicle
with which communication was not possible.
5) After completing the check, turn ignition switch off and dis-
connect scan tool from data link connector.
Page 374 of 656

ENGINE AND EMISSION CONTROL SYSTEM (SEQUENTIAL MULTIPORT FUEL INJECTION FOR H27 ENGINE) 6E2-41
INSTALLATION
1) Confirm that vacuum passage on intake manifold is free from
clog.
2) Apply engine oil to O-ring of sensor.
3) Install sensor (1) to intake manifold (2).
4) Connect connector to sensor (1) securely.
Fuel level sensor (sender gauge)
Refer to Section 8C.
Crankshaft position sensor
REMOVAL AND INSTALLATION
Refer to Section 6A4.
INSPECTION
Refer to Section 6-1.
Main relay
INSPECTION
1) Disconnect negative (–) cable at battery.
2) Remove main relay (1) from its connector.
2. Fuel pump relay
3. Fuse box
4. Instrument panel
[A]: Left-hand steering vehicle
[B]: Right-hand steering vehicle