Page 67 of 345

1A10 : CHECK AUTOMATIC TRANSMIS-
SION CONTROL MODULE.
1) Connect connector to automatic transmission
control module.
2) Set the vehicle on a free roller, or lift-up the
vehicle and support with safety stands.
WARNING:
Be careful not to get caught in the rotating
wheels.
3) Drive the vehicle faster than 10 km/h (6 MPH).
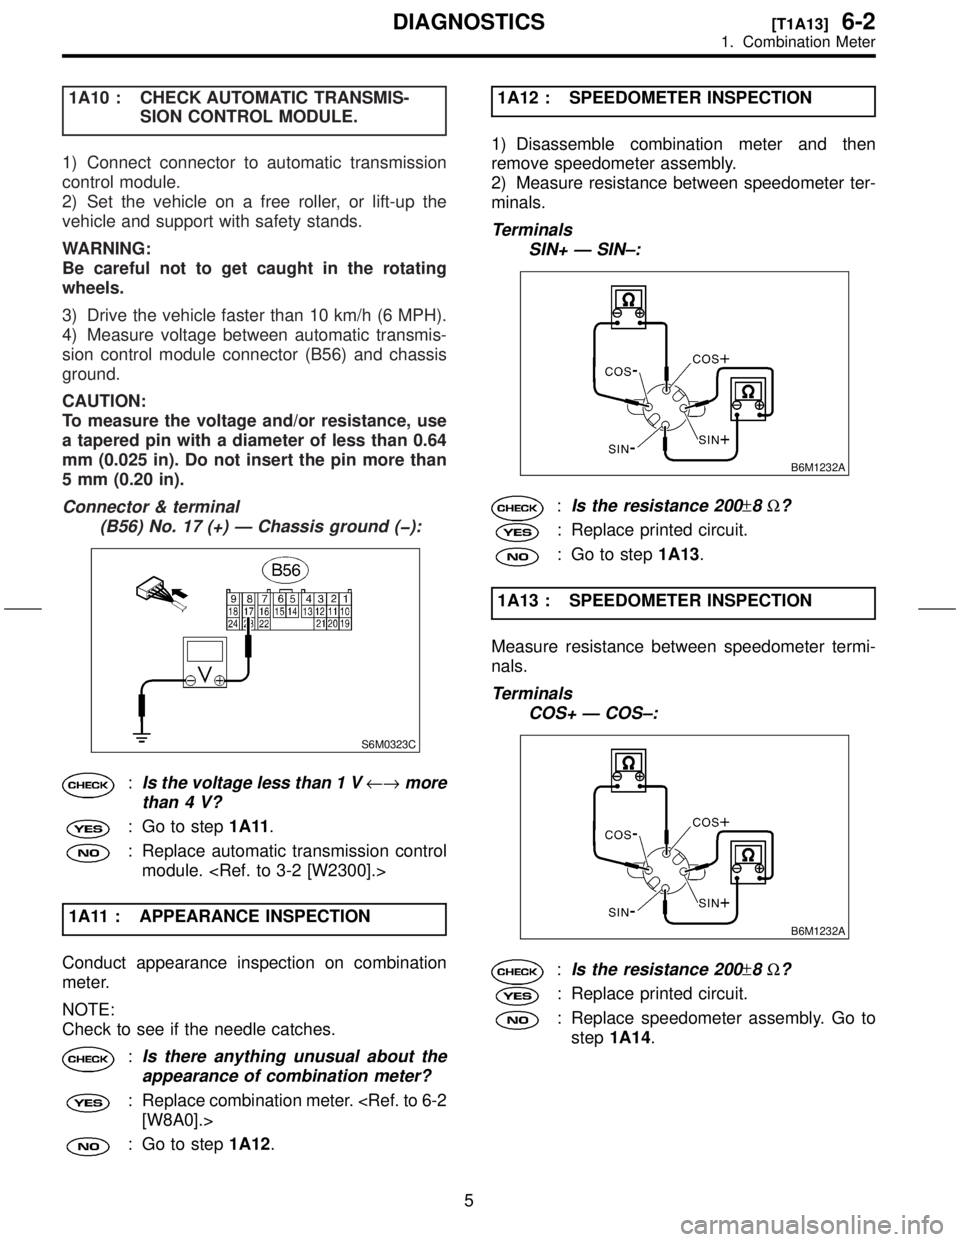
4) Measure voltage between automatic transmis-
sion control module connector (B56) and chassis
ground.
CAUTION:
To measure the voltage and/or resistance, use
a tapered pin with a diameter of less than 0.64
mm (0.025 in). Do not insert the pin more than
5 mm (0.20 in).
Connector & terminal
(B56) No. 17 (+) Ð Chassis ground (þ):
S6M0323C
:Is the voltage less than 1 V¨more
than 4 V?
: Go to step1A11.
: Replace automatic transmission control
module.
1A11 : APPEARANCE INSPECTION
Conduct appearance inspection on combination
meter.
NOTE:
Check to see if the needle catches.
:Is there anything unusual about the
appearance of combination meter?
: Replace combination meter.
[W8A0].>
: Go to step1A12.1A12 : SPEEDOMETER INSPECTION
1) Disassemble combination meter and then
remove speedometer assembly.
2) Measure resistance between speedometer ter-
minals.
Terminals
SIN+ Ð SIN±:
B6M1232A
:Is the resistance 200±8W?
: Replace printed circuit.
: Go to step1A13.
1A13 : SPEEDOMETER INSPECTION
Measure resistance between speedometer termi-
nals.
Terminals
COS+ Ð COS±:
B6M1232A
:Is the resistance 200±8W?
: Replace printed circuit.
: Replace speedometer assembly. Go to
step1A14.
5
[T1A13]6-2DIAGNOSTICS
1. Combination Meter
Page 276 of 345

G: STEERING WHEEL
1. INSPECTION STANDARD
IA vehicle damaged in a collision (regardless of
whether or not airbag is deployed).
2. REPLACEMENT STANDARD
ICheck steering wheel insert for cracks or defor-
mities.
ICheck to ensure that new airbag module is prop-
erly installed in steering wheel.
IAfter installing airbag module, check to ensure
that it is free of interference with steering wheel
and that clearance between the two is equal at all
points.
B5M0095
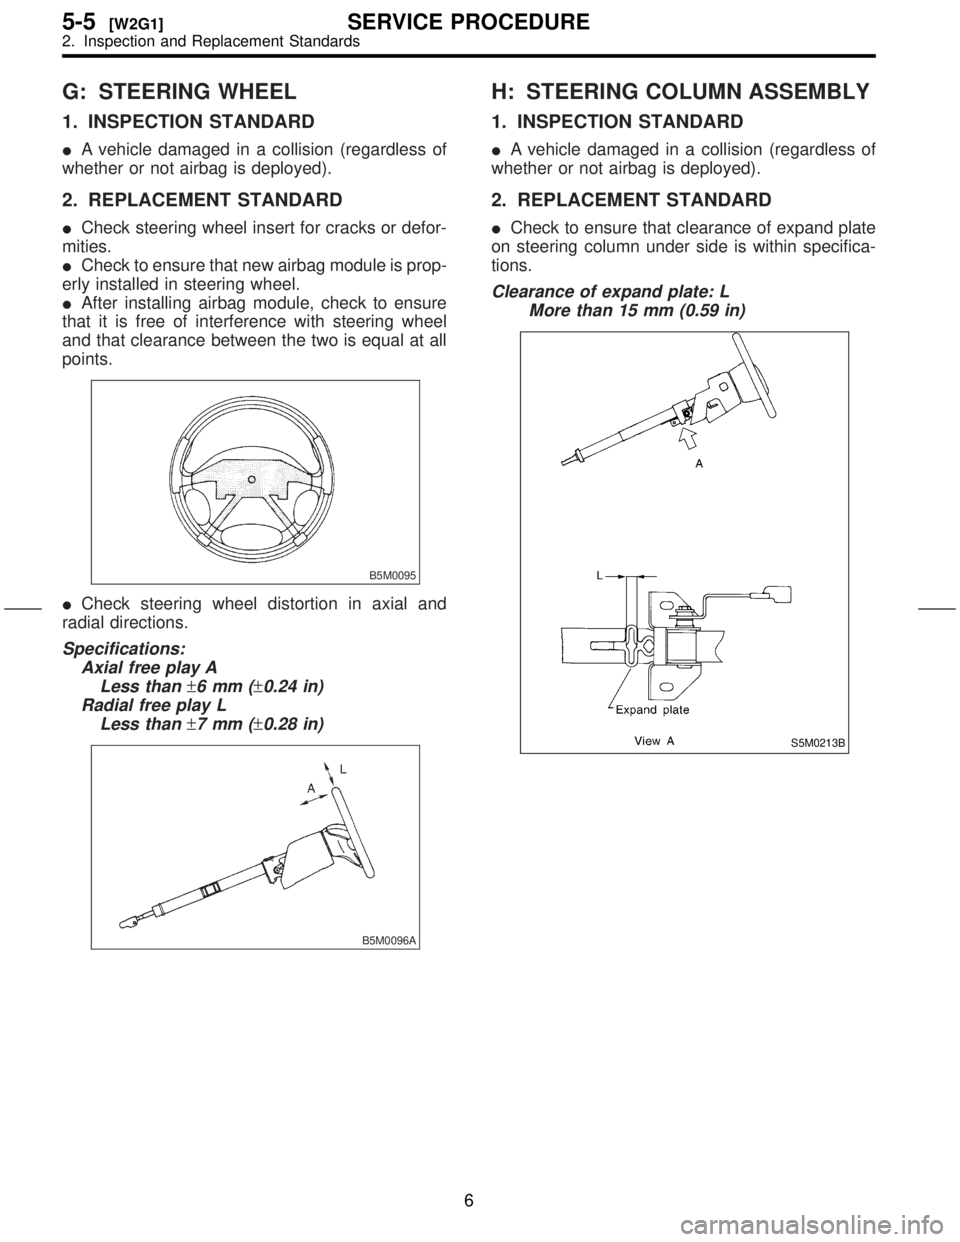
ICheck steering wheel distortion in axial and
radial directions.
Specifications:
Axial free play A
Less than
±6mm(±0.24 in)
Radial free play L
Less than
±7mm(±0.28 in)
B5M0096A
H: STEERING COLUMN ASSEMBLY
1. INSPECTION STANDARD
IA vehicle damaged in a collision (regardless of
whether or not airbag is deployed).
2. REPLACEMENT STANDARD
ICheck to ensure that clearance of expand plate
on steering column under side is within specifica-
tions.
Clearance of expand plate: L
More than 15 mm (0.59 in)
S5M0213B
6
5-5[W2G1]SERVICE PROCEDURE
2. Inspection and Replacement Standards
Page 280 of 345

1. DRIVER'S AIRBAG MODULE
1) Set front wheels in straight ahead position.
2) Turn ignition switch off.
3) Disconnect ground cable from battery and wait
for at least 20 seconds before starting work.
4) Using TORXTBIT T30, remove the two TORXT
bolts.
H5M0662
5) Disconnect airbag connector on back of airbag
module.
H5M0664
6) Refer toªCAUTIONºfor handling of a removed
airbag module.
7) Install in the reverse order of removal.
CAUTION:
Do not allow harness and connectors to inter-
fere or get caught with other parts.
2. PASSENGER'S AIRBAG MODULE
1) Turn ignition switch off.
2) Disconnect ground cable from battery and wait
for at least 20 seconds before starting work.
3) Remove glove box.
4) Disconnect airbag connector.
[M2F2].>
S5M0214
5) Remove the seven bolts and then carefully
remove airbag module.
S5M0215
6) Refer to ªCAUTIONº for handling of a removed
airbag module.
7) Install in the reverse order of removal.
CAUTION:
Do not allow harness and connectors to inter-
fere or get caught with other parts.
3. SIDE AIRBAG MODULE
The side airbag module cannot be detached from
the front seat assembly. When replacing side air-
bag module, replace front seat assembly.
5-3 [W100].>
10
5-5[W3A1]SERVICE PROCEDURE
3. Airbag Module
Page 287 of 345

11) Disconnect connectors and then detach com-
bination switch assembly.
12) Remove lighting switch and wiper switch from
roll connector.
B5M0940
B: ADJUSTMENT
1. CENTERING ROLL CONNECTOR
Before installing steering wheel, make sure to cen-
ter roll connector built into combination switch.
1) Make sure that front wheels are positioned
straight ahead.
2) Install steering gearbox, steering shaft and
combination switch properly. Turn roll connector
pin (A) clockwise until it stops.
3) Then, back off roll connector pin (A) approxi-
mately 2.5 turns until ªGº marks aligned.
H5M0663B
C: INSTALLATION
CAUTION:
Failure to do this might damage roll connector.
1) Install lighting switch and wiper switch to roll
connector.
2) Before installing combination switch, check to
ensure that combination switch is off and front
wheels are set in the straight ahead position.
3) Install combination switch assembly and then
connect connectors.
4) Install column cover and centering roll connec-
tor.
5) Install steering wheel in neutral position. Care-
fully insert roll connector pin (A) into hole on steer-
ing wheel.
NOTE:
If steering wheel angle requires fine adjustment,
adjust tie-rod.
H5M0663B
6) Install airbag module and lower cover in the
reverse order of removal.
15
[W8C0]5-5SERVICE PROCEDURE
8. Roll Connector
Page 288 of 345

9. Front Sub Sensor
A: REMOVAL AND INSTALLATION
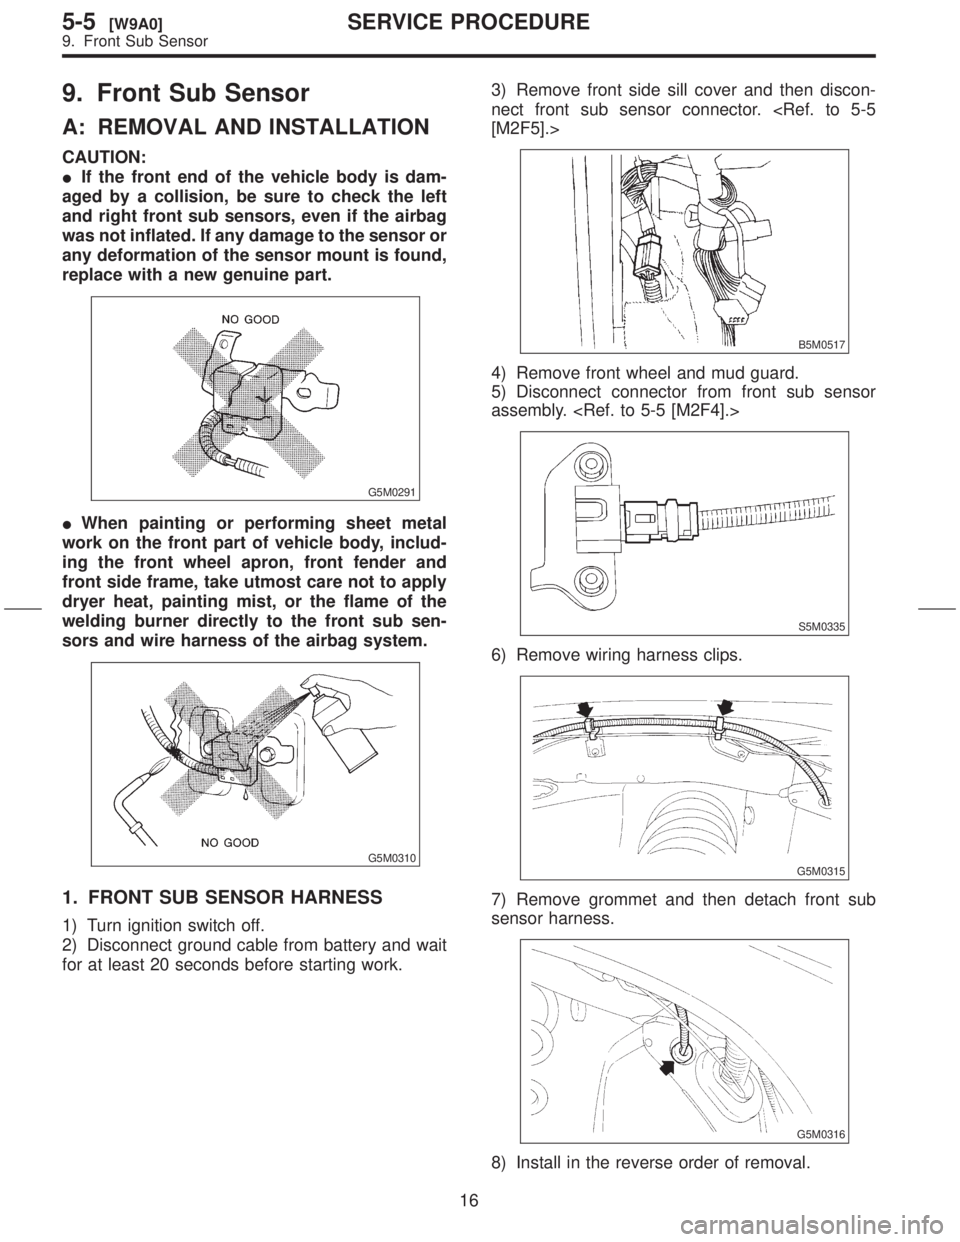
CAUTION:
IIf the front end of the vehicle body is dam-
aged by a collision, be sure to check the left
and right front sub sensors, even if the airbag
was not inflated. If any damage to the sensor or
any deformation of the sensor mount is found,
replace with a new genuine part.
G5M0291
IWhen painting or performing sheet metal
work on the front part of vehicle body, includ-
ing the front wheel apron, front fender and
front side frame, take utmost care not to apply
dryer heat, painting mist, or the flame of the
welding burner directly to the front sub sen-
sors and wire harness of the airbag system.
G5M0310
1. FRONT SUB SENSOR HARNESS
1) Turn ignition switch off.
2) Disconnect ground cable from battery and wait
for at least 20 seconds before starting work.3) Remove front side sill cover and then discon-
nect front sub sensor connector.
[M2F5].>
B5M0517
4) Remove front wheel and mud guard.
5) Disconnect connector from front sub sensor
assembly.
S5M0335
6) Remove wiring harness clips.
G5M0315
7) Remove grommet and then detach front sub
sensor harness.
G5M0316
8) Install in the reverse order of removal.
16
5-5[W9A0]SERVICE PROCEDURE
9. Front Sub Sensor
Page 289 of 345
2. FRONT SUB SENSOR ASSEMBLY
1) Turn ignition switch off.
2) Disconnect ground cable from battery and wait
for at least 20 seconds before starting work.
3) Remove front wheel and mud guard.
4) Disconnect connector from front sub sensor
assembly.
S5M0335
5) Remove front sub sensor.
S5M0336
6) Install in the reverse order of removal.
17
[W9A2]5-5SERVICE PROCEDURE
9. Front Sub Sensor