Page 73 of 392
yellowblue
2-13 Battery Replacement
Under normal use, the battery in your remote keyless
entry transmitter should last about two years.
You can tell the battery is weak if the transmitter won't
work at the normal range in any location. If you have to
get close to your vehicle before the transmitter works,
it's probably time to change the battery.
NOTICE:
When replacing the battery, use care not to
touch any of the circuitry. Static from your
body transferred to these surfaces may damage
the transmitter.
For battery replacement, use one Duracell� battery, type
DL
-2032, or a similar type.
To replace the battery:
1. Insert a coin into the notch near the key ring. Turn
the coin counterclockwise to separate the two halves
of the transmitter.
2. Once the transmitter is separated, use a pencil eraser
to remove the old battery. Do not use a metal object.
3. Remove and replace the battery. Replace it as the
instructions inside the cover indicate.
Page 104 of 392
yellowblue
2-44
At night, you can turn off
all exterior lamps when you
are in PARK (P) by turning
the twilight sentinel knob
all the way to MIN.
If it was on MIN, turn the knob clockwise to turn it on,
then back to MIN. The lamps will come back on when
you put the transaxle in gear.
Twilight sentinel will keep your headlamps on for up
to three minutes, to light your way when you leave
your vehicle.
See ªTwilight Sentinelº in the Index to learn how to
operate this feature.
As with any vehicle, you should turn on the regular
headlamp system when you need it.Fog Lamps
The fog lamps switch is
in the front of the front
reading lamps.
An indicator light in the switch will glow when the fog
lamps are on. Your low
-beam headlamps or parking
lamps must be on for your fog lamps to work.
If your fog lamps are on when you use your
flash
-to-pass feature, the fog lamps will be disabled
while the flash
-to-pass feature is being used.
Page 105 of 392
yellowblue
2-45 Twilight Sentinel
Push in the headlamp switch
to turn your headlamps off.
Turn the twilight sentinel
knob located behind the
headlamp switch
toward MAX.
At night, you can turn off all exterior lamps when you
are in PARK (P) by turning the twilight sentinel knob all
the way to MIN. If it was on MIN, turn the knob
clockwise to turn it on, then back to MIN. The lamps
will come back on when you turn the knob
toward MAX.Twilight sentinel will keep your headlamps on for up
to three minutes, to light your way when you leave
your vehicle.
To operate twilight sentinel, turn the knob to MAX
for the three minute delay. Turn it the other way to
reduce the delay. Turn the knob to MIN to turn twilight
sentinel off.
Also, it's possible that your headlamps may go out if
you drive from a dark area into a bright area like a
lighted parking lot. If this happens, turn on your
headlamps with the regular headlamp switch.
Page 106 of 392

yellowblue
2-46
Interior Lamps
Instrument Panel/Brightness Control
You can brighten or dim your instrument cluster lights
by turning the headlamp knob. Turn the knob clockwise
to brighten the instrument cluster lights and displays.
Turn the knob clockwise all the way to turn on the
interior courtesy lamps. Turn the knob counterclockwise
to dim the instrument cluster lights and displays and to
turn off the courtesy lamps.
Illuminated Entry (Option)
When you press the UNLOCK button on the optional
remote keyless entry transmitter, the lamps inside your
vehicle will go on. These lamps will go off after about
25 seconds, or when you start your engine. Pressing the
LOCK button on your remote keyless entry transmitter
will turn the lights immediately off.
If a door is left ajar, your interior lamps will turn off
after 10 minutes to save your battery.
Delayed Illumination
When you open the door to enter your vehicle, the
interior lamps will come on. When you close the door
with the ignition off, the interior lamps will stay on for
25 seconds or until the ignition is turned on. Please note
that locking the doors with the power door lock switch
will override the delayed illumination feature and the
lamps will turn off right away.
Theater Dimming
This feature allows for a three to five-second fade out of
the courtesy lamps instead of immediate turn off.
Exit Lighting
With this feature, the interior lamps will come on for 25
seconds after you remove the key from the ignition. This
will give you time to find the door pull handle or lock
switches as you exit the vehicle.
Page 110 of 392
yellowblue
2-50 Power Remote Control Mirrors (Option)
A control lever on the
driver's door controls both
outside rearview mirrors.
Turn the lever counterclockwise to select the driver's
side rearview mirror, or clockwise to select the
passenger's side rearview mirror. Then push the lever in
the direction of the desired movement to adjust each
mirror so that you can see the side of the vehicle when
you are sitting in a comfortable driving position.
Convex Outside Mirror
Your passenger's side mirror is convex. A convex
mirror's surface is curved so you can see more from the
driver's seat.
CAUTION:
A convex mirror can make things (like other
vehicles) look farther away than they really are.
If you cut too sharply into the right lane, you
could hit a vehicle on your right. Check your
inside mirror or glance over your shoulder before
changing lanes.
Page 147 of 392

3-
First Edition for Pontiac Bonneville Owner's Manual ± 1999
yellowblue
3-1
Section 3 Comfort Controls and Audio Systems
In this section, you'll find out how to operate the comfort control and audio systems offered with your vehicle. Be
sure to read about the particular systems supplied with your vehicle.
3
-2 Comfort Controls
3
-6 Air Conditioning
3
-6 Heating
3
-7 Ventilation System
3
-8 Defogging and Defrosting
3
-9 Rear Window Defogger
3
-10 Audio Systems
3
-10 Setting the Clock for AM-FM Stereo
3
-10 Setting the Clock for All Systems Except
AM
-FM Stereo
3
-10 AM-FM Stereo
3
-12 AM-FM Stereo with Cassette Tape Player
(If Equipped)
3
-16 AM-FM Stereo with Cassette Tape Player and
Equalizer (If Equipped)3
-19 AM-FM Stereo with Compact Disc Player
(If Equipped)
3
-22 AM-FM Stereo with Compact Disc Player and
Equalizer (If Equipped)
3
-25 Theft-Deterrent Feature
3
-27 Audio Steering Wheel Controls (If Equipped)
3
-28 Understanding Radio Reception
3
-28 Tips About Your Audio System
3
-29 Care of Your Cassette Tape Player
3
-30 Care of Your Compact Discs
3
-30 Care of Your Compact Disc Player
3
-31 Fixed Mast Antenna
3
-31 Power Antenna Mast Care
Page 148 of 392

First Edition for Pontiac Bonneville Owner's Manual ± 1999
yellowblue
3-2
Comfort Controls
This section tells you how to make your air system work
for you. Your comfort control system uses
ozone
-friendly R-134a refrigerant.
With these systems, you can control the heating, cooling
and ventilation in your vehicle. Your vehicle also has a
flow
-through ventilation system described later in
this section.
Standard Climate Control System
H±23±4002±S
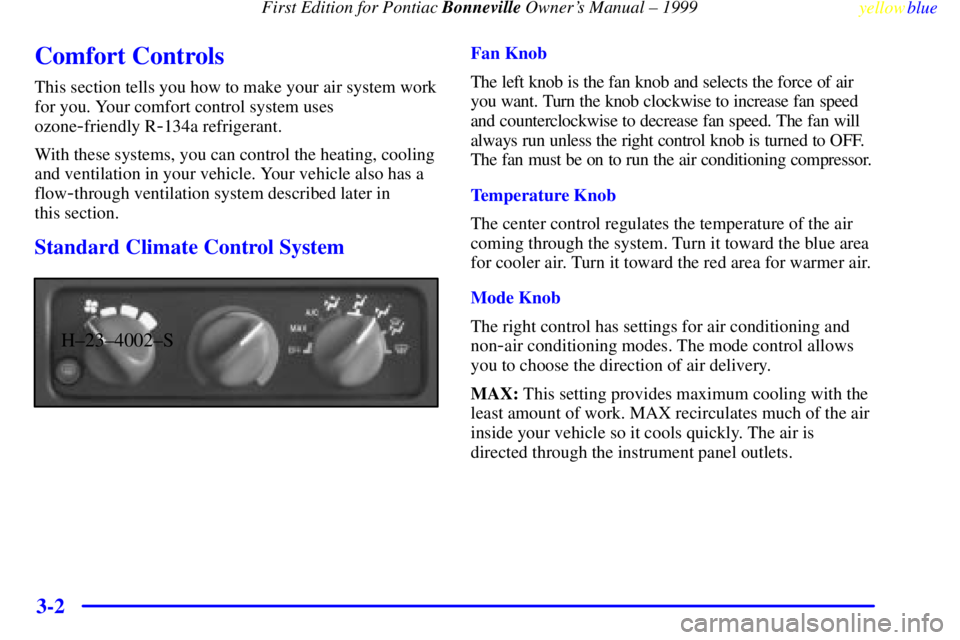
Fan Knob
The left knob is the fan knob and selects the force of air
you want. Turn the knob clockwise to increase fan speed
and counterclockwise to decrease fan speed. The fan will
always run unless the right control knob is turned to OFF.
The fan must be on to run the air conditioning compressor.
Temperature Knob
The center control regulates the temperature of the air
coming through the system. Turn it toward the blue area
for cooler air. Turn it toward the red area for warmer air.
Mode Knob
The right control has settings for air conditioning and
non
-air conditioning modes. The mode control allows
you to choose the direction of air delivery.
MAX: This setting provides maximum cooling with the
least amount of work. MAX recirculates much of the air
inside your vehicle so it cools quickly. The air is
directed through the instrument panel outlets.
Page 156 of 392

First Edition for Pontiac Bonneville Owner's Manual ± 1999
yellowblue
3-10
Audio Systems
Your Delco Electronics audio system has been designed
to operate easily and give years of listening pleasure.
You will get the most enjoyment out of it if you acquaint
yourself with it first. Find out what your Delco
Electronics system can do and how to operate all its
controls, to be sure you're getting the most out of the
advanced engineering that went into it.
Setting the Clock for AM-FM Stereo
Press SET. Within five seconds, press and hold the
SEEK down arrow until the correct hour appears on the
display. Press and hold the SEEK up arrow until the
correct minute appears on the display.
Setting the Clock for All Systems Except
AM-FM Stereo
Press and hold HR until the correct hour appears. Press
and hold MIN until the correct minute appears. There
will be a two
-second delay before the clock goes into
time
-set mode, and the colon on the display will blink
while in this mode.
AM-FM Stereo
DE±23±0001±V
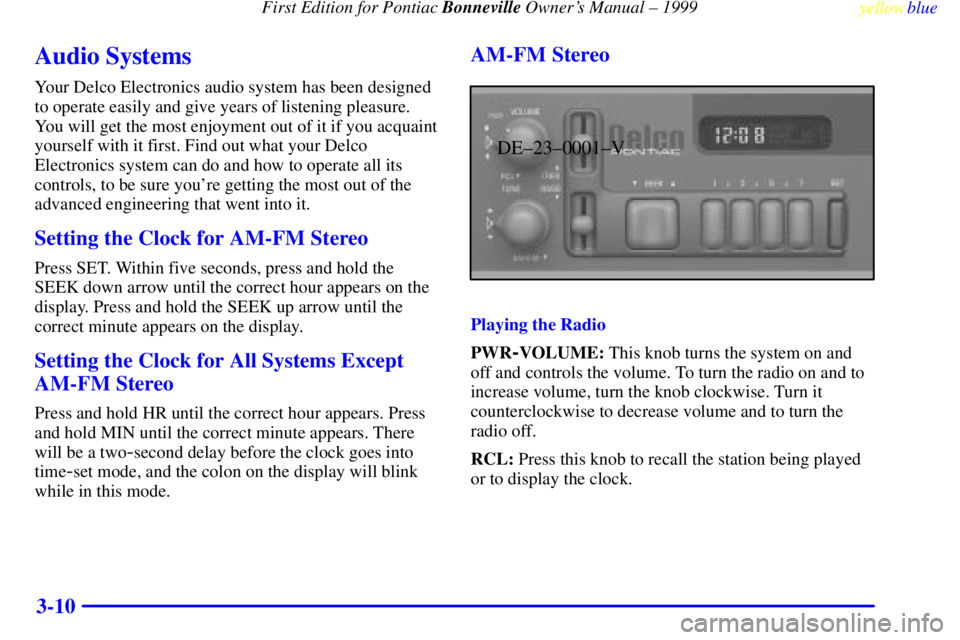
Playing the Radio
PWR
-VOLUME: This knob turns the system on and
off and controls the volume. To turn the radio on and to
increase volume, turn the knob clockwise. Turn it
counterclockwise to decrease volume and to turn the
radio off.
RCL: Press this knob to recall the station being played
or to display the clock.